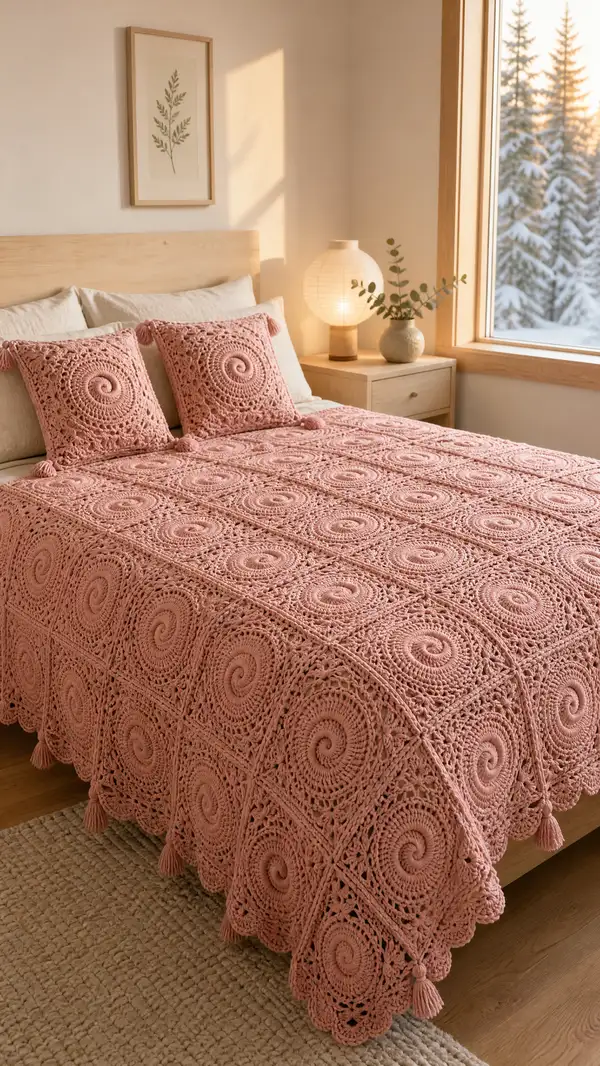
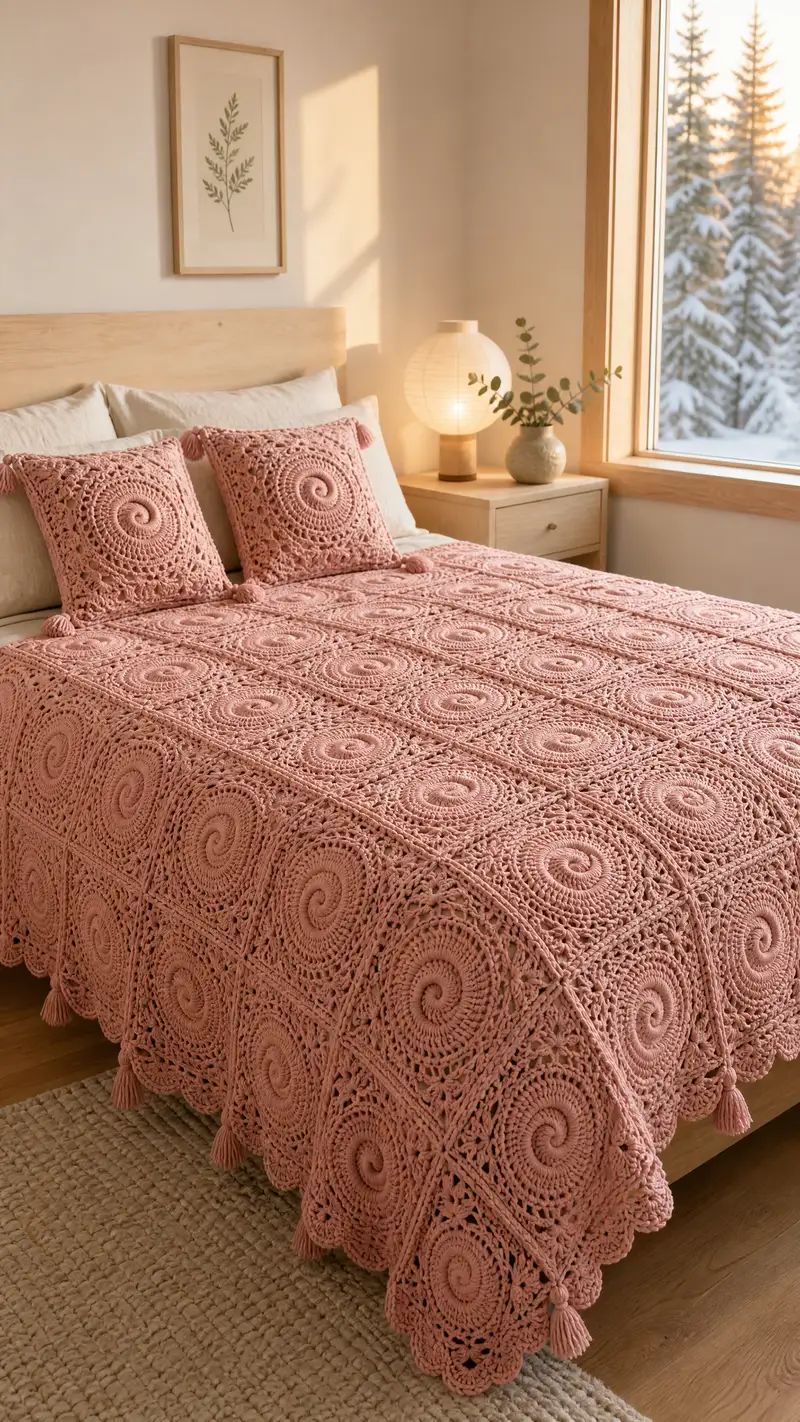
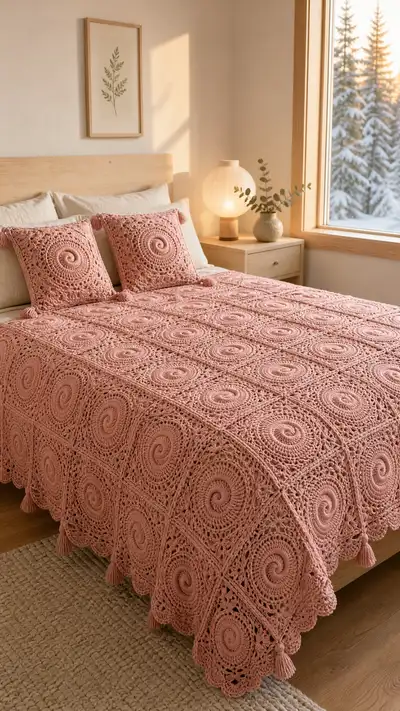
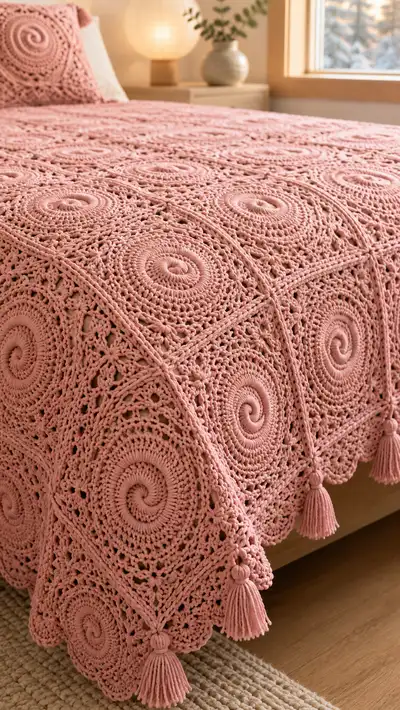
A romantic dusty rose bedspread made from large spiral-centered granny squares joined into a lacy modular spread. Each square features a raised spiral center, intricate lace rounds, and scalloped edges. Finished with hand-tied tassels at the corners for a soft boho look. Designed to drape beautifully over a double/queen bed and pair with matching pillow shams.
Progress Tracker
0% Complete
— Spiral Granny Motif (make X motifs to desired size) :
Round 1 :
6 sc in magic ring (6)
Round 2 :
Inc in each st around (6 inc) (12)
Round 3 :
(1 sc, inc) x 6 (18)
Round 4 :
(2 sc, inc) x 6 (24)
Round 5 :
(3 sc, inc) x 6 (30)
Info :
Work these early rounds with a slightly tighter tension than usual to create a firm spiral center that will hold its shape. Place a stitch marker in the first st of each new round to keep track as the spiral tightens.
Round 6 :
(4 sc, inc) x 6 (36)
Round 7 :
(5 sc, inc) x 6 (42)
Round 8 :
(6 sc, inc) x 6 (48)
Round 9 :
(7 sc, inc) x 6 (54)
Round 10 :
(8 sc, inc) x 6 (60)
Round 11 :
(9 sc, inc) x 6 (66)
Round 12 :
(10 sc, inc) x 6 (72)
Info :
At the end of Round 12 you should have a firm round of 72 stitches. This will be the stable base for the raised spiral. If your stitch count differs, adjust previous rounds to land on 72 to make square shaping easier in later rounds.
Round 13 :
1 dc in each st around (72)
Round 14 :
1 dc in each st around (72)
Round 15 :
Change to BLO: 1 sc in each st BLO (72)
Info :
Working in BLO here creates a shallow ridge that begins to read as a spiral when combined with the central tightening. Keep the hook size consistent; if you want a more pronounced spiral, work Round 15 more tightly or use a smaller hook just for this round.
Round 16 :
Work in dc for more height: *dc in next 18 sts, ch 3 (corner),* repeat 4 times. (72 dc + 4 ch-3 corner spaces) - do not join with sl st; work in rounds
Round 17 :
Form true square corners: *dc in next 18 dc, (2 dc, ch 3, 2 dc) in ch-3 sp,* repeat 4 times (88 dc total including corner groups)
Round 18 :
1 dc in each dc around, placing 1 dc in each dc and 1 dc in each corner ch-3 (88)
Info :
From Round 16 onward we begin to square the round. Each corner group (2 dc, ch3, 2 dc) creates a little expansion that turns the round into a four-sided motif. Keep a marker at the start of each corner so you know where to place corner shells for future rounds.
Round 19 :
*dc in next 6, skip 1, dc in next 8, ch 2, skip 2,* repeat around to create openwork arches between spirals (88)
Round 20 :
In each ch-2 corner sp: (3 dc, ch 3, 3 dc). Along sides: *dc in each dc across sides (maintain 88 dc around including corners)*
Round 21 :
*(ch 1, sc) across 4 sts for small picot-like anchors, ch 3, skip 3*, maintain placement to keep square lines (88)
Info :
These rounds add surface texture and open lacy lines that will read as the decorative spokes radiating from the spiral center. Because bulky yarn is used, keep stitches spacious for a pleasing lace look but not so open that the motifs sag after joining. If your yarn is lighter, adjust by using smaller hook for lace rounds.
Round 22 :
Shell round: *skip 2, (3 dc, ch 2, 3 dc) in next sp, skip 2, sc in next dc* repeat around to create scalloped shells on sides and corners (88 plus corner shells)
Round 23 :
Work edging lattice: *ch 3, skip 2, sc in next, ch 3, sc in next* repeat to create chain arches across each side and corner (use 88 as base stitch guideline)
Round 24 :
Round of tall stitches: 1 tr in each dc and in corners' last dc to give a lifted rim (88 tr)
Round 25 :
Small picot scallops: *sc in next 2, ch 3, sl st in top of previous tr, sc in next 2* around (count remains visually consistent; aim to keep scallops evenly spaced across each side)
Info :
Block each motif gently after completing Round 25 to square up corners and set stitches. Use steam or wet blocking depending on fiber content. Blocking is essential for uniform joins and a flat bedspread surface.
Round 26 :
Optional decorative row: 1 sc in each st BLO across body of motif to create a defined seam ridge (88)
Round 27 :
Final motif edging: *ch 1, sc in each sc and shell point around, placing sc into top of corner shell to maintain shape* Fasten off leaving long tail for joining (88)
Info :
Each finished motif should measure approximately 14.5-16" (36-41cm) square after blocking when worked in bulky yarn with a 6.5mm hook. Make a sample motif and measure—adjust hook size to meet personal gauge before committing to full spread.
— Lace Expansion Rounds (add texture and side detail) :
Round 1 :
With RS facing, join yarn in a side sp: ch 1, sc evenly across side spacing 22 sc per side (total count will vary depending on side spacing; aim for equal sc distribution)
Round 2 :
*ch 5, skip 2, sc in next sc* across to create long chain lacy arches across each side
Info :
These expansion rounds are optional but recommended for the lacy join used in the blanket. If you prefer a denser look, substitute ch-5 arches for shells or dc clusters. Keep counts even per side for clean joins.
Round 3 :
*sc in center of ch-5 arch, (ch 3, 3 dc cluster) in same space, sc in next arch* repeat around to create raised clusters at the midpoint of each side
Round 4 :
Work a final ornamental row of reverse single crochet (crab stitch) along the last round to create a twisted rope-like look that frames the motif (maintain stitch count around)
Info :
Reverse single crochet creates a subtle twisted edge which echoes the spiral center. Work slowly to keep stitches even—practice on a sample to match tension to adjacent motifs.
— Join-As-You-Go Method (preferred for large blankets) :
Info :
We recommend joining motifs as you complete them using a slip-stitch or single crochet join technique. This reduces finishing at the end and keeps motifs aligned. Arrange motifs on a flat surface in the desired layout, matching spirals and lace alignment before joining.
Round 1 :
Lay two completed motifs RS together (or place motif flat and join from RS). Join yarn in corner ch-3 space of motif A, ch 1, sc in same corner, then *sl st in corresponding ch-3 corner of motif B, sc in next side sp of motif A* continue across side until corner is reached; join corners with sl st into corner of motif B and sc into motif A corner (this method creates a strong, slightly raised join)
Info :
Work slowly to ensure motifs align evenly. If heights vary slightly, use a smaller or larger hook in the joining row to compensate and keep the blanket surface flat. Use stitch markers at three points along the side to keep alignment while you stitch.
Round 2 :
After joining the first two motifs, join a third in the same manner using the single crochet & slip stitch sequence, always checking that the spirals lie in the same orientation for a cohesive look
Round 3 :
When joining motifs in the center of the layout (i.e., joining four motifs around one corner), work corner joins carefully: sl st into corner of each adjacent motif, then sc into corner of main motif to create a neat nested corner (no gaps)
Info :
If you prefer a flat, invisible seam, use the whip stitch with tapestry needle to join through the back loops only of adjacent motifs—this hides the join but is not as elastic as the sc/sl-st method. Choose the join based on desired finished look and durability.
— Assembly Layout & Working Notes :
Info :
Decide layout before joining. For a queen bed shown, a typical layout is 5 motifs across by 6 motifs down (total 30 motifs) when each motif is ~15" square; adjust motif counts for full/queen/king sizes. Arrange motifs with spirals rotated consistently or alternating for a textured checker effect.
Info :
Block every motif before joining and pin them to the same dimensions to ensure all blocks match. Use blocking pins and a damp towel/steam blocking according to fiber instructions. Let dry completely before joining to avoid distortion.
— Border & Scalloped Edge (after all motifs joined) :
Round 1 :
With RS facing and working around entire outer edge, join yarn at a corner and work 1 sc in each join space along the outermost seams to create a unified edge foundation (count varies with blanket size; record total)
Round 2 :
*ch 3, skip 2, sc in next st* repeat around to make large chain arches for scallop foundation (even spacing is key)
Round 3 :
Shell scallops: *(5 dc, ch 2, 5 dc) all in one arch sp, sc between shells* repeat around; place larger shells at corners for curvature
Info :
For a deep scalloped edge like the photo, repeat a shell row (Round 3) twice: the outermost row will create the pronounced scalloped profile that drapes over the bed edge. Space shells so that scallops align with motif corners for a cohesive visual flow.
Round 4 :
Finish outer row with reverse single crochet (crab stitch) worked into the back loops only of the shell edges to create a defined rope-like finish (maintain even spacing across shells)
Round 5 :
Optional fringe base: *ch 8, sl st to base leaving loops* repeat around if you prefer fringe; otherwise proceed to tassel placement (foundation row remains intact)
Info :
When working the border, check the blanket on the bed or a flat surface often so scallops form evenly and the edge does not pull inward. If the border puffs, work a tighter final round; if it pulls, work the round looser or increase spacing between shells.
— Pillow Sham (make 2) :
Round 1 :
Make 4 motifs for each sham (2x2 layout) following Spiral Granny Motif instructions. Block each motif to match motif size used in bedspread.
Round 2 :
Join the four motifs as per Join-As-You-Go method, leaving one side open if you wish to insert a pillow form. You may also crochet a separate back panel of 1-2 panels to create an envelope closure.
Round 3 :
Work a uniform border around the assembled sham of a single round of sc then a round of shell scallops (5 dc, ch2, 5 dc) in each side arch to echo the bedspread border (count will match perimeter of 2x2 motif rectangle)
Info :
Add tassels at each corner of the sham to match the bedspread. For a more polished pillow, make a removable sham with a button or zipper sewn into the back panel so the front motif panel stays decorative.
Round 4 :
For envelope closure: overlap back panels by 4" and sew or single crochet to fasten; alternate closure options are mattress buttons or hidden zipper.
— Tassels & Decorative Knots :
Info :
Tassels in the photo are full and tied with a wrapped bead head. To make each tassel: wind yarn around a 3.5" cardboard 30-40 times (depending on desired fullness). Tie the top tightly with a short yarn tail to form the head, wrap a 1.5" length of yarn around several times to create the neck, and secure ends. Trim the bottom loops to release the tassel. Add a wrapped yarn bead by winding yarn into a tight ball and sewing over the top of the tassel head if desired.
Round 1 :
Attach tassels to outside corners and to scallop points every X scallops (spacing depends on layout). Use a darning needle to thread the tassel top through the corner and knot on the underside, then weave ends into seam for secure finish.
Info :
Make tassels in small batches to ensure uniformity. Use the same number of wraps for each tassel and trim with precision. If you want a heavier tassel like the sample, wind 40-50 wraps; for lighter tassels 20-30 wraps will suffice.
— Finishing & Care :
Info :
Weave in all tails into the reverse side of motifs and secure with a couple of hidden stitches. Re-block the entire bedspread to ensure the border scallops and tassels sit evenly. For cleaning, check yarn label — typically hand wash or gentle machine cycle in a mesh bag and lay flat to dry. Avoid tumble drying to maintain tassel shape.
Info :
Store the bedspread folded and protected from dust; if storing long-term, wrap in breathable cotton bag to maintain fiber integrity and avoid mildew. Rewrap tassels to avoid flattening and trim any stray fibers over time for a fresh look.
This Dusty Rose Spiral Granny Bedspread combines lovely spiral centers with lacy joins and tassel details to create a heirloom-quality bed covering. Each motif is satisfying to crochet and blocking reveals the full beauty of the lacework and scalloped edge. Whether you make it as a gift or for your own bedroom, this project invites slow, meditative crocheting and a gorgeous finished result. 🧶✨ Add tassels and matching pillow shams for a complete boudoir-ready set. Happy stitching and enjoy every spiral! 🌸