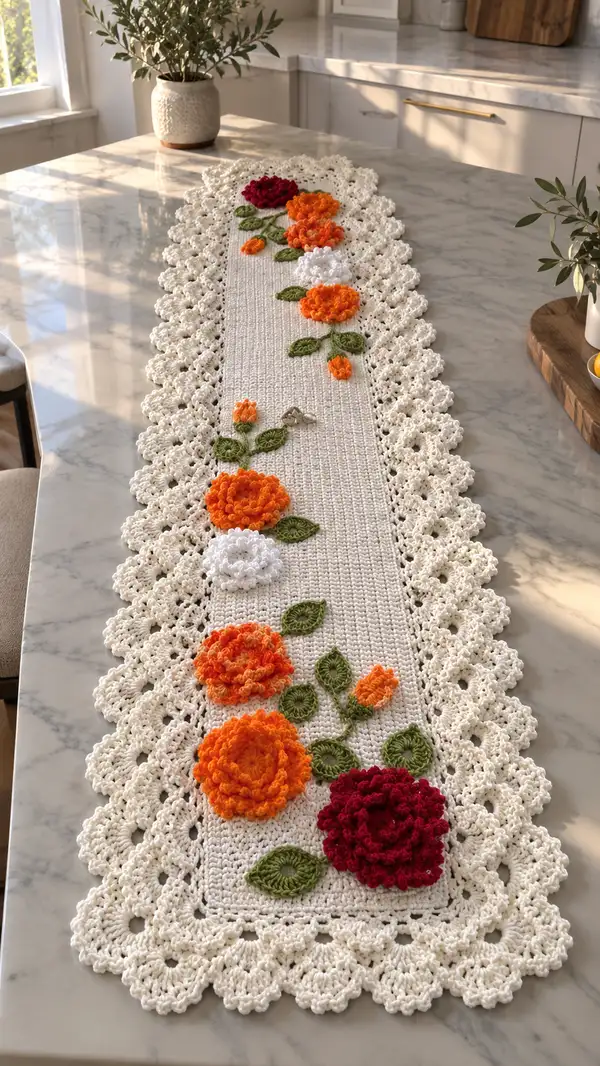
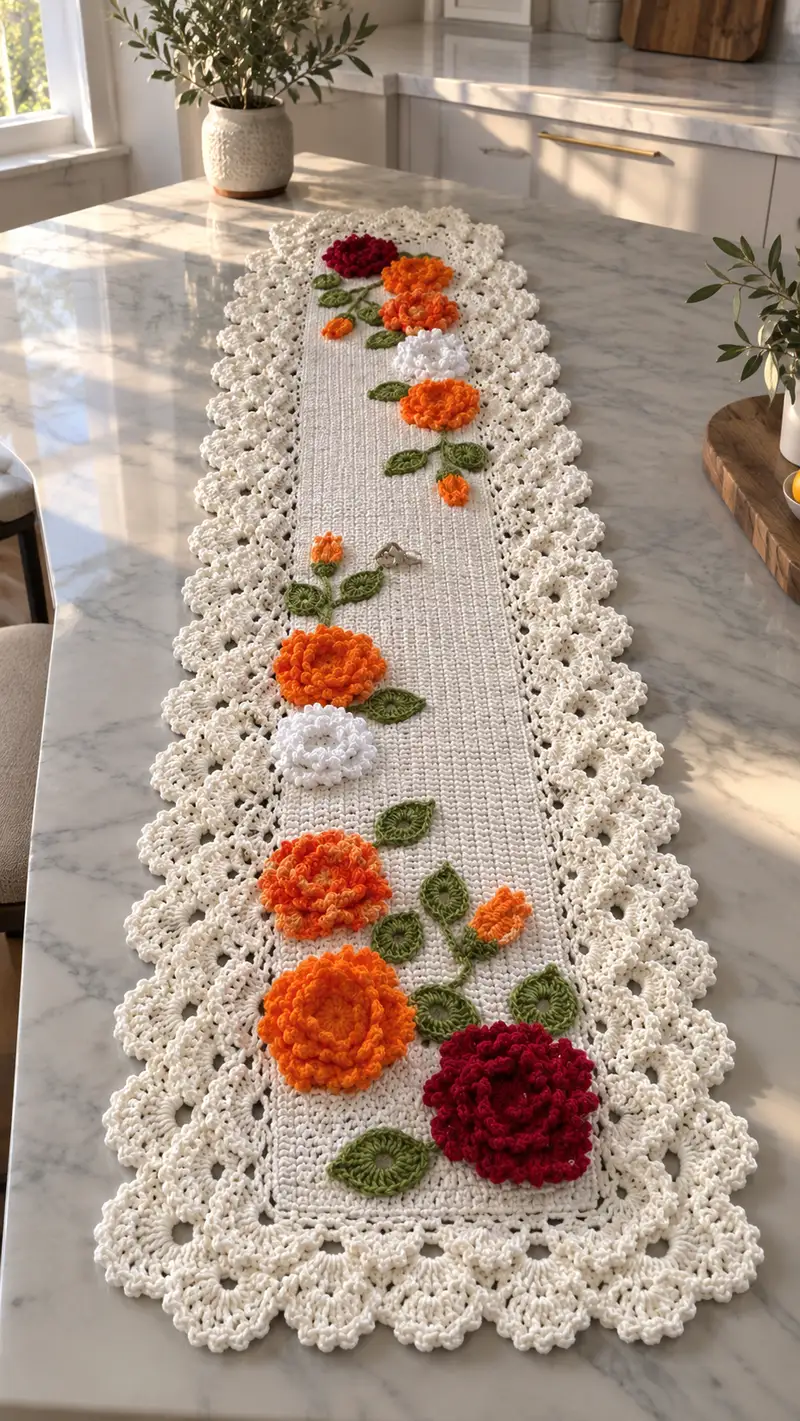
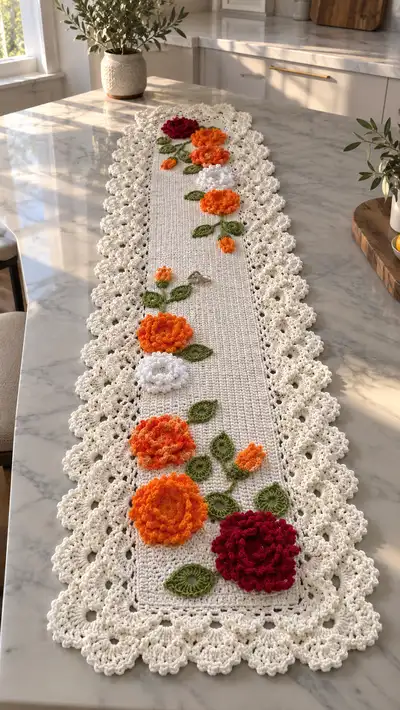
This long, elegant table runner features a crisp cream ground with lacy scalloped edges and bold 3D floral appliques in warm autumn tones — deep red, bright orange and white with olive green leaves. Worked in a combination of single crochet panels and decorative shell borders, finished with layered ruffle flowers sewn on top for a rich textured look. The finished runner lies flat with a delicate openwork frame and dramatic center blooms perfect for dining room and seasonal décor.
Progress Tracker
0% Complete
— Notes & Gauge :
Info :
Finished size approximately 48 in (122 cm) long x 11 in (28 cm) wide (including scalloped border). Gauge: 18 sc x 20 rows = 4 in (10 cm) using 3.5 mm hook with worsted cotton yarn. Adjust foundation chain to lengthen or shorten runner in multiples of 6 plus 2 for border repeat.
— Center Panel (working flat rows) :
Round 1 :
Foundation: With Cream yarn, ch 122 (this gives a working width of approximately 11 inches; ch multiple = 6 + 2). Turn, count chains; do not twist.
Round 2 :
Row 1: Sc in 2nd ch from hook and in each ch across. (121 sc)
Round 3 :
Row 2: ch 1, turn. Sc in BLO of each st across to create a faint ridge along edges. (121 sc)
Info :
Working the BLO on the return creates a subtle vertical ribbing visible on the runner surface. Place stitch marker in first stitch of each row if desired to track edges.
Round 4-9 :
Rows 3-8: ch 1, turn. 1 sc in each st (121 sc). Maintain consistent tension and keep edge stitches slightly firmer for straight edges.
Info :
At this stage you are establishing the body fabric. If you want a slightly tighter fabric, switch to 3.25 mm hook for these rows; otherwise continue with 3.5 mm.
Round 10-19 :
Rows 9-18: ch 1, turn. 1 sc in each st (121 sc). Continue until you have worked a total of 60 rows across the foundation (including the first sc row). These rows form the main flat panel. (121 sc each row)
Info :
Place temporary thread markers at the locations where each large flower will sit. On this sample runner the large blooms are positioned approximately at rows: 6, 18, 30, 42 and 54 from one end (count from the edge). Mark the center stitch of each flower horizontal placement using pins or locking stitch markers.
Round 20-60 :
Rows 19-59: ch 1, turn. Continue 1 sc in each st across (121 sc). Keep working until the central panel measures approximately 46 in (117 cm) from starting edge to the opposite edge, ending on an even-numbered row. (121 sc)
Info :
Finish the center panel with three rows of sc for a firm edge: ch 1, turn, sc across for 3 rows in total. Fasten off and weave in ends, or leave live for joining to border.
— Preparation for Border :
Info :
If you prefer to crochet the border in the round around the panel, place the panel flat and plan to work continuous rounds along the long edge, short edge, long edge and short edge. Alternatively make two long border strips and two short corner pieces and sew them on. This pattern instructions continue as continuous rounds joined with sl st at the end of each round.
Round 61 :
Join cream yarn in the corner stitch with sl st, ch 1. Work 1 sc into the same corner stitch and evenly across the short side (end of rows), placing 1 sc into each row end. For short sides expect approximately 3 sc per row end; for this panel work 15 sc along the short side counting the end-of-row posts (approximate) to square the corner.
Round 62 :
Once you reach the next long edge, work 1 sc into the side of each row along the long side (121 sc). Maintain even tension so the panel does not pucker. Continue around until you have returned to the starting corner. Join with sl st to first sc.
Info :
When working into row ends and side loops, you'll be crocheting into the short 'end' loops of the turned rows; keep a consistent orientation to produce a neat edge. Count stitches as you go: short sides will be approx 15-17 sts, long sides 121 sts.
Round 63 :
Round of even single crochet: ch 1, sc evenly around in each side stitch and in each end stitch. Total stitches this round will be approximately 2*(121)+2*(15) = 272 sc. Join with sl st. (approx 272 sc)
Round 64 :
ch 1, sc in same st and each st around working tightly over corners (work 2 sc in each corner stitch to avoid pulling). (approx 276 sc)
Info :
Adding 2 sc in each corner creates a small expansion; if your corners pull, add 1 more sc in corner on next round. The exact totals depend on your stitch counts on the side. Keep a consistent increase at each corner across rounds.
Round 65 :
Change to 3.0 mm hook for the lace rounds (optional). ch 3 (counts as first dc), *sk 2 sc, (5 dc) in next sc (shell), sk 2 sc, sl st into next sc; rep across each long side producing shells spaced evenly. In short sides work 2 shells with sl st between them to keep pattern consistent. Join with sl st to top of ch 3.
Info :
To space shells evenly on long sides, aim for a shell every 6th stitch. If necessary, adjust by adding or spacing shells by 5 or 7 stitches so shells land cleanly at corners. Count shells per long side — typically about 18 shells on a 121-st long side when shell occupies 6 sts.
Round 66 :
ch 3, dc into each dc of shells across, placing 2 dc in each sl st space between shells (approx 360 dc total around). Join with sl st to top of ch 3.
Round 67 :
ch 1, sc in same st, *ch 3, sk 2 dc, sc in next dc (between shells) rep around to create a picot-style spacing between shells; join with sl st. (approx 360 sc and 60 ch-3 sps)
Info :
These rounds create a scaffold for the final scalloped edging. If your sample has fewer shells, count the shells and plan the final scallops to match the number of shells so points line up.
Round 68 :
Scallop Round 1: Join cream in the back loop of a shell top. *Work (sc, hdc, 3 dc, hdc, sc) all into the top of the shell to create a large scallop; skip to next shell top and sl st into top; rep around. You will have one scallop per shell (approx 60 scallops). Join with sl st to first sc of round.
Round 69 :
Scallop Round 2: ch 2, in the same st work (2 dc, ch 2, 2 dc) to create a picot-arched scallop over each previous scallop; sl st to next scallop center and rep across. (approx 60 small arch clusters)
Info :
Work these scallops loosely — if the scallops curl up, block them heavily; if they sag, work the following round tighter with sc in FLO to create definition.
Round 70 :
Edge Finish: ch 1, sc in each stitch and around scallop arches place (sl st, ch1) to anchor arches. Join with sl st, fasten off and weave in ends. Block the entire runner flat using spray or pin-and-damp method to set scallops open.
— Large Layered Rose (Make 3 in Bright Orange, 1 in Deep Red) :
Info :
Each large rose is worked in a spiral that is then shaped into layered ruffles. Use Bright Orange for three large 3D roses and Deep Red for one large statement rose. Each rose measures approx 4-5 in (10-12 cm) diameter when finished.
Round 1 :
With Bright Orange (or Deep Red), make a MR, ch 2 (counts as first hdc), 11 hdc into MR. Pull ring tight. (12 hdc)
Round 2 :
2 hdc in each st around (24 hdc)
Round 3 :
(1 hdc, 2 hdc in next) x 12 (36 hdc)
Info :
At this point the disk is the rose center. We will now create a ruffled spiral by working clusters into each st and then cutting the spiral and coiling it to form petals.
Round 4 :
Working in a continuous spiral (do not join): *In next st work (sc, ch 3, sc) to create a small loop; in next st make a picot (sc, ch2, sl st in last sc); rep across until you have 36 small loops/picots to form the first petal layer. (36 loop units)
Round 5 :
Continue spiral: In next st *work (2 dc, 1 tr, 2 dc) in same st to create a taller petal, skip 1 st, sl st into next st; rep across entire spiral to produce 36 tall petal clusters.
Round 6 :
Continue spiral: In each space between tall petal clusters work (3 dc, ch2, 3 dc) to create a scalloped petal ridge. Fasten off leaving long tail (approx 12-18 in / 30-45 cm) for sewing. Spiral should be about 36 units long when unwound.
Info :
To form the rose, lay the spiral flat with the side that has taller petals facing up. Starting at one short end, roll the spiral tightly to form the center, then gently fan and sew the base as you coil outward so petals flare naturally. Use the long tail and yarn needle to stitch through the base layers securing each turn. Anchor with several stitches at the underside base so the rose keeps its shape.
Round 7 :
After coiling and securing the first spiral, add an optional outer ruffle: join new yarn (same color) to outer edge and in each outer st work a cluster (sc, ch 4, sc) creating a looser outer frill; fasten off and weave in tail. Rose finished diameter approx 4-5 in.
Info :
Make three roses in Bright Orange and one in Deep Red. Vary the tightness of your coil to produce slightly different bloom shapes for a natural look. Make one or two with an extra outer ruffle for more depth.
— Medium Layered Bloom (Make 2 in White) :
Round 1 :
With White, MR, ch 2, 10 hdc in ring. (10 hdc)
Round 2 :
2 hdc in each st around. (20 hdc)
Round 3 :
(1 hdc, 2 hdc in next) x 10. (30 hdc)
Round 4 :
Spiral: In next st * (sc, ch 3, sc), in next st (2 dc), rep across making 30 small loop units. Fasten off leaving long tail for sewing.
Info :
Roll spiral as with larger rose but stop after 3-4 coils to create a smaller 2.5-3 in (6-8 cm) blossom. Add a single round of (sc, ch 3, sc) to outer edge if you want extra frill.
— Small Buds (Make 4-6 in Orange Shades) :
Round 1 :
With Bright Orange, MR, ch 1, 6 sc in MR. (6 sc)
Round 2 :
Inc around (12 sc)
Round 3 :
(1 sc, inc) x 6 (18 sc)
Round 4 :
Ch 2, turn, sc in each st across (18 sc). Fasten off leaving long tail. Shape into small buds by folding and securing a couple of stitches at base. Buds finished approx 1-1.5 in.
Info :
Buds can be elongated by adding a short stem: ch 6 from bud base, sl st back down chain to runner and secure. Use a few small tacking stitches to keep bud angled.
— Leaves (Make 10-14) :
Round 1 :
With Olive Green, ch 11, sc in 2nd ch from hook, hdc in next, dc in next 2, tr in next 2 (leaf tip), dc in next 2, hdc in next, sc in last ch. (10 sts across chain, mirrored shape)
Round 2 :
Work back down the other side of chain: sc in next st, hdc in next, dc in next 2, tr in next 2, dc in next 2, hdc in next, sc in last. Fasten off and leave long tail for sewing. Leaf length approx 2.5-3 in.
Info :
For a more sculpted leaf, on round 2 work in BLO to create a raised center vein, or add surface slip stitch veins after attaching leaves to runner by using a contrasting green strand and working 3-4 surface sl st lines from base to tip.
— Stems & Vines (Surface Crochet) :
Round 1 :
With Olive Green, attach yarn at the underside of a flower location using a sl st. Ch a length to reach next flower/leaf placement following marked layout. Surface crochet by slip stitching along the cream panel: insert hook under the horizontal bar of a sc stitch, sl st into panel, then bring yarn forward and repeat for approx 30-50 sl sts to create stems.
Round 2 :
For thicker stems: after completing initial surface sl sts, work 1-2 rows of sc around the surface chain by anchoring sc on both sides (use short ss anchors into panel at intervals) to build a raised cord. Fasten off and weave ends into panel interior.
Info :
Work vines loosely so they lay flat and natural. Pin flowers and leaves over the stems before sewing permanently. Use a slightly darker green for vine main and a lighter green for leaf accents if you want depth.
— Assembly & Placement :
Round 1 :
Layout: With center panel blocked and border attached, arrange flowers and leaves on the runner surface using the earlier placement markers. Typical layout: two large orange roses near each end, one deep red rose centered on one end, two white blooms interspersed, and medium buds and leaves connecting groups into an organic garland along the center.
Round 2 :
Pin each flower carefully. Use a blunt yarn needle and the long tail from each flower to sew through the base of the coiled spiral into the cream panel. Use small stitches all around the lower edge of the flower to anchor it flat to the fabric. Continue until all large flowers are secure.
Round 3 :
Sew leaves under and around flowers using small invisible whip stitches through the leaf midrib into the panel. Allow leaves to peek beyond the flower edges. For buds, sew the base and attach a short embroidered stem directly into the fabric for a natural tilt.
Info :
Attach flowers on top of the settled stems and then tack stems down with small stitches so the arrangement reads as a unified garland. Use extra stitches at high-traffic points to ensure durability for a functional table runner.
Round 4 :
Weave in all ends: pass tails through several layers of the runner or through the base of flowers and leaves. Trim ends close to work. Give the entire piece a final light blocking to open scallops and flatten seams.
— Optional Finishes & Variations :
Info :
To make runner washable, sew flowers using cotton thread and secure with a dab of fabric glue inside the base of the flower for extra hold. For a glossier look use mercerized cotton yarn; for a rustic farmhouse look choose matte cotton or cotton-blend.
Info :
To resize: adjust foundation chain in multiples of 6 + 2. Add or remove pairs of shells in border to keep scallop spacing proportional to new width. For a wider runner, increase chain and work two central columns of flowers symmetrically.
Info :
Color swaps: Use pastel pinks and greens for spring, deep jewel tones for winter, or shades of blue and white for coastal styling. You can also make all-applique monochrome for subtle texture without high contrast.
Info :
Care instructions: Hand wash in cool water with mild detergent and lay flat to dry. Re-block lightly while damp to restore scallops if necessary.
This floral table runner is a beautiful blend of solid crochet fabric and sculptural applique — a real showstopper on any dining surface. The layered roses and delicate scalloped border make it feel like a handcrafted heirloom ready to be passed down. I hope you enjoy making each textured petal and that this runner brings a little extra warmth and personality to your home! 🧶🌼✨