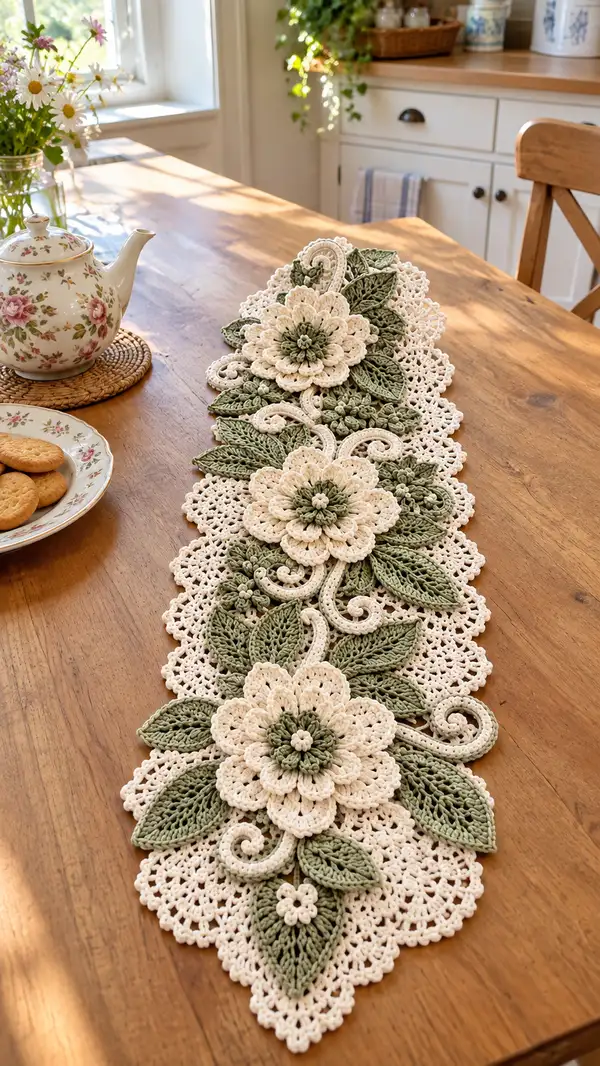
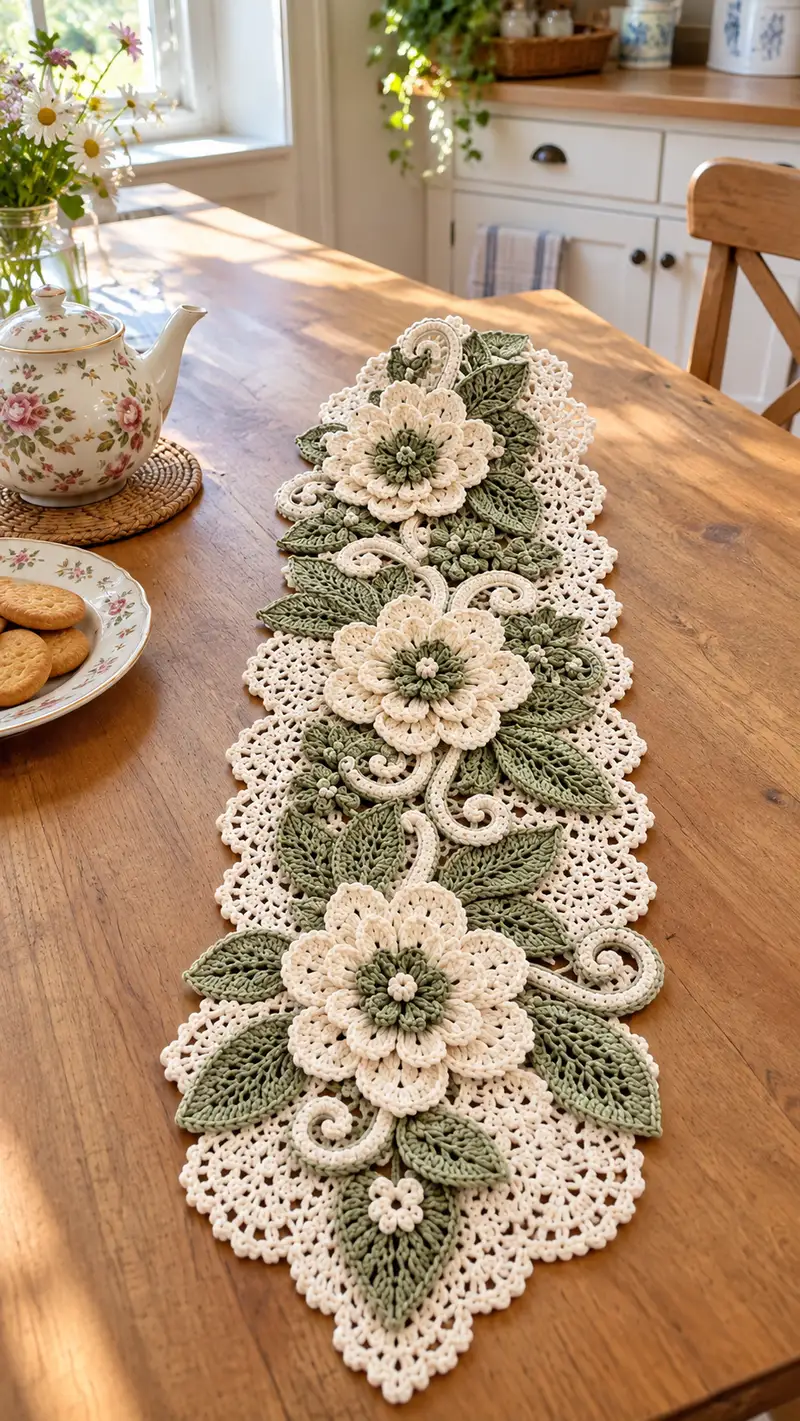
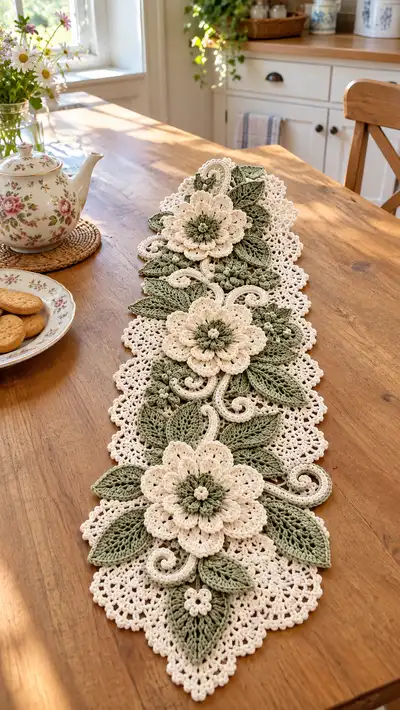
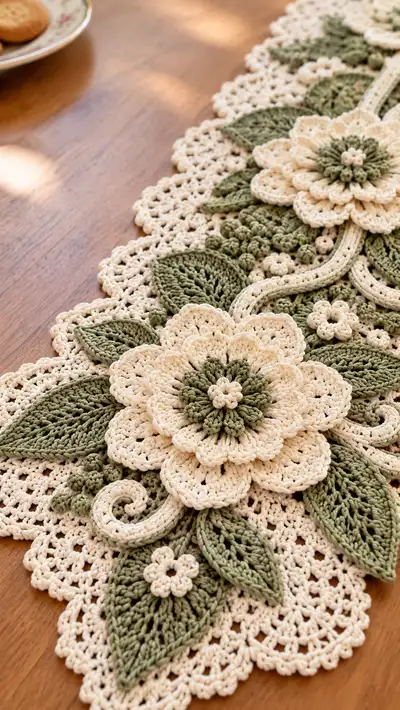
A romantic lace table runner featuring layered crochet flowers, sculpted leaves and delicate scrollwork in soft cream and sage green. This richly textured centerpiece is made from joined lacy doily motifs with raised 3D blossoms and vines for a dimensional heirloom look. Detailed stitchwork and clear assembly notes guide you through creating each flower, leaf, and scroll before joining into a finished runner that dresses any table.
Progress Tracker
0% Complete
— Materials and Gauge :
Info :
Gauge is not critical for this decorative runner but for scale aim for 6 sc = 2cm in cream yarn using 3.5mm hook. Finished runner shown measures approximately 70-80cm long by 20-22cm wide. Use 3.0mm for fine edgings where indicated.
— Notes & Techniques :
Info :
Work in continuous rounds where indicated or join with sl st at designer preference. Puff stitch: yoh, insert hook, yoh pull up loop (repeat 3-4 times depending on instruction), yoh and pull through all loops, ch1 to close if required. For raised petals, stitches are worked around a small central ring to create a gathered look.
— Base Doily Motif (Make 7 motifs) :
Round 1 :
6 sc in magic ring (6)
Round 3 :
(1 sc, inc) x 6 (18)
Round 4 :
(2 sc, inc) x 6 (24)
Round 5 :
(3 sc, inc) x 6 (30)
Round 6 :
1 sc in each st around (30)
Info :
Switch to 3.0mm hook if you want a lacy lightweight doily. Keep tension even; these base motifs will be joined later to form the runner foundation.
Round 7 :
(3 sc, ch3, sk 1) x 6 creating 6 ch-3 loops (30)
Round 8 :
Into each ch-3 loop: (dc, ch2, dc) shell; sl st to next st to position (6 shells, plus sl st joins) (36)
Round 9 :
*(ch4, sk2, sc) repeat around to create mesh border; adjust spacing evenly to form round scallop (approx 48 mesh-chs)
Round 10 :
Work picot shell edging: *5 dc in mesh, picot, sl st into next mesh* repeat to end creating fine lacy edge (approx 48 shells)
Round 11 :
1 sc in each around to firm up edge, sl st to join (48)
Info :
Block each motif flat and pin scallops evenly after completing round 10. Make 7 identical motifs and place them in a line for joining later. Blocking makes the lace crisp and joining easier.
— Large Layered Flower (Make 3) :
Round 1 :
Using sage green, magic ring, ch1, 8 sc in ring (8)
Round 2 :
2 sc in each st around (16)
Round 3 :
(1 sc, inc) x 8 (24)
Round 4 :
Switch to cream. *ch2, puff (yoh insert, pull up loop 4x), ch1 to close puff, sl st into next st* repeat 12 times making 12 puff clusters arranged (12 puffs)
Info :
Puff clusters for the center create a small rosette. Keep puffs consistent by pulling loops to the same height. You can lightly stuff the rosette with a tiny pinch of fiberfill before adding outer petals if you want extra height.
Round 5 :
Ch2, in same st work (1 dc, ch2, 1 dc) to anchor base for petal layers; *skip 1, sl st into next between puffs, ch2, work (1 dc,ch2,1 dc)* repeat to make 12 small petal anchors (12)
Round 6 :
First petal layer: Into each ch-2 space work (sc, hdc, 3 dc, hdc, sc) — these are slightly arched petals (12 petals)
Round 7 :
Ch1, working behind first petal layer, *ch4, sl st into base between petals* creating looped supports for second layer (12 loops)
Round 8 :
Second petal layer (cream): Into each loop work (sc, 2 hdc, 5 dc, 2 hdc, sc) making larger petals (12 larger petals)
Info :
Work the second petal layer so petals slightly overlap the first layer to create fullness. Use stitch markers to mark every third petal to keep consistent spacing while working.
Round 9 :
Ch1, sl st at base to secure. Fasten off cream but leave long tail for sewing; weave in starting tail under petals to tighten center.
Round 10 :
Using sage, create a small decorative cup under the flower: join sage at the back, ch1, work 12 sc around base forming a small disc (12)
Round 11 :
Work 12 sc in BLO to create a ridge for sewing the flower to the base (12)
Info :
Option: Add a narrow ring of 6 tiny cream picot flowers between petals by chaining 4, sl st to form picot clusters and sewing them into the flower center for extra detail.
Round 13 :
Make three of these layered flowers. For the central flower you may choose to make an extra inner petal round to increase diameter by approximately 20% (add an extra round of 12 larger petals worked into ch loops following Round 8 structure).
— Flower Inner Detail (Optional extra height) :
Round 1 :
Using sage, ch4, join to make small ring, (ch1, 6 sc) in ring (6)
Round 2 :
(1 sc, inc) x 2 then (2 sc, inc) x 2 and (3 sc, inc)x1 to shape slight star (12)
Round 3 :
Work 6 elongated leaves as tiny petals around with (sc, ch2, 3dc, ch2, sc) into each of 6 spaces (6 small petals)
Info :
Sew this inner crown to the center of the layered flower before final sewing to the base, using long tails and secure weaving for stability.
— Sculpted Leaf (Make 18 leaves total; 12 large, 6 small) :
Round 1 :
With sage, ch6. Row foundation: sc in 2nd ch from hook, hdc, 2 dc, 2 tr, 2 dc, hdc, sc in last ch — working back along opposite side of foundation ch: sc, hdc, 2 dc, 2 tr, 2 dc, hdc, sc (total stitches across both sides ~22)
Round 2 :
Ch1, work 1 sc into each st around to create a neat single crochet border (approx 22)
Round 3 :
FLO: 1 sc in each st BLO to create a vein ridge along the leaf center (22)
Round 4 :
Edge shaping: *(sc, picot, sc) in tip of leaf, sl st down other side to base* finish with sl st to join (adds decorative picot tip)
Info :
For larger leaves increase foundation ch to ch9 and add extra 2 dc pairs in each side to enlarge. Block leaves over a curved pin to give them a natural slight cupping.
Round 5 :
Make 12 large leaves and 6 small leaves. Small leaves: use ch5 foundation and follow same pattern with 16 total stitches round 2.
— Leaf Vein Lace (Alternate leaf style, Make 6) :
Round 1 :
Ch10, sc in 2nd ch from hook, (hdc, 2 dc) across 8 sts then sc at end and work back: sc, (2 dc, hdc) to start (approx 18)
Round 2 :
Into each stitch along center spine: ch3, sl st into top of corresponding stitch on opposite side to create netted vein (creates airy lace; approx 18 loops)
Info :
This leaf is flatter and lacy; it sits well under the 3D petals. Work 6 of these to alternate the runner look.
— Scroll Vines (Make 4 long vines) :
Round 1 :
Using sage, ch50 (or desired length for vine). Row 2: sc in 2nd ch from hook and across to end (49 sc)
Round 2 :
Fold chain strip lengthwise; using cream yarn and 3.0mm hook, work single crochet through both layers along one long edge to create a tubular look (approx 49 sc)
Round 3 :
Lightly stuff tube or leave flat. Ch3 and create a spiral by twisting tube and using sl st every 6-8 sts to hold curve (creates a scroll). Make 4 vines of varying lengths (approx 40-70cm each before coiling).
Info :
Vines are decorative and can be shaped by wet-blocking. Sew them to the runner top later; stitch through both tube edges for a secure hold. Vary coil tightness to add natural movement.
— Small Puff Clusters and Tiny Flowers (Make several clusters) :
Round 1 :
Using cream, ch4 join to ring, (ch1, 6 sc) in ring (6)
Round 2 :
Into each st make a small picot puff: *yoh insert, pull up loop 4x, yoh pull through all loops, ch1* repeat 6 times (6 mini puffs)
Round 3 :
Join puffs together with small sl st petals: *sl st, ch3, sl st into base* repeat to make a 5-petal tiny flower (5 petals)
Info :
These tiny flowers and clusters are used to fill gaps between leaves and petals and add visual interest. Make at least 12 clusters of varying sizes.
— Decorative Beads and Bobbles (Make multiple) :
Round 1 :
Ch3, join to ring, 8 sc in ring (8)
Round 2 :
Make 3 rounds of sc to thicken bead (8, 8, 8). Finish with sl st and leave tail for sewing (optional to insert a small bead before final closing)
Info :
These bobbles are sewn sparsely among the leaves and flower bases to suggest seed pods; use small beads if desired, but keep pieces washable by using yarn-only options.
— Joining Base Motifs into Runner :
Round 1 :
Lay 7 doily motifs in a straight line overlapping scallops by one scallop at each junction. Use long cream yarn tails to whip stitch motifs together through the outer loops of scallops creating a firm flat seam.
Round 2 :
Join by mattress stitch or whip stitch: align scallop peaks and sew through two loops from each motif for invisible seam. Repeat between all motifs to create a long base (7 motifs joined).
Info :
After joining, block the entire base line to ensure the motifs lie flat. Pin into shape and steam-block if your yarn allows. This makes subsequent placement of flowers and leaves easier and more accurate.
— Placement Plan for Flowers, Leaves and Vines :
Info :
Arrange three large flowers spaced evenly down the runner length, with large leaves radiating outward and lacy leaves filling gaps. Position vines flowing between flowers and curving outward to create a natural trail. Pin heat-blocked pieces in place before stitching.
— Sewing Flowers to Base :
Round 1 :
Place a layered flower centered across two joined base motifs where you want the focal. Using the sage back disc made in Round 10 of the flower, whip stitch through the disc and into the base mesh at 12-16 evenly spaced points to secure (12-16 stitches)
Round 2 :
Reinforce by sewing some stitches through the inner petals and directly into the base mesh, focusing on center and three opposing anchor points so flower doesn't flop (6 additional stitches).
Info :
Be careful not to pull petals flat while sewing — keep them slightly lifted so their 3D shape remains. Use small, neat stitches and weave ends under the base disc.
— Attaching Leaves and Small Flowers :
Round 1 :
Pin each leaf in place: large leaves typically sit under the petals and are sewn with a ladder stitch through the BLO ridge to the base mesh (approx 6-8 stitches per leaf)
Round 2 :
Sew small lacy leaves and tiny flowers into the gaps with 4-6 stitches each. Use a combination of whip stitch and small stab stitches to hold shapes so they appear to grow naturally from the main flower.
Info :
Alternate sage and cream leaves for a balanced look. If a leaf edge lifts undesirably, add a hidden stitch under it to hold the curve. Place tiny bobble beads near the leaf bases as seed pod accents.
— Attaching Scroll Vines :
Round 1 :
Position vines so they weave between flowers and around leaves. Tuck ends under petal bases and secure with long whip stitches every 2-3cm to the base mesh to hold coil shape (approx 12-30 stitches per vine depending on length)
Round 2 :
For extra security stitch through the tubular edge into the base fabric at curve peaks. Avoid stitching too many points which would flatten the tube.
Info :
Make sure each vine has at least three anchor points: two ends and one or two midpoints for stable, graceful curves.
— Final Scalloped Edge and Unified Border :
Round 1 :
With cream yarn and 3.0mm hook, pick up along runner edge working evenly spaced sc to create a uniform edge (count and adjust to maintain symmetry; approx 4 sc per scallop unit across entire runner)
Round 2 :
Work scalloped shell around edge: *5 dc in next space, picot, sl st into next edge point* repeat across runner to bring the runner into a unified scalloped border (count will vary with runner length; maintain even spacing)
Round 3 :
Finish with a round of sc in BLO to create a neat ridge and to conceal seam joins (sc across; use shorter tail to weave and finish) (approx total sc matching previous count)
Info :
Block whole runner after finishing edging. Use pins to open scallops and steam gently (if cotton) to set shape. Weave in all ends by threading through multiple stitches and trimming close to fabric.
— Finishing Touches :
Round 1 :
Sew on bobbles and tiny flowers in any remaining gaps using small tacking stitches. Balance both sides stylistically so the runner looks cohesive from any angle.
Round 2 :
Lightly steam-block once more and allow to dry fully pinned in shape. Remove pins and gently press with a towel under low heat if desired for a flat finish.
Info :
Store flat to maintain shape. For machine-washable variations, use mercerized cotton and avoid beads; hand wash and reshape immediately while damp.
You've created a gorgeous heirloom-style floral lace table runner with layered blossoms and sculpted leaves — a beautiful centerpiece for any table! Each stitched petal, vine and scallop adds texture and charm, and the finishing blocking brings everything together into a refined, elegant piece. Display it proudly, wrap it as a special gift, or use it seasonally to add vintage warmth to your home. 🧶🌿✨