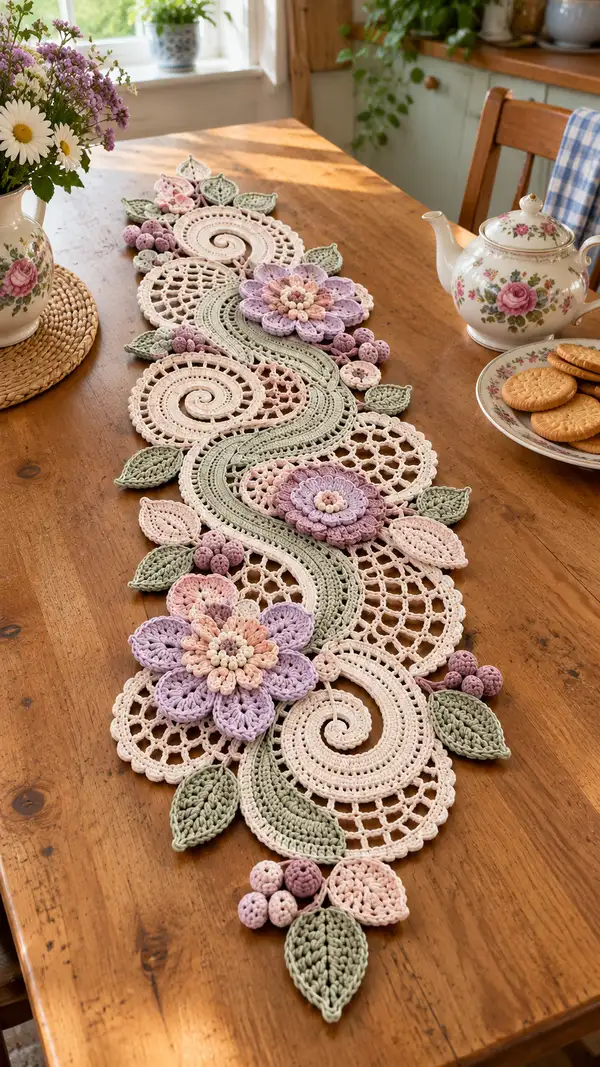
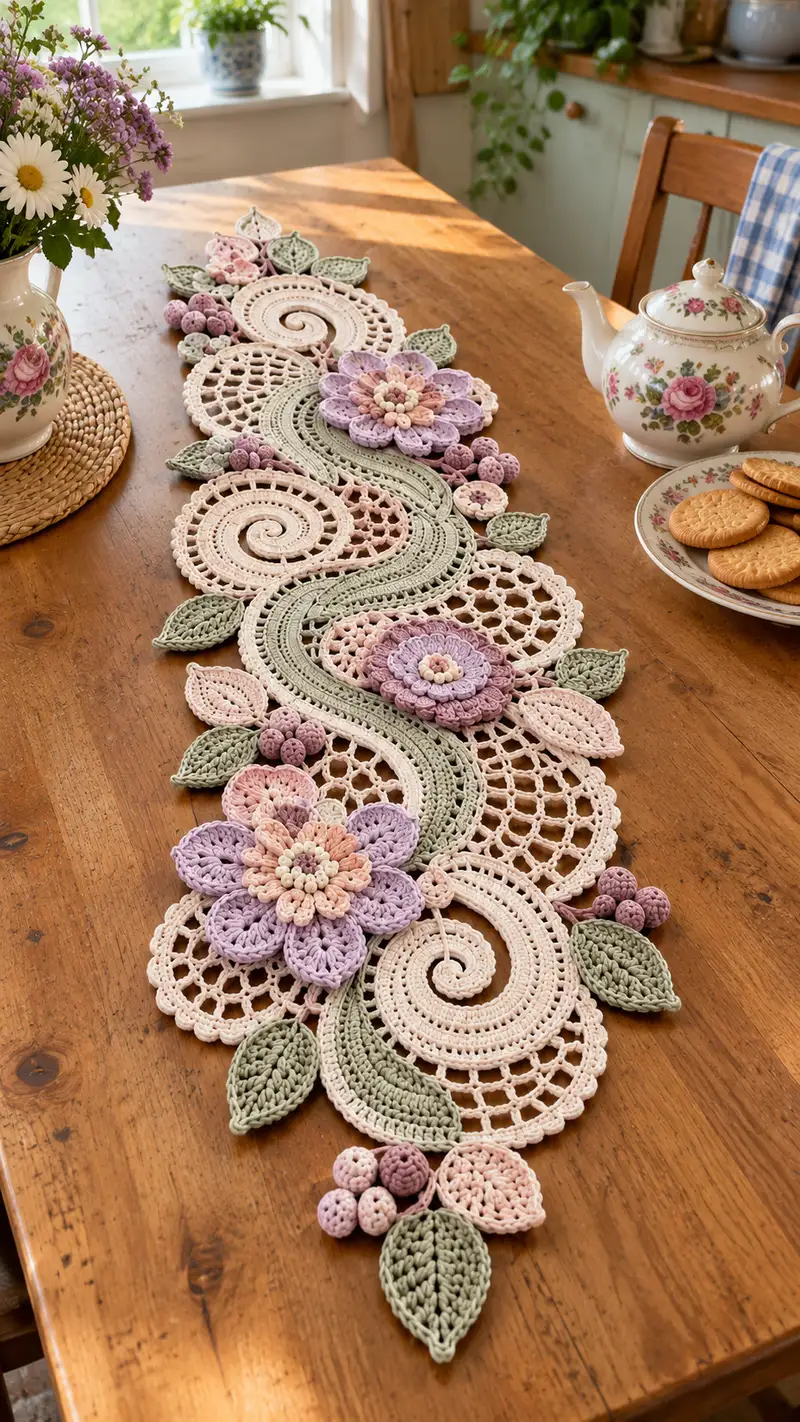
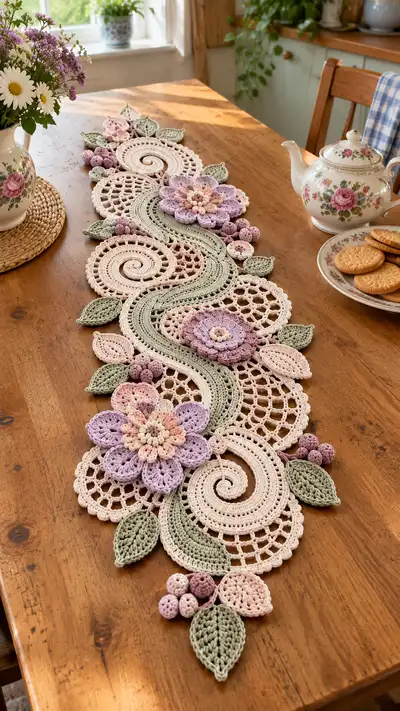
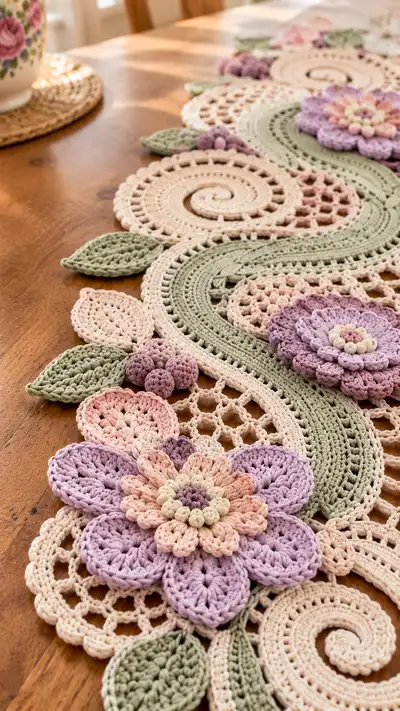
Create a romantic, vintage-inspired floral lace table runner worked in soft pastels. This pattern uses a mix of lace circles, spirals, layered flowers, leaves and tiny berry clusters to form a flowing S-shaped runner that lays beautifully down the table. The finished piece combines openwork mesh, textured petals and raised leaves for a stunning centerpiece. Perfect for spring or any table in need of a delicate, handmade accent.
Progress Tracker
0% Complete
— Spiral Motif (make 6 large spirals) :
Round 1 :
6 sc in magic ring (6)
Round 3 :
(1 sc, 1 inc) x 6 (18)
Round 4 :
(2 sc, 1 inc) x 6 (24)
Round 5 :
(3 sc, 1 inc) x 6 (30)
Info :
Work these rounds tightly for a firm spiral core; use stitch marker to mark round start. This little disc becomes the spiral center from which we will form a flat spiral strip.
Round 6 :
(4 sc, 1 inc) x 6 (36)
Round 7 :
(5 sc, 1 inc) x 6 (42)
Round 8 :
(6 sc, 1 inc) x 6 (48)
Round 9 :
1 sc in each st (48)
Round 10 :
1 sc in each st BLO (48)
Info :
To begin curling the round into a spiral, we will start selectively increasing on the same side each round; this forces the fabric to curl into the spiral. Fold the circle so increases stack and create curvature.
Round 11 :
(7 sc, 1 inc) x 6 (54)
Round 12 :
1 sc in each st (54)
Round 13 :
(8 sc, 1 inc) x 6 (60)
Round 14 :
1 sc in each st (60)
Info :
When working these increase rounds, always place increases on the same arc (track roughly 6 increases spaced evenly) so the spiral grows outward and turns. Pin into spiral shape during blocking if necessary.
Round 15 :
(9 sc, 1 inc) x 6 (66)
Round 16 :
1 sc in each st (66)
Round 17 :
Switch to 1 dc in next round to add height: 1 dc in each st (66)
Round 18 :
1 dc in each st (66)
Info :
To form a lacy outer edge, in the next round we'll introduce chain spaces that produce the openwork between the spiral ribs. Keep counts by substituting dc clusters for sc groups; counts remain 66 foundation posts.
Round 19 :
*Dc in next 3 sts, ch3, sk 1* repeat around (66 dc, 22 ch3 sps total).
Round 20 :
In each ch3 sp: (sc, ch2, sc) to make eyelet arches (66 sc across dc rounds, 22 arches)
Round 21 :
1 sc in each st and sc in top of each arch (approx 88 sc - count will vary slightly due to arches)
Round 22 :
Work picot scallop: *(3 dc in next 4 sts, sl st in top of next arch)* repeat around to form an outer scallop. Maintain even spacing (approx 22 scallops)
Info :
Finish off and weave in tail. Block spiral by pinning into a gentle round spiral, allowing the inner rounds to sit slightly higher for three-dimensionality. Make 6 spirals in cream and 4 in blush for the sample runner.
— Lattice Circle Motif (make 6) :
Round 1 :
6 sc in magic ring (6)
Round 3 :
(1 sc, 1 inc) x 6 (18)
Round 4 :
(2 sc, 1 inc) x 6 (24)
Round 5 :
(3 sc, 1 inc) x 6 (30)
Info :
We will transform the solid circle into open lattice by replacing rows of sc with chain arches. Keep a stitch marker at round start for counting.
Round 6 :
1 sc in each st (30)
Round 7 :
*dc in next st, ch3, sk 2* repeat around (approximately 30 dc and 10 ch3 sps)
Round 8 :
In each ch3 sp: (sc, ch3, sc) to open into a second round of mesh (30 sc counted on base)
Round 9 :
*In next ch3 sp: (dc, ch2, dc), sk next arch* repeat to enlarge mesh (approx 10 larger arches)
Round 10 :
Round of sc: 1 sc in each dc and sc across (maintain even tension; approximate count 60 sc)
Round 11 :
Work open lattice: *(ch5, sl st in base between two previous arch posts)* repeat around to make long chain loops (approx 20 loops)
Round 12 :
Secure loops with sc: 1 sc in each chain loop and in next sc along base to anchor (approx 60 sc)
Round 13 :
Final decorative edge: *(sc, ch2, sc) in each chain arch, sl st to next base st* repeat to form neat scalloped lace border (approx 30 scallops)
Info :
Block flat and square. These open circles are the large round lacy background pieces that sit between spirals and along the S-band edges. Make 6 lattice circles in cream.
— S-shaped Band (make 1 long curved band, approx 30 rounds) :
Info :
Work the S-band as a long flat strip worked in joined rounds (working spiral/curve shaping by selective increases and decreases along the edges). The band in the photo is worked in sage green and measures roughly 8-10 cm wide across many rounds. Chain an initial foundation of 120 chains (adjust to table width desired) and join carefully, avoiding twist.
Round 1 :
Ch 120, join with sl st to first ch to work in joined rounds. Ch1, 1 sc in each ch around (120)
Round 2 :
1 sc in each st (120)
Round 3 :
1 sc in each st BLO to create defined ridge (120)
Round 4 :
*Sk 8 sts on the inner edge every 40 sts to create inward curve shaping: (work 36 sc, dec, 34 sc, inc) pattern across the band to begin an S-shape* (120)
Round 5 :
1 sc in each st (120)
Round 6 :
Edge shaping round: *On one side work 3 sc in same st every 40 sts to flare outward; on opposite side do dec every 40 sts to curve inward* (120)
Info :
Use stitch markers along the inner and outer edge positions (every 40 stitches) to keep the curve consistent. By repeating these directional increases and decreases across many rounds the band will take on a smooth S-curve.
Rounds 7-12 :
Repeat Rounds 4-6 sequence three times to deepen curve (120 each round)
Round 13 :
Change to 1 dc in each st for a row of height to visually separate the band from motifs (120)
Round 14 :
1 dc in each st (120)
Round 15 :
Work surface slip-stitch line along each long edge for definition: sl st in each st around (120)
Info :
If you prefer a narrower band, decrease initial ch foundation to 96 or 84 and adjust subsequent counts proportionally. Keep the same ratio of increases/decreases to create consistent curvature regardless of width.
Rounds 16-22 :
Repeat a rhythm of three rounds of sc (120) then one round of decorative openwork: *ch3, sk 1* across to create tiny mesh lanes (count returns to 120 each round)
Round 23 :
Work final smoothing rounds: 2 sc rounds and one sl st round to firm edges (120)
Round 24 :
Attach band ends decoratively into the motif assembly by leaving long tails for sewing. Fasten off and weave in ends.
Info :
Block the band pinned to a gentle S shape that matches your desired runner curve before joining. The band will be the spine of the runner and supports attaching spirals and circles to either side.
— Large Layered Flower (Make 4 large flowers) :
Round 3 :
(1 sc, inc) x 6 (18)
Round 4 :
1 sc in each st (18)
Info :
We will build a textured layered center using puff stitches for a dense poppy-like core, then create larger petal rounds on top. Use lighter tension for petals so they sit softly to the sides.
Round 5 :
Change color to pale yellow. *Puff stitch in next st (yarn over, insert, pull up loop, repeat 4 times, yarn over and pull through all loops), sl st to secure* repeat 6 times around (6 puffs)
Round 6 :
Sc around puffs: 1 sc between puffs to anchor (12 sc)
Round 7 :
Change to blush: *(ch3, dc3 in next st, ch3, sl st in next sc)* repeat 6 times to make a 6-petal inner ring (work into spaces between puffs)
Round 8 :
Round of sc around entire ring: 1 sc in each dc and sc to neat the edge (approx 48 sc)
Round 9 :
Start large petals: *(ch2, (tr, tr, tr) all in next sc, ch2, sl st in next sc)* repeat 6 times to make tall petals (approx 6 big petals)
Round 10 :
Work over petals: in each petal base make 6 sc to create thickness and sculpt each petal (36 sc total)
Info :
Use a combination of puff and tall stitches to create sculptural petals that catch light. Block petals individually if needed using pins to shape edges.
Round 11 :
Decorative round: *(sc along petal edge, picot, sc to petal base)* to create scalloped petal tips (approx 36 sc + picots)
Round 12 :
Fasten off and weave tails. Make four flowers in lavender and blush layered as shown. Stack smaller flower centers onto larger petals by sewing through base centers to fasten securely.
— Small Flower (Make 6) :
Round 3 :
*(ch2, 3 dc in next st, ch2, sl st in next st)* repeat 6 times to make 6 quick petals (12 base points)
Round 4 :
Secure with 1 sc around and a picot on each petal tip (approx 24 sc)
Info :
These small flowers are used to fill gaps and nestle between larger motifs. Make in alternating blush and pale mauve.
— Leaf (Make 24 leaves) :
Round 1 :
Ch 6, sc in 2nd ch from hook, hdc in next, dc in next, tr in next, into last ch work 3 sc across to turn and work down opposite side: dc, hdc, sc, sl st to join to first sc. (Approx 14 sts total)
Round 2 :
Work edge: *(sc, ch1, sc) along each edge to add definition and small scallop (approx 20 sts)
Round 3 :
Work central vein: with contrasting color, surface sl st a straight line down center of leaf from base to tip; fasten off.
Info :
Leaves are worked flat and can be made slightly larger by increasing the initial chain. Block each leaf with mild steam to flatten and set shape before joining.
— Berry (Make approx 30 small berries, cluster into groups) :
Round 3 :
(1 sc, 1 inc) x 6 (18)
Round 4 :
1 sc in each st (18)
Round 5 :
(1 sc, 1 dec) x 6 (12)
Round 6 :
6 dec (6) - finish tube, stuff lightly with a tiny pinch of fiberfill then close with sl st and fasten off leaving tail for sewing
Info :
Make berries in mixed mauve and blush. Cluster 3-5 berries and sew them together by stitching through their bases to form small grape-like clusters for visual interest.
— Joining & Decorative Mesh Bridges :
Info :
Layout your motifs on a blocking mat in the desired order: alternate spiral, lattice circle, flower group, and S-band center. Pin in place exactly where you want to join then connect using chain-bridges and small mesh panels as described below.
Round 1 :
With cream yarn join at edge of spiral and sc around outer scallop to create a stable joining rim, evenly spacing sc to achieve approx 88 sc around the spiral outer edge
Round 2 :
Work chain bridges: *ch12, sl st into a corresponding stitch on the S-band; ch12, sl st back into outer rim* repeat to join spiral to band at 6 points around edge (adjust number of bridges depending on spiral size)
Round 3 :
Into each bridge ch12 make small mesh: (sc, ch3, sc) across chain to turn it into stabilizing net; fasten and weave in ends
Info :
When joining, use a whip stitch or mattress stitch with the same yarn color for an invisible seam. Sew from the right side so the stitch direction matches the motif orientation.
Round 4 :
Join lattice circles by working sc along their edges and bridging with ch6 loops to the S-band and spirals; make sure the mesh openings align to create a balanced look
Round 5 :
Sew layered flowers into the chosen centers by stitching through the flower base and the underlying lattice using long tails. Reinforce with several passes for a secure join.
Round 6 :
Sew leaves and berry clusters into gaps: position leaves with veins facing upward and tack at base with three neat stitches; sew berry clusters in small groups of 3-5 near flowers and spirals
Info :
Work slowly when joining motifs. Pin and check symmetry frequently. If the piece curves unevenly, ease tension by adjusting the number of chains in certain bridges or by repositioning motif anchors slightly before final sewing.
— Final Edge & Finishing Rounds :
Round 1 :
Once all motifs are joined, work an edging around the entire runner: join cream yarn at one end, sc evenly around outer edge to tidy joins (approx 300 sc depending on overall assembled length)
Round 2 :
Edge scallop: *(ch3, skip 2 sts, sl st)* around to create all-over tiny scallops (count varies)
Round 3 :
Decorative picots: *sc in next st, picot (ch3 sl st in top of last sc), sc in next 4 sts* repeat to create tiny raised picots along border
Round 4 :
Final secure round: 1 sl st around entire edge to flatten and finish. Fasten off, weave in ends and trim close to work
Info :
Optional: apply a light mist of starch or fabric stiffener to edging while pinned if you want a crisper, more table-linen look. Allow drying flat to keep shape.
— Blocking & Care :
Info :
Wet-block or steam-block each motif before final joining for consistent shaping. Pin motifs to the recommended dimensions and allow to dry completely. For washing, handwash gently in cool water with mild detergent and lay flat to dry. Iron lightly using a cloth over the lace if needed.
Final :
Weave in all remaining ends, trim, and re-check joins. Your floral lace runner is complete and ready to grace your table.
Completing this floral lace table runner is such a joyful process — every spiral, petal and leaf adds a little moment of handmade charm. The layered flowers and delicate lattice make a stunning centerpiece that feels both vintage and fresh. Pin and block each motif with care, then watch your runner come to life as you join each piece. 🧶🌸 Your finished runner will bring soft, welcoming style to any table — enjoy the slow, satisfying progress and show it off with pride! ✨