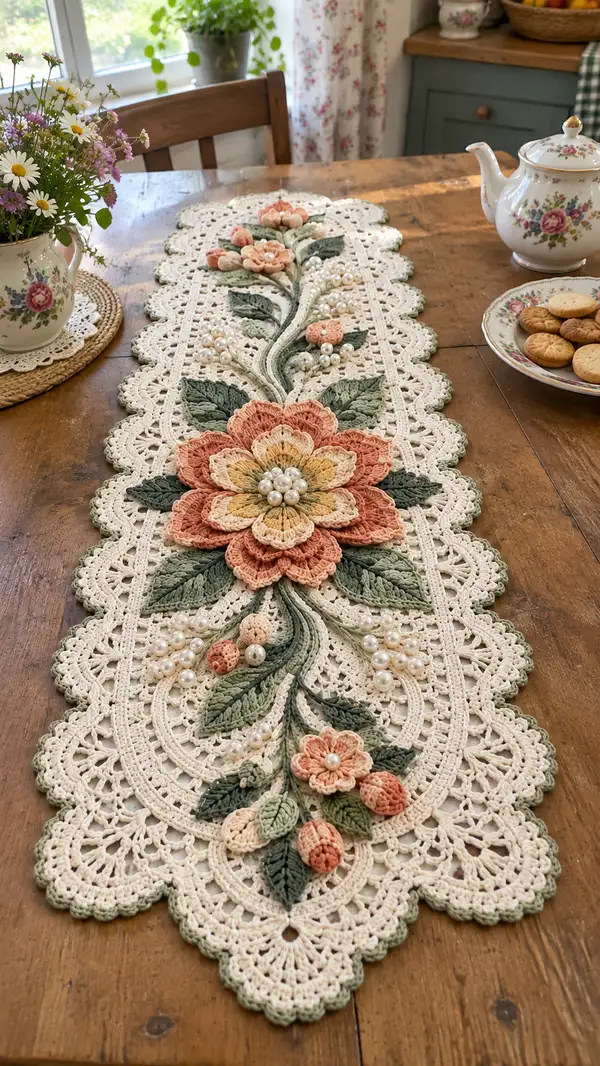
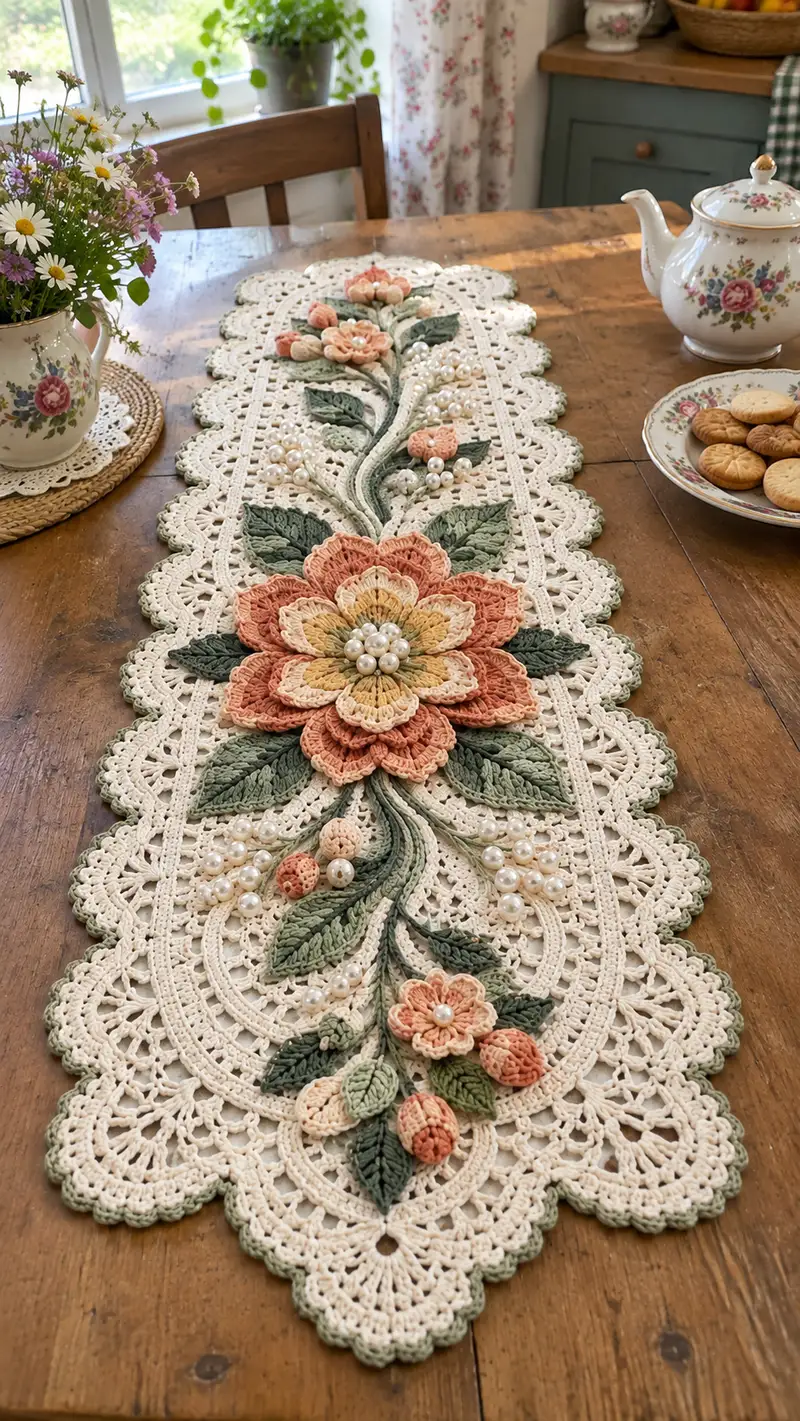
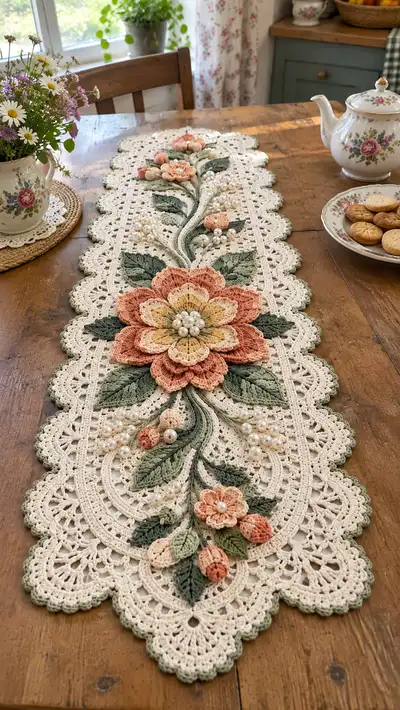
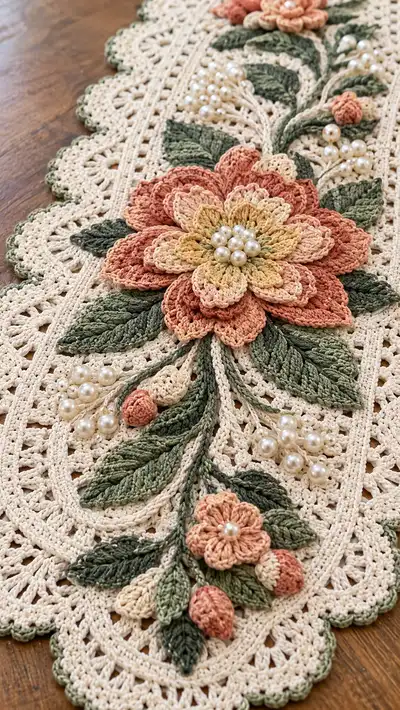
Create a vintage-inspired floral lace table runner with layered crochet flowers, sculpted leaves and pearl bead clusters. This runner features a delicate cream lace background edged in soft sage and decorated with multi-layered peach and blush flowers with pearl centers. The design combines filet-style lace rounds, raised petal motifs, braided stems and beaded embellishments to deliver a heirloom-style centerpiece. Perfect for a tea setting, mantel or special table display.
Progress Tracker
0% Complete
— Materials & Gauge :
Info :
Gauge is lace-dependent. Using size 10 cotton thread and a 1.75mm hook, 10 dc = 4 cm measured on simple fabric. Final runner measures approximately 90cm long x 24-26cm wide depending on blocking and tension. Work tightly enough that appliques will sit flat without holes showing through the lace base.
— Base Lace Panel (worked flat in joined rounds) :
Round 1 :
Make a foundation chain of 45 sts. Join with sl st to first chain to form a ring, ensuring chain is not twisted. (45)
Round 2 :
Ch3 (counts as dc), 1 dc in same ch, dc in next 43 ch, 2 dc in last ch, now work along opposite edge of foundation chain: dc in next 43 ch, 1 dc in last ch, sl st to top of beginning ch3 to join (92)
Round 3 :
Ch3, dc in same st, *ch2, sk 1 dc, dc in next 2 dc; repeat from * across until you reach final 2 sts, work 2 dc in last st, continue along opposite edge mirroring the lace pattern, join with sl st (structure creates an open filet border) (92)
Round 4 :
Ch1, sc in same st, *ch3, sk 2 sts, sc in next 2 dc, rep from * across, maintaining the rounded oval by working sc2tog at each short end to smooth curvature (92)
Round 5 :
Ch3, dc in same st, (2 dc, ch2, 2 dc) in each ch3 space along flanks to form fan shells; at short ends work (2 dc, ch2, 2 dc) into the end 2 sc to keep oval shape. Join (approx 92 shell clusters)
Info :
Keep the panel flat as you work by blocking the foundation chain gently with pins if it tends to curve. Use stitch markers at the short-oval center points to help maintain symmetry when working shells.
Round 6 :
Ch1, sc in same st, sc in next dc, *(ch3, dc3) in next ch2 space, ch3, sc in next 3 dc; rep across both sides and through ends to create a lacy mesh (92)
Round 7 :
Ch3, 2 dc in same sp, *(ch2, sk the sc row, 3 dc in next ch3 space) across; at short ends work 3 dc clusters to maintain roundness (96)
Round 8 :
Ch1, sc in each dc and sc across but work x2 sc in the central short-end st to slightly widen the center; this prepares the runner length without adding too much width (96)
Round 9 :
Repeat Rounds 5-8 pattern but replace ch3 spaces with ch4 on Rows 9-10 to open the lace slightly. You will maintain a consistent overall count of around 96-100 sts depending on how many ch spaces are present
Info :
Work 4 alternate rows of the fan-shell / mesh sequence, changing the ch sizes to balance openness. This creates the classic filet-lace ground that will receive appliques. Keep an even fabric width; measure width after each sequence and adjust by adding or reducing ch spaces in the fan shells as needed.
Round 10-15 :
Work repeating motif: (Row A: fan shell in ch spaces; Row B: sc and ch loops to form mesh; Row C: cluster dc for texture; Row D: sc rounds) Repeat sequence three times to build height and central surface area for appliques. (Maintain approx 96-100 sts)
Round 16 :
Ch1, sc in each st; at the short ends work (sc, ch3, sc) into the central end space to create a small oval opening that will become the scalloped shaping base (96)
Round 17 :
Begin scalloped edging: *sk 3 sts, (5 dc, sl st) in next st, sk 3 sts, sl st in next st; rep across both long sides and mirror at short ends. This begins the scalloped border seen in the runner (12 scallops per side approx)
Info :
Make sure to work the scallops symmetrically along both long edges. Use pins to block each scallop as you work the first few to set their size. The scallops will later be edged with sage green.
Round 18 :
Ch1, sc around the entire runner working 3 sc into each scallop valley to anchor the next round (approx 120 sc total). This will be the sturdy foundation for the decorative sage edging.
Round 19 :
Change to sage green (Info: join sage in a back-loop only join to create a subtle ridge). Ch1, work 1 sc in each st BLO around, placing 2 sc in the center of each scallop to emphasize the scallop tips (approx 120)
Round 20 :
Ch2, hdc in each st around to smooth the ridge. At scallop tips work (hdc, ch1, hdc) in the same st to create a firm ridge. Join and fasten off. Block runner flat to dimensions and allow to dry thoroughly before appliquing pieces. (120)
Info :
Blocking is crucial: pin the runner to shape so the scallops are even and the lace mesh sits flat. Spray lightly with water and shape each scallop evenly. Let dry fully to set the lace grid for secure appliquing.
— Large Layered Flower (center focal motif) :
Round 1 :
Using peach thread, make a magic ring, ch1, work 6 sc into ring. Pull tight. (6)
Round 2 :
Inc in each st around (6 inc) (12)
Round 3 :
(1 sc, inc) x6 (18)
Info :
This small central disc will be the anchor for the first petal round. Keep the disc flat. We will build three layered sets of petals around this center.
Round 4 :
Ch2, *(in same st: 1 dc, ch2, 1 dc), sk 1, sc in next st; rep around to form 6 petal bases; join to first dc (6 petal bases)
Round 5 :
Work petals row A: In each ch2 space: (ch1, 2 dc, tr, 2 dc, ch1) anchoring in the sc between petal bases; rep for all 6 petals to form tall shaped petals (6 tall petals)
Round 6 :
Change to blush thread (Info: fasten off peach and join blush at back of last petal). In the back loop of each petal base, work a reverse picot and sl st to create a textured ridge: *(sl st, ch3, sl st) in base; rep around. This strengthens the petal attachment.
Round 7 :
Second petal layer (peach): Join peach at back of a petal, ch3, in the space behind first layer work: (2 dc, tr, 2 dc) in each behind-space alternating between petals to create overlapping petals (12 medium petals)
Info :
Adjust petal height so second layer overlays the first by about 40%—this creates depth. Pin petals in place on a flat surface to ensure symmetric spacing while continuing rounds.
Round 8 :
Third petal round (blush and yellow blend): Use buttery yellow for centers—join yellow to center disc and work a cluster of (hdc, dc, hdc) in each center stitch between base petals to give an inner halo. Then switch to blush to crochet small scalloped edging around each outer petal: in each petal edge work (sc, ch2, sc) to make delicate scallops. Fasten off. (This finalizes three layered petal sets)
Round 9 :
Center bead cluster: Using beading needle and fine thread, sew seven 8mm pearls in a tight circle over the center disc. Secure by passing needle through the disc multiple times. Knot thread at back and weave ends in. (Info: place bead cluster after blocking the petal layers flat.)
Info :
Stiffen petals slightly if they flop by lightly dampening and pinning to shape; the pearl cluster will hide most central sewing. Leave long tails for sewing the flower to runner later.
Round 10 :
Fasten off and weave remaining tails through the back of the disc. Press lightly under a cloth if needed to flatten petals for application. (No additional stitches; finish)
— Medium Flowers & Small Sprigs (Make 3-4 varieties) :
Round 1 :
Magic ring, ch1, 6 sc in ring, pull tight (6)
Round 2 :
Inc in each st around (12)
Round 3 :
*(ch2, 3 dc) in next st, sl st in next st; rep around to make 6 small petals. Fasten off and leave long tail for sewing. Add 6mm bead center using sewing thread. (6 petals)
Info :
These medium flowers fill spaces along the central spine. Vary color combinations between peach and blush for layered contrast.
Round 4 :
Small open blossom: Join two colors by working a popcorn petal: ch1, sc into magic ring, *(ch2, 5 dc in same st, ch2, sl st) rep for 6 petals, close and fasten off leaving long tail (6 popcorn petals)
Round 5 :
Attach 4 medium flowers: space them along the central oval panel as pictured—one near each short end and two along the spine. Pin before sewing. (Info: use bead centers for cohesion)
— Leaves (Sculpted Leaf, Make 12-16 total varying sizes) :
Round 1 :
Ch12 in olive green. Work along the chain back: 1 sc in 2nd ch from hook, hdc in next, 2 dc in next, *(tr in next, 2 dc in next) repeat until near end, hdc, sc in last; turn and work along other side of foundation chain: sc, hdc, dc in mirrored increases until base is closed. Leave pointed tip for shape. This creates a standard leaf base. (approx 22-26 sts)
Round 2 :
Edge shaping: ch1, sc around leaf placing (2 sc) at the tip to round it, and sc2tog gently at base to taper. Fasten off. (Edge complete)
Round 3 :
Surface vein: Using sage green, with tapestry needle and long tail, embroider a central vein through the leaf by passing needle with chain stitch along center; tack at base and tip. This gives the raised vein modeling seen in photos.
Round 4 :
Raised leaf variant (for larger leaves): Make foundation of ch16. Work through BLO on the return to create a ridged texture: ch1, 1 sc in BLO of each ch across, then on return work sc across in normal loops forming a thick ridge. Add 3 rounds of slip stitch edge to compress and curve leaf slightly. Fasten off. (Leaf approx 28-34 sts)
Info :
Make leaves in two sizes: small (12-13cm long) and large (16-18cm long). Vary colors between olive and sage to achieve the multi-tonal foliage effect. Pin and starch lightly if you want leaves to hold curved shape before sewing in place.
Round 5 :
Make 8 small leaves and 6 large leaves. Reserve three largest leaves to tuck beneath the main flower to create the base platform. (Info: all leaves leave long tails for sewing.)
— Buds and Berry Clusters (make approx 12 buds and 6 bead clusters) :
Round 1 :
Ch6, sl st to form small ring, work 6 sc into ring, pull tight (6)
Round 2 :
*(1 sc, inc) x3 (9)
Round 3 :
*(2 sc, inc) x3 (12) - if you desire slightly larger buds, continue one more round: (3 sc, inc) x3 (15)
Info :
To create the textured wrapped buds seen in the photos, after making the sphere, crochet a very tight spiral of sc three times around the bud with alternating blush and peach colors and finish with a tiny leaf cap using green thread.
Round 4 :
Berries/ pearl clusters: Thread 6-12 small pearls on beading thread, space them along a short cord made with 6 ch and sc back. Tie and secure bead cord through lace with small stitches. Make 6 clusters of varying bead counts to place along the stems. (Info: always secure each bead with a tiny stitch behind it so it cannot slip.)
— Braided Stems and Corded Vines :
Round 1 :
Make 3 chains of 80 ch in sage and olive. Braid them together loosely then single-crochet along the braid to lock the cords together: sc in each braid stitch for entire length. This yields organic, raised stems. Make 4 stem lengths to mirror the photo: two long central stems and two shorter side stems.
Round 2 :
Surface slip-stitch vines: On the lace base, work a chain of sc and sl st forming an S-curve, anchored by occasional small sl st tacks through the lace base to hold. This sets the path for leaves and bead clusters to be sewn over.
Info :
When you attach stems to the lace base, use hidden whipstitch from the back: pass yarn needle through lace and stem underside at 3-5mm intervals so the top remains smooth and the stem appears to flow across the surface.
— Small Decorative Motifs (tiny 5-petal blooms and leafets) :
Round 1 :
Magic ring, ch1, 5 sc into ring, in each sc: (ch3, sl st) to form 5 small loops, fasten off (5 loop petals). Add 4-6 of these to fill corners of runner and near big flower. Sew small 4mm pearl in center of each.
Round 2 :
Mini elongated leaf: ch6, 1 sc back along chain, add single crochet picot to tip, fasten off. Make 8-12 mini leafets to scatter across lace and fill spaces.
Info :
These small motifs are useful to disguise any stitch joins and give the runner a cohesive, hand-embroidered look. Always leave long tails for secure sewing and weave them through multiple fabric layers for stability.
— Edging Detail and Final Scallop Finishing :
Round 1 :
Return to the sage scalloped edge: using sage, join at a scallop base, ch1, *(3 sc in scallop tip, sc in next 4 sts, sl st) repeat around to create a defined sage rim. Fasten off and weave ends in. (This reinforces the scallops while adding a subtle green rim.)
Round 2 :
Picot finish: join cream at midpoint between scallops, ch3, sl st in base to create small picot row across entire runner edge for delicate finish; this also helps hide any sewing anchors for appliques. (Apply to both long sides and ends.)
Info :
Blocking again after finishing the edge ensures the scallops and picots lie flat. Use damp blocking and allow to dry overnight for best results.
— Placement & Assembly Instructions (detailed steps) :
Round 1 :
Layout: Place the blocked lace panel on a large flat surface. Arrange the large layered flower centered slightly off the runner midline as pictured, tuck large leaves beneath it, then fan smaller flowers, buds and bead clusters along an S-curve heading toward both short ends.
Round 2 :
Pin each piece in place with rust-proof pins. Step back to check symmetry; adjust until visually balanced. Use extra pins under heavy beads to avoid sagging.
Round 3 :
Sewing appliques: Attach flowers by sewing through the base disc using mattress or whip stitch to the lace ground. Use matching thread color and pass needle through several lace rounds to anchor. Sew leaves at three anchor points (base, midpoint, tip) and hide knots in back. (Info: sew beads using beading thread separately after pieces are sewn.)
Round 4 :
Bead clusters: Sew each bead cluster into position over small open mesh areas. Use tiny reinforcing stitches through the lace below each bead so weight is supported by lace structure not only the surface thread.
Info :
Add small tacking stitches at petal tips to hold petals in place. For dimensional petals, only tack where necessary so petals keep their lifted look. Trim and weave in all long tails to the back.
Round 5 :
Final inspection: Check both sides for loose threads and reinforce any beads or elements that wobble. Press under a cloth with a warm iron if necessary to flatten any uneven petals slightly.
— Care & Finishing Touches :
Info :
Hand wash cold and lay flat to dry to preserve pearls and shape. Avoid machine drying. If beads are wooden or fragile, remove before washing. Store flat or rolled with acid-free tissue between layers.
Info :
If you want more sheen on petals, lightly starch edges and pin into shape until dry. Replace pearls with vintage buttons for a different look or swap color palette for seasonal versions.
This floral lace runner is a true labor of love—a beautiful combination of vintage lacework and sculpted crochet motifs that create a timeless table centerpiece. Each embroidered petal, leaf and bead cluster adds personality and texture, making this project as rewarding to make as it is to display. Whether for special occasions or everyday charm, this runner becomes an heirloom that will brighten any table for years. 🧶🌸✨