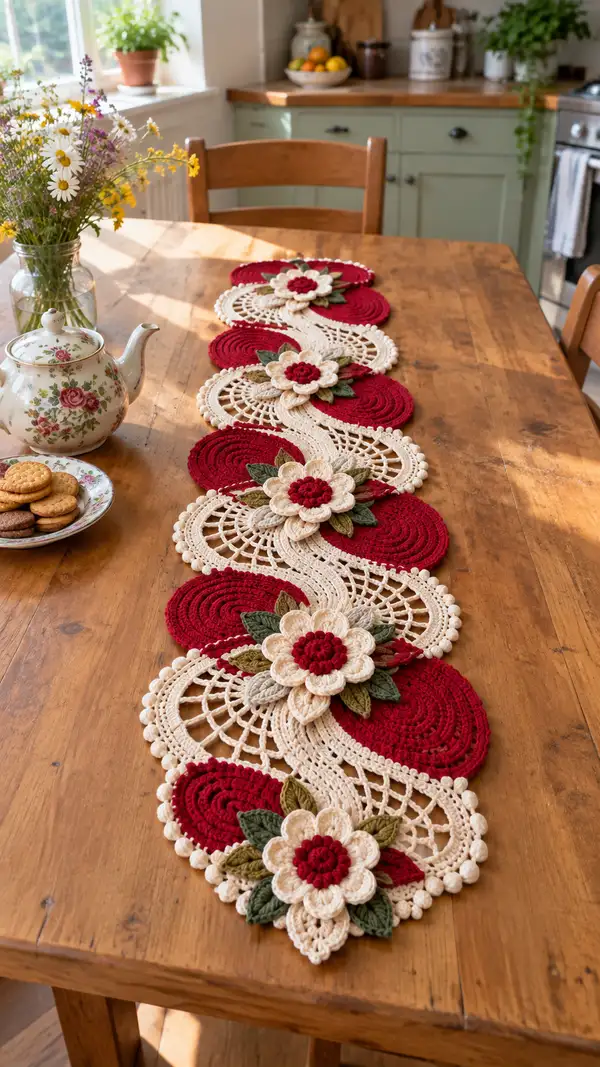
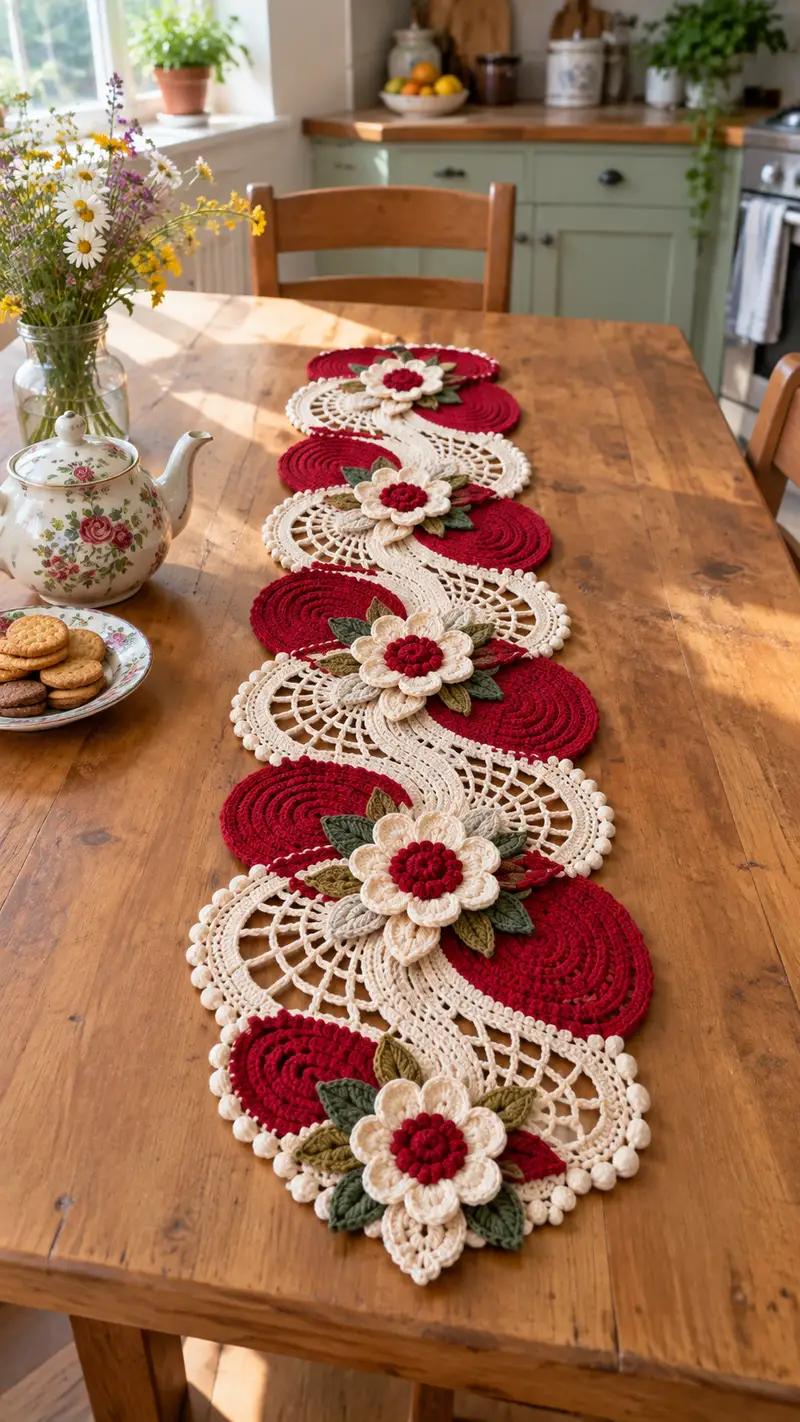
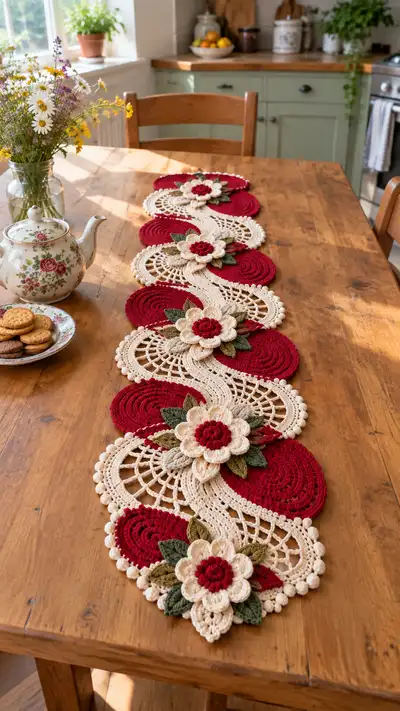
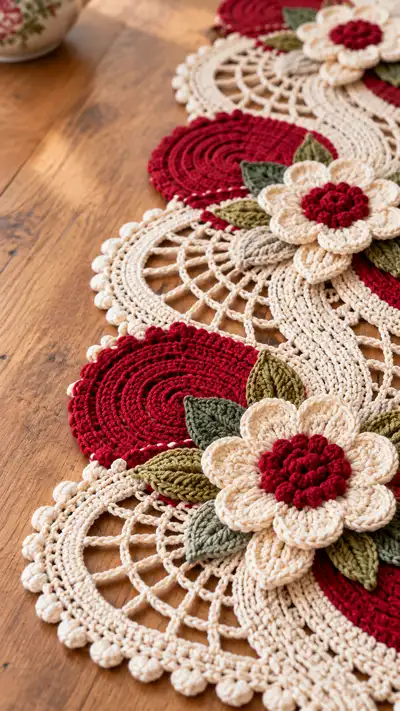
Create a stunning S-shaped table runner featuring alternating solid red circles and delicate cream lace motifs, topped with layered cream flowers and olive-green leaves. This pattern uses textured bobbles, picot edging, and open lacework to produce a vintage-inspired centerpiece. Finished runner has rich depth from layered petals and sculpted leaves and makes a dramatic table accent.
Progress Tracker
0% Complete
— Materials & Gauge :
Info :
Gauge is not critical for lace table runner but overall scale depends on yarn/hook. Sample one red circle and one lace circle and block them. With 3.5mm hook and worsted cotton, red circle measures approx 14cm (5.5") across and lace circle approx 14cm after blocking. Adjust hook to match desired size.
— Red Spiral Disc (Make 6-8 depending on runner length) :
Round 1 :
6 sc in magic ring (6)
Round 3 :
(1 sc, inc) x 6 (18)
Round 4 :
(2 sc, inc) x 6 (24)
Round 5 :
(3 sc, inc) x 6 (30)
Info :
Maintain a fairly tight gauge for solid discs so that they do not gap when joined to lace motifs. Use yarn tail to tighten magic ring fully.
Round 6 :
(4 sc, inc) x 6 (36)
Round 7 :
(5 sc, inc) x 6 (42)
Round 8 :
(6 sc, inc) x 6 (48)
Round 9 :
1 sc in each st (48)
Round 10 :
1 sc in each st (48)
Round 11 :
1 sc in each st (48)
Info :
If you want a thicker disc, switch to 3.0mm hook for two rounds and then back to 3.5mm. Blocking will concentrate spirals; resist stretching the center too flat.
Round 12 :
1 sc in each st (48)
Round 13 :
1 sc in each st BLO (48) — this creates a subtle ridge to help the disc sit against lace
Round 14 :
1 sc in each st (48)
Info :
Optional: Work a round of sl st in BLO to tighten edge. Fasten off, weave in ends and block to 13-15cm across according to sample. Make required number for your runner length (pictured runner uses 6 red discs alternating with 6 lace motifs).
— Cream Lace Circle Motif (Make equal number to red discs) :
Round 1 :
6 sc in magic ring (6)
Round 3 :
(1 sc, inc) x 6 (18)
Round 4 :
(2 sc, inc) x 6 (24)
Round 5 :
(3 sc, inc) x 6 (30)
Info :
Begin constructing lace area purposefully: start increases as usual but prepare to switch to chains and tall stitches for openwork.
Round 6 :
(4 sc, inc) x 6 (36)
Round 7 :
1 sc in each st (36)
Round 8 :
*Ch5, skip 2 sts, sc in next* around — create 12 open loops (36)
Round 9 :
Into each ch5 loop: (sc, 3 dc, sc) — forms 12 petal-like arches (36)
Info :
Keep tension even on chain loops so arches lie flat. Use stitch markers at every third arch to count easily.
Round 10 :
Working into top of each arch: sl st, ch3 (counts as dc), 11 dc across arch, sl st into base — creates a continuous ring of tall stitches (132 dc total in groups)
Round 11 :
Ch1, sc in each dc around (132)
Round 12 :
(3 sc, sk 1, picot) x across ring to create a scallop; approximate count 99 sc + picots
Round 13 :
Join with sl st, ch1, *5 sc in next scallop, sl st in picot* repeat around — forms raised bobble edging of small clusters
Info :
Adjust counts for tension: aim for lace circle diameter equal to red disc when blocked. If your lace becomes larger, reduce dc counts in round 10 accordingly.
Round 14 :
Work one round sc across to tidy edge (approx 120 sc)
Round 15 :
Work reverse picot row: *sc 2, picot* around to produce pronounced bobble edge (approx 80 picots)
Round 16 :
Fasten off, weave ends, and wet-block gently to a 13-15cm circle. Ensure picot bobbles are evenly shaped and lace arches splayed open.
— Flower Center (Make as many flowers as motifs; each flower sits on a paired motif) :
Round 1 :
In red yarn: 6 sc in magic ring (6)
Round 3 :
(1 sc, inc) x 6 (18)
Round 4 :
Make bobble cluster round: ch1, *bobble (yo, insert, pull up loop x4, yo pull through all loops), sl st into same st* repeat around to create 18 small bobbles
Info :
Bobble technique: work tightly so bobbles sit proud. If bobbles are too loose, use smaller hook for this round, then switch back.
Round 5 :
Fasten off red bobble center. With cream yarn, join to any stitch on round edge and ch1.
Round 6 :
(sc in same st, ch2, sc in next st) around to form a small ring of chain spaces for petal anchors — approx 18 ch2 spaces
Round 7 :
Petal base: Into each ch2 space work (sc, hdc, 3 dc, hdc, sc) — this forms 18 narrow petals (counts are per petal, total stitches variable)
Info :
Petal shape depends on tension and placement: keep petal stitches compact so they overlap slightly when layered.
Round 8 :
Fasten off cream main petal round. Block flat on wrong side to shape petals slightly outward.
— Second Petal Layer (Optional thicker flower) :
Round 1 :
Join cream yarn between two petals and ch1. Work a deeper petal into every second ch2 space: (sc, 2hdc, 5 dc, 2hdc, sc) x9 (layer offset by 1 petal)
Info :
This staggered layering yields a fuller flower. You can make single layer for a flatter look or add two layers for sculptural depth as in photo.
Round 2 :
Fasten off, weave ends. Use tapestry needle to sew red bobble center onto the cream petal layers, centering carefully.
— Leaves (Make groups of 6-8 per flower; mix 2 green shades) :
Leaf Round 1 :
Ch8, sc in 2nd ch from hook, hdc, dc, tr, dc, hdc, sc — across chain to create a tapered leaf (approx 8 sts)
Leaf Round 2 :
Work along opposite side of chain: sc, hdc, dc, tr, dc, hdc, sc into last st to form symmetric leaf and sl st to base — leaf complete
Info :
For sculpted veins, work a center rib by making 3 fpdc along the center of leaf on wrong side, which creates raised vein on right side when turned.
Leaf Round 3 :
Optional: With a contrasting green, embroider center veins using running stitch and single crochet floats for definition.
Info :
Make leaves in two sizes by using ch6 for small leaves and ch10 for long accent leaves. For pictured runner use 3 large and 3 small leaves per flower clustered around base.
— S-Shaped Connector & Runner Body (This builds the curving lattice band that links motifs) :
Round 1 :
With cream yarn and 3.5mm hook, ch60 (foundation chain length will determine runner length). Join ends with sl st to form gentle curve or work as straight row for modular joining (approx sample uses a long chain of 120 across runner length)
Round 2 :
Ch3 (counts as dc), dc in each ch across, join with sl st (60 dc)
Round 3 :
Ch1, sc in each dc across (60)
Info :
The long chain acts as a scaffold; you will curve it by selective increases and mesh insertions, working pairs of arches that alternate left-right to form the S-sweep.
Round 4 :
Working in FLO, 1 sc in each st across to create a ridge that will sit against motif joins (60)
Round 5 :
*Ch6, skip 4 sts, sc in next 2 sts* across to create 8 chain loops per repeat section — count will vary with foundation length
Round 6 :
Into each ch6 loop: (sc, 7 dc, sc) to form tall arches; these arches will be pulled to alternating sides when joining motifs (approx 8 arches per module)
Info :
When working these arches, place stitch markers on every 3rd arch to maintain even spacing and create the S-wave curvature when you join to discs and lace circles.
Round 7 :
Ch3, dc across top of each arch, sl st to base between arches to secure (approx 56 dc)
Round 8 :
Ch1, sc across to tidy and compress arches (approx 56 sc)
Round 9 :
Start shaping S: On alternating groups of arches, add increases at base: at every other arch base work (sc, inc, sc) to pull that arch slightly larger; repeat across designated arches
Info :
Selective increases on alternating arches will cause the chain scaffold to curve. Visualize S-flow and place increases consistently to maintain smooth sweep.
Round 10 :
Work one round of sc in BLO to create a subtle ridge that helps the joining seam; continue across length (count varies)
Round 11 :
Edge reinforcement: *sc 3, picot* repeat along both long edges of the scaffold to form anchor points for motif attachment (approx picots equal to arch count)
Info :
This scaffold will be joined to the lace circles and red discs on alternating sides to create the S-shaped chain of paired motifs. Keep scaffold flat by blocking after pegging motifs in place.
Round 12 :
Fasten off but leave long tail for seaming to motifs where required.
— Joining Motifs to Connector (Detailed placement and stitch counts) :
Info :
Layout strategy: Place motifs in alternating order along scaffold: red disc on one side, cream lace on the other, overlapping edges by approx 1.5cm so flower sits where discs meet. Use blocking pins to secure positions before sewing.
Step 1 :
Pin first red disc overlapping scaffold by aligning its picot edge to scaffold picots; use mattress stitch through outer edge sc rounds to secure every 6-8 stitches
Step 2 :
Attach lace circle on opposite side so that its open arches nest into adjacent arches on scaffold; sew through arch bases and scaffold loops using small whip stitches to hide seam
Info :
Sew slowly with matching cream or red yarn and a blunt tapestry needle. When joining open lace, pass needle under chain arches and through scaffold ch sp rather than through the visible lace arches to minimize visible threads on right side.
Step 3 :
After sewing both motifs, pin the cream flower across the seam at overlapping point and baste lightly with sewing yarn through flower base and into both motifs to hold position.
Info :
Repeat process for each pair. Space motifs evenly — pictured runner alternates 6 sets; you can add or reduce sets to suit table length. Keep symmetry by counting stitches from ends.
— Decorative Edge & Bobble Trim :
Round 1 :
With cream yarn, pick up along outermost edge of assembled runner and sc evenly around to create uniform edge (count depends on assembly width; sample approx 260 sc total around complete runner)
Round 2 :
*Ch3, picot, sk 1, sc in next* repeat around to create small picot trim and spacing (approx 80 picot clusters)
Round 3 :
Working into each picot space: (sc, bobble, sc) where bobble = (yo insert pull up x4, yo pull through all loops) to form pronounced bead-like border across alternating points
Info :
For consistent bobbles, keep loops small and use a slightly smaller hook for bobble stitches only if needed. Press bobbles into uniform shape during blocking.
Round 4 :
Finish with one round of tidy sc across to even out counts and hide joinings (stitch count variable)
Round 5 :
Fasten off and weave in ends. Block runner on large surface using steam or wet-block method. Pin picots and bobbles round for even spacing until dry.
— Final Assembly & Finishing Touches :
Info :
Sew flowers and leaves on last: arrange each flower where a red disc and lace circle meet. Tuck leaves under petals and sew through leaf base and petal base to secure. Use a few extra stitches at base for stability.
Step :
Sew in all loose ends on underside, then steam-block again gently so flowers flatten slightly and adhere to runner. Avoid direct contact of iron with yarn; use a pressing cloth.
Info :
Optional: Add non-slip felt pads to underside at intervals if runner will sit on a smooth surface to prevent sliding and protect finish.
Care :
Hand wash in cool water and reshape while damp. Lay flat to dry. Avoid tumble drying to preserve bobbles and lace openness.
This elegant floral runner combines airy lacework with rich spiral discs and three-dimensional flowers to create a truly special table centerpiece. Each motif layers texture and color to form a cohesive S-shaped composition that will brighten any dining table. The detailed step-by-step instructions and frequent tips guide you through blocking, joining, and finishing for a professional result. 🧶✨ Display your finished runner proudly or gift it as a cherished handmade accent. Happy crocheting! 🌸