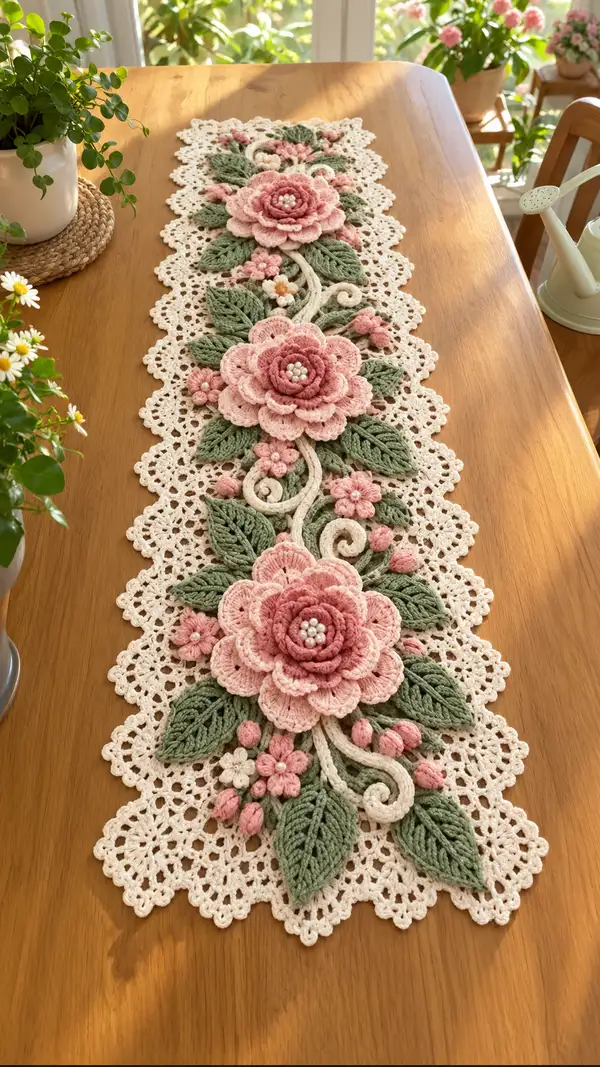
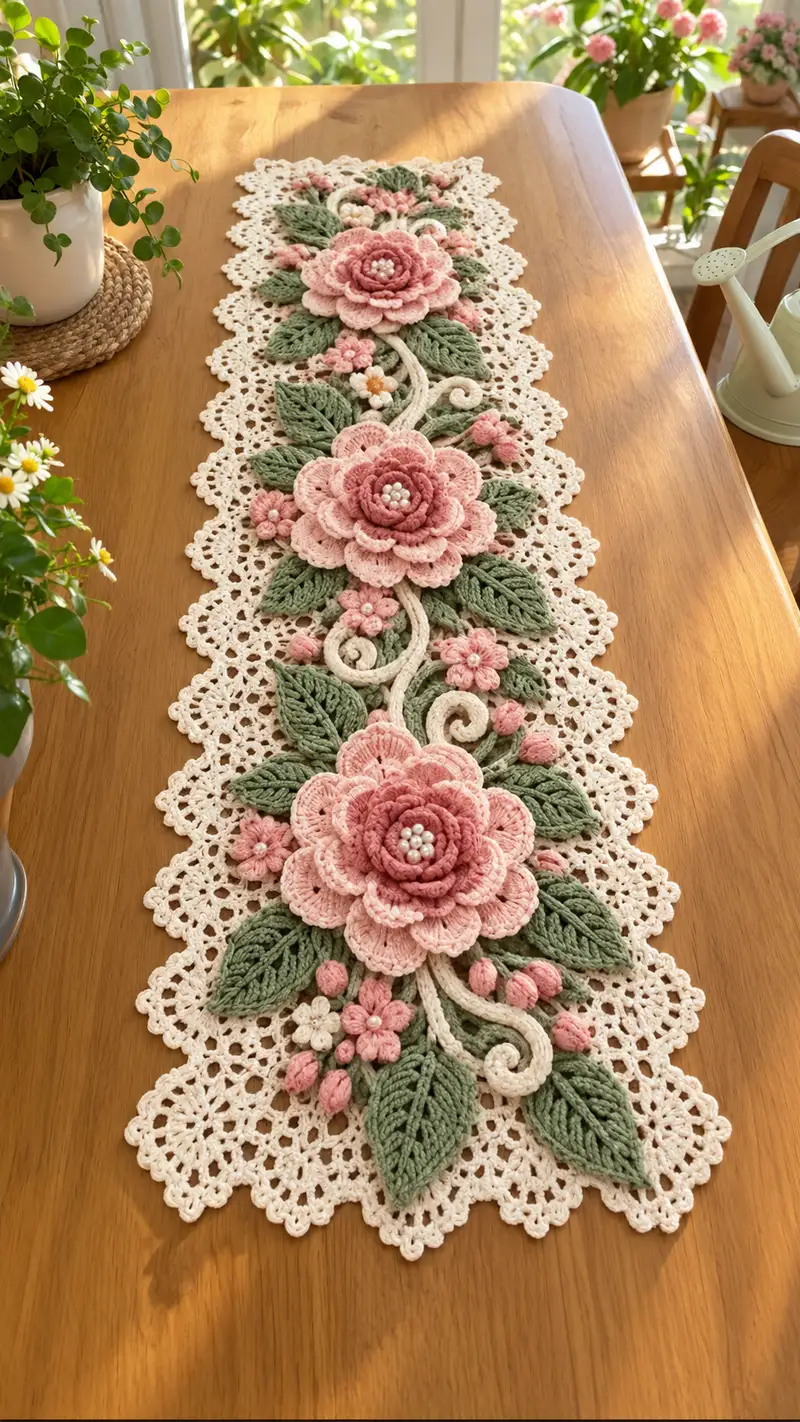
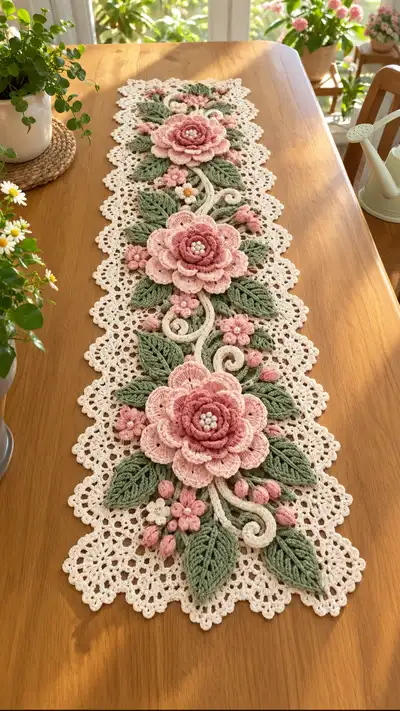
Create an elegant floral table runner featuring three dimensional roses, textured leaves, delicate buds and a lacy scalloped background. This pattern uses layered crochet motifs and surface vines to form a continuous runner that lies flat and photographs beautifully. Soft blush pinks, sage greens and a warm cream background make it perfect for dining tables or as a decorative centerpiece. Follow detailed step-by-step motif instructions and assembly guidance to recreate this heirloom piece.
Progress Tracker
0% Complete
— Notes & Gauge :
Info :
Gauge is not critical for decorative table runner, but a consistent tension is essential so motifs match and lie flat. Using 3.25mm hook with DK cotton, one lace motif (as described) measures approx. 10cm/4in squares before blocking. Finished runner shown measures approximately 30cm x 125cm (12in x 49in). Adjust number of lace modules to length desired.
Info :
Throughout the pattern, work in continuous rounds for sculpted pieces and joined-rounds for lace squares. Block each motif to shape before assembly. Beads are sewn on after motifs are assembled and blocked.
— Lace Background Module (Make 12 modules, join as you go to form runner base) :
Round 1 :
Make 6 ch, join to form ring with sl st. ch1, work 12 sc into ring (12)
Round 2 :
Inc in each stitch around (24)
Round 3 :
(1 sc, inc) x 12 (36)
Round 4 :
(2 sc, inc) x 12 (48)
Round 5 :
(3 sc, inc) x 12 (60)
Round 6 :
(4 sc, inc) x 12 (72)
Round 7 :
1 sc in each st around (72)
Info :
These beginning rounds create a solid center for later lace expansion. Keep tension even. Place a stitch marker at the first stitch of each round to track starting point.
Round 8 :
*ch4, skip 2, sc in next st* repeat around to create spaced chain loops. End with sl st to first sc. (24 ch4 loops)
Round 9 :
Work in each ch4 loop: (sc, ch3, 3 dc, ch3, sc) in each loop to create petal arches (24 arches)
Round 10 :
Between arches, *ch2, sc in top of previous arch*. This spaces arches and forms small picot-like loops around perimeter. Sl st to join. (24 picot spots)
Info :
Block this module to 10cm square. For runner, you will make 12 of these and join along long sides using sl st or whip stitch. You may adjust count of modules to reach desired runner length.
Round 11 :
With RS facing, join cream at mid-edge: ch3 (counts as dc), 2 dc in same st, *sk arch, (3 dc, ch3, 3 dc) into next arch* repeat around edges to create scalloped clusters. sl st to join. (12 clusters)
Round 12 :
Work (sl st, ch3, 2 dc, ch3, 2 dc) into ch3 sps to deepen scallop. Finish with sl st. Fasten off and weave ends.
Info :
Make 12 modules using these rounds. Block each module with pins to sharpen scallops and align edges. Join-as-you-go option: On final round of subsequent modules, instead of working entire round, sl st into adjacent module's corresponding st to join. See assembly section for join placement guidance.
— Large Rose Motif A (Center Flower 1 - Top) :
Round 1 :
Make 6 ch, join to ring. ch1, work 8 sc in ring (8)
Round 2 :
Inc in each st around (16)
Round 3 :
(1 sc, inc) x 8 (24)
Round 4 :
1 sc in each st (24)
Info :
These first rounds form a small solid disk that will be the flower center. Use dusty rose for inner rounds for color contrast (center color).
Round 5 :
Switch to dusty rose or deeper shade. *ch3, sk 1, sl st in next st* around to create small loops (12 loops). sl st to join.
Round 6 :
Into each loop work: (sc, hdc, 3 dc, hdc, sc) to form first petal layer (12 petals)
Round 7 :
Ch2, sl st to tip of each petal to tighten shape. Fasten off center color if desired and join blush pink for outer petals.
Info :
Petals are worked in the round; keep petals slightly cupped by pulling first and last stitches snugly. Do not stuff; petals are flat but layered for dimensional look.
Round 8 :
With blush pink, into base between petals: *ch4, 5 dc into same sp, ch4, sl st in next base sp* repeat around to create wide scalloped petal base. (12 large scallops)
Round 9 :
Into each scallop work 7 dc to create a full petal (12 petals). At the end of each petal, sl st to base and ch1 to reach next petal base.
Round 10 :
Round of reverse sc around petal bases (work in BLO of the petal row): 1 sc in each st to define petal rim. (approx. 84 sc)
Info :
Use BLO to create a defined ridge at petal base; this makes layering easier. Keep petal counts precise—if your dc counts differ, adjust next round to maintain symmetry.
Round 11 :
Make secondary outer petal layer: join at a point between two petals, ch5, (2 tr, ch2, 3 tr) into base to form tall petal clusters; repeat to create 12 outer petals. sl st to join.
Round 12 :
Working inside each tall petal: sc in first tr, hdc across center, 5 dc at peak, hdc down, sc to base. This sculpts the outer petal shape. Fasten off and weave in ends.
Round 13 :
Make a ring of small raised petaloid stitches between inner and outer petals: attach lighter blush, *ch3, sl st in base between petals* repeat (12 small arches)
Round 14 :
Into each arch work puff cluster: (yarn over, insert, pull up loop) x 4, yarn over pull through all loops, ch1 to secure—create 12 puff clusters. Pull thread slightly to form bead-like raised centers. Fasten off.
Info :
Layer petals by staggering rounds slightly—slightly offset outer petals from inner petals to mimic natural rose form. Block lightly flat with petal curves pinned down so final assembly remains flat on table.
Round 15 :
Optional: Add small seed bead cluster in center: using fine thread, sew 7 small pearls into a circular cluster centered over round 2-4 disk. Secure with several passes and knot on WS.
Info :
Make 3 large roses. For variation, create one rose with deeper center and lighter outer petals. Block and set aside for assembly. Be careful not to stretch centers while sewing beads.
— Large Rose Motif B (Center Flower 2 - Middle) :
Round 1 :
Make 6 ch, join to ring. ch1, 8 sc in ring (8)
Round 2 :
Inc in each (16)
Round 3 :
(1 sc, inc) x 8 (24)
Round 4 :
1 sc in each st (24)
Round 5 :
Switch to dusty rose. *ch3, sl st into every other stitch* around to make 12 tiny loop notches. sl st to join.
Round 6 :
In each notch: (sc, 2 hdc, 4 dc, 2 hdc, sc) to create petite petals (12 petals). Keep petals slightly raised by joining tail tight at base.
Info :
Make this rose slightly more compact than Rose A: reduce outer petal height for a fuller center. This will create visual depth when layered along runner.
Round 7 :
Join blush pink in base between petals: ch4, 6 dc around base to form larger petal sockets (12 sockets). sl st to join.
Round 8 :
Into each socket make 6 dc increasing to 8 dc at peak then decreasing back to 6 dc to form full outer petals. sl st and finish round. (12 outer petals)
Round 9 :
Work a defining round in BLO: 1 sc in each st around petal row to define edges. Approx (96 sc)
Round 10 :
Add tiny cabled ridges around petal tips: join yarn, (ch3, sl st in next 2 sts) around to make little arches. Fasten off and sew small bead cluster at center (5-7 pearls).
Info :
Make rose B similar to rose A but scaled slightly smaller to create tapered visual hierarchy. Block as before and set aside.
— Large Rose Motif C (Bottom Rose) :
Round 1 :
6 ch, join, ch1, 10 sc in ring (10)
Round 2 :
Inc in each (20)
Round 3 :
(1 sc, inc) x 10 (30)
Round 5 :
Switch to dusty rose, *ch3, sl st* around in every 2nd stitch to create 15 loops. sl st to join.
Round 6 :
Into each loop work petal clusters: (sc, hdc, 5 dc, hdc, sc) forming 15 inner petals to create a fuller bloom (15 petals)
Round 7 :
ch2, sl st at petal tips to shape and slightly cup petals. Fasten off dusty rose and join blush for outer layers.
Round 8 :
Outer petal layer: *ch5, 3 tr, ch2, 3 tr, ch5, sl st in base between petals* repeat for 15 outer scallops. sl st to join.
Round 9 :
Work 9 dc into each scallop to build large ruffled outer petals. Finish with sl st and trim ends. (15 large petals)
Round 10 :
Add a ring of small puff clusters between layers: make 15 puff groups (4 loops each) secured with ch1. These form textured dividers between petal rows.
Round 11 :
Sew bead cluster in center using 9-11 pearls for a statement center. Secure thoroughly with fine thread and tie off on the WS.
Info :
Make 3 roses total: Rose A, Rose B, Rose C. Vary center bead counts to add visual contrast. Block all roses flat with petals pinned so they have a gentle cup but stay mostly flat for table display.
— Leaf Type 1 (Large Veined Leaf) - Make 9 :
Round 1 :
With sage green, make ch11. sc in 2nd ch from hook and across to end (10 sc). Turn to work other side of chain: 9 sc into opposite side to create oval (19 sc total including start). sl st to join at first sc.
Round 2 :
Ch1, sc in same st, (2 sc in next, 1 sc in next) across around to broaden base; you should end with 24 sc. sl st to join. (24)
Round 3 :
Ch2, hdc in each st around to add height. (24 hdc)
Round 4 :
Work central vein: flip leaf, join yarn at center back. ch20, sl st to the tip center to create a corded vein, fasten off leaving tail for sewing. This creates raised central rib.
Info :
Leaf vein is a decorative cord made with chain and sl st anchored at tip. For a stitched vein alternative, work surface slip stitches along center from base to tip.
Round 5 :
Edge leaf with BLO sc to create textured rim: 1 sc in each st BLO around. (24 sc)
Round 6 :
Surface embroidery: with darker green, use duplicate stitch to add visible veins branching from central rib. Work 3-4 small branch veins on each side. Fasten off and weave ends.
Info :
Make 9 large leaves. When attaching, space them underneath roses as shown: 2-3 leaves clustered per rose to support big petals. Block leaves flat to dry for easier assembly.
— Leaf Type 2 (Medium Leaf) - Make 8 :
Round 1 :
ch9, sc in 2nd ch from hook and across to last ch, 8 sc, turn and 7 sc down opposite side to finish oval (15 sc). sl st to join.
Round 2 :
Ch1, sc around increasing 3 sts evenly to get 18 sc. sl st to join. (18)
Round 3 :
ch2, hdc around for height (18). sl st and fasten off with tail for sewing. Add surface midrib cord ch12 anchored at tip/back as in Leaf Type1.
Info :
Make 8 medium leaves. Use these to fill gaps and create layered foliage under small blossoms and buds.
— Small Blossom (5-Petal Flower) - Make 16 :
Round 1 :
Make 6 ch, join to ring. ch1, 6 sc in ring (6)
Round 2 :
*(ch3, sl st in next st)* around to create 6 loops. sl st to join.
Round 3 :
In each loop: (sc, hdc, 3 dc, hdc, sc) to form 6 petals. Fasten off and weave ends. Optionally sew a single small pearl in center.
Info :
These petite flowers are scattered around roses. Make clusters of 2-4 near a rose to mimic blooms. Block lightly if needed.
— Bud (Tiny Clustered Bud) - Make 18 :
Round 1 :
ch6, join to ring, ch1, 8 sc in ring (8)
Round 2 :
Make 3 small puff stitches in a row around the ring: (puff x3) with 3 loops each, secure each with ch1 to form bulbous buds. Fasten off leaving tail for secure sewing to base.
Info :
Stuff buds extremely lightly with a tiny pinch of fiberfill if you want them puffed. Sew them into clusters at vine ends or flanking leaves.
— Curled Vine & Stem (Surface Cord Technique) - Make 6 vines :
Round 1 :
Using cream yarn, ch55 (or length required). Work 1 sc in 2nd ch from hook and across to create a narrow cord (54 sc). Fasten off leaving long tail to sew.
Round 2 :
Alternate cord technique: ch60, using slip stitch crochet i-cord method: sc in 2nd ch and each ch, do not turn—this creates tighter look. Work to length desired for vine swirls shown.
Info :
Pipe-like cord will be surface-stitched to base to form scrolls and connecting stems. For spiral ends, coil cord and tack through underside with yarn needle every 5 mm to hold shape. Use blocking to hold gentle curves if needed.
Round 3 :
Optional: overcord, with sage green working a few slip stitches alongside base cord to create variegated ridge. Fasten off and weave tail long for sewing to base.
Info :
Create 6 vines of varying lengths. These will run between the three roses, connecting them and anchoring small blossoms and buds.
— Petal Shaping & Puff Stitch Explanation :
Info :
Puff stitch: yarn over, insert hook, pull up loop, repeat yarn over and insert hook pull up loop 3-5 times (depending on desired puff), yarn over pull through all loops on hook, ch1 to secure puff. Tighten to form bead-like puff. Use consistent number of loops per puff for uniformity.
Info :
For ruffled petal edges, work 2 dc in each st across the desired petal edge, then 3 dc in peak to produce fullness. Finish with sl st to base to anchor petal curve.
— Join Background Modules into Runner Base :
Round 1 :
Lay out 12 lace modules in a single long strip, aligning scalloped edges. Join long sides by whip stitch or sl st through matching stitches: aim for 11 joins connecting adjacent modules. Join only in final round of each module for neatness.
Round 2 :
Seam method (sl st join-as-you-go): on last round of new module, when you reach point that corresponds to an existing module's st, sl st into that st instead of chaining; continue pattern. This produces an invisible seamed join.
Info :
Spacing: join modules so runner width remains approx 30cm (12in). If you want a wider runner, make modules in two rows and join rows side-by-side and then assemble into a wider panel.
Round 3 :
Once all modules are joined into base strip, work a unifying round in cream: pick up yarn at one long edge, ch1, sc evenly around entire long rectangle (including short ends) to create a neat foundation for attaching motifs. Keep counts even; approx 360-420 sc depending on exact module geometry.
Info :
Blocking now is essential: lay runner base flat, pin scalloped edges to even shape, spray lightly with water and allow to dry. This ensures the base won't pucker when motifs are sewn on.
— Placement Plan & Pinning :
Info :
Place Rose C (bottom) approx 6cm from one short end, Rose B centered in middle of runner, Rose A approx 6cm from opposite short end. Arrange large leaves around each rose (2-4 leaves per cluster). Lay vines between roses, tucking small blossoms, buds and medium leaves into natural gaps. Use pins to hold all motifs in place, step back and check symmetry before sewing.
Info :
Use contrasting color pins or tapestry needles when pinning to avoid leaving rust marks on cotton yarn.
— Sewing Motifs to Base :
Round 1 :
With matching yarn and yarn needle, sew each motif to base using whip stitch through motif back and base stitches. Take small, neat stitches to avoid visible sewing on top of motifs.
Round 2 :
Attach leaves first, then roses on top of leaves, finally add small flowers and buds. Sew from center outward to maintain shape. Hide tails under layers wherever possible and weave in securely.
Info :
Sew vines last: position cords along planned path on top of arrangement and tack every 1-2 cm on underside of cord to base with small stitches for a floating stem look. Curl vine tips into spirals and secure beneath a leaf or bud to hide ends.
— Attaching Beads & Final Embellishment :
Round 1 :
Sew pearls into centers of large roses: cluster 7-11 beads depending on bloom. Use fine thread and small sewing needle for secure hold. Tie thread on underside and dot with a tiny glue if desired for security.
Round 2 :
Sew single beads onto small blossom centers and on cluster buds for a light sparkle. Ensure beads sit flat and don't catch on table linens by sewing thread loops tight and hiding knots under petals.
Info :
When using glue, use a very small amount applied to knot; allow to dry completely before removing blocking pins or handling heavily.
— Edging Round (Scalloped Edge) :
Round 1 :
With cream yarn, join at any scallop valley; ch1, sc evenly in each base stitch around runner perimeter to even out edges. Keep count consistent—expect approx 420 sc (adjust to match your assembly).
Round 2 :
*sk 2 sc, (5 dc, ch3, 5 dc) in next sc, sk 2 sc, sl st in next sc* around to make large scallop clusters along entire perimeter. Adjust repeats so short ends close neatly. Sl st to finish.
Round 3 :
Work a final picot edge: *sl st, ch3, sl st in base of ch3* into each ch3 loop across scallops to add delicate finishing touches. Fasten off and weave in ends thoroughly.
Info :
Block entire runner one last time after assembly and beadwork. Pin edges gently to keep scallops even. Allow to dry flat to preserve shape and ensure runner lies snugly on table without curling.
— Finishing & Care :
Info :
Hand wash in cool water with mild detergent and lay flat to dry. Iron from wrong side with cloth barrier on low heat if necessary to flatten but avoid crushing beads and sculpted petals. Store flat to avoid creasing.
Info :
Optional protective backing: sew a lightweight linen or cotton backing to underside using whip stitch if you want the runner to be more robust and to protect delicate crochet from direct tabletop use.
Completing this runner is such a satisfying journey: each flower you crochet becomes a tiny piece of a bigger floral story. The layered petals, raised veins on leaves and lacy background combine into a delicate centerpiece you'll be proud to display. Take your time with blocking and assembly—those final steps transform individual motifs into a cohesive heirloom. Enjoy the peaceful rhythm of crocheting each petal, and smile when you lay your finished runner down on the table. 🌸🧶