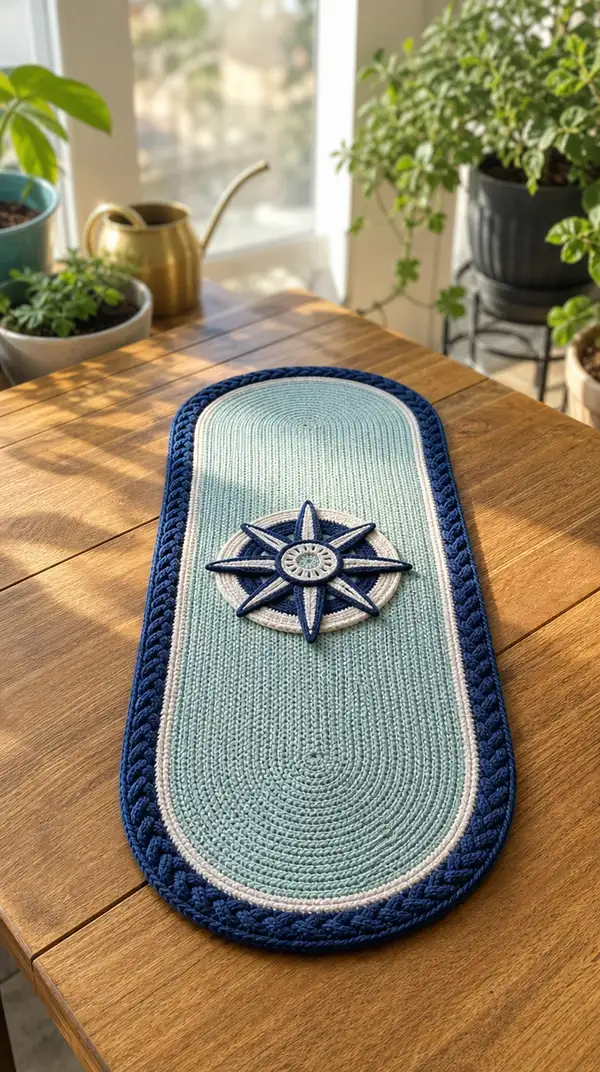
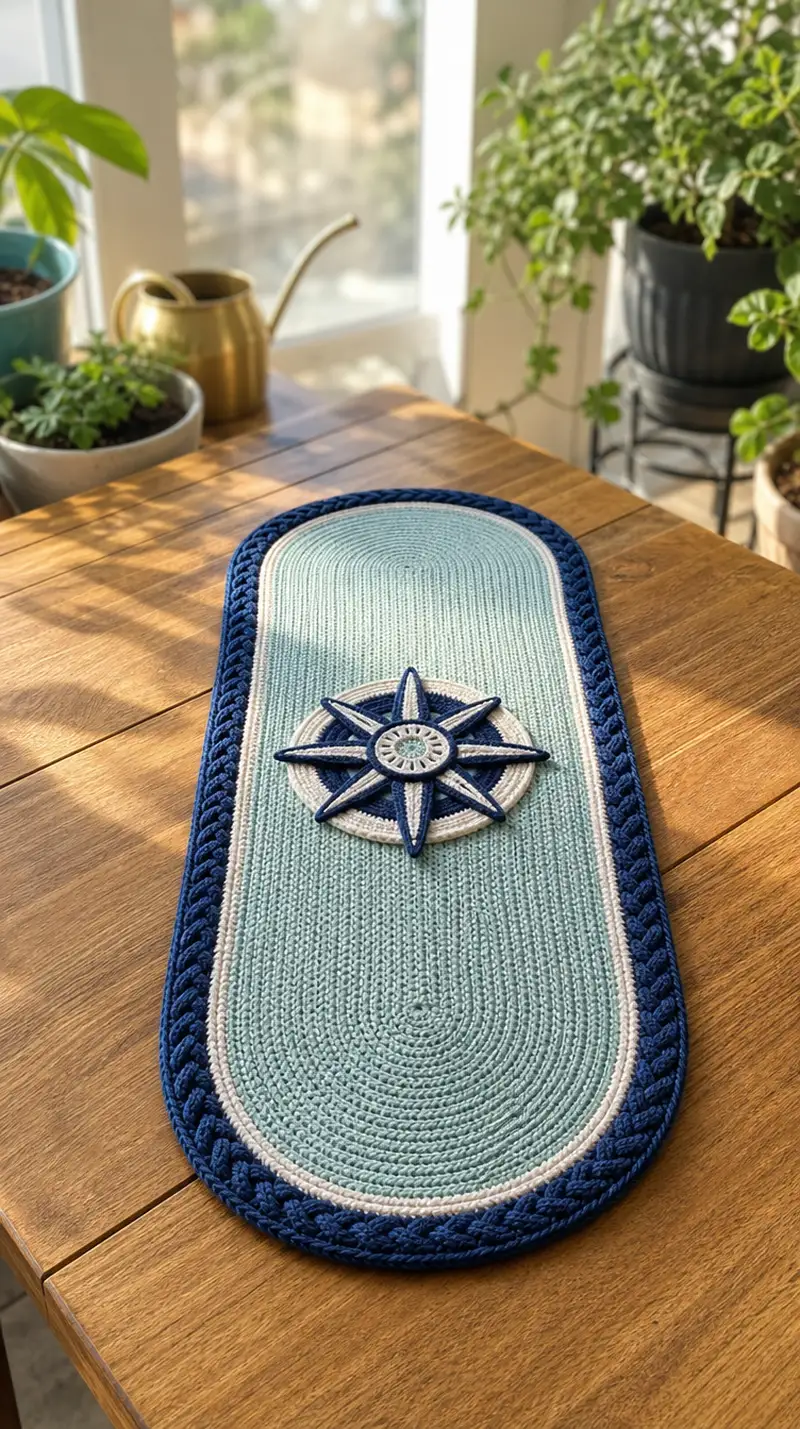
A long, elegant oval table runner with a soft mint center, crisp cream inner piping and a deep navy braided edge. The centerpiece is a raised nautical compass rose applique9 in navy, cream and mint. Perfect for coastal decor or a refined dining table, this sturdy, flat crochet runner lies smooth with a sculpted cable border and layered star medallion. Detailed step-by-step instructions make recreating the texture-rich runner straightforward.
Progress Tracker
0% Complete
— Main Oval Base (Center Field) :
Round 1 :
6 sc in magic ring (6)
Round 3 :
(1 sc, inc) x6 (18)
Round 4 :
(2 sc, inc) x6 (24)
Round 5 :
(3 sc, inc) x6 (30)
Round 6 :
(4 sc, inc) x6 (36)
Round 7 :
(5 sc, inc) x6 (42)
Round 8 :
(6 sc, inc) x6 (48)
Round 9 :
(7 sc, inc) x6 (54)
Round 10 :
(8 sc, inc) x6 (60)
Round 11 :
(9 sc, inc) x6 (66)
Round 12 :
(10 sc, inc) x6 (72)
Info :
Use a stitch marker to mark the first sc of Round 12 and move it each round. This central circle will become the mid-point of your oval; keep tension even to avoid ripples.
Round 13-16 :
1 sc in each st (72)
Info :
Rounds 13-16 build height at the circle size to form a balanced central field. If you prefer a shorter runner, reduce the number of even rounds here before elongating.
Round 17 :
(36 sc, inc) x2 (74)
Round 18 :
1 sc in each st (74)
Info :
To start elongating the circle into an oval, increases are placed at two opposite sides. The pattern ' (36 sc, inc) x2 ' means work 36 sc, inc, then 36 sc, inc. This adds 2 stitches and lengthens the runner along the long axis.
Round 19 :
(37 sc, inc) x2 (76)
Round 20 :
1 sc in each st (76)
Round 21 :
(38 sc, inc) x2 (78)
Round 22 :
1 sc in each st (78)
Info :
Continue to add 2 sts every second round to elongate gradually. The increases are always placed at two opposite points so your oval keeps symmetry. Move your stitch marker each round.
Round 23 :
(39 sc, inc) x2 (80)
Round 24 :
1 sc in each st (80)
Round 25 :
(40 sc, inc) x2 (82)
Round 26 :
1 sc in each st (82)
Round 27 :
(41 sc, inc) x2 (84)
Round 28 :
1 sc in each st (84)
Info :
At this stage periodically flatten your runner on a table to check the oval proportions. If the long axis is not long enough, repeat an additional increase round pair (increase round + even round) until desired length is achieved.
Round 29 :
(42 sc, inc) x2 (86)
Round 30 :
1 sc in each st (86)
Round 31 :
(43 sc, inc) x2 (88)
Round 32 :
1 sc in each st (88)
Round 33 :
(44 sc, inc) x2 (90)
Round 34 :
1 sc in each st (90)
Round 35 :
(45 sc, inc) x2 (92)
Round 36 :
1 sc in each st (92)
Info :
If you would like a shorter runner, stop increasing earlier; if you want a longer runner, continue the increase/even round pair cycle. For the pictured runner, continue until you reach approximately 106 sts (detailed below).
Round 37 :
(46 sc, inc) x2 (94)
Round 38 :
1 sc in each st (94)
Round 39 :
(47 sc, inc) x2 (96)
Round 40 :
1 sc in each st (96)
Round 41 :
(48 sc, inc) x2 (98)
Round 42 :
1 sc in each st (98)
Round 43 :
(49 sc, inc) x2 (100)
Round 44 :
1 sc in each st (100)
Round 45 :
(50 sc, inc) x2 (102)
Round 46 :
1 sc in each st (102)
Round 47 :
(51 sc, inc) x2 (104)
Round 48 :
1 sc in each st (104)
Round 49 :
(52 sc, inc) x2 (106)
Round 50 :
1 sc in each st (106)
Info :
Round 50 is the target circumference for the pictured runner. If your stitch gauge differs and you have a different stitch count, adapt following sections proportionally. Keep a note of your final stitch count — it governs repeats for border rounds and medallion placement.
Round 51-60 :
1 sc in each st (106) - work 10 rounds to build the central height (106)
Info :
Work even for a tall, flat center. Avoid over-stretching stitches when turning around the end caps — keep each sc snug and even to maintain a flat surface.
— Inner Piping (Cream Accent) :
Info :
Change to cream yarn at the end of Round 60. Carry the mint yarn inside or fasten off and weave tail to the back; choose the method that gives a clean color change.
Round 61 :
Join cream with sl st to any stitch, ch1, 1 sc in same st and 1 sc in each st around (106)
Round 62 :
1 sc in each st (106)
Round 63 :
1 sc in each st (106)
Info :
These 2-3 rounds of cream create a narrow piping band. Work tightly so the piping sits defined against the mint field. Fasten off cream at end of Round 63 and weave ends to the wrong side.
— Outer Braided Border (Navy) :
Info :
Join navy yarn with sl st to any stitch of Round 63. The braided effect is created with a series of front post double crochets (fpdc) and back post double crochets (bpdc) grouped to form cable-like segments. You will work over the full circumference (106 sts for pictured gauge). For different stitch counts, keep the group size consistent: groups of 6-8 stitches between post-cable sections work well.
Round 64 :
ch2 (counts as first dc), *dc in next 7 sts, (fpdc around next 4 sts, bpdc around next 4 sts) repeat from * around to last 8 sts, dc in last 7 sts, join with sl st to top of ch2 (106)
Round 65 :
ch2, dc in each dc and in top of each post stitch (work through both loops where possible) around, join (106)
Round 66 :
ch2, *dc in next 7 sts, fpdc around the same 4 post stitches from previous round, bpdc around next 4 post stitches; repeat from * around, join (106)
Info :
Rounds 64-66 begin to build texture. Work the post stitches snugly but not tight; you want the braided surface to have defined ribs. If FPDC/BPDC feel loose, pull a little tighter on the working loop before completing the stitch.
Round 67 :
ch1, sc in each st around in BLO (back loop only) to create a neat edge ridge (106)
Round 68 :
ch1, sc in each st around (106)
Round 69 :
ch1, sc in each st around (106)
Info :
The BLO row gives the outer ridge that frames the cable. Fasten off and weave ends. If you prefer a larger braid, add another repetition of the cable motif (Rounds 64-66).
— Compass Rose Medallion : Center Circle :
Info :
Work the medallion separately in cream and navy. The medallion sits centered on the runner. Make one medallion and eight points; sew the medallion to the runner using a whip or mattress stitch for a flat base. Place it centered along the long axis, approximately at the midpoint of the runner length.
Round 1 :
With cream, mr, 6 sc in ring (6)
Round 3 :
(1 sc, inc) x6 (18)
Round 4 :
(2 sc, inc) x6 (24)
Round 5 :
(3 sc, inc) x6 (30)
Round 6 :
1 sc in each st around (30)
Round 7 :
1 sc in each st BLO to create a small ridge (30)
Round 8 :
Change to mint with sl st; ch1, sc in each st around (30)
Round 9 :
Change to navy, ch1, sc in each st around (30)
Round 10 :
With navy, ch2, *dc in next 2 sts, ch2, skip 2 sts; repeat around to create small decorative ring; join (30)
Info :
The small center medallion gives the compass hub. Fasten off leaving a long tail for sewing; this will be used to attach the medallion to the runner after the points are added around it.
— Compass Points (Make 8) :
Info :
You will make eight identical triangular points (long, narrow diamonds) worked from the base outward to a sharp tip. Work each point in navy with cream stitch outlining, then over-edge with a thin mint accent if desired. Each point is worked flat and then edged to give depth. Work one point to check gauge and then make 7 more.
Point - Round 1 :
With navy, ch6, sc in 2nd ch from hook and across to last ch, 3 sc in last ch, continue along opposite side of foundation chain working sc back along chain to first ch; sl st to join to create a closed triangular nose base (10)
Point - Round 2 :
Ch1, sc in each st around, adding 2 sc in the 3-st corner to maintain shape (12)
Point - Round 3 :
Ch1, sc in next 4 sts, inc, sc across long side 4 sts, inc at tip, sc around (14)
Point - Round 4 :
Ch1, sc in each st around, placing increases at the tip to produce a tapered point if needed (14)
Point - Round 5 :
Ch1, (sc2tog) at tip to start shaping, sc around sides to maintain flat base (13)
Point - Round 6 :
Ch1, sc in each st around, finish shaping so tip becomes narrow (13)
Point - Round 7 :
Ch1, sc2tog at tip if needed to make the point sharp, sc around; fasten off leaving long tail for sewing (12)
Info :
After finishing a navy point, use cream to single crochet around the perimeter (working through both loops) to create a crisp outline. For an inset effect, work the cream border in BLO only. Repeat for all eight points.
Point - Edging :
With cream, attach at base, ch1, sc evenly around the entire point, placing 3 sc at the wide base to keep it flat. Fasten off and weave ends (12)
Info :
Make sure all points are identical in size. Lay them around the center medallion to check spacing before sewing. If one point appears longer or shorter, adjust by adding or removing a sc row.
— Compass Assembly and Raised Ridge Stitching :
Info :
Place the cream center medallion on the runner and arrange the eight points radially. Ensure points align evenly; use pins to mark placement at the medallion edge. The compass points will overlap the medallion by about 2-3 stitches to create a raised star.
Sewing the Center :
Use the long tail from the medallion to whip-stitch the medallion to the runner, taking small stitches through the medallion back loops and the runner stitches so the seam is nearly invisible. Keep the medallion slightly stuffed with flat batting if you want a subtle lift.
Sewing Points :
Attach each point by sewing the base to the medallion edge, using the cream outline as a guide. Overlap the base slightly onto the medallion to create a continuous star. Once all points are sewn, secure with 2-3 extra passes around key seams for durability.
Info :
To give the star a raised ridge effect, surface stitch a narrow chain of navy or mint around each point's center using a lazy-cam or cord technique: crochet a 2-3 mm chain, pull it into position and sew it down along the center line of each point. This creates the dimensional rib visible in the image.
— Finishing Touches and Optional Decorative Ridges :
Info :
Once the medallion and points are securely sewn, weave in all ends and trim close. If you prefer the medallion to be fully integrated, add a round of slip stitches around the medallion edge into the runner to fuse it. If you like the raised look, avoid slip stitching across seams and keep the medallion slightly padded.
Optional Surface Cord :
Make a thin navy cord by chaining 50-70 stitches and single crocheting back along the chain to compress it; sew this cord around the point centers or medallion perimeter to mimic the sculpted ridges seen in the photo.
Info :
Lightly block the entire runner: pin it onto a flat surface, steam or spray with water, and allow to dry overnight. Blocking helps the braided edge sit neatly and flattens out any ripples in the center.
Care :
Handwash gently in cool water with mild detergent. Lay flat to dry to retain shape. Cotton yarn will soften slightly after washing but the braided border will hold structure.
You did it — a beautiful nautical-inspired table runner that brings texture and coastal charm to your table! The smooth mint center, crisp cream piping, and sculpted navy braided edge come together into a refined, handmade accent. Sewing the compass rose is a satisfying step that makes the runner feel bespoke and special. Treat yourself to a moment of pride and display it proudly — your table just found a fresh, coastal focal point! 🧶🌊