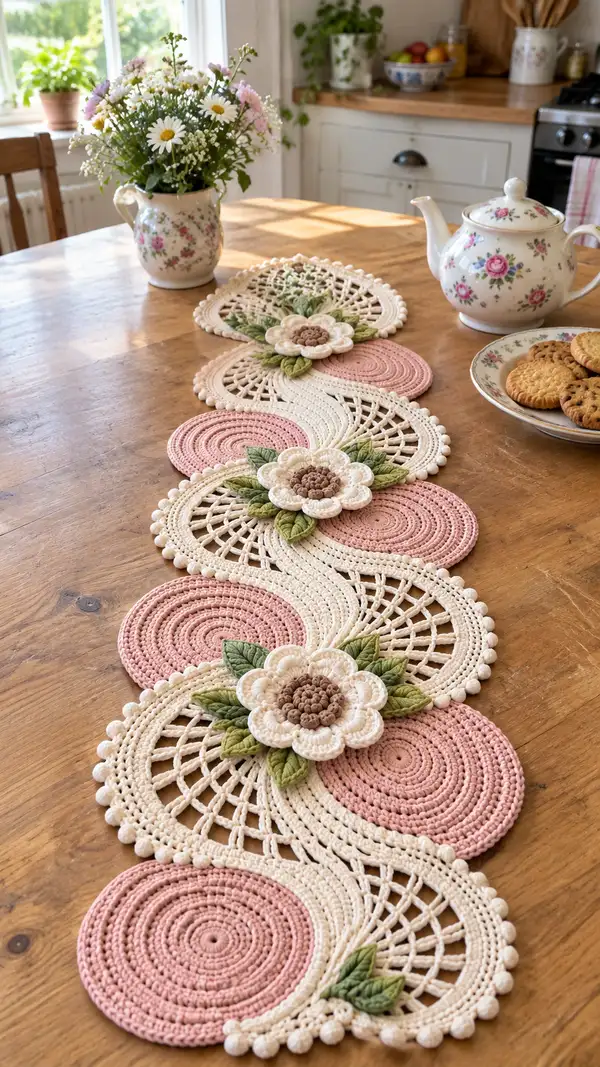
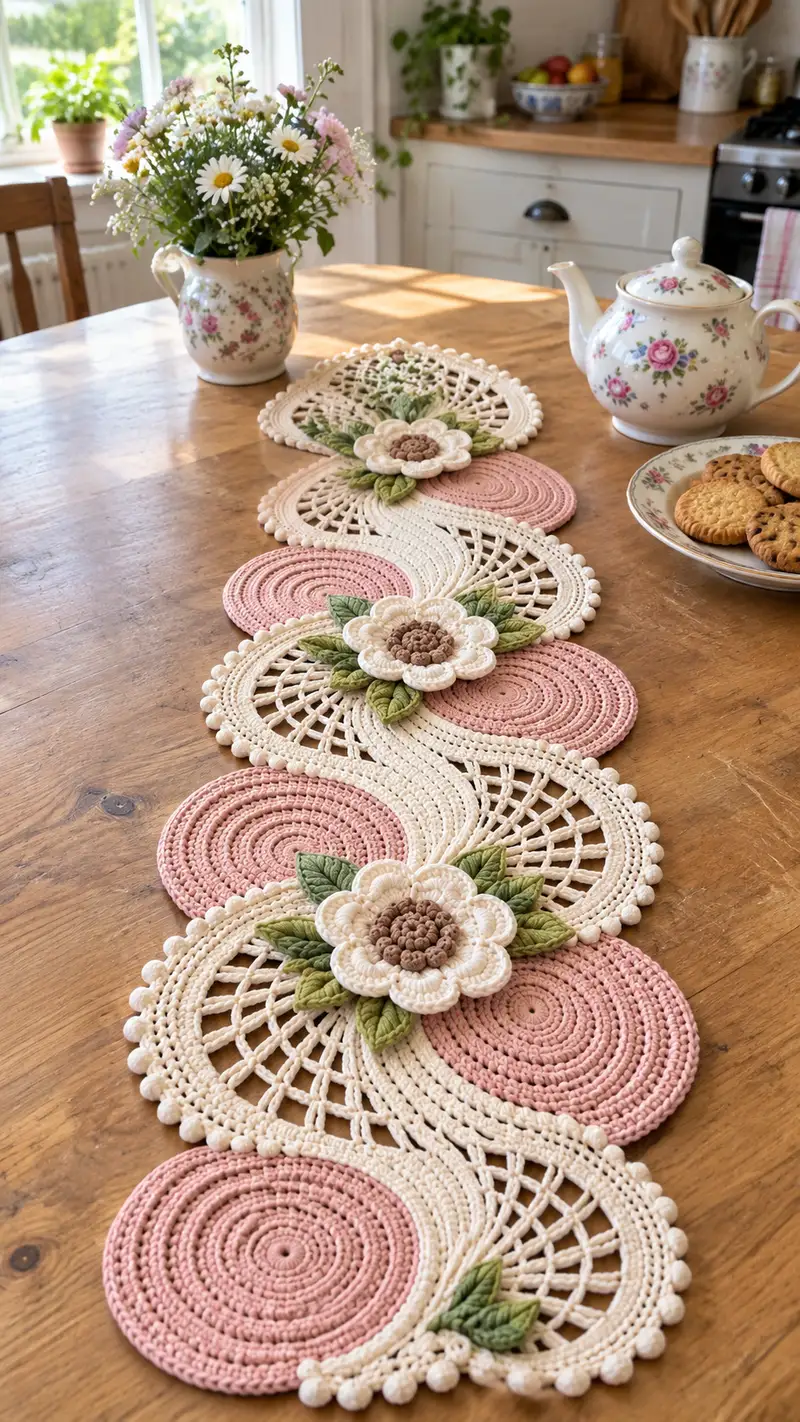
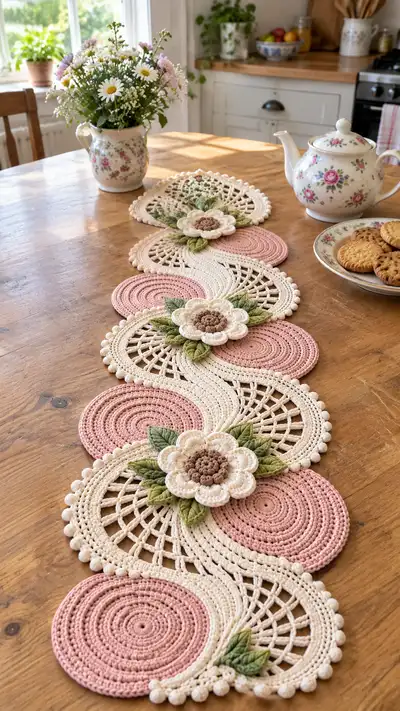
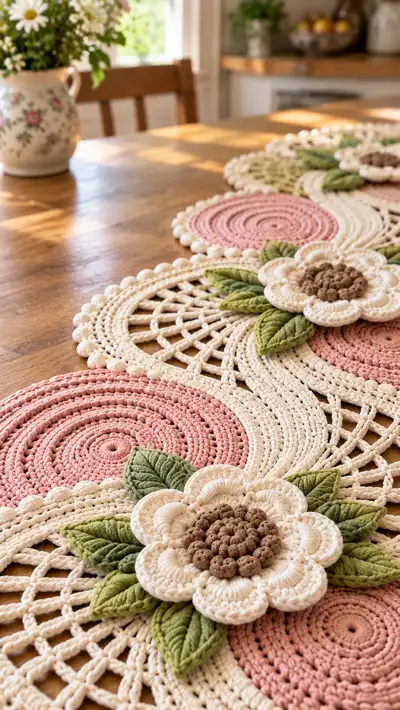
A delicate, vintage-inspired crochet table runner featuring alternating spiral discs and lacy fan motifs, finished with 3D layered flowers and sculpted leaves. Soft blush pink and warm cream combine with muted green leaves and a warm brown flower center to create an inviting centerpiece. Detailed texture includes bobble edging, open lace arcs, and spiral work for a refined, handmade look. Designed to be assembled in repeat sections so you can customize length.
Progress Tracker
0% Complete
— Overview :
Info :
This runner is made of repeat units: one spiral disc (blush), one lacy fan/arc (cream) and a decorative overlay flower with leaves. Make required number of repeats to reach your desired length. The pattern gives full instructions for one repeat unit and all embellishments. Use 3.5mm hook for main work, 3.0mm for petals and leaves if you prefer crisper definition.
Info :
For a table runner shown (approx 1.2m long) you will make 6 blush discs and 6 cream lace arcs with 3 large flowers spaced evenly. Each motif is joined as you go with long tails to whip-stitch in position. Blocking motifs flat before joining will improve lace openness and alignment.
— Spiral Disc (Blush) - Make 6 :
Round 1 :
6 sc in magic ring (6)
Round 3 :
(1 sc, inc) x 6 (18)
Round 4 :
(2 sc, inc) x 6 (24)
Round 5 :
(3 sc, inc) x 6 (30)
Round 6 :
(4 sc, inc) x 6 (36)
Round 7 :
(5 sc, inc) x 6 (42)
Round 8 :
(6 sc, inc) x 6 (48)
Info :
Maintain even tension to keep the disc flat. If the disc bowls, go back a round and tighten tension or drop a round of increases. If it ruffles, reduce next increase round or add one even round before next increase.
Round 9-20 :
1 sc in each st (48)
Info :
These rounds build disc height. Keep stitches small and even. Place a marker at round start to track 12 rounds of even stitching. Block each disc gently after finishing for flat spiral texture.
Round 21 :
1 sc in each st BLO (48)
Round 22 :
Reverse single crochet (crab stitch) around to form a neat raised edge (48)
Info :
Fasten off leaving a long tail (approx 35-40cm) for joining to adjacent cream fan. Weave in short tail after joining. Make 6 discs or desired count.
— Large Lacy Fan / Arc (Cream) - Make 6 :
Round 1 :
6 sc in magic ring (6)
Round 3 :
(1 sc, inc) x 6 (18)
Round 4 :
(2 sc, inc) x 6 (24)
Round 5 :
(3 sc, inc) x 6 (30)
Round 6 :
(4 sc, inc) x 6 (36)
Round 7 :
(5 sc, inc) x 6 (42)
Round 8 :
(6 sc, inc) x 6 (48)
Info :
These rounds create a base circle that will be transformed into a half-fan shape by working mesh arches and selective trimming. Keep a stitch marker at first stitch each round.
Round 9 :
(7 sc, inc) x 6 (54)
Round 10-11 :
1 sc in each st (54)
Round 12 :
'Create dividing lines: *ch 5, skip 2, sc in next* across' — this produces 18 chain arches (54 base stitches provide 18 repeats)
Info :
When working the ch-arch round, keep loops even; you will work into these chain arches in following rounds to form the lacy fan. Count arches at the end of round to be sure you have 18 arches.
Round 13 :
*In each ch-5 arch: (sc, ch3, 3 dc, ch3, sc)* across giving 18 fan motifs (work 1 fan in each arch)
Round 14 :
Into each fan: *sc in center, 5 dc cluster in next ch3, sc in opposite side* to reinforce fan shape (54 stitch-equivalent appearance)
Round 15-17 :
1 sc in each base stitch across original 54 positions to stabilize fan (54)
Info :
These stabilization rounds anchor the fan arches and give the motif body. If your mesh is too open, add an extra sc round before continuing to next shaping round.
Round 18 :
'Begin forming the semicircular arc: (2 sc, dec) x 18 (36) — works a gradual inward shaping across the base to create an arc'
Round 19 :
'(1 sc, dec) x 12, sc in remaining stitches (24) — note: this reduces to a narrower arc base for the open lace'
Info :
These decreases shape the lower base into a half-oval. Stuffing is not used here — keep motif flat. Pin to blocking mat to set the curve after finishing.
Round 20 :
Chain-lace round: attach at even intervals and work *ch 6, sc in next arch top* across to create long open bars across arc — you should create 12 long bars
Round 21 :
Work into each long bar: *sc, ch 4, sc* to create a lattice effect (12 lattice repeats)
Round 22-24 :
1 sc around arc perimeter (36) to tidy outer edge
Round 25 :
Work bobble edging: *(4 sc, bobble) x 6* around evenly spaced points (you will make 6 bobbles around arc outer curve) (36 total sc and 6 bobbles)
Round 26 :
1 sc between bobbles to even edge and fasten off leaving long tail for joining (36)
Info :
Fasten off leaving a long tail (~40cm) for joining to adjacent discs. Block the arc on a mat to open the lattice before joining.
— Narrow Connecting S-Band (Cream) - Make 1 per repeat :
Info :
The runner has an S-shaped connecting band that sits between each disc/arc pair. This band is worked as a curved narrow panel so several rounds are included to shape the sine-wave curve and provide the illusion of continuous flow.
Round 1 :
Ch 40, turn, 1 sc in 2nd ch from hook and across (39)
Round 2 :
Ch1, turn, 1 sc in each st (39)
Round 3 :
'Shape curve: *1 sc in next 6, inc* repeat across (45) — increases at intervals create a gentle bulge'
Round 4 :
'1 sc across (45)'
Round 5 :
'(2 sc, inc) x 15 (60) — expand center to create mid-bulge'
Info :
Work extra rows on the bulge side to make the S-curve. Use stitch markers to mark the bulge center and ends. This panel will be joined to the sides of two adjacent motifs.
Round 6-10 :
1 sc in each st across, turning at ends to create a rectangular bulge (60)
Round 11 :
'Begin tapering: (2 sc, dec) x 15 (45)'
Round 12 :
'1 sc across (45)'
Round 13 :
'(1 sc, dec) x 15 (30)'
Round 14 :
'1 sc across (30)'
Round 15 :
Fasten off and leave long tails for joining to discs and arcs
Info :
Block this narrow panel into a gentle S-curve before joining; it helps keep the runner's flow. You will stitch this panel between motifs to smooth transitions.
— Flower Center (Brown) - Make 3 :
Round 1 :
6 sc in magic ring (6)
Round 3 :
(1 sc, inc) x 6 (18)
Round 4 :
Work bobble cluster round: *pop/bob in each st across to build raised center — for each stitch: (yo, insert, pull up loop) x 3 and finish as bobble* (18 bobbles)
Round 5 :
1 sc around centers between bobbles to tidy (18)
Info :
Use slightly tighter tension than petals so the center sits sculpted and proud. Do not fasten off; leave long tail to stitch petals to center.
— Flower Petals (Cream) - Make 3 flowers with 6 petals each :
Round 1 :
Ch 3, in starting loop work 8 hdc, sl st to first hdc to form a small ring (8)
Round 2 :
*ch1, sc in same, ch3, (3 dc, ch3, sc) in next stitch* around to make 6 petal loops (6 petals)
Round 3 :
Work petals: in each petal loop: (sc, hdc, 5 dc, hdc, sc) to form full rounded petal — repeat for 6 petals
Round 4 :
Picot round: *sc in petal tip, ch3, sl st in top to form decorative picot* around petals (6 picots)
Round 5 :
Attach petals to brown center: use long tail to sew petals evenly around center, spacing so centers align snugly. Fasten off leaving tail to secure to runner (no stuffing)
Info :
Block petals flat and gently curve them upward when stitching to the runner for a dimensional bloom. For extra height, make a small ring of sc behind petals and sew to center.
— Layered Petal Round (Cream) - Optional second layer to make flower fuller :
Round 1 :
Ch 4, sl st to form small loop, ch1, 12 sc into loop, sl st to first sc (12)
Round 2 :
In each sc: *ch3, skip 1 sc, sl st in next* around to create 6 outer loops
Round 3 :
Work larger petals in these loops: (sc, 2 hdc, 7 dc, 2 hdc, sc) in each loop (6 petals)
Round 4 :
Whipstitch this layer behind first petal layer so petals are staggered; fasten off and hide tails
Info :
If you want a shallower flower, skip the layered round. The pictured flowers are two-layered to achieve the sculpted look.
— Leaves (Green) - Make 12 (4 per flower or place as desired) :
Round 1 :
Ch 6, sc in 2nd ch from hook, hdc in next, dc in next, hdc in next, sc in last (5 sts across chain)
Round 2 :
Turn, work on opposite side of chain: sc in first, hdc, 2 dc, hdc, sc in last (9)
Round 3 :
Along leaf center: work front post stitch vein: *fpdc across center 3 stitches, then sc in edges* to create pronounced rib (9)
Round 4 :
Edge shaping: *sc, dec, sc* on each tip to taper leaves (7)
Round 5 :
Finishing round: 1 sc around leaf, add a small sl st at base and fasten off leaving long tail for sewing (7)
Info :
Block leaves to a subtle curve. Use yarn needle to stitch the central vein using matched yarn and a few running stitches to accentuate the raised rib.
— Bobble Edging Around Cream Fans (Detail) :
Round 1 :
Attach cream yarn to outermost sc of arc, *sc 3, bobble in next* repeat around arc edge producing approx 12-14 bobbles depending on arc curvature (edge count ~36 sc + bobbles)
Round 2 :
Slip stitch to secure bobbles and sc in between to even spacing (edge count remains consistent)
Info :
If you prefer small rounded beads, use 5 partial dc bobbles. For larger beads, make 7-part bobbles. Keep counts even so joining points match up with discs.
— Joining Motifs and Final Edge Work :
Info :
Join motifs as you make them for better alignment. The sequence for each repeat: make one blush disc, make the adjacent cream arc, make the narrow S-band connecting them, then secure with whipstitch along the connecting perimeter. Leave long tails to whipstitch and hide at the end.
Round 1 :
Lay disc and adjacent arc overlapped by approx 6–8 stitches where they meet. Using long tail from disc, whipstitch through corresponding sc on arc across seam (approx 20-25 stitches depending on overlap)
Round 2 :
Repeat joining for opposite side of disc to next arc and for the S-band to both sides to create smooth S-flow. Use mattress or ladder stitch for nearly invisible seams
Info :
Pin motifs in place on blocking mat in final desired layout before joining. Slight stretching of lace and careful pin placement will help the S-curve sit naturally.
Round 3 :
Reinforce joins by stitching through both joining rounds twice if runner will see heavy tableware traffic. Trim and weave ends through several rounds to secure.
Round 4 :
Attach bobble-edged arcs together where outer arcs meet by single crochet join: sl st into edge of arc A, ch1, sc through edge of arc B and arc A simultaneously at even intervals to create a continuous scalloped border (work along the seam where two arcs touch)
Info :
For the pictured runner, join three sets of alternating disc/fan pairs into one continuous runner. Adjust the number of repeats to match your table length.
— Decorative Placement of Flowers & Leaves :
Info :
Flowers are placed at the seams where arc meets disc to distract from structural joins and add interest. Each flower is centered over the seam and anchored by stitching through the S-band and both adjacent motifs.
Round 1 :
Position a brown center over seam — baste in place with a long tail. Align first petal layer so petals radiate evenly over both motifs and whipstitch through the arc + disc layers using the tail.
Round 2 :
Arrange leaves by tucking base under petals and sewing through three points into cream motif and S-band for security (two leaves per side of flower pictured)
Info :
Use small, hidden stitches and tie off securely on the underside of runner. Weave tails at least three rounds deep to avoid slippage. Optional: add a dab of fabric glue on underside for extra hold.
— Final Border (All Along Runner) :
Round 1 :
With cream yarn, pick up edge around entire runner and sc evenly across all exposed edges to tidy the silhouette. Maintain consistent spacing and keep corners slightly rounded
Round 2 :
*sc 3, bobble* repeat along outermost edges to mimic round bobble border from photo. Keep bobble placement symmetric at each repeat join (bobble count varies with runner length)
Round 3 :
Slip stitch evenly and fasten off; weave in all ends on underside and block the runner flat to final measurements
Info :
Blocking is crucial: pin to shape, steam or spray with water and allow to dry fully to set lace. This will open the lattices and even bobble edges for the polished look shown in photos.
— Finishing Touches and Care :
Info :
Gently hand wash in cool water with mild soap and lay flat to dry. Avoid abrasive cleaners and heavy stain treatments on 3D flower areas. Store flat or rolled to avoid creasing the blocked shape.
Info :
To lengthen the runner, add more repeats of the blush disc + cream fan sequence. To shorten, omit repeats symmetrically so flowers stay centered.
This elegant floral runner brings a vintage, cottage-chic feel to any table — its soft blush discs and lacy cream fans are balanced with three-dimensional blooms and sculpted leaves. Each repeat is a joy to make, combining solid spiral work with airy lace and raised bobbles for texture. The modular approach means you can easily customize length and color to match your décor. Enjoy the meditative process and the beautiful centerpiece you create! 🧶🌸