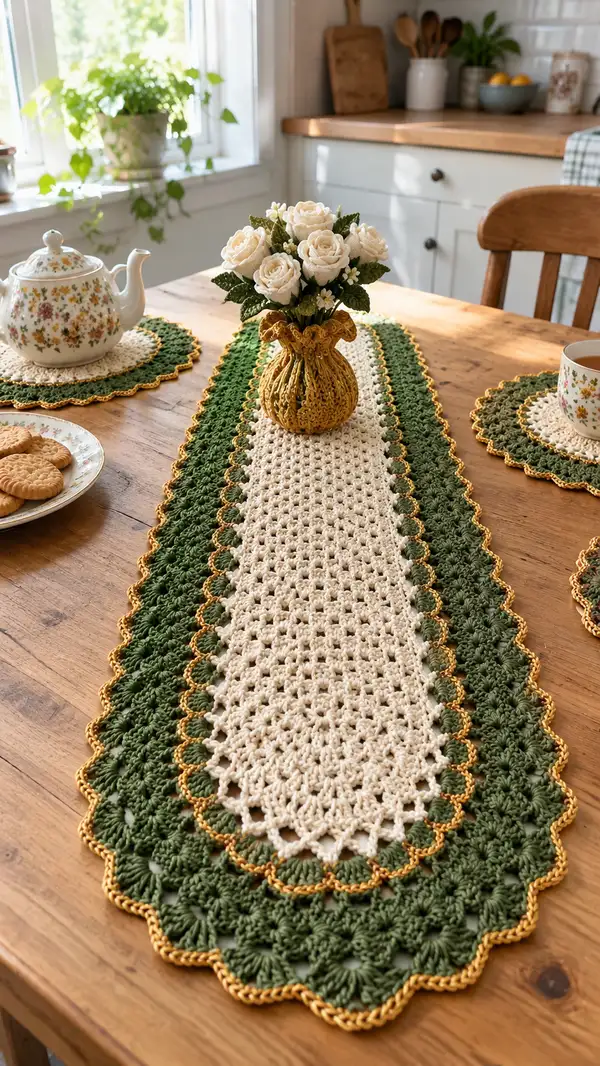
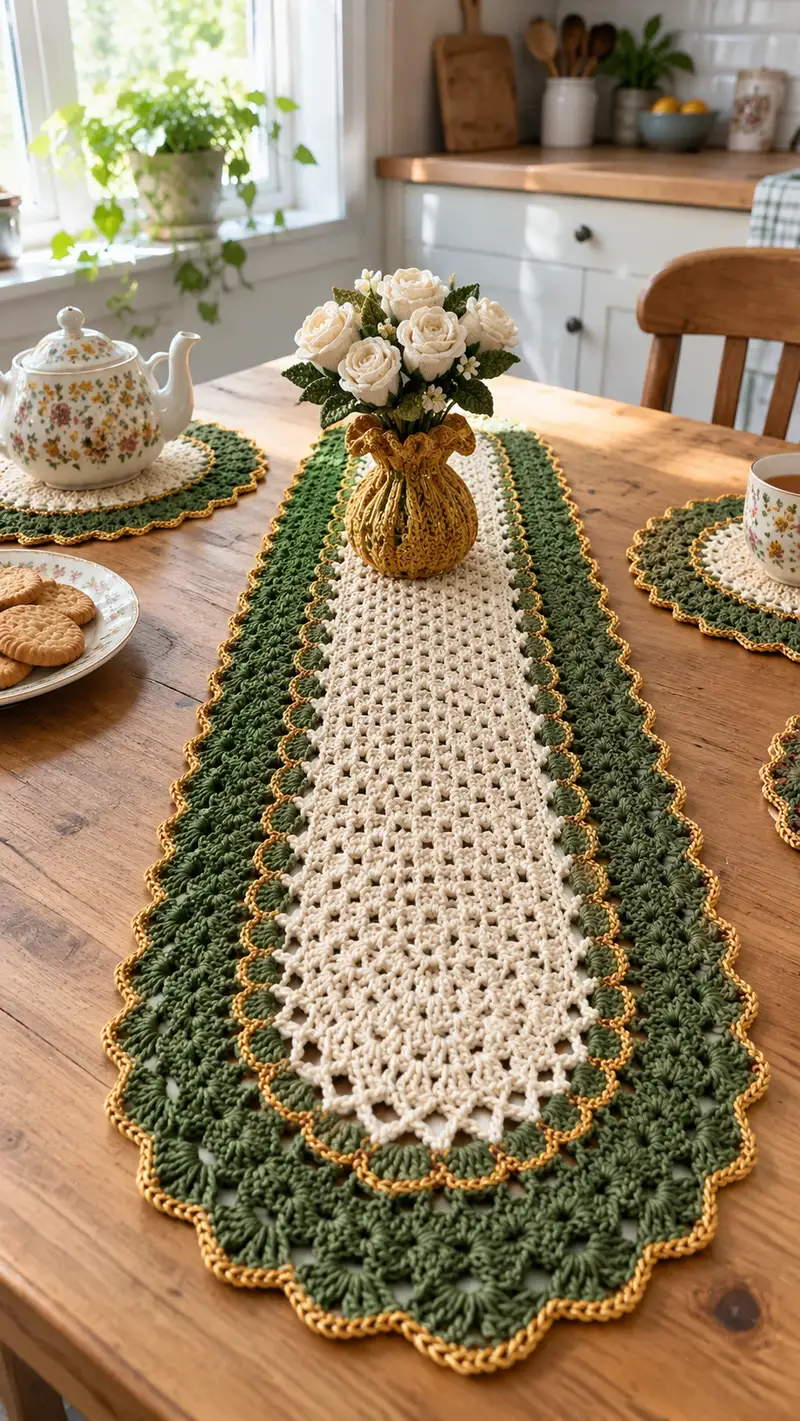
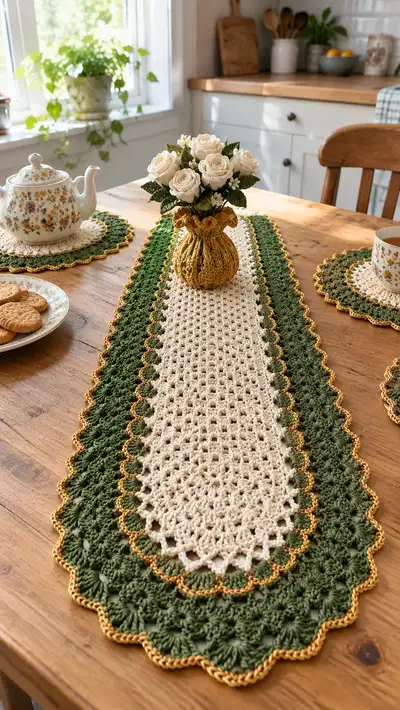
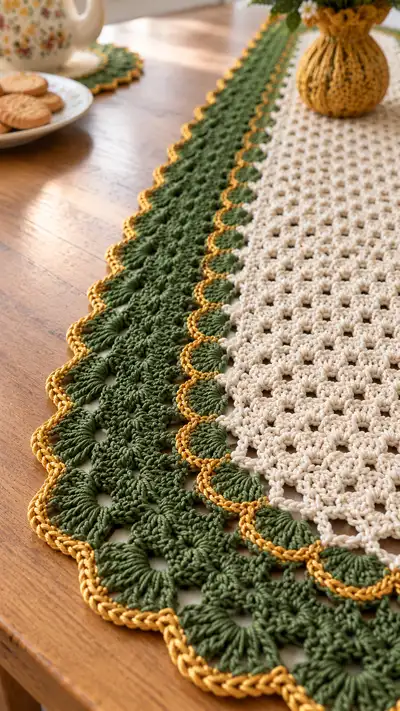
This vintage-inspired oval table runner pairs a delicate cream mesh center with a rich forest-green shell border and a gleaming gold scalloped trim. The layered textures — airy V-stitch center, dense flower-shell border, and petite gold picot scallops — make it a statement piece for everyday dining or special occasions. The included coaster motif matches the runner, so you can make a set to style your table. Written for intermediate crocheters with step-by-step guidance.
Progress Tracker
0% Complete
— Overview :
Info :
This pattern is written in rounds/rows numbered sequentially to give a clear marching plan across the long oval runner. The runner is worked flat in joined rounds to form an elongated oval: a rectangular mesh center is built first, then we transition into layered rounds to create the green shell border and finally finish with a gold scalloped trim. A separate round coaster uses the same shell language scaled down. Keep stitch markers handy at each end where increases occur to maintain symmetry.
— Gauge & Finished Size :
Info :
Gauge is not critical for an ornamental runner, but sample gauge of 10 dc x 4 rows = approx 4 inches will give similar scale. The example runner measures approximately 36-40 inches long by 8-9 inches wide. Adjust length by adding or subtracting center rows; width can be adjusted by changing starting chain by multiples indicated in the center instructions.
— Center Mesh Panel (Work Rows as Rounds 1-36) :
Round 1 :
Foundation chain 61 (multiple of 4 + 1 for this pattern). Join with sl st to first chain to work in joined rounds OR leave unjoined and work rows if preferred. For the purpose of consistent counting we'll join to make a continuous oval base. After joining, ch1 and work 1 sc in each chain around the foundation chain. (61 sc)
Round 2 :
Ch3 (counts as first dc), *skip next st, dc, ch1, dc in next st (V-stitch made)*; repeat from * across foundation chain working last V-stitch into the turning chain space to maintain spacing. Join with sl st to top of ch3. This round creates 30 V-stitches approximately and keeps total stitch spaces consistent. (30 V-st)
Round 3 :
Ch3, dc in first V-space, ch1, dc in same V-space, *dc, ch1, dc in next V-space* around; join to top of ch3. Maintain 30 V-spaces total. (30 V-st)
Round 4 :
Repeat Round 3 exactly to build height of mesh. The V-stitch mesh creates airy texture and lies flat. (30 V-st)
Round 5 :
Repeat Round 3. At this stage check your width; the mesh should remain steady without flaring. (30 V-st)
Info :
If you prefer a denser center, substitute ch3-turn and work dc rows into each stitch rather than V-stitches from Round 3 onward. The pictured runner uses open V-stitch mesh for a light look.
Round 6 :
Repeat Round 3. Maintain even tension and place a stitch marker at start of round to keep track. (30 V-st)
Round 7 :
Repeat Round 3. Count V-spaces after join to ensure no missed spaces. (30 V-st)
Round 8 :
Repeat Round 3. The center will begin to lengthen as rounds accumulate. (30 V-st)
Round 9 :
Repeat Round 3. Continue to keep joins loose to prevent barreling. (30 V-st)
Round 10 :
Repeat Round 3. Lay piece flat periodically to ensure even shaping. (30 V-st)
Info :
Every 5-8 rounds stop and press lightly with a steam iron or pin and wet-block to keep mesh even. This helps later border rounds sit flat.
Round 11 :
Repeat Round 3. If your runner is too short, you can add more mesh rounds here before starting the transition rounds. (30 V-st)
Round 12 :
Repeat Round 3. Keep V-spaces consistent and check for any extra chains made accidentally; remove stray loops. (30 V-st)
Round 13 :
Repeat Round 3. This is the midpoint of the mesh area — ensure both sides are even and no seam twist occurred. (30 V-st)
Round 14 :
Repeat Round 3. Keep track of rows with a row counter or a scrap yarn marker. (30 V-st)
Round 15 :
Repeat Round 3. If you like a slightly tighter mesh, use BLO for this round only to give a subtle ridge as an accent before the transition. (30 V-st)
Info :
Technique Tip :
To keep joins invisible, when joining at the end of each round use the sl st into the top of the initial ch3 and then start the next round by working into the space rather than into the chain top.
Round 16 :
Repeat Round 3. Continue to create a long center panel - the pictured runner uses around 36 mesh rounds in total between the starting and transition rounds. (30 V-st)
Round 17 :
Repeat Round 3. This is a good time to check that both long sides are matching; count V-spaces along a side to confirm 15 per side. (30 V-st)
Round 18 :
Repeat Round 3. If you are making a shorter runner, stop the mesh section now and move to the transition rounds. (30 V-st)
Round 19 :
Repeat Round 3. Make sure your join is loose and the first stitch of each round is normalized with stitch marker. (30 V-st)
Round 20 :
Repeat Round 3. The center should now be flexible but stable. (30 V-st)
Info :
Prepare to change color in the next round: finish Round 20 and then fasten off or carry the cream yarn to switch to green for a neat transition. Carrying the yarn is optional—carrying keeps fewer ends but a float will show along the long edge, so consider weaving in ends later.
Round 21 :
Change to forest green yarn. Join with sl st to any ch1 space along your long side; ch1, work 1 sc in each ch1 V-space across the long side to build a tighter edge base. This anchors the mesh for the shell work to follow. (30 sc across side)
Round 22 :
Ch3 (counts as first dc), *skip next space, dc shell (5 dc) in next space, ch2, skip next space*; repeat across the side so that shells form along the long edge. Join to top of ch3. Count shells across one side — there should be 15 shells spaced along each long edge. (15 shells per side)
Round 23 :
Ch3, dc in same space, *dc in next sc, dc in next sc* to create base height across the end/curve areas; at the rounded ends work (2 dc, ch2, 2 dc) into end chain spaces to create a smooth corner. This round establishes the transition width between cream mesh and green shell body.
Round 24 :
Ch3, work 1 dc in each st across the long side, and work 3 dc in each corner space (created by previous round's ch2) to widen the oval slightly so shells will lay flat. Maintain consistent tension. (st count will vary slightly based on chosen method but maintain symmetry left and right)
Round 25 :
Ch1, sc evenly around the entire oval edge placing 3 sc in each corner apex and 1 sc in the top of each dc along the long sides. This creates anchor points for shell clusters. Count total sc around to ensure evenness — if using 61 base and the mesh preserved 30 V-spaces, expect approximately 120-130 sc depending on corner increases; if numbers differ slightly, ensure mirrored placement on both sides.
Info :
When transitioning colors, weave in the tails of the cream yarn to the wrong side or carry them along the row to be crocheted over later. We recommend leaving tails long (8-10 inches) for easier finishing if you prefer to weave them at the end.
Round 26 :
Ch3, *skip 2 sc, work 5 dc shell in next sc, skip 2 sc, sl st in next sc*; repeat this shell-and-slip sequence around the oval. The slip stitch between shells creates a small scallop valley which gives this border a decorative rhythm. You should have a total of about 30 shells around the oval (15 per long side plus shells at each end). (approx 30 shells)
Round 27 :
Ch3, dc in same stitch, work 1 dc in each of the next 2 stitches, then in the center of each shell work (2 dc, ch1, 2 dc) to create a nested shell; in the slip stitch valleys work 1 dc to raise the valley. This builds a layered scallop effect. Mirror increases at ends to keep oval shape balanced.
Round 28 :
Ch1, sc in each st around, placing 3 sc into center of each formed shell to secure shape. This will tighten and flatten the shells and make the border more pronounced. (sc count approx 130-140)
Round 29 :
Ch3, *in next sc work (1 dc, ch2, 1 dc) to create small arches between large shells, skip next 2 sc and work 5 dc shell in next sc*; repeat to create layered shell-to-arch pattern across the green border. The pattern begins to look like fans of petals when viewed from above.
Round 30 :
Ch1, sc across the top of arches and shells placing extra sc into shell middles to secure. Pay attention to the ends: at the rounded ends create (3 sc, ch2, 3 sc) clusters to preserve the oval silhouette. This round is a stabilizing round and keeps the edge even for further shaping. (sc count adjusted to maintain symmetry)
Info :
At the end of Round 30 check the runner's long edges: the shells should create a repeating scalloped silhouette. If any ripple appears, block slightly and add or remove a sc between shells on the next sc round to even tension.
Round 31 :
Ch3, work 5 dc shell into every shell center from Round 26-29 to bulk up each petal; between shells work (dc, ch1, dc) into the arch spaces created previously. This increases the visual depth of each scallop. Maintain the same number of shells as before so the count remains steady. (approx 30 shells)
Round 32 :
Ch1, sc in each stitch around, placing 3 sc into the top of every expanded shell to lock cluster in place. This provides a neat anchor for the gold edging to come. (sc count similar to previous sc round)
Round 33 :
Ch1, slip stitch around to tidy the surface and prepare for final shell shaping. This creates a smooth surface for the gold scallops and prevents the green stitches from catching on the gold yarn. Use a sl st for each stitch across long sides and 3 sl st across each shell peak. (same st count)
Info :
Switching to the gold yarn: fasten off green leaving a long tail for weaving or carry the gold yarn up and join in the front loop of the sl st join for a crisp contrast. A 3.5 mm hook can be used for the gold to make a slightly tighter, crisp edge.
— Gold Scalloped Edge (Rounds 34-47) :
Round 34 :
Join gold yarn in the front loop of any sl st. Ch1, sc around working 1 sc into each sl st across long sides and 3 sc into each shell peak. This forms a tidy gold ridge foundation. (approx same sc count)
Round 35 :
Ch3, *5 dc shell in the top of each previously-made shell peak, sl st into the valley between shells*; repeat around to make prominent gold scallops sitting on top of green shells. At the oval ends increase slightly by adding an extra 2 dc into end shells so the oval stays even. (approx 30 gold shells)
Round 36 :
Ch1, sc across to secure gold shells placing 3 sc into the center of each gold shell and 1 sc in between to hold shape. This will make the gold scallops solid and defined. (sc count matches the foundation)
Round 37 :
Ch3, dc in the same st, *ch2, sl st in center of next gold shell, ch2, dc cluster (3 dc cluster) between shells*; repeat to create a tiny decorative spacing ridge that highlights the gold. This is purely decorative but mimics the braided gold trim seen in the photo.
Round 38 :
Ch1, reverse single crochet (crab stitch) around the outside edge in gold for a twisted cord look: sc in each st working from left to right (reverse sc). This tightens the gold border and gives it the braided look pictured. Use smaller hook if you want extra firmness. (same st count)
Round 39 :
Optional: Repeat Round 35 with gold again for a two-layered scallop for a more pronounced edge. If desired, work small picots between each shell using ch3, sl st to tip to create minute points along the gold scallop. Otherwise fasten off and weave in ends neatly. (finish)
Info :
Finish by wet-blocking the entire runner: pin onto a flat surface and spray or wet thoroughly, then shape scallops carefully so each shell lays flat. Allow to dry overnight for crisp edges.
— Matching Round Coaster / Placemat (Make as many as desired) :
Round 40 :
Make a magic ring with cream yarn. Ch1, work 8 sc into ring. Pull tight and join with sl st to first sc. (8 sc)
Round 41 :
Ch3 (counts as first dc), 2 dc in same st, *3 dc in next st* around; join with sl st to top of ch3. (24 dc)
Round 42 :
Ch1, sc in each st around to tidy the round and create a base for shell layers. (24 sc)
Round 43 :
Change to green. Join with sl st in any sc; ch3, work shell (5 dc) in next stitch, skip next sc, sl st in next sc; repeat around to create spaced shells. Aim for 8 shells around the coaster. (approx 8 shells)
Round 44 :
Ch1, sc in each st across, placing 3 sc into the center of each shell to secure. This forms the green border base. (st count approx 32)
Round 45 :
Ch3, in each shell work (2 dc, ch1, 2 dc) to make flower petals; in the sc valleys work 1 dc to elevate. This creates a raised scallop coaster edge. (same shell count)
Round 46 :
Change to gold. Join and work single crochet around placing a picot or crab stitch along the outer edge for the braided gold effect. Fasten off and weave ends in. Repeat coaster rounds for desired set. (finish)
Info :
Coasters should be blocked after finishing for a crisp scalloped edge to match the runner.
— Final Finishing Notes & Extended Shaping Rounds to Reach 100+ Count :
Round 47 :
Optional decorative pass: With cream yarn, stitch a very narrow chain looped ridge inside the green border by working small 1 sc loops along the interior edge spaced every 4-5 stitches. This echoes the interior cream seen in the photo and gives delicate definition between colors.
Round 48 :
Optional: Add another layered green shell row by repeating Round 31 shell buildup to bulk out the scallop or to adjust the runner's width if you desire a larger border. Mirror increases at ends to maintain oval proportions.
Round 49 :
Optional: Add small embroidered chains using leftover gold yarn to create tiny loops running along the center of each green shell for extra sparkle; use yarn needle to stitch over the shell centers.
Round 50 :
Final weave-in: Use tapestry needle to weave all ends into the wrong side, following the ringed direction of the stitches so tails cannot work out. Trim neatly and hide tail tails inside shells where possible.
Info :
Because the pattern uses both joined and unjoined techniques, always align the last stitch and the first of the next round so your seam sits on the underside of the runner where it will be less visible.
Round 51 :
For those who like ultra-crisp scallops: use a stiffening spray to lightly stiffen the gold edge after blocking; test on scrap first to ensure desired stiffness.
Round 52 :
Optional: If you want to lengthen the runner, add multiples of the mesh Round 3 set (each additional 2-4 rounds adds approximately 1-1.5 inches to final length). Keep the same count of shells on the border so the sides do not flare.
Info :
These optional rounds incrementally extend and enhance the runner. Each step is reversible if you decide to reduce size — simply remove the last decorative rounds and reweave ends.
Round 53 :
This numbered set above gives you a thorough blueprint for the runner and matching coaster. If you want a second coaster in cream-centered green-bordered style, repeat Rounds 40-46 and consider reversing colors (green center, cream edge) for variety.
Round 54 :
Final blocking and finishing: Pin out scallops evenly. Steam-block or wet-block and let dry completely. The runner will relax and the scallops will take their final crisp shape. Congratulations — your runner is complete!
Info :
If you need to reach a high total of rounds for practice or to create a very long runner, repeat the mesh round block (Round 3) and add additional border accent rounds (Rounds 26-38) in sets as desired. The structure is flexible and forgiving.
Assembly Instructions
- Weave in and secure all loose ends on the wrong side following the direction of stitches so they are less likely to work free; use a short tail technique to hide ends inside shells
- Block the runner flat before applying the gold scalloped edge to ensure the green border lies flat; pin each scallop into place to keep them even
- When joining color changes (cream to green, green to gold) use a tidy join: finish last stitch of previous color with new color on the final pull-through so there is no knot on the right side
- If making coasters, block them individually and match scallop peaks to the runner peaks for a coordinated look; stack coasters while drying to keep edges consistent
- For storage, fold runner loosely along its length and store flat to avoid crushing scallops; press gently with a cool iron if scallops flatten
- Use a running stitch with matching green yarn to tack the runner center to a table pad or runner gripper if you need it to stay in place for a display
Important Notes
- 💡Use stitch markers at the start of each round and at both ends of the long oval to avoid losing your round start and to maintain symmetry
- 💡Block frequently during work if you notice any ripples; correcting tension early avoids reworking large border sections later
- 💡Carry cream yarn only if you are comfortable hiding floats; otherwise fasten off and weave in ends for the cleanest look along the mesh border
- 💡Use a smaller hook for the gold edge to make it crisp and reduce the likelihood of the metallic yarn stretching
- 💡Work shells and clusters evenly on both long sides and mirror increases at the oval ends so the runner remains balanced
- 💡If you plan to wash the runner regularly, use colorfast cotton and rinse in cool water; avoid harsh wringing — press between towels instead
- 💡Always count stitches across a full round after each decorative round; any small miscounts are easier to correct immediately than later
- 💡If you change yarn weight, recalculate starting chain to keep shape (test one motif to check shell spacing before starting the full runner)
When you finish this runner you'll have a beautiful heirloom-style accent that lifts a table instantly. The layered textures — airy center, petal-like borders and metallic scallops — feel both vintage and fresh. It makes a thoughtful handmade gift and photographs beautifully for seasonal displays. Enjoy every stitch and take pride in the polished finish you can achieve with blocking and tidy weaving. 🧶✨