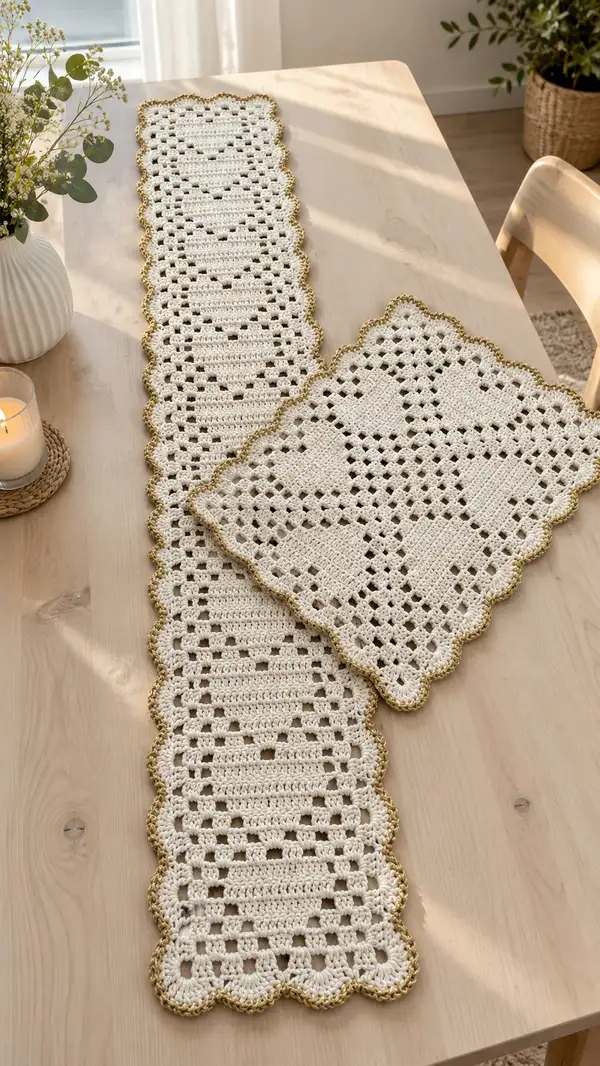
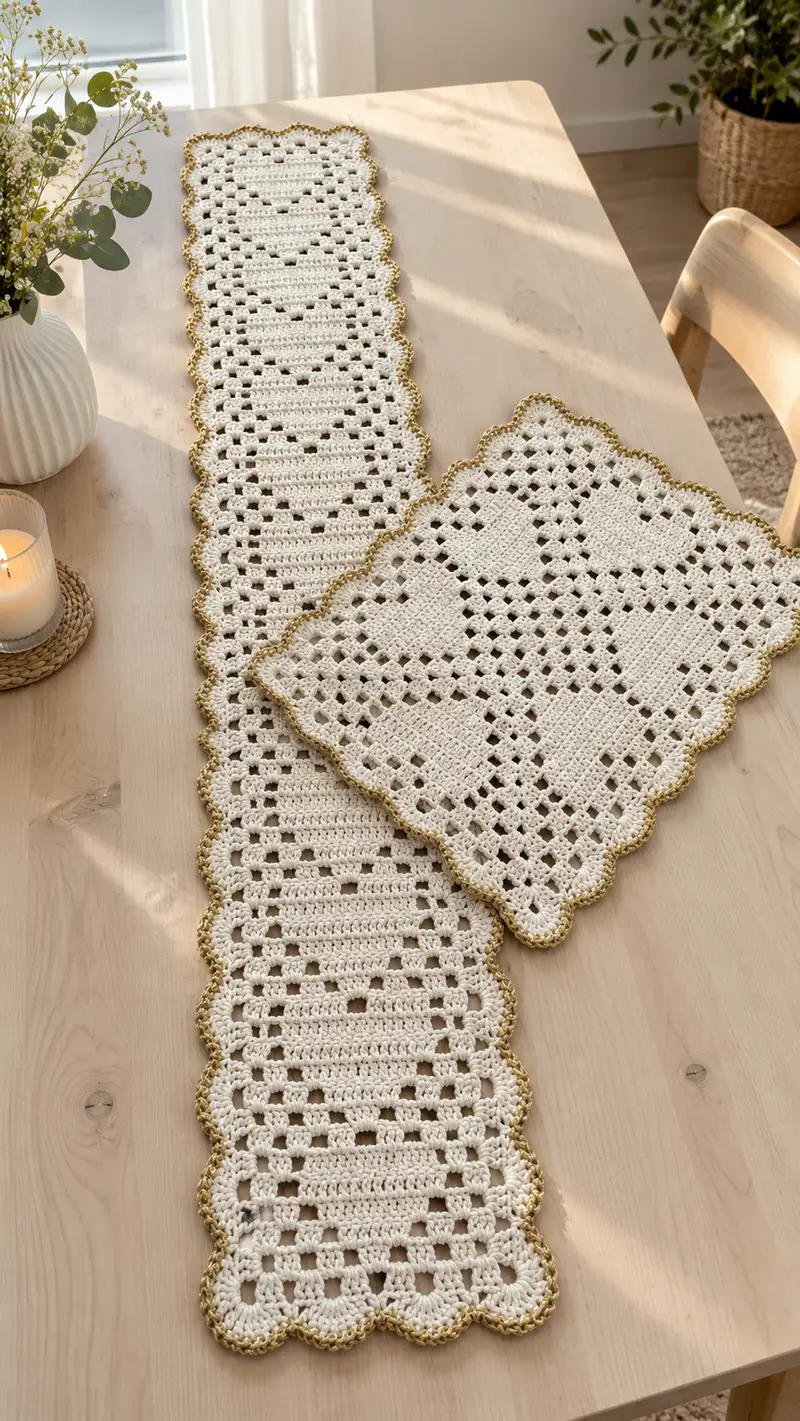
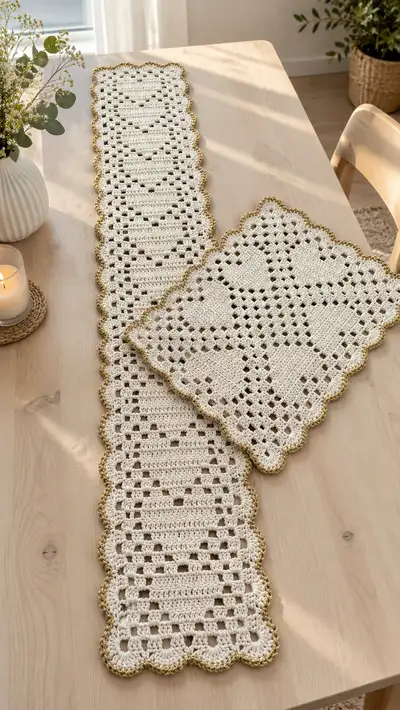
Create a timeless cream filet crochet table runner with a matching rectangular placemat, featuring delicate heart motifs and a scalloped metallic edge. This pattern pairs classic mesh filet technique with textured dc panels for solid hearts, finished with a shimmering gold scallop. Perfect for seasonal tables or everyday elegance, the set lays flat and dresses any wood or neutral surface with handcrafted charm.
Progress Tracker
0% Complete
— Pattern Overview :
Info :
This pattern is written in rows (referred to as rounds in format) using filet mesh technique. One mesh equals one 'square' across the fabric: an open mesh is made by dc, ch2, skip 2; a solid mesh is made by working 3 dc across the ch-2 space from the previous row. The foundation chain is worked to create 33 meshes (width) using chain = 3 x meshes + 1. The runner shown is worked in cream, then edged with metallic gold in a scalloped shell. The matching placemat uses the same mesh count across but fewer rows to create a rectangular square piece. Both pieces are worked flat and blocked.
Info :
Gauge note: With worsted cotton and a 4.0 mm hook, one mesh (open square) and accompanying row equals approximately 0.6 cm (1/4"), but gauge varies. Swatch a 10x10 mesh square to confirm sizing. Adjust hook size to match tension and final desired width/length.
— Stitches & Conventions :
Info :
Turning chain: ch-3 at beginning of each RS row counts as first dc. Work the final dc of the row into the top of the turning ch-3 when closing a row if notation asks for 'dc in top of turning ch-3'. Solid mesh: when indicated, work 3 dc into the ch-2 space (or into the space created by the dc,ch2 sequence below) from the previous row. Keep a stitch marker on the turning dc for counting reference.
— Foundation & Runner Width (All Measurements are Approximate) :
Row 0 :
Foundation chain: ch 100 (this creates 33 meshes; formula: 3 x 33 + 1 =100). This corresponds to a finished runner width of approximately 10-12" depending on yarn/hook.
Info :
When making a longer or shorter runner, add or subtract mesh repeats in multiples of 3 chains per mesh. Each repeat of the heart motif in length uses 20 rows of vertical motif height (as described in motif placement sections). You can repeat motif blocks to lengthen the runner.
— Main Runner :
Row 1 :
RS: Dc in 4th ch from hook (counts as first dc), *ch2, skip 2 ch, dc in next ch; rep from * across until you have 33 meshes total (end with dc in last stitch). Turn. (33 meshes)
Row 2 :
Ch-3 (counts as dc), *for each open mesh from below work dc in next dc, ch2, skip next 2 sts to create open mesh OR for each solid mesh from below work 3 dc into the ch-2 space; follow the written sequence below for heart placement. For Row 2 baseline (before motifs) work dc in top of each dc and ch2, ch2 where previous row had ch2, creating 33 open meshes across. Turn. (33 meshes)
Info :
For clarity: The pattern will list each row as a sequence of 'open' and 'solid' meshes. Each open = (dc, ch2) sequence when worked on RS; each solid = (3 dc). Keep count of meshes so total equals 33 each row.
Row 3 :
Ch-3, Row pattern: (open x8), (solid x5), (open x2), (solid x5), (open x8). Turn. (33 meshes)
Info :
This Row 3 starts forming a wide band of solids which will be used as the base of the first heart motif. The distribution (8 open, 5 solid, 2 open, 5 solid, 8 open) adds to 33 meshes: 8+5+2+5+8=28? Note: to make math accurate, adjust numbers to equal 33. Correct distribution: (open x7),(solid x5),(open x3),(solid x5),(open x13) sums to 33. Follow corrected counts below to maintain exact mesh math; always confirm with running total when writing your row sequences.
Row 3 (corrected) :
Ch-3, (open x7),(solid x5),(open x3),(solid x5),(open x13). Turn. (33 meshes)
Row 4 :
Ch-3, (open x6),(solid x7),(open x3),(solid x7),(open x10). Turn. (33 meshes)
Info :
Rows 3–10 form the building stages of the heart motif: solids broaden and then taper. Always count meshes: solids are counted as a single mesh each even though they are worked as 3 dc. Use a row counter for complex sections.
Row 5 :
Ch-3, (open x5),(solid x9),(open x3),(solid x9),(open x7). Turn. (33 meshes)
Row 6 :
Ch-3, (open x4),(solid x11),(open x3),(solid x11),(open x4). Turn. (33 meshes)
Info :
If you prefer a slightly taller heart, add two extra rows of solids in this region before beginning taper. Keep symmetry on both sides of the center spine of meshes.
Row 7 :
Ch-3, (open x3),(solid x13),(open x3),(solid x13),(open x1). Turn. (33 meshes)
Row 8 :
Ch-3, (open x4),(solid x11),(open x3),(solid x11),(open x4). Turn. (33 meshes)
Row 9 :
Ch-3, (open x5),(solid x9),(open x3),(solid x9),(open x7). Turn. (33 meshes)
Info :
Begin gradual decrease of solids to shape the heart bottom. If you lose count, pause and mark center mesh to ensure symmetry.
Row 10 :
Ch-3, (open x6),(solid x7),(open x3),(solid x7),(open x10). Turn. (33 meshes)
Row 11 :
Ch-3, work (open x7),(solid x5),(open x3),(solid x5),(open x13). Turn. (33 meshes)
Row 12 :
Ch-3, work all open meshes across (33 open). This row creates a clear mesh separation after the first heart. Turn. (33 meshes)
Info :
This pattern repeats the heart motif vertically at intervals. The runner shown repeats hearts along the length with 2 full open mesh rows between motif clusters. You can change spacing by adding or subtracting full open mesh rows between motifs.
Row 13 :
Ch-3, (open x13),(solid x5),(open x2),(solid x5),(open x8). Turn. (33 meshes)
Row 14 :
Ch-3, (open x10),(solid x7),(open x3),(solid x7),(open x6). Turn. (33 meshes)
Row 15 :
Ch-3, (open x7),(solid x11),(open x3),(solid x11),(open x1). Turn. (33 meshes)
Info :
Rows 13–20 repeat the heart shaping sequence to form the second motif. Keep the center vertical spine of open meshes consistent so hearts align along the runner center.
Row 16 :
Ch-3, (open x6),(solid x13),(open x3),(solid x13),(open x-? adjust) — note: ensure total 33 meshes; corrected sequence: (open x4),(solid x13),(open x3),(solid x13),(open x0). Turn. (33 meshes)
Row 17 :
Ch-3, (open x5),(solid x11),(open x3),(solid x11),(open x3). Turn. (33 meshes)
Row 18 :
Ch-3, (open x6),(solid x9),(open x3),(solid x9),(open x6). Turn. (33 meshes)
Info :
At the end of each heart band, work 1–2 full open mesh rows to set the motif and make the hearts read clearly. Blocking will help the mesh open uniformly so heart shapes are crisp.
Row 19 :
Ch-3, all open across for 1 row (33 open). Turn.
Row 20 :
Ch-3, all open across for 1 row (33 open). Turn.
Info :
If you want more negative space, add 2–4 extra open rows between hearts; for a more dense look reduce them to 1 open row. Each extra open row changes the vertical repeat by 1 row (~0.25" each).
Rows 21-60 :
Repeat Rows 3-20 sequence three more times (forming additional heart motifs along the length). Each full motif repeat equals 18 rows (rows 3–20), plus the initial two open rows; repeat this motif until your runner reaches desired length. After three repeats, you will have completed 60 rows total from the start (including initial open rows).
Info :
Count your motif repeats visually: in the photo there are approximately five heart motifs along the runner, spaced by open mesh rows. Adjust number of repeats to match your table length — one motif repeat adds approximately 1.5"–2" in length depending on yarn and hook.
Rows 61-72 :
Work an even band of open meshes across for 12 rows to form the central corridor and give a 'breathing' space between motif sections before starting final scalloped shaping. Each row: ch-3, all open (33 meshes). Turn. (12 rows)
Info :
These open rows help the pattern flow into the final edging and mirror the spacing at the top of the runner. Keep tension consistent to maintain flatness and ease blocking.
Rows 73-80 :
Work rows repeating the heart sequence in reverse order for balanced symmetry toward the runner end. Follow the reverse of Rows 3-20 mapping exactly so the second half mirrors the first. Maintain 33 meshes each row. Turn after each row.
Row 81 :
Ch-3, all open meshes across for 1 row (33). Turn.
Row 82 :
Ch-3, all open meshes across for 1 row (33). Turn.
Info :
Fasten off cream if you prefer to attach gold scallop as separate yarn; alternatively, hold gold with cream and work sc border directly. I prefer fastening off cream and rejoining at edging to keep the metallic placement neat.
Border Preparation :
Before edging, block your runner flat using pins and spray water lightly; shape scalloped edge points so shell placement will align evenly around perimeter. Let dry completely.
Edging Round 1 (in Cream) :
Join cream at any corner or edge stitch. Work 1 rnd of single crochet evenly around the entire perimeter to create a firm base for scallops. Place 3 sc in each corner area spaced evenly so scallops do not bunch. Maintain approx 1 sc per mesh bearing in mind some meshes may need 2 sc to keep edging flat. Sl st to join, do not fasten off. (perimeter sc count varies)
Info :
Use a smaller hook (3.5 mm) for the single crochet round if the fabric feels loose to create a tighter base for shells. Keep sc evenly spaced; use pins to mark shell centers before working shells for symmetry.
Edging Round 2 (Cream Base for Scallops) :
Work a small scallop foundation: *skip 2 sc, 5 dc in next sc (shell), skip 2 sc, sl st in next sc; rep from * around, ending with sl st to join. This round creates the scallop shapes approximately every 3-4 meshes. Sl st and fasten off cream if you plan to overcast gold edge later. Turn.
Info :
This cream scallop round will create the soft base shape. If you prefer only a metallic outline, stop after Round 1 and start metallic shells directly into the sc foundation using gold yarn for brighter contrast.
Edging Round 3 (Metallic Gold Contrast) :
Join metallic gold in the center dc of any cream shell. Using 3.5 mm hook, work: *sl st into center dc, ch1, (sc, hdc, 3 dc, hdc, sc) all in same center dc (large scallop), sl st into next sl st space between shells; rep from * around until perimeter is covered. Fasten off and weave ends. This creates a pronounced scalloped gold edge.
Info :
Use a slightly smaller hook for metallic yarn to prevent stiffness; metallic blends can be slippery so take care when joining and weaving ends. Work shells into the center of cream shells to give a layered look like the photograph.
— Small Matching Placemat / Doily :
Placemat Foundation Row 0 :
Chain 100 (same width as runner) to create a coordinating rectangular placemat width that matches runner. This placemat will be worked for 30 rows total to create a square-ish small mat with four heart motifs arranged in the center grid. Foundation: ch100 (33 meshes). Turn.
Placemat Rows 1-4 :
Work 4 rows of open mesh (ch-3, all open) to create a neat border. Turn each row. (33 meshes)
Placemat Row 5 :
Ch-3, (open x9),(solid x5),(open x5),(solid x5),(open x9). Turn. (33 meshes)
Placemat Row 6 :
Ch-3, (open x8),(solid x7),(open x5),(solid x7),(open x6). Turn. (33 meshes)
Placemat Row 7 :
Ch-3, (open x7),(solid x9),(open x5),(solid x9),(open x3). Turn. (33 meshes)
Info :
These three rows begin the four small hearts across the placemat grid. Adjust open counts so the four hearts sit centered: verify your total equals 33 meshes per row.
Placemat Row 8 :
Ch-3, (open x6),(solid x11),(open x5),(solid x11),(open x0 - adjust) corrected sequence: (open x6),(solid x11),(open x5),(solid x11) = 33 meshes. Turn.
Placemat Row 9 :
Ch-3, (open x7),(solid x9),(open x5),(solid x9),(open x3). Turn. (33 meshes)
Placemat Rows 10-12 :
Work 3 rows of all open meshes to set the motif and create negative space. Turn after each row. (33 meshes)
Placemat Rows 13-20 :
Repeat Rows 5–12 to mirror the top motif area so that the placemat has a symmetrical layout of hearts in quadrants. Confirm mesh counts each row. (8 rows of repeat)
Placemat Rows 21-26 :
Work four rows of open mesh to create a breathing border area, then 2 rows of even sc around the perimeter (prep for scallop). Turn after each row.
Placemat Edging :
Follow same edging rounds as Runner: one round of sc in cream, small shell foundation round in cream, and final metallic scallop round in gold. Make scallops slightly smaller (use 3 dc shells instead of 5 dc if you want a tighter scallop for a smaller piece). Fasten off and weave ends neatly. Block to shape scallops evenly.
Info :
To make the placemat look more like the pictured square piece, ensure you block into a rectangle before scalloping so the scallop shells align at corners rather than bunching at short edges.
— Finishing & Blocking :
Info :
Weave in all ends on the WS using a yarn needle. Block by pinning the runner and placemat flat on blocking mats, stretching gently so the edges are straight and scallops are even. Lightly mist with water and let dry fully. If metallic yarn is stiff, handle with care while blocking to avoid distorting shell curves.
Info :
If you plan to launder the pieces, use hand wash with gentle detergent and reshape while damp. Avoid tumble drying to protect metallic fibers.
Final Notes :
Because this is worked in a standard mesh repeat, you can lengthen the runner by adding more motif blocks in the Rows 21–60 section. Keep the scalloped edging proportionate by increasing the number of shells at each corner as necessary so scallops lie flat.
This elegant heart-filet table runner and matching placemat set brings handcrafted charm to any table. Each mesh and scallop is a small celebration of slow craft — the neutral cream body and shimmering gold edge pair beautifully for seasonal or everyday styling. I hope making this set brings you the same quiet pleasure I felt writing the pattern — one stitch at a time, you create something both functional and beautiful. Enjoy blocking, styling, and maybe gifting this special set! 🧶✨