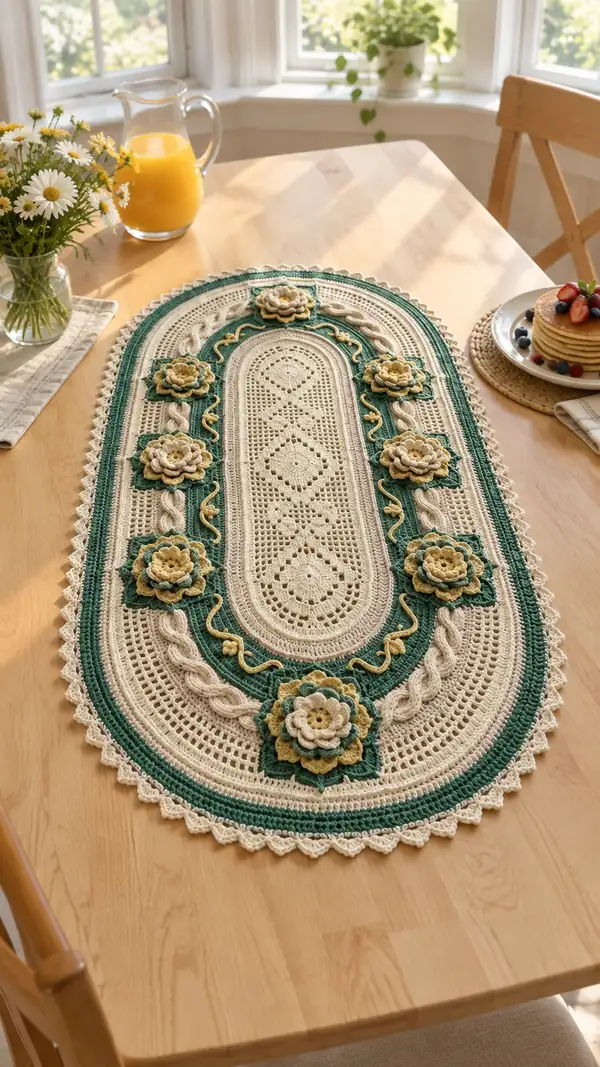
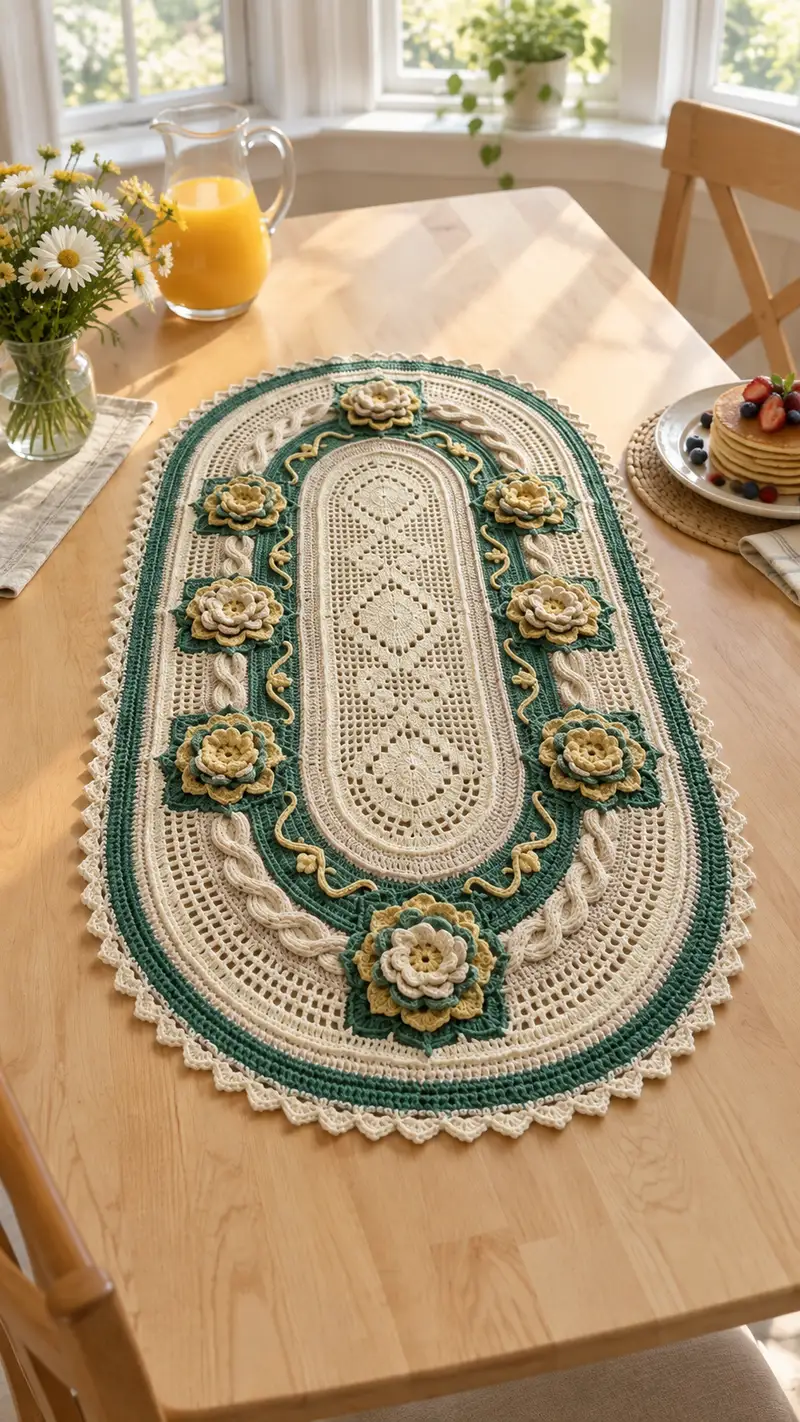
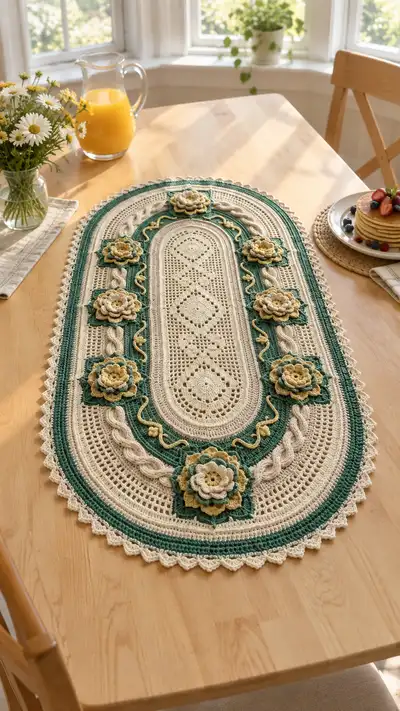
A vintage-inspired oval table runner featuring layered 3D floral appliques, braided cable trims and delicate lacy filet insets. Worked in cream, deep green and warm gold tones, this runner combines textured crochet techniques—lace, cables and layered petals—into a statement piece for dining or side tables. The finished runner has an ornate scalloped edge and nine dimensional rosettes mounted around a central oval lace panel.
Progress Tracker
0% Complete
— Center Oval Filet Panel :
Foundation :
Ch 30, do not join. We will work around this foundation to create an oval base.
Round 1 :
Working back along the chain: sc in 2nd ch from hook and in each ch across to last ch (29 sc), 3 sc in last ch, working down the opposite side of the foundation chain sc in each ch (29 sc), 3 sc in first chain base (turning point) — total 64 sc (64)
Info :
Place a stitch marker in the first stitch of Round 1 to mark the round start. This oval foundation gives a stable base for filet work.
Round 2 :
(7 sc, inc) x 8 — divide the round into 8 segments: sc 7, then 2 sc in next st (8 increases) — 72 sc (72)
Round 3 :
(8 sc, inc) x 8 — 80 sc (80)
Round 4 :
(9 sc, inc) x 8 — 88 sc (88)
Round 5 :
(10 sc, inc) x 8 — 96 sc (96)
Info :
Work these increase rounds evenly so the oval grows smoothly. Adjust your increases so the curve at the ends remains rounded and not pointy — place increases across the existing turning regions.
Round 6 :
(11 sc, inc) x 8 — 104 sc (104)
Round 7 :
(12 sc, inc) x 8 — 112 sc (112)
Round 8 :
1 sc in each st (112)
Round 9 :
Change to cream if not already. *Ch2, sk next st, dc in following st* repeat around to create an even mesh foundation. Where you encounter corner triples, work dc in each of the 3 corner sts and continue. Count measured as 112 'work units' (112)
Info :
From Round 9 we shift into an alternating dc/ch2 openwork mesh—this will form the basis of the filet motif. Use a stitch marker to note the top center of the oval for later applique placements.
Round 10 :
Using filet method: (dc, ch2, sk2) across straight sides; when reaching the rounded end work (dc, ch2, dc, ch2, dc) across the 3-corner triple to keep curve — maintain approx 112 work units (112)
Round 11 :
1 dc in each dc, 1 dc in each ch-2 space across; at corner clusters work dc into each corner stitch — (112)
Round 12 :
Work filet block pattern now: *[dc, ch2, sk2] 3 times, [dc in next 2 dc]* — repeat around keeping count by working dc into each dc and dc into each ch2 sp as 'base' — (112)
Info :
Mark center long axis top and bottom (round positions) so you can align later embroidery and appliques symmetrically. After Round 12 block this section flat if desired to set the lace shape before continuing.
Round 13 :
Work 1 dc in each dc and in each ch-2 space to maintain the open filet fabric; at rounded ends maintain corner increases (112)
Round 14 :
Switch to pattern of alternating filet squares and lacy diamond motifs: *ch1, sk1, dc5 across small groups, then ch2, sk2* — maintain 112 base units (112)
Round 15 :
1 dc in each dc and 1 dc into each ch space; place stitch markers at points 12 sts apart along the long edges to mark where cable trims will later sit (112)
Round 16-18 :
Repeat Round 13 pattern for three rounds to set a stable filet panel band (112)
Info :
If you want to add a subtle diamond motif down the center, pick Round 17 to work a diamond filet chart. The chart will require changing where you place ch2 spaces; keep total units equal to 112 by converting some dc to ch-2 blocks symmetrically.
Round 19 :
Switch to cream worked rows: 1 sc in each dc stitch and 1 sc in each ch-space to tighten up the center panel slightly (112 sc equivalent)
Round 20 :
1 sc in each st (112)
Round 21 :
1 sc in BLO around to create a clean ridge for attaching inner oval frame later (112)
Info :
Set this center panel aside and block gently. This will help the stitches relax and make it far easier to join the adjacent frames and appliques later.
— Inner Decorative Oval Frame (Green) :
Round 1 :
Join deep forest green yarn to the BLO ridge you created on the center panel at the top center mark. Ch1, sc evenly around edge in each BLO (112 sc) — place a marker at round start (112)
Round 2 :
(4 sc, inc) x 16 — place increases evenly on both curved ends and along straight sections to create an even oval frame — 128 sc (128)
Round 3 :
1 sc in each st (128)
Round 4 :
1 sc in each st BLO to create a ridge (128)
Info :
This green frame is the base for later braided cords and leaf blocks. The BLO round creates a small shelf to which cables and appliques can be sewn neatly.
Round 5 :
Start decorative textured row: *sc 3, ch2, sk2* around straight sections, at ends work small picot-like clusters (sc, ch2, sc) into corner stitches so frame curves remain tidy — maintain 128 base units (128)
Round 6-8 :
1 sc in each st for three even rounds to build the frame thickness (128)
Info :
During Round 8 use extra stitch markers to mark placement points for the nine appliques: top center, bottom center, plus three pairs spaced equally down each side. Count 16-18 sts from center to place each applique marker so spacing matches the photo.
Round 9 :
Work a decorative raised ridge by making 1 sc in each st FLO for a single round to create a separation between base and next attachment round (128)
Round 10 :
1 sc in each st (128)
— Braided Cable Trim (Make 2 long braid strips for each side) :
General Info :
The braided cables are worked as three narrow crocheted cords which are then crocheted together in a braided layout and sewn to the green frame. You will make 4 long cable pieces (2 per side) that curve around the long edges of the oval. The pictured runner uses a cream cable that sits just inside the green frame.
Braid Cord A - Cord Template (Make 6 cords of length approx 85cm total when stretched) :
Ch 120 (or length needed to follow the oval curve), sc in 2nd ch from hook and in each ch across (119 sc). Fasten off leaving long tail for joining. Make 6 cords total. These will be joined together in sets of 3 to form braided ropes.
Info :
Work the cords slightly tight so they have body and will hold a braid shape. If you prefer a rounder rope, use hdc instead of sc for the cords.
Braid Assembly :
Layout three cords parallel, tie start ends together with temporary thread, braid physically by crossing cords as with hair braid (right over center, left over center) for the full length, then secure. Using yarn needle and matching cream yarn, stitch through the braid along its length to lock the braid and keep it flat. Repeat for remaining sets so you have 4 braided ropes total (two for each side).
Attachment Info :
Pin each braid to the green frame along the placement markers from earlier rounds. Use even stitches to sew the braid into place through the green frame and into the center panel's back if necessary. Use small invisible whip stitches and tie off securely.
Round 11 :
After braids are basted in place, work 1 sc in green frame around and through the braid to lock it in place: work into the braid by catching the edge of the braid and the frame every 4th stitch, keeping tension even (approx 128)
Info :
Check that the braid follows the oval contour without buckling. Re-pin and ease any excess before permanently sewing down. Sewing from the back side through the braid edge gives a flatter front finish.
— Piped Vine & Leaf Embroidery (Gold) :
Info :
Using golden yellow, we will surface-crochet a piped vine that loops between flower positions. This is worked as a cord created by crocheting a foundation chain and then slip-stitching back along the chain to create a raised cord; sew in place in loose S shapes and secure with small stitches.
Vine Cord :
Ch 100 (or length to fit between two appliques). Sl st into 2nd ch from hook and in each ch across to create a tight sl st rope. Fasten off. Make 10 short vine segments and a few small curled tendrils (ch6, sl st back) to place around flowers.
Attachment :
Pin vine segments on top of the green frame within the inner groove formed by the braid. Sew down with small ladder stitches using matching yellow, then hide tails into the green frame with yarn needle.
Info :
Vines should be slightly raised; avoid stitching through the fileted center to maintain lace openness. Sew into the green frame and braid edge only so the vine appears to sit on top.
— Layered Flower Applique (Make 9) :
General Info :
Each raised rosette is made from multiple layered petals worked in rounds; colors alternate cream, green and golden layers to match the photo. Make 9 identical flowers: 1 centered at the top, 1 at bottom and 3 evenly spaced on each side (3+3+2+1 layout). The following rounds describe one full flower — replicate 9 times.
Round 1 :
With golden yellow, make a magic ring, ch1, 8 sc in ring. Pull tight and join with sl st to first sc (8)
Round 2 :
(Inc) x8 — 16 sc (16)
Round 3 :
*Ch2, sl st in next st* around to create small picot-like spacing — remain with 16 picots (counts as 16 spaces)
Round 4 :
Change to cream. Working into picot spaces: [ch3, dc2, ch3, sl st] in each space to create a small petal cluster — 16 petal clusters (16)
Info :
Petal round is decorative rather than strictly counted; ensure each petal sits neatly by blocking lightly after completing the flower layers.
Round 5 :
Change to green. Around the outside of the petal clusters work: *ch2, sl st into petal base, ch2, sl st into next base* to join and form a scalloped support (approx 32 sl st joins) — present as support ring
Round 6 :
Switch to cream. In each scallop work: (sl st, ch1, tr3, ch1, sl st) to form larger outer petals — total 16 larger petals (16)
Round 7 :
With golden yellow, work over the outer petal edges: sc in each petal edge stitch to add texture and define petal edges (approx 64 sc)
Round 8 :
Create an under-leaf layer in green: make a separate motif—ch6, join to ring, work (sc, hdc, dc, hdc, sc) into each chain loop to create 8 supporting leaves; join and fasten leaving long tail for sewing.
Round 9 :
Stacking: place the green leaf disk under the cream/gold petal disk. Use long yarn tails to sew through centers and around petal bases, securing each layer centered. Sew multiple passes to ensure the flower holds its layered shape.
Round 10 :
Finishing: Weave in tails through the back of layered flower, trim. Optional: add a tiny French knot with leftover golden yarn in the center to give a raised stamen effect.
Info :
Make 9 identical flowers. Block flowers on a flat surface to hold shape — place pins in petal tips and mist lightly to shape before drying.
— Side Fill Panels & Mesh Extension :
Round 1 :
Back to the main runner: with cream yarn, work 1 dc in each st across the green frame outer edge to create a connecting band (approx 128 dc) — this forms the base for side mesh rows
Round 2-6 :
Alternate mesh rows: Round A (ch3, sk1, dc) repeat to create airy mesh - Round B (dc in each dc) to set. Repeat Rounds 2-6 to create a ~3 cm band of mesh between frame and outer border (128 per round)
Info :
These mesh rounds visually push the green frame outward and give room for the braided cables and flowers to rest. Keep your tension even so the mesh does not pull the frame.
Round 7 :
Work a supportive sc round: 1 sc in each st (128)
Round 8 :
Decorative rib: 1 sc BLO around to form slight ridge (128)
— Outer Border & Scalloped Edge :
Round 1 :
Join cream yarn at a convenient spot. Ch1, sc in each st around to create final base (128)
Round 2 :
(5 sc, inc) x 16 — 144 sc (144)
Round 3 :
1 sc in each st (144)
Round 4 :
Start scallop prep: *sc 2, ch3, sk3, sc 2* repeat around while adjusting at corners; aim for 36 scallop points total (counts vary by motif position) — work to maintain smooth oval curve (144)
Round 5 :
Scallop round: In each ch3 space work (sc, hdc, 3 dc, hdc, sc) to create pronounced scallop shells. At rounded ends distribute shells evenly to avoid crowding. Finalised scallops approx 36 shells (144 ‘base anchors’)
Round 6 :
Edge finishing: 1 sl st into each scallop tip, then ch4 and sl st into next scallop tip to create tiny picots between shells. Fasten off and weave in ends.
Info :
Wet-block the entire runner on blocking mats, pinning scallops to precise points so the edge sits symmetric. Let dry fully before removing pins.
— Final Assembly & Finishing Touches :
Step 1 :
Position the nine flowers: top center, bottom center, and three matched pairs down each side. Pin in place so the largest petals are oriented outward (as in the photo).
Step 2 :
Sew each flower through its center into the green frame and braid base using small, even whip stitches with tail from the flower. Secure knots on the back and weave tails into the runner body so they are not visible.
Info :
Add a few surface slip-stitch details with golden yarn to trace the vine around flower positions and to emphasize petal veins if desired.
Step 3 :
Stitch piped vine segments into place between flowers, using the golden cord and small secure stitches at the ends and at natural loops. Add tiny curled tendrils at vine tips for extra detail.
Step 4 :
Once all appliques and trims are attached, do a final blocking with a bit of steam to relax joins; pin scallops and flower tips gently to perfect the silhouette.
Info :
Weave in all remaining yarn tails into the runner's back, trimming flush. If any elements feel loose after blocking, add a couple of discreet stitches from the back to reinforce them.
Care Instructions :
Hand wash gently in cool water with mild soap, reshape and dry flat. Avoid machine washing to preserve scalloped edges and appliques. Light starch may be used to keep crisper lace if desired.
This elegant oval table runner brings classic crochet charm to any table with its lace center, braided trims and three-dimensional rosettes. Each step is a chance to enjoy texture and meticulous detail as the design comes together. Once finished and blocked, the runner lays beautifully with a refined scalloped edge and bold floral accents — perfect for dining room seasonal styling or as a treasured handmade gift. 🧶🌼✨