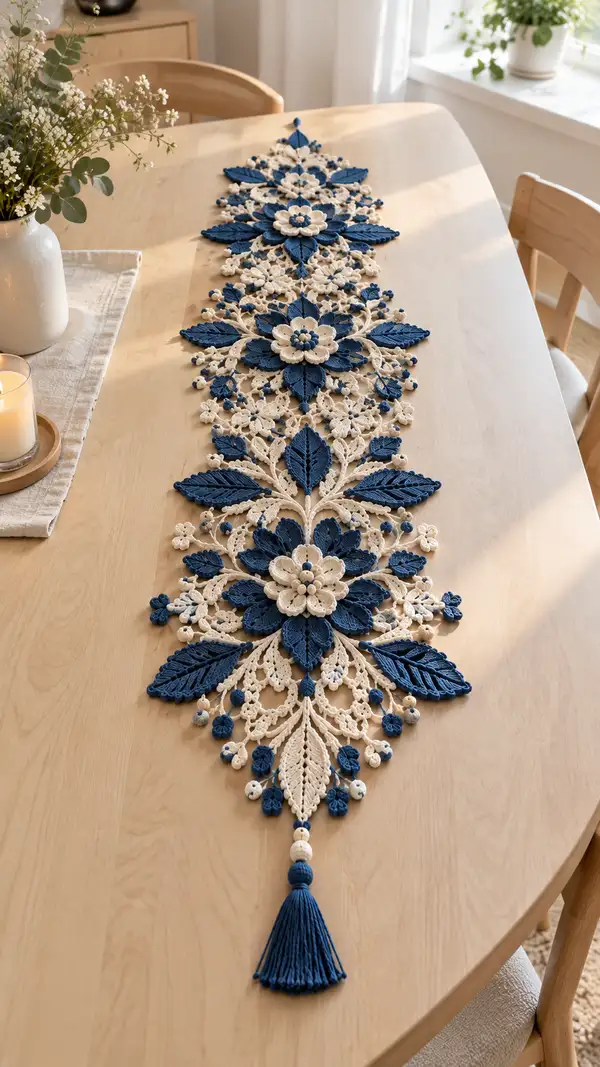
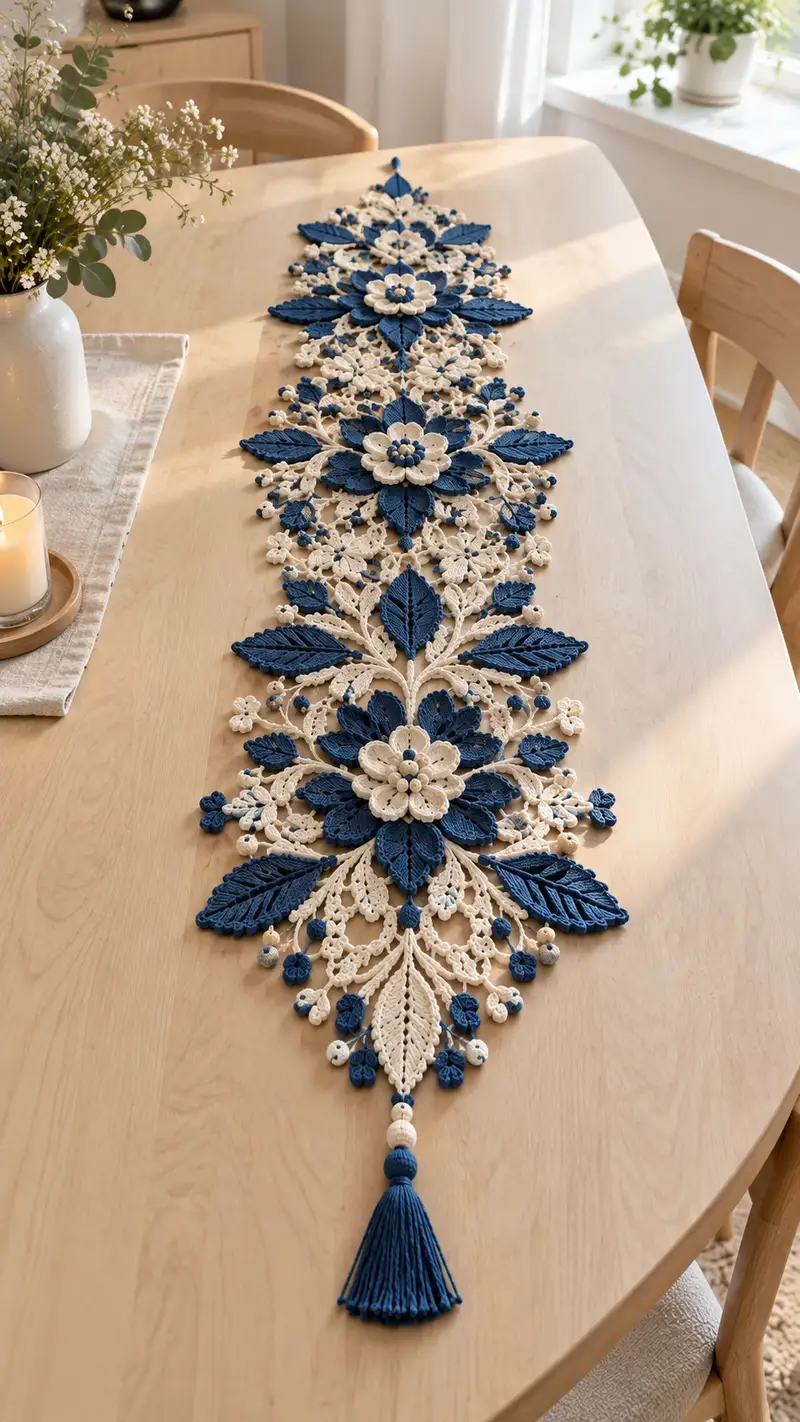
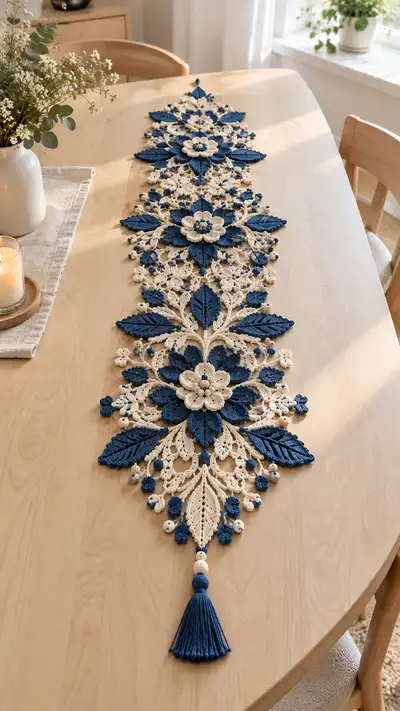
Create a stunning floral lace table runner with layered navy and cream motifs, sculpted leaves, and delicate beaded buds. This pattern builds modular flowers, ornate leaves and filigree vines that join into a long runner finished with a navy tassel and wooden bead accents. Detailed stitch-by-stitch instructions, color-change notes and assembly guidance make this a rewarding project for intermediate crocheters who love intricate surface texture.
Progress Tracker
0% Complete
— Overview & Gauge :
Info :
This pattern is modular: you will crochet 3 large layered flower medallions, multiple leaves, small blossoms and filigree connector panels. Each large flower medallion measures approximately 20-22 cm across after blocking when using worsted cotton and 3.5mm hook. The finished runner length shown is approximately 150-160 cm including tassels; adjust by adding or subtracting repeats.
Info :
Gauge is not critical for this decorative runner; however, for similar scale use worsted cotton and 3.5mm hook. Maintain consistent tension so motifs join cleanly. Block each motif flat before assembly for best results.
— Large Layered Flower Medallion (Make 3) :
Round 1 :
MR, 8 sc in magic ring (8)
Round 2 :
Inc in each st around (8 inc) (16)
Round 3 :
(1 sc, inc) x8 (24)
Round 4 :
(2 sc, inc) x8 (32)
Round 5 :
(3 sc, inc) x8 (40)
Info :
Switch to navy for petal rounds now if you are layering navy petals over a cream center. Use color change technique: complete last yarn-over of Round 5 with navy.
Round 6 :
1 sc in each st (40)
Round 7 :
BLO 1 sc in each st (40) — creates subtle ridge for petal base
Round 8 :
*ch 4, skip 2 sc, sc in next st* repeat around to create petal anchors (10 ch-4 petal anchors) (40 sts but 10 petals)
Info :
Petal construction will be worked into the ch-4 loops. Each petal is a layered fan of clusters to build 3D effect. Use stitch marker to mark first petal anchor.
Round 9 :
In first ch-4 sp: (sc, hdc, 3 dc, hdc, sc) — complete petal. Sl st into next ch-4 sp and repeat around to make 10 full petals. Join with sl st. (10 petals)
Round 10 :
Work second layer of petals: into center of each petal from previous round work (sl st, ch1, 2 sc, ch2, 2 sc, sl st) to create small ridge and base for larger outer petal (10 small petals)
Round 11 :
Switch back to cream yarn for decorative edging: In BLO of the sc round beneath, *ch3, sc between petal bases* repeat for 10 ch-3 loops.
Round 12 :
Work outer sculpted petals in navy: In each ch-3 loop work (sc, hdc, 5 dc, hdc, sc) creating pronounced outer petals. Fasten off navy, weave ends. (10 outer petals)
Info :
If you prefer fuller petals, add an extra dc or two to the center cluster of Round 12. Block petals gently forward to keep shape.
Round 13 :
Join cream again at back of flower center: sc around base of petals into the row under petals (40 sc) — this creates a stability ring for the next decorative ring.
Round 14 :
(4 sc, inc) x8 (48)
Round 15 :
1 sc in each st (48)
Round 16 :
In BLO 1 sc in each st (48) — prepares for lace spokes
Round 17 :
*ch5, sl st into every 4th st to form loops; repeat around making 8 ch-5 loops* (8 loops)
Round 18 :
Into each ch-5 loop work (sc, hdc, 7 dc, hdc, sc) to create large lace petals alternated with previously worked navy petals. Fasten off and weave ends. (8 large lace petals)
Info :
Add small seed bead to center using needle and thread if desired—this decorative bead will peek through when final center is added.
Round 19 :
Rejoin navy at center, ch1, 12 sc evenly around the very center (12) — these will act as base for center rosette.
Round 20 :
*(ch2, 3 dc in next st, ch2, sl st in same st) repeat 6 times creating a small rosette layered center* (6 petals)
Round 21 :
Edge round: sc in each st around the entire medallion working into stitch tops and petal bases to tidy edges (estimate 120 sc — count during work to keep even tension)
Info :
Block each medallion flat, pinning petal points outward. Shape petals with fingers while damp or steam gently. Allow to dry completely before assembly.
Round 22 :
Optional embroidery: Using cream thread embroider small dots or French knots between lace petals to mimic the beaded clusters visible in the photo.
— Secondary Flower (Make 2 identical; smaller layered motif) :
Round 1 :
MR, 6 sc in ring (6)
Round 2 :
Inc in each st (6 inc) (12)
Round 3 :
(1 sc, inc) x6 (18)
Round 4 :
(2 sc, inc) x6 (24)
Round 5 :
1 sc in each st (24)
Round 6 :
BLO 1 sc in each st (24)
Round 7 :
*ch4, sc in next st* repeat around to form 6 ch-4 loops — anchor points for petals
Round 8 :
In each ch-4 loop work (sc, hdc, 3 dc, hdc, sc) to make 6 small petals. Fasten off navy if used, weave ends. (6 petals)
Round 9 :
Rejoin cream at base and work a round of 1 sc in each st around the base of petals (count depends on anchors, approximate 36 sc)
Round 10 :
*(ch3, sl st into base to create loops) repeat 6 times* forming small loops
Round 11 :
Work picot edging into each ch-3 loop: (sc, ch3, sl st into same loop) creating a lacy edge. Fasten off and weave ends.
Info :
These secondary flowers will sit between the large medallions. Block flat and shape petals forward slightly for layered visual depth.
— Large Sculpted Leaf (Make 12) :
Round 1 :
Ch 11, sc in 2nd ch from hook, sc across to last ch (10 sc) — this is foundation chain for leaf center
Round 2 :
Ch1, turn, sc in each st across (10)
Round 3 :
Ch1, BLO sc across (10) — creates ridge
Round 4 :
Work along one edge to create point: (2 sc in first st, sc next 3, hdc next 2, dc next 2, hdc next 1, sc last st) then mirror down other side to make symmetrical leaf. Total sts vary; establish symmetrical shaping as you crochet.
Round 5 :
Turn leaf, work single crochet around entire leaf edge working increases at the tip to round it and decreases at the base to taper (estimate 28 sc around). Use markers to keep count.
Round 6 :
Vein texture: With navy, surface crochet a running line down the center: attach yarn at leaf base, sc in a line toward tip placing visible stitches, fasten off at tip. Repeat with parallel shorter veins on each side using chain-less surface slip stitch technique.
Round 7 :
Edge detail: Work picot or crab stitch (reverse sc) around edge to create crisp outline. Fasten off and block leaf lightly curved for natural shape.
Info :
Make 12 leaves total: 6 larger leaves (as above) and 6 slightly smaller by working foundation ch 9 and repeating shaping. Attach beads at leaf junctions later during assembly.
— Small Four-Petal Blossom (Make 28) :
Round 1 :
MR, 6 sc in ring (6)
Round 2 :
*ch3, sl st in next st* repeat around to form 3 ch-3 loops (3 loops)
Round 3 :
In each ch-3 loop work (sc, hdc, sc) making 3 small petals; join and fasten off. Make 28 blossoms in cream; add navy center knot for contrast if desired.
Info :
These blossoms are used as filler between larger motifs and along vines. Block gently to flatten then use tiny stitches to sew into place later.
— Beaded Buds & Tiny Sphere Embellishments (Make 36) :
Round 1 :
With cream, MR, 6 sc (6) — fasten off leaving long tail for wrapping around small wooden beads
Round 2 :
Cover bead method: Thread bead onto tail, wrap yarn around bead interior and whip-stitch the crocheted cap to hide hole. Sew securely so bead sits tight within cap.
Round 3 :
For tiny navy spheres use MR, 6 sc made with navy, pull tight and fasten off leaving tail to sew into vines. Make 36 mixed size bead-caps and tiny spheres.
Info :
These beaded buds create the dotted texture that mimics berries in the photo. Use a mix of covered wooden beads and crocheted balls for variation.
— Filigree Vine Connector Panel (Make 6 panels) :
Round 1 :
MR, 8 sc in ring (8)
Round 2 :
(1 sc, inc) x8 (24)
Round 3-4 :
1 sc in each st (24)
Round 5 :
Info : Change to cream yarn for delicate vinework. Carry navy inside if you plan to attach a navy leaf directly at the edge.
Round 6 :
*ch6, sl st into next st to create long chain loop* repeat around making 4-6 loops depending on panel size
Round 7 :
Into each chain loop work lace branches: ch3, sc, ch5, picot, sl st into loop to create branch tip — repeat to make 6 branches per loop.
Round 8 :
Extend branches: from branch bases, ch7 and slip-stitch back into panel to create second-tier loops. Work small blossoms or bead buds into alternate loop centers.
Round 9 :
Edge join points: Leave 3 evenly spaced ch-5 loops on each side to act as join points for the large medallions and leaves. These loops will be used during assembly to stitch panels together when forming the runner.
Info :
Each panel is a flexible lace piece that can be stretched slightly when joining. Block panels flat and pin join points in a straight line before sewing motifs together.
Round 10 :
Weave tiny spheres and bead-caps into branch tips by sewing through loop centers with tapestry needle. Secure each bead with extra thread for durability.
Round 11 :
Edge finishing: sc evenly around entire panel to provide a firm border for sewing. Fasten off and weave ends.
— Edge Lace Scallop & Decorative Pointing (Make two long edges) :
Round 1 :
Along the runner edge where panels meet, work a round of sc evenly spaced to create a continuous edge foundation (count based on join; estimate 220-260 sc for full runner length).
Round 2 :
*ch5, sl st in 3rd sc from previous scallop base to form scallop loops* repeat along entire edge creating uniform loops
Round 3 :
Into each ch-5 loop work (sc, hdc, 5 dc, hdc, sc) making pronounced scallops. Work a picot at the tip of every third scallop for delicate points.
Info :
Work edge scallops while panels are joined to ensure consistent spacing and symmetry. If your runner is longer or shorter, adapt the number of scallops to suit length.
Round 4 :
Optional bead fringe: Tie or sew bead-capped spheres and small navy spheres at scallop valley points to mimic the photo's dotted fringe. Space beads evenly between scallops.
— Tassel & Beaded Tail Finishing (Make 2 tassels for each end or one per end) :
Round 1 :
Cut 120 strands of navy yarn 25 cm long. Fold in half and loop through a 6 cm cord or wrapped yarn neck to create tassel top. Wrap neck tightly with yarn to form a neat head.
Round 2 :
Attach wooden beads: Using the long end of runner center chain, string 3 beads in pattern cream-navy-cream. Secure above tassel neck and sew bead positions to runner base.
Round 3 :
Trim tassel evenly and comb through strands to make flat and full. Attach tassel to runner end by sewing through top loops and reinforcing with strong thread.
Info :
Two tassels provide a tailored finish. For a single tassel per end, scale bead pattern to maintain visual weight. Consider a wooden bead as a weight so runner drapes well on table.
— Joining & Assembly Instructions (Detailed Join Sequence) :
Round 1 :
Lay out items: central medallion, two secondary flowers, filigree panels, leaves and small blossoms in desired symmetrical order on blocking board. Pin each piece to hold layout.
Round 2 :
Pick up tapestry needle and matching cream yarn. Sew medallions to filigree panels by stitching through the prepared ch-5 join loops and the medallion's corresponding sl st base. Use ladder stitch through adjacent loops for invisible joins.
Round 3 :
Attach leaves: Position large sculpted leaves so veins align with runner's radial lines. Sew through leaf base into panel join points using whipstitch; make 12 stitches per leaf to secure firmly.
Round 4 :
Sew small blossoms and bead-caps into branch tips. Use short length of sewing thread to stitch bead-caps through panel loops, then knot and weave ends back into motif for security.
Round 5 :
Edge finishing: Once panels are all joined and decorative elements sewn on, work the scallop edge by inserting hook through outer joins and crocheting the edge pattern in place—this binds the runner neatly.
Info :
Pin entire runner on blocking board and steam-block carefully to set stitches. The blocked runner will have crisp lace openings resembling the image's filigree look. Allow to dry completely before removing pins.
— Finishing Touches & Final Blocking :
Round 1 :
Weave all loose ends into the nearest seam or decorative row at least 4-6 cm before trimming. Use the tapestry needle to split yarn plies into tight fabric for invisibility.
Round 2 :
Give the runner a final check: reinforce any bead attachments and re-sew if wobble is felt. Ensure tassels are symmetric and hang straight.
Info :
For long-term care: hand-wash gently in cold water with mild detergent and lay flat to dry. Avoid machine washing which relaxes cotton and may distort blocked motif shapes.
— Notes on Scaling & Customization :
Round 1 :
To lengthen runner: add additional filigree panels and secondary flowers in the repeating sequence central medallion—panel—secondary—panel. Each additional panel adds roughly 30 cm depending on blocking.
Round 2 :
Change color scheme: invert navy/cream for lighter or warmer palettes. For a monochrome look use one color throughout and accent with metallic beads.
Info :
If you want a denser runner, double up on filigree panels side-by-side before joining, creating a wider central band with richer texture.
This elegant floral lace table runner adds instant sophistication to any table setting. Each layered medallion and sculpted leaf combines texture and contrast in navy and cream to create a timeless centerpiece. The modular construction makes it easy to customize the length and add personal touches like beads or different colors. Enjoy the calming rhythm of making motif after motif, then watching them come together into a beautiful finished piece. 🧶🌿