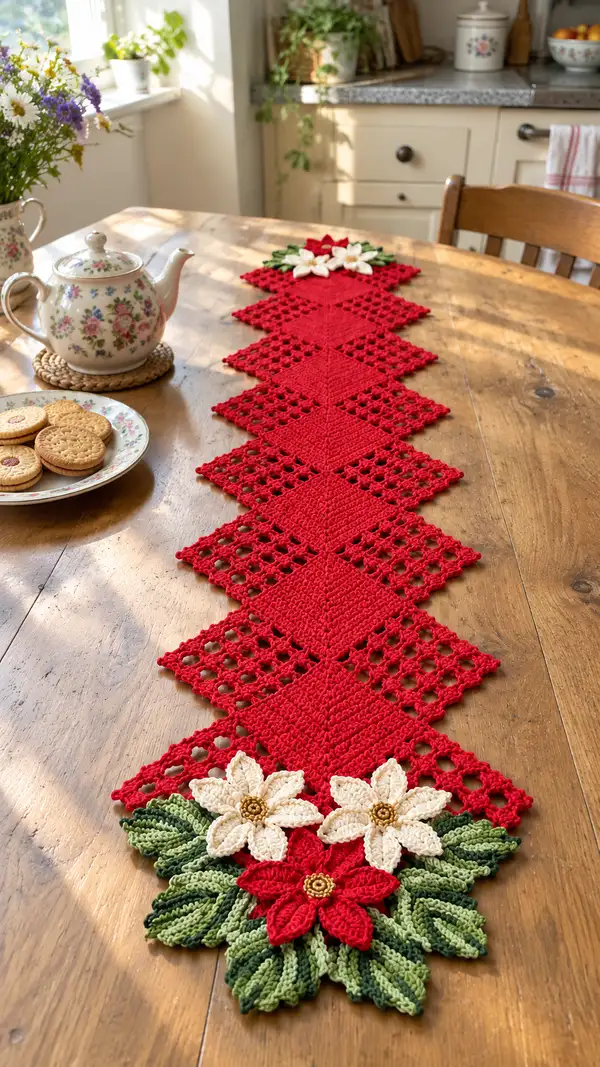
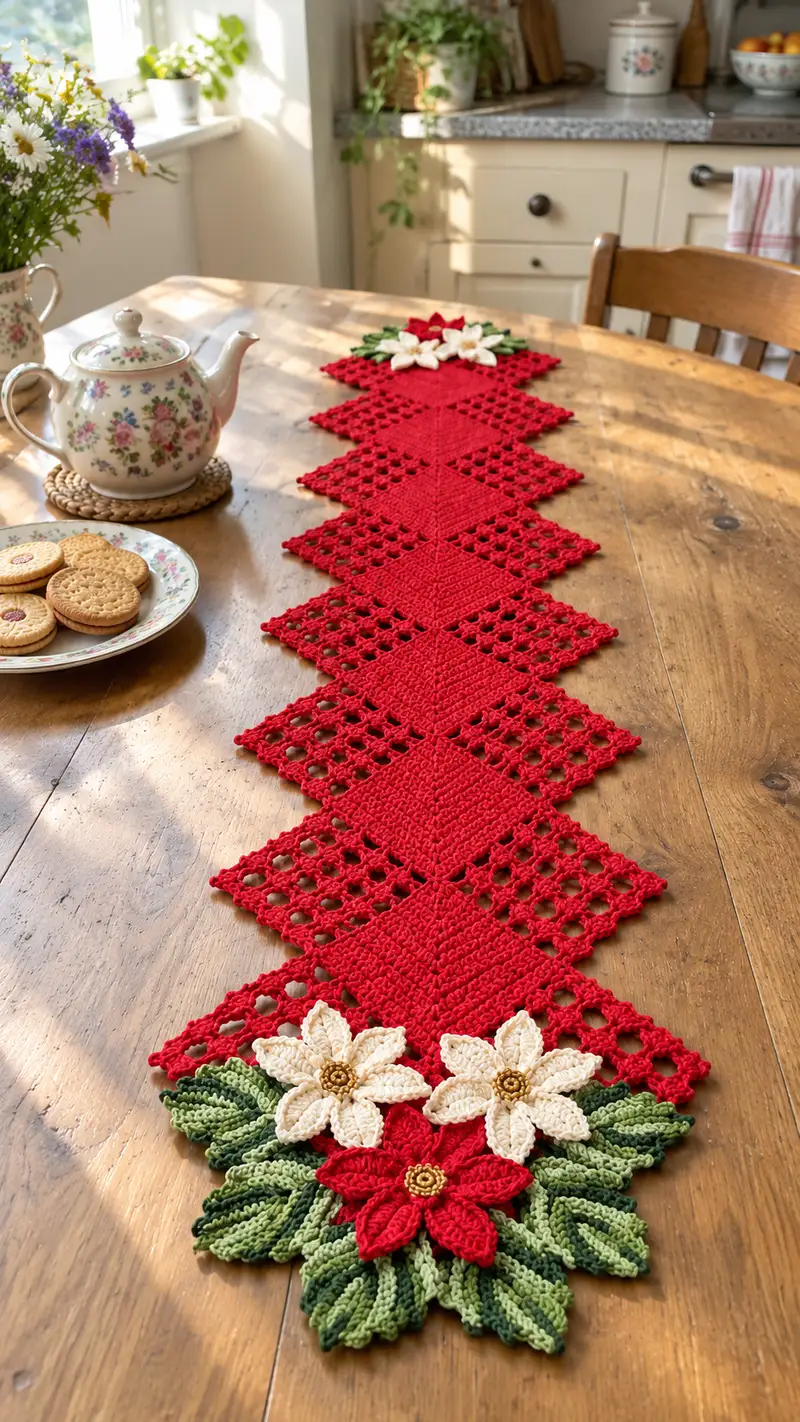
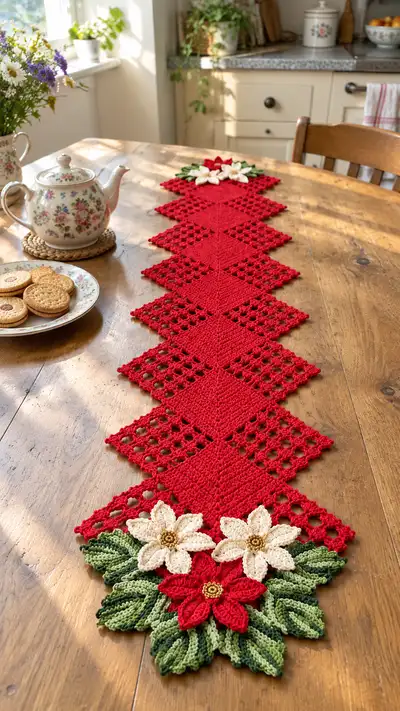
Create a festive diamond table runner featuring alternating solid and lacy diamond motifs, joined point-to-point, finished with layered poinsettia flowers and textured leaves. Worked in crisp cotton yarn for a clean, holiday-ready look, this runner is perfect for the dining table or sideboard. The pattern uses classic granny-style clusters, filet lace mesh, and layered appliques to achieve an heirloom appearance. Clear step-by-step instructions, assembly tips and variations are included to guide you to a professional finish.
Progress Tracker
0% Complete
— Overview and Gauge :
Info :
Gauge: With 3.5mm hook and DK cotton, a finished solid diamond motif measured flat (corner to corner across one diagonal) should be approximately 22cm (8.5in). Adjust hook if your motif measures significantly different. This pattern is modular — repeat motif counts to lengthen runner.
Info :
Construction Summary: You will make alternating Solid Diamond Motifs and Lacy Diamond Motifs. Join them point-to-point using a join-as-you-go (JAYG) method on one diagonal edge, then finish with a scalloped border. Attach layered poinsettia appliques to each end: 2 cream flowers, 1 red flower, and multiple layered leaves as shown.
— Solid Diamond Motif (Make 9) :
Info :
This motif is worked as a square in rounds and is later placed on point to form a diamond. Work in continuous rounds or join rounds as you prefer. Use main red color. The motif is dense — worked primarily in dc clusters and sc rounds to produce a flat, stable square.
Round 1 :
Ch4, join with sl st to form ring. Ch3 (counts as first dc), 2 dc into ring, ch2 (corner made), *3 dc into ring, ch2* repeat 2 more times — overall you have 4 groups of 3 dc separated by ch2 corners. Join with sl st to top of ch3. (12 dc, 4 ch2 corners)
Round 2 :
Sl st into next 2 dc to reach corner ch2 space. Work (3 dc, ch2, 3 dc) into same corner ch2 space, *ch1, sk next 3 dc cluster, (3 dc, ch2, 3 dc) in next corner ch2 space* around; join to top of beginning ch3 with sl st. (4 corner shells, 4 ch1 spaces between corners)
Round 3 :
Begin in corner: (3 dc, ch2, 3 dc) in corner ch2, *ch1, sc into ch1 space from previous round, ch1, (3 dc, ch2, 3 dc) in next corner* around. Join. This sets a denser fill inside while keeping corner structure.
Round 4 :
Work around in pattern: in each side between corners you will work 3 dc clusters separated by sc + ch1 pockets. Specifically: In corner (3 dc, ch2, 3 dc), across side work: *ch1, sc in ch1 space, ch1, (3 dc) in next side space* until you reach next corner. Join. This begins to square the piece with even sides.
Info :
Check motif is lying flat after Round 4 — if edges ripple, tighten tension slightly or block later. Keep corners consistent; the ch2 at corners creates the sharp diamond point after rotating the square on point.
Round 5 :
Repeat Round 4, adding one additional 3-dc cluster in each side between corners as needed to maintain flatness. Work (3 dc, ch2, 3 dc) in each corner. Join. (Sides now show 2 or 3 cluster repeats depending on growth)
Round 6 :
Continue as Round 5: increase clusters evenly along sides: in each side work (sc, ch1, 3 dc) pairing across until distance between corner shells is filled. Join. This rounds builds a full solid face across the motif.
Round 7 :
Work one full round of sc in each dc and sc across to flatten face: 1 sc in each dc and sc, and (1 sc, ch2, 1 sc) in each corner ch2. Join. This creates a smooth surface for the central section and evens out cluster texture. (Approx stitch count ~96 sc depending on previous cluster count)
Round 8 :
Switch to hdc round for slight ridge detail: Work 1 hdc in each st across sides and (1 hdc, ch2, 1 hdc) in corners. Join. This is optional if you prefer more texture.
Info :
At this point your square should measure approximately 11-12cm corner-to-corner across the shorter diagonal (when on point). If larger or smaller, adjust hook in future motifs to maintain consistent size when joining.
Round 9 :
Work 1 dc in each st around keeping (3 dc, ch2, 3 dc) in corners for stability. Join. This adds body and weight for a flat diamond look when rotated.
Round 10 :
Work a finishing round: *ch1, sk next st, sc in next st* across each side to give a delicate picot-like texture; in corners work (sc, ch2, sc). Join and fasten off, weave in ends. (If you prefer a true picot edge, work (sc, ch3, sl st) in every 6th stitch)
Info :
Make the number of Solid Motifs needed: In the sample runner there are 9 solid diamonds alternating with 8 lacy diamonds. Make 9 solid motifs unless you choose a different length.
— Lacy Diamond Motif (Make 8) :
Info :
The lacy motif is built using filet technique to create open squares (eyelets) across the surface. Work in rounds with dc and chains to produce neat grid holes. Use main red color.
Round 1 :
Ch16, join with sl st to form a ring (16-ch ring). Ch3 (counts as dc), dc in next 15 ch; join to top of ch3. (16 dc)
Round 2 :
Ch3, dc in same st, ch2, sk 1 dc, *dc in next 2 dc, ch2, sk 1 dc* repeat across placing (2 dc groups) and ch2 corner spaces at 4 equidistant points — create 4 corner pockets. Join. (This round establishes corner ch2 spaces that will be used as corners)
Round 3 :
Work filet rows around: In corner work (dc, ch2, dc) in corner; across side work pattern: *ch1, sk 1, dc in next*, leaving chain-1 mesh spaces as required for openwork. Join. (Approx equal numbers of ch1 meshes per side)
Round 4 :
Continue filet: In each side between corners work alternating blocks of dc and (ch1 + dc) to create a 4x4 mesh pattern: (dc, ch1) x 8 across the side ending at corner. In corners work (dc, ch2, dc). Join.
Info :
Count chain meshes to ensure each side has the same number of ch1 spaces; this keeps the square straight and prevents skewing. If needed, add or reduce one ch1 mesh per side to compensate for tension.
Round 5 :
Repeat Round 4 to grow the lacy panel to match the dimensions of Solid Motif. Maintain corner (dc, ch2, dc) and work mesh blocks across sides. Join.
Round 6 :
To square the motif, work one round of sc across the dc and sc across ch1 spaces as: sc into each dc, sc in each ch1 space, and (sc, ch2, sc) in corners. Join and fasten off. Block to shape before joining.
Info :
Make the number of Lacy Motifs needed: In the sample runner there are 8 lacy diamonds alternating with solid ones. Again, adjust count to alter runner length.
— Join-As-You-Go (JAYG) Point-to-Point Assembly :
Info :
Rotate squares on point: each square's corner is the top/bottom point. You will join motifs diagonally so that one corner of a motif meets the adjacent corner of the next motif. Use a join-as-you-go slip-stitch or single-crochet join for a clean flat seam.
Round 1 :
Prepare first motif edge: On RS, align second motif with first so corners match. Begin at corner point of base motif. Attach yarn to corner ch2 and ch1 to secure.
Round 2 :
Join with sl st method: Working along side edge, *sl st through next stitch of motif A, then sl st into corresponding stitch or ch space of motif B*; continue across side until reaching corner. At corner, work (sl st, ch2, sl st) through corner ch2 spaces to secure. Fasten off.
Round 3 :
If you prefer an invisible single crochet join: With RS facing, insert hook through corresponding stitches of both motifs, sc through both loops, continue across. This creates a slightly raised seam but is very strong.
Info :
Pin motifs together before joining to ensure points and sides align exactly. Use a removable stitch marker at midpoints to map matching stitches if your side stitch counts differ by one or two due to tension differences.
Round 4 :
Join the runner by alternately adding motifs: start with one solid diamond, join a lacy diamond to its lower corner, then add the next solid to the next corner of the lacy motif, continuing until full length is reached. Work joins on only one diagonal edge per motif so the opposite edge remains clean prior to the final border.
Info :
After joining each motif, lightly block the seam to flatten and ensure the runner stays flat across the table. Repeat until all motifs are connected in alternating order. Check daily alignment before final border.
— Outer Border and Edge Finishing :
Round 1 :
Once all motifs are joined, work a round of sc around entire runner to tidy raw joins: Attach yarn at a point of a corner. Work 1 sc in each st and 3 sc in each corner point to keep edges neat. Join and fasten off.
Round 2 :
Work a decorative picot round: *sc in next 2 sts, (ch3, sl st into first ch to form small picot), sc in next 2 sts* across each side; in corners work (sc, ch3, sl st into first ch, sc). This gives the neat dotted edging that is visible between diamonds in the photo.
Round 3 :
For a slightly raised rope edge, work 1 round of reverse single crochet (crab stitch) along the outermost boundary: insert hook in previous st from left to right and work sc backwards. This helps the runner lie flat at table edges.
Info :
Block the entire runner after the border is complete. Pin carefully to maintain diamond geometry and steam or wet block until dry. Use light pressure when ironing or steaming cotton to keep clarity of lace holes.
— Poinsettia Flower Appliques (Make 3 clusters at each end) :
Info :
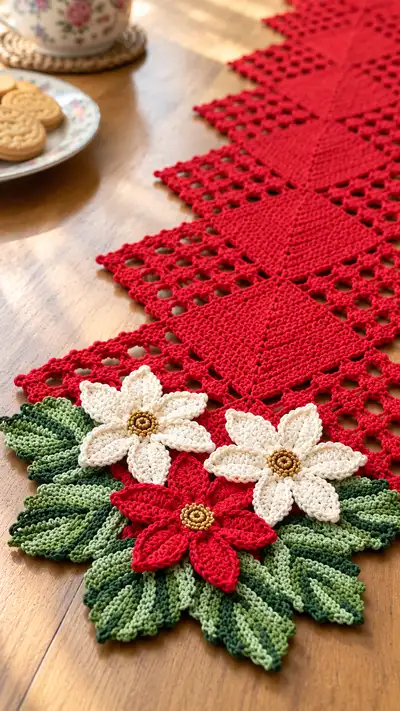
Each end cluster features three poinsettia flowers: 2 cream 6-petal flowers and 1 red 6-petal flower layered over multi-shade leaves. Make 2 cream petals, 1 red petal flower, and leaves as individual appliques then assemble and sew to runner ends.
Flower Center - Round 1 :
With gold yarn, ch2, 8 sc into second ch from hook (or magic ring with 8 sc). Join with sl st to first sc. (8)
Flower Center - Round 2 :
*Ch1, (2 sc, ch1) into each sc around* to create a slightly raised center; join and fasten off. This produces a small textured button to sew into petal base.
Info :
Make three centers in gold for each flower cluster. Optionally, sew a small round bead to the top center for vintage sparkle.
Petal Base - Round 1 :
With cream (for cream petals) or red for red petals, ch5, join with sl st to form ring. Ch1 (does not count), work 6 sc into ring. Join. (6 sc)
Petal Round 2 :
Work 6 petals around: *ch3, in next sc work (sc, hdc, 2 dc, hdc, sc)*, join with sl st to first sc. Fasten off leaving long tail for sewing. Each petal uses 6 base stitches so you will complete 6 petals evenly around. Petals are formed as shells of increasing height for a layered look.
Info :
For the fuller look in the photo the petals are worked in two layers: make one round of petals as above, then overlay a second slightly smaller set of petals offset between the first petals with a different color or same color depending on desired fullness.
Petal Layer 2 :
Using same petal base, join at the tip of a petal with sl st, ch1 and work smaller petals between each large petal: *(sl st to mid of next base sc, ch2, (sc, hdc, dc, hdc, sc))* repeat around 6 times. Fasten off, weave in ends.
Info :
Stiffen petals slightly by blocking each petal on a small absorbent surface and pinning into shape, steam lightly and allow to dry for a defined petal shape that sits proudly on the runner.
— Leaves (Make 14–18) :
Info :
The leaves are layered under the flowers, worked in two shades of green to create depth. Each leaf is worked in rows with FLO and BLO texture for ribbing. Use Leaf Green for main body and Forest Green for veins/edges on alternate leaves.
Leaf - Row 1 :
Ch12 (or ch10 for a slightly smaller leaf). Row 1: sc in 2nd ch from hook and across (11 sc). Turn. (11)
Leaf - Row 2 :
Ch1, sc in first st, *FLO hdc in next 2 sts, hdc in next 2 sts, BLO hdc in next 2 sts, sc in last 2 sts*; turn. This creates FLO and BLO texture bands that look like leaf ribs. (11)
Leaf - Row 3 :
Ch1, sc decrease once at base to taper: sc2tog at start, continue FLO/BLO pattern across, sc2tog at end to taper tip. Fasten off leaving long tail for sewing. Block leaf onto curve when wet to produce natural curling look.
Info :
Alternate colors as you make leaves to mimic the layered effect in the photo: make some leaves entirely Leaf Green, some with a row of Forest Green along the center rib, and a few with Forest Green as outline by stitching a contrasting surface slip-stitch after blocking.
— Assembling Flower Clusters :
Info :
Stack leaves in fan shapes: place dark leaves underneath for shadow and lighter leaves on top. Position flower centers and petals over leaves with red flower slightly offset so the cream flowers sit slightly behind. Pin in position prior to sewing.
Assembly Step 1 :
Sew gold center to red petal base using whipped running stitches around base. Then secure red petals to leaves by sewing through leaf bases and petal bases with matching yarn tail hidden to underside of arrangement.
Assembly Step 2 :
Sew cream flowers overlapping the red flower as seen, using slip stitches held from the underside, then tack to runner at the edge diamond so flower centers sit exactly at the diamond edge point. Hide tails carefully and secure with small knots buried inside stitches.
Info :
Use small dabs of fabric glue under centers if you plan to use the runner frequently; this gives additional holding power. If using beads, sew beads into center last to avoid damaging beads by steam blocking.
— Finishing Touches and Tips :
Info :
Weave in all ends running tails into nearby stitches and knotting invisibly where necessary. After final assembly pin the runner flat and steam-block so that diamond points are crisp and the lacy holes open consistently. Trim stray fibers and check for evenness.
Info :
If you want a stiffer, table-protecting runner insert a thin interfacing or ribbon along the underside center before attaching appliques for extra weight and durability. Sew through the holes of lace sections so the interfacing is discreet.
Info :
To change length: add or remove entire motif repeats and finish ends with symmetrical flower clusters. To make a square table topper, arrange motifs in a diamond grid of 3x3 or 5x5 instead of a single long row.
This Poinsettia Diamond Table Runner is a delightful heirloom piece that brings holiday sparkle to any home. The alternating solid and lacy diamonds give classic structure while the layered poinsettia appliques add hand-crafted charm and dimension. Each motif is satisfying to make and the modular construction means you can easily customize length and color scheme. Enjoy the meditative repetition and the joyful reveal as the runner comes together — it's the perfect seasonal project to make and to gift. 🧶🌺🎄