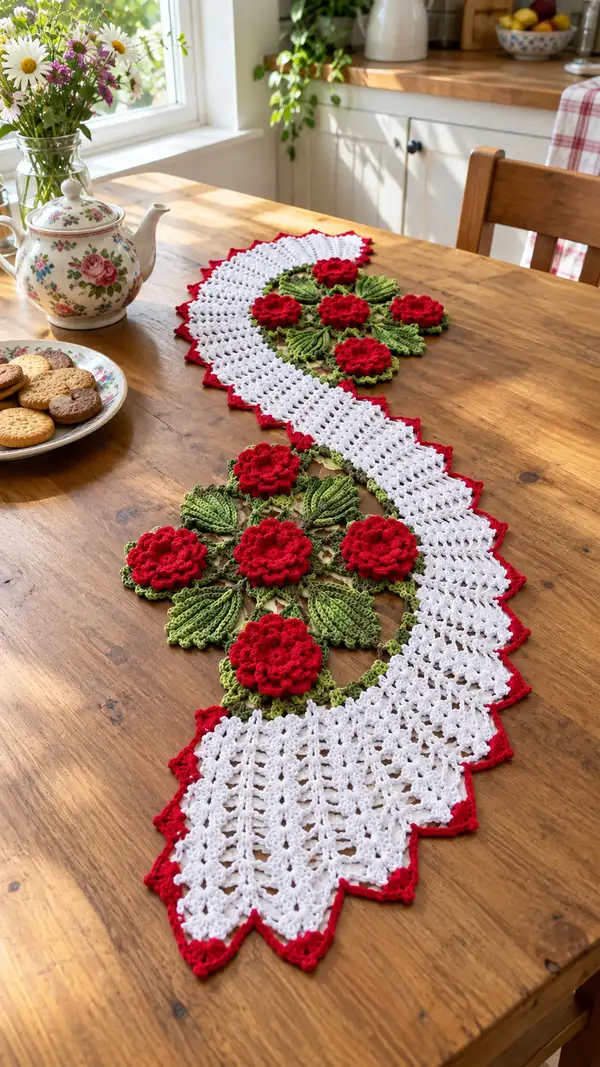
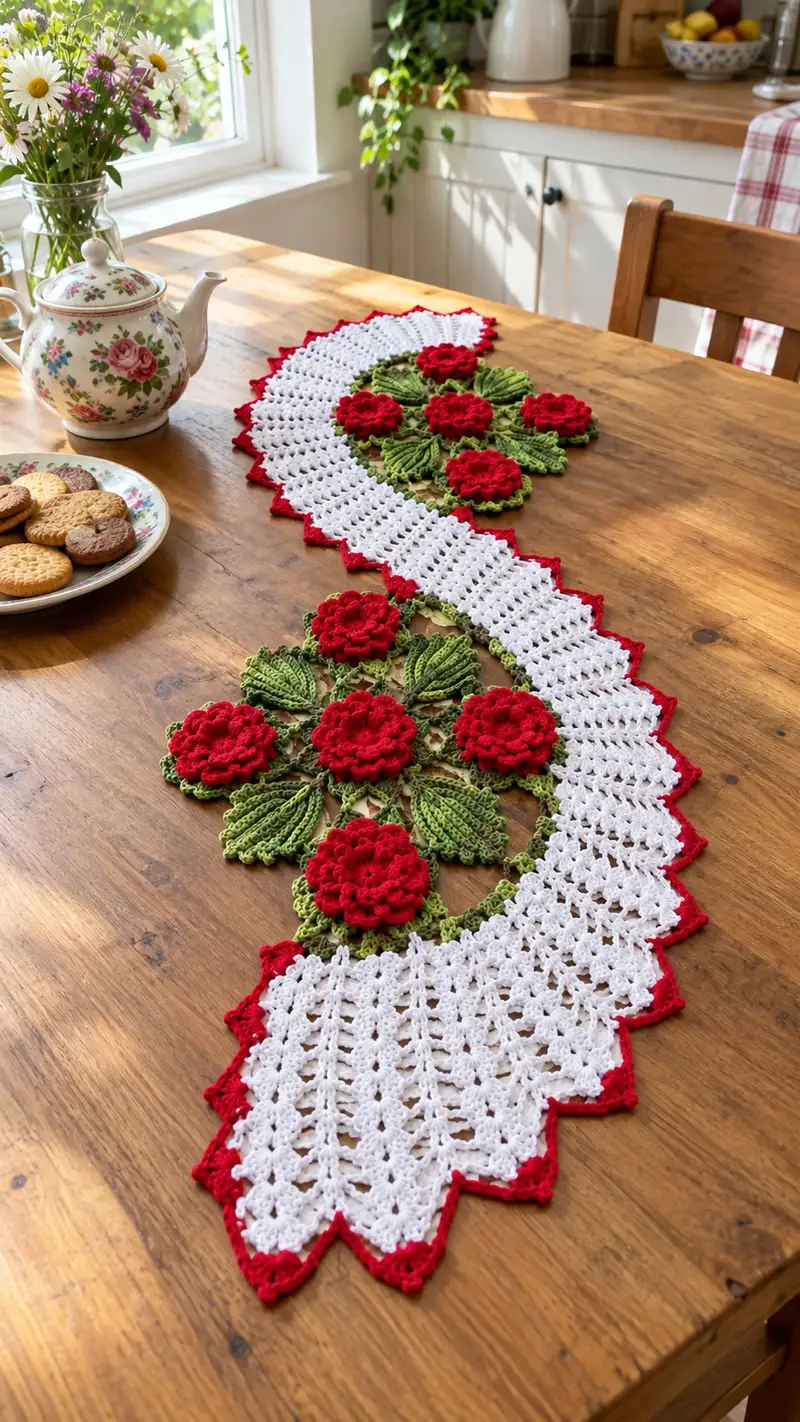
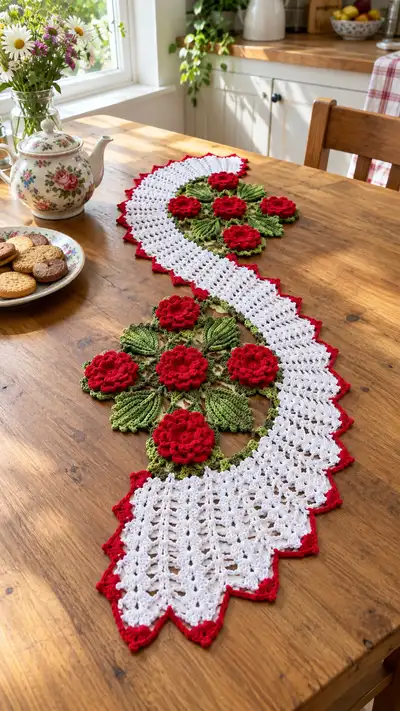
Create a graceful, vintage-inspired table runner featuring layered red roses, textured green leaves and a lacy white fan body with a red scalloped edge. This pattern uses modular floral motifs joined with lacework to form a flowing S-shaped runner. Ideal for country, cottage, or holiday tablescapes—beautiful in cotton for durability and a crisp finish.
Progress Tracker
0% Complete
— Notes & Overview :
Info :
This pattern is modular: you will make separate rose motifs, leaf motifs, and small connector motifs. After blocking each motif, you will arrange them into three clustered floral medallions along the center spine, join them to form the green lace connector, and then work the white lacy fan body around and between the medallions. Finally add the red scalloped edge. Adjust number of motifs to change runner length.
Info :
Gauge is not strict for this decorative piece but for consistent size use DK cotton and a 3.5mm hook: 10cm square in double crochet grid = approx 16 dc x 8 rows. Block motifs to measurements before joining.
— Rose Motif (Make 7) :
Round 1 :
Make magic ring, ch1, 6 sc in ring, pull tight (6)
Round 2 :
Inc in each st around (12)
Round 3 :
(1 sc, inc) x 6 (18)
Round 4 :
(2 sc, inc) x 6 (24)
Info :
Rounds 1-4 create a small, stable disk that acts as the rose center. Keep tension slightly firm to support layered petals.
Round 5 :
Ch1, sc in same st, *ch3, skip next sc, sc in next sc* around to create 12 ch3 loops (24 sc base)
Round 6 :
Into each ch3 loop work petal: (sc, hdc, 3 dc, hdc, sc) in each loop. Join with sl st to first sc. (12 petals; stitch count remains conceptually 24 base stitches)
Info :
Work petals gently — do not pull yarn tightly inside clusters; petals should cup slightly for a natural rose look.
Round 7 :
Sl st into space between petals to reach base, *ch4, sl st into next space between petals* around to make 12 ch4 loops for second petal layer
Round 8 :
Into each ch4 loop work larger petal: (sc, hdc, 5 dc, hdc, sc). Sl st to join. (12 larger petals)
Info :
Offset second layer petals between the first layer for full coverage. Use hook one size smaller if petals feel loose.
Round 9 :
Slip stitch around to the top of each second layer petal and *ch5, sl st into next top* repeat 12 times to make loops for the outer layer.
Round 10 :
Into each ch5 loop work full outer petal: (sc, hdc, 7 dc, hdc, sc). Finish with sl st. Fasten off leaving a 20cm tail for sewing. (Decorative petal layer complete)
Info :
Optional: Gently fold and tack petals with a few small stitches using the leftover tail to give a cupped rose shape. If you prefer a looser rose, skip tacking.
Round 11 :
Using red, make a small 5-loop center embellishment: join in central back, ch6, sl st to create a small knot-loop if you want more height. Fasten off and weave ends.
Info :
Make 7 roses for the pictured layout (3 in top cluster, 3 in bottom cluster, 1 central connector). You may make fewer for a shorter runner.
— Leaf Motif (Make 18-20) :
Info :
Leaves are worked flat in rows to achieve the long textured ribbed look seen in the photos. Each leaf uses a foundation chain of 18 to create an elongated shape. Make 18-20 leaves so each floral cluster can have 6 leaves arranged around it and a few extra for the runner center.
Row/Round 1 :
Ch18; 1 sc in 2nd ch from hook, 1 sc in each ch to end (17 sc), continue working on opposite side of foundation chain: 1 sc in each returning ch except last (16 sc) — total 33 sc (leaf base)
Row/Round 2 :
Turn, ch1, sc in first 2 sts, *hdc in next 3, dc in next 5, hdc in next 3, sc in last 2* — maintain 33 sts (Textured center ridge begins)
Row/Round 3 :
Turn, ch2 (counts as hdc), *fpdc around corresponding dc below for raised rib, hdc in next 2, sc in next 2, hdc in next 2, fpdc along next dc* — 33 sts; work fpdc to create the central vein effect
Info :
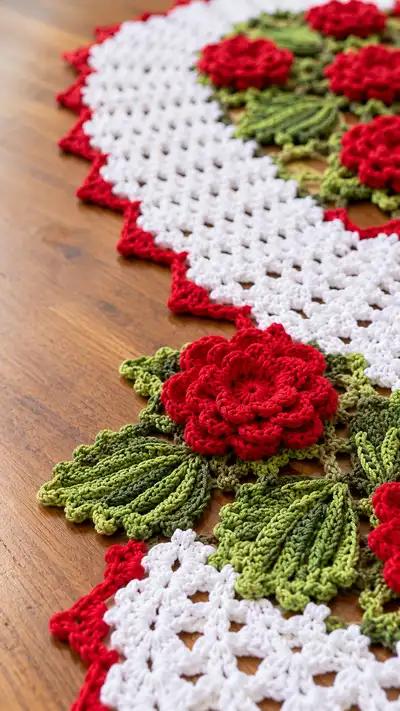
Front post dc rows create the raised ribbed vein visible in the image. Maintain consistent tension so ribs sit flat when blocked.
Row/Round 4 :
Repeat Row 2 but decrease 1 st at each leaf tip to create a gently tapered end: work until final two stitches then sc2tog for a tapered finish (31 sts)
Row/Round 5 :
Turn, ch1, sc across 31 sts in BLO to create a crisp edge (31)
Row/Round 6 :
Turn, ch2, (dc, hdc, sc) across center ribs to add scalloped edge texture; maintain 31 conceptual sts (decorative)
Row/Round 7 :
Turn, ch1, sc across 31 sts; fasten off leaving 15cm tail for sewing
Info :
After making leaves, steam or wet-block them flat and slightly curve along the central vein. Arrange leaves around roses before final joining to check placement.
— Small Connector Motif (Make 6 for joining clusters) :
Round 1 :
mr, ch1, 8 sc in ring, pull tight (8)
Round 2 :
2 sc in each st around (16)
Round 3 :
*(sc, ch3, sc) in next st; skip next st* repeat 8 times to make 8 chain loops; sl st to join (16 base)
Round 4 :
Into each ch3 loop work (sc, 3 dc, sc) to form small petal lobes. Sl st to join, fasten off. Leave tails for sewing joins.
Info :
These small green connector motifs fill gaps and provide anchor points for the white lacework. Use a slightly darker green to create definition against the leaf tones if desired.
— Assembling Floral Clusters :
Info :
Arrange three roses and six leaves into a roughly circular medallion (see photo). Pin pieces on blocking mat to match spacing. Use the small connector motifs at the gaps between petals and leaves to create secure anchor points for the white lacework later.
Step :
Sew roses to a lightweight, removable backing or tack them to each other with small whip stitches through the base disks using long tails. Sew leaves around edges, making sure petal overlap looks natural.
Info :
Make two large clusters (top and bottom of runner) with 3 roses each, and one smaller cluster of a single rose to sit in the center curve. Leave connector motifs free so they can be used to anchor the lace body.
— White Lacy Fan Body (Main Runner Section) :
Info :
The white body is worked as a wide curved strip using shell and chain-granny combinations. You will work a foundation chain of 81 (or adjust in multiples of 6 + 3) for the initial width; the example below uses ch81 for a runner about 10-12 inches wide at the widest point. Work rows as 'rounds' for consistency with motif instructions.
Round 1 :
Ch81, dc in 4th ch from hook (counts as first dc cluster), *skip 2 ch, (3 dc) in next ch, ch1, skip 2 ch* repeat across until last 3 ch, end with 3 dc in last ch (creates a row of shell clusters). Count: approx 26 shell clusters depending on spacing.
Round 2 :
Turn, ch3 (counts as dc), *3 dc in ch1 space between shells, ch1* repeat across to end, dc in top of turning ch. Maintain 26 shells (26 shells x 3 dc each = 78 dc worked in clusters)
Info :
Row 2 builds the lattice; keep turning ch=3 to maintain height. When working near floral medallions, join by slip-stitching into connector motifs instead of working free spaces — details follow.
Round 3 :
Turn, ch3, *skip next dc, (3 dc) in next dc, ch1* repeat across to end; maintain shell count (26 shells). At edge shells work 2 shells into end to expand curve.
Round 4 :
Turn, ch2, *1 hdc in each of next 3 dc, ch1 between shell groups* repeat across creating a low row that stabilizes the fan. Maintain overall width.
Info :
To shape the S-curve, every 6th shell decrease by skipping a shell (omit working into one ch1 space) to pull the row inward slightly, and at the outer curve increase by working two sets of shells into one space. Make a schematic: increase on rows 6, 14, 22 and decrease on rows 9, 17, 25 etc to create the gentle S wave.
Round 5 :
Turn, ch3, *3 dc in ch1 space, ch1* repeat across but in positions marked for the outer curve work (3 dc, ch1, 3 dc) in same ch1 space to add a local increase (this will create a slight bulge equal to an extra shell). Maintain stitch math by balancing increases with decreases on following rows.
Round 6 :
Turn, ch3, work shells as before across the row; follow schematic to ensure the curve placements remain symmetrical down the strip. Count shells and ensure symmetry: if row 5 had 27 shells due to local increase, row 6 should also have 27 shells.
Info :
Work Rows 3–10 as a repeating shell pattern, checking the placement of floral medallions. Stop every 4-6 rows to pin the runner over the clusters to ensure the white lace lines flow between the roses and connector motifs as in the photo.
Round 7 :
Turn, ch3, *3 dc in each ch1 space, ch1* repeat across. When you reach the area where a connector motif should be, instead of working 3 dc into the ch1 space, sl st into the connector motif's outer loop, ch1, then resume shells. This attaches the white lace to the green connectors as you go.
Round 8 :
Repeat Round 2 pattern but on each side of the central medallion work one extra shell into the outermost ch1 spaces to expand the curve where the red rose cluster meets the white lace.
Round 9-16 :
Repeat Rounds 3–8 twice more, following the curve schematic. Maintain shell counts and symmetry. Total shell count should remain within +/- 1 across rows if increases/decreases are balanced properly.
Info :
At this stage you will have a long white strip with shells. Check the overall length against your table: if it's too short, add 2–4 more rows of shells; if too long, remove symmetric rows in the central portion so the floral medallions remain centered.
Round 17 :
Turn, ch2, 1 hdc in each dc across but in ch1 spaces work (hdc, ch1, hdc) to keep the lattice open; this row tightens the fabric slightly and prepares for the scalloped red edge.
Round 18 :
Turn, ch3, work shells across again but in every 7th shell reduce to (2 dc, ch1, 2 dc) to create subtle shaping and prevent flaring at the ends. Keep track of total shells per row so edges remain consistent.
Round 19-30 :
Work repeating shell rows (as Rounds 2–8) alternating with stabilization rows (hdc rows as Round 17) until you have reached the desired runner length. In the pictured layout, work a total of 30 shell rows (approximately 15 shell row pairs plus stabilization rows) which yields a runner approximately 90-100cm long when blocked with DK cotton and a 3.5mm hook.
Info :
If your runner will include more floral medallions, pause every few rows to slip-stitch into connector motifs or chain spaces around the clusters. Secure edges with temporary pins before final sewing.
— Joining Floral Clusters to White Body :
Info :
Pin all floral clusters and connector motifs to the white lace strip to find exact join points. You may need to remove a small number of shells to insert clusters without bulk. Join using slip stitches through the connector loop and one or two sl st through petals and leaves to anchor.
Step 1 :
Position bottom cluster approximately 6-8 shells from one end, center cluster near the middle S-bend, and top cluster about 6-8 shells from the opposite end. Pin firmly.
Step 2 :
Using long tails from the connector motifs, whip stitch them to the white lace from the back, then work 1–2 sl st from the white strip into the connector loops to lock them in. Reinforce with a few invisible stitches for strength.
Info :
Leave a small gap between white shells and red petals to allow the red rose edge to overlap the white slightly like the photo. This prevents the white from looking like a frame and instead integrates it into the floral composition.
— Red Scalloped Edge :
Info :
Work edging after all motifs are joined and the runner is blocked and pinned flat. Use the red yarn and a smaller hook (3.0mm) for a tidy scallop.
Round 1 :
Join red yarn at any outer shell top; ch1, sc evenly around the outer white edge, working 1 sc into each dc and 3 sc into each ch1 space between shells; adjust so red sc count around edge is divisible by 6 to create symmetric scallops.
Round 2 :
*Ch3, sl st into same st (picot), skip 1 sc, in next st work (5 dc, ch2, 5 dc) to make a deep scallop, sl st to next sc* repeat around to create pointed scallops where visible in photo. Repeat count so scallops align with white shell points (approx 14-16 scallops per outer curved edge depending on length).
Round 3 :
Work a finishing row of sc in BLO around scallop bases to stabilize, sl st to join and fasten off. Weave in ends neatly on the reverse side.
Info :
For an alternate look, use a simple (5 dc shell) edging with small picots between shells to imitate a crocheted lace trim rather than deep scallops.
— Final Finishing Touches :
Info :
Press gently with a warm steam iron from the backside using a cloth barrier or wet-block each motif and the completed runner to even out stitches. Pin scallops to exact shape during blocking and allow to dry fully.
Round/Step :
Weave in all tails, reinforcing every motif join with 2–3 extra small stitches where visible. Trim any stray ends flush with yarn needle. Lightly steam to remove any small bumps.
Info :
Optional: Add a small fabric backing (lightweight felt) to the underside of the center clusters if you want extra surface protection for delicate tables.
Your Elegant Rose Table Runner will transform your table with vintage romance and handmade charm. Each rose and leaf is crafted with care, joined into a flowing lace ribbon that adds a delicate focal point to meals and gatherings. Enjoy the slow, satisfying process of assembling the motifs and watching the runner come to life — it makes a beautiful heirloom or gift. 🧶🌹 Treat yourself to the pleasure of blocking and finishing; the small details truly shine. ✨