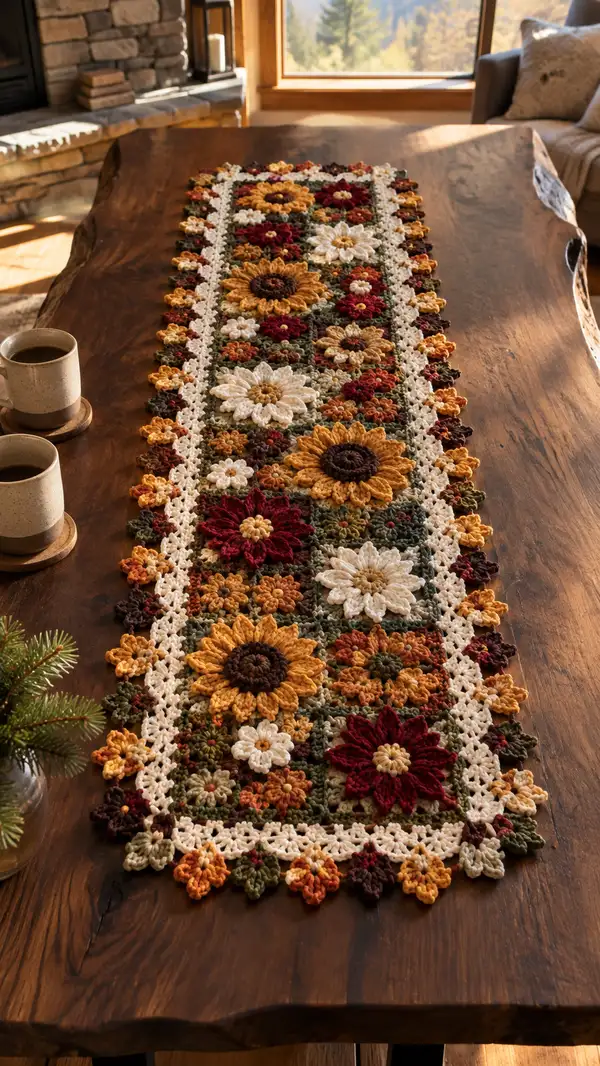
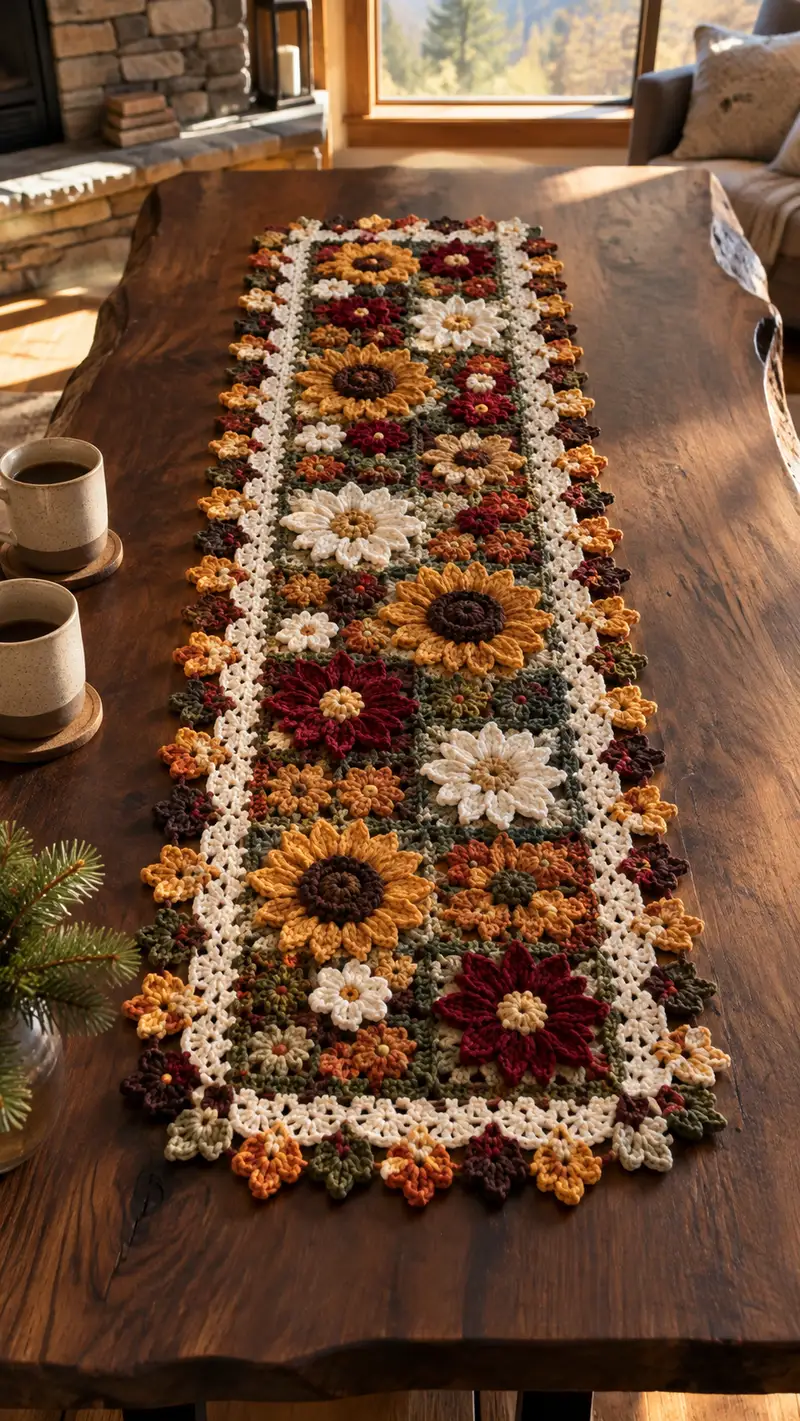
This autumn-inspired table runner features layered sunflower and cream daisy motifs set on olive granny squares, joined into a long runner with a delicate cream border and scalloped floral edging. Rich mustard, deep rust, berry and warm neutral tones create a cozy seasonal centerpiece. The pattern uses modular motifs, join-as-you-go techniques, and textured petal work for a dimensional finished piece.
Progress Tracker
0% Complete
— Notes and Gauge :
Info :
This pattern is worked modularly — you will create floral motifs and granny-square bases, then attach flowers to squares and join squares into a long runner. Gauge is flexible for decorative table runners, but aim for 18 sts and 16 rows = 4 in (10 cm) in single crochet on 4.0 mm hook for consistent motif sizing.
Info :
Use stitch markers to mark the start of rounds. Work tightly for a firm fabric so the backing squares lay flat under layered petals. Block each square and motif lightly before joining for best results.
— Sunflower Base (center rounds) :
Round 1 :
6 sc in magic ring (6)
Round 3 :
(1 sc, inc) x 6 (18)
Round 4 :
(2 sc, inc) x 6 (24)
Round 5 :
(3 sc, inc) x 6 (30)
Info :
This small brown center will be slightly domed. If you prefer a very flat center, work the rounds looser or substitute 2 rounds only. Change to Chocolate Brown yarn before Round 1.
Round 6 :
1 sc in each st (30)
Round 7 :
(4 sc, inc) x 6 (36)
Round 8 :
1 sc in each st (36)
Info :
Fasten off and leave a 12-14 inch tail to stitch the center to the petal layer later. Center should measure approximately 2-2.25 in (5-5.5 cm) across depending on tension.
— Sunflower Petal Round (first petal foundation) :
Round 9 :
Join Mustard Gold in any st; ch 1, sc in same st, *ch 3, sk 1 st, sc in next st; rep from * around to create 12 ch-3 loops total (12 loops)
Round 10 :
Work petals into each ch-3 loop: (sc, hdc, 3 dc, hdc, sc) in each loop — 12 petals. Fasten off, weave ends (12 petals)
Info :
Petal cluster above is formed over ch-3 loops; keep petals slightly puffed by working with a slightly larger hook (optional) or pulling loop gently before completion to create definition.
— Sunflower Outer Petal Round (layering for large sunflower) :
Round 11 :
With Mustard Gold, join behind the previous petal base by inserting hook through the center-back loop area between two petals; ch 1, sc, *ch 4, sk to next petal base, sc between petal back loops; rep from * around to make 12 ch-4 loops (12 loops)
Round 12 :
In each ch-4 loop work (sc, hdc, 5 dc, hdc, sc) to form larger outer petals; 12 outer petals total. Fasten off and weave ends (12 petals)
Info :
For more dimensional petals, use BLO on outer petals for a slightly cupped look. Place petals evenly so outer layer sits neatly behind inner petals.
— Sunflower Finishing and Center Sewing :
Round 13 :
Re-attach Brown center: using long tail from Round 8, place center over petal bases and mattress stitch around the base through center back loops and petal foundation to secure; ensure center covers inner petal joins
Info :
Sew center securely with even tension to avoid petals flaring out. Weave the tail through several petals to anchor the layer then trim.
Round 14 :
Optional: Using a small amount of dark brown or burgundy, embroider tiny french knot-like clusters in the brown center by sewing small loops into the center to resemble sunflower seeds (non-structural decoration)
Info :
If you desire flatter sunflower heads for lying flush on the square base, slightly flatten while stitching and do not over-stuff petals.
— Cream Daisy Motif :
Round 1 :
6 sc in magic ring with Light Tan or soft gold for small center (6)
Round 3 :
1 sc in each st (12)
Info :
Change to Cream yarn for petals. Leave a 10-12 in tail for sewing. This small daisy will be layered on a green square background.
Round 4 :
*ch 4, sl st in next st; rep from * around to make 6 ch-4 loops (6 loops)
Round 5 :
In each ch-4 loop work (sc, hdc, 3 dc, hdc, sc) — 6 petals. Fasten off, leave tail for sewing (6 petals)
Info :
Small daisies are intended to sit flat and can be made in alternation with small rust flower motifs for the clustered look.
— Small 5-Petal Blossom (filler flower) :
Round 1 :
6 sc in magic ring with accent color (rust or burgundy) (6)
Round 2 :
*ch 3, sl st in next st; rep around to create 6 ch-3 loops (6 loops)
Round 3 :
In each ch-3 loop work (sc, 3 dc, sc) to make small puff petals. Fasten off (6 petals)
Info :
These small blossoms are worked quickly and used to fill gaps between larger motifs. Make many in varying colors for depth.
— Granny Square Base (single square, worked in rounds) :
Round 1 :
With Olive/Forest Green, ch 4, join with sl st to form ring, ch 3 (counts as first dc), 2 dc in ring, ch 2, *3 dc in ring, ch 2; rep from * 2 more times; join with sl st to top of ch-3 (4 clusters, ch-2 at corners)
Round 2 :
Sl st into next 2 dc to reach corner ch-2, ch 3, 2 dc in same corner, ch 2, 3 dc in same corner, *skip to next corner, (3 dc, ch 2, 3 dc) in corner; rep from * around; join (8 clusters)
Round 3 :
Ch 3, 3 dc in next sp between clusters, 1 dc in next dc, *3 dc in next sp, 1 dc in each of next 3 dc; rep around, placing (3 dc, ch 2, 3 dc) in each corner; join (around 24-28 dc depending on exact placement)
Info :
Work 3 rounds of granny clusters in olive to establish a textured, slightly mossy background. Keep corners square and consistent. Block square to dimensions approximately 4.25-4.5 in per square.
Round 4 :
Work one even round: dc in each st and 3 dc in corner ch-2 spaces to even out edges (continue until square measures approximately 4.25 in across with the yarn and hook specified)
Round 5 :
Change to Variegated Rust or alternate color to add subtle shading: ch 1, sc evenly around working 1 sc in each dc and 3 sc in each corner (this creates a small frame for sewing flowers). Fasten off and weave ends.
Info :
Squares are intentionally slightly small so that when flowers are sewn on they fill the central area and reach into surrounding chains. Make 15-18 squares for a long runner layout (adjust quantity to desired runner length).
— Attaching Flowers to Squares :
Round 1 :
Position flower motifs on squares before sewing using pins; typical layout: 1 large sunflower or cream daisy centered, 2-4 small filler blossoms around it depending on square size
Info :
Sew centers through the square background using long tails and a yarn needle. Use small invisible stitches through the back loops of both flower base and square to secure; avoid stitching through petals so they remain dimensional.
Round 2 :
For larger layered flowers, tack the inner petal layer at 6 evenly spaced points around base, then tack the outer petal layer at 8-12 points in between to keep layers offset and tidy (no stitch counts necessary; ensure even spacing)
Info :
Use color-coordinated small stitches and weave tails through the square's reverse to hide ends. Pin and check squares lay flat after sewing; reblock if necessary.
— Join-As-You-Go Row Joining (joining two squares) :
Round 1 :
Place two squares RS together where edges meet. Join with Olive on 4.0 mm hook at corner ch-2 space, ch 1, sc into same corner of Square A, *sc through both loops of corresponding st of Square B and Square A along the edge (join-as-you-go), rep across to next corner; in corner work (sc, ch 2, sc) through both squares; continue joining squares in row (stitch count equals sts along edge)
Info :
Maintain tension so the seam is flat — if seam pulls too tight, use a larger hook for joining. For long runner, join squares into 3 columns by however many rows you need to achieve desired length (pin placement matters).
Round 2 :
After joining a full row, work a single crochet border along the long edge to even out joins: sc evenly across the joined seam, placing 3 sc in each corner ch-2 (counts will vary by number of joined sts)
Info :
Keep corners neat and square. Repeat the join-as-you-go to connect rows into the full runner assembly. Weave in ends on the wrong side as you go to keep work tidy.
— Central Narrow Cream Border (frame rounds) :
Round 1 :
With Cream, join in any corner ch-2 of assembled runner, ch 3 (counts as dc), work 2 dc in corner ch-2, ch 1, *dc evenly along side edge in each sc or dc (maintain 1 dc per sc/dc), when you reach corner work (2 dc, ch 1, 2 dc) in corner ch-2 space; rep around entire runner; join with sl st to top of ch-3 (counts will vary; record your counts for reference)
Info :
Ch-1 at corners gives a lacy framed effect. Work the cream border slightly looser to create an even lacy frame between the floral columns.
Round 2 :
Ch 1, sc in each dc around, placing (sc, ch 3, sc) in each corner to create delicate chain corner spaces (counts equal number of dc from previous round)
Info :
If runner edge seems small or too tight, forgo sc round and instead work hdc for a slightly taller frame. Always try on-runner drape by folding a corner to check flatness before proceeding.
— Cream Lacy Border Rows (multiple rounds) :
Round 3 :
Ch 3, *skip next st, (3 dc, ch 1, 3 dc) into the next st (cluster), skip next st, dc in next st; rep around to form alternating clusters and single dc for lace effect. Join with sl st (counts depend on prior round)
Round 4 :
Ch 1, sc in each st and into ch-1 spaces between clusters to form a flat foundation for final scallop edging (even out counts; adjust by adding sc in cluster ch-1 if needed)
Info :
Inspect the runner now; ensure edges are even. Block the runner flat again before scallop edge to set dimensions.
Round 5 :
Ch 1, sc in next 2 sts, *(sc, ch 4, sc) in next ch-1 space between clusters to create loops for scallops; sc in next 2 sts; rep around. Join with sl st (creates loops for decorative flowers)
Info :
These ch-4 loops are where small edge flowers will be anchored. Ensure loops are evenly spaced; adjust by adding or removing a sc between loops if your total loops do not divide evenly around runner sides.
— Scallop Edge Small Flower Attachment (repeated edge units) :
Round 1 :
Into each ch-4 loop around the border, join color of choice (mix mustard, rust, burgundy and olive) and work (sc, ch 3, sl st) to create a small picot-like base — fasten off leaving tail for sewing additional petal
Round 2 :
Rejoin and work (ch 2, 3 dc, ch 2, sl st) back into the same loop to create a 5-petal motif; fasten off. Repeat into each loop around runner edges (number of edge flowers equals number of loops)
Info :
Alternate colors on the edge and cluster similar colors for a cohesive fall palette. Weave short tails to underside. Make sure petals lie flat and do not overlap the central cream border excessively.
— Outer Petal Accents and Leaf Sprigs :
Round 1 :
To create small leaves, with Olive, ch 6, sc in 2nd ch from hook, hdc in next, dc in next 2 ch, hdc in next, sc in last ch; sl st into base to form leaf. Make 24-30 leaves to tuck around larger flowers and edge clusters.
Round 2 :
Optional: for texture, work an edging of BLO sc across leaf bases before attaching to squares to create a ridge. Fasten off and leave tails for sewing.
Info :
Attach leaves by sewing one edge into seams between flower and square background so leaves splay outward naturally. Group 2-3 leaves behind large sunflowers for a realistic arrangement.
— Extra Large Poinsettia-Like Deep Red Flower (accent motif) :
Round 1 :
6 sc in magic ring (6)
Round 3 :
(1 sc, inc) x 6 (18)
Round 4 :
Make 8 ch-3 loops around by *ch 3, sl st in next st; rep (8 loops)
Round 5 :
In each ch-3 loop work (sc, 5 dc, sc) to create full deep red petals — 8 petals total; fasten off leaving long tail to sew to square
Info :
This deep red accent fills a square when used in place of a sunflower for variety. Sew similarly to sunflower, tucking small filler blossoms and leaves around base.
— Assembly: Full Runner Join Sequence :
Round 1 :
Arrange squares in the desired order and pin in place on a flat surface. Typical layout alternates large sunflowers and cream daisies across three central columns with filler flowers in the outer columns.
Round 2 :
Begin at one short end and join squares into the first row using Join-As-You-Go Row Joining instructions above; proceed until you have one long row for each of the three columns needed for the runner width.
Round 3 :
Join these rows together using the same join-as-you-go method but working across the long edges to create a flat runner. Ensure all top edges align and seam tensions are even; pin heavily if needed.
Info :
Take regular breaks to check alignment and flatness. If one section pulls, locate the join and rework with a looser tension or add a few extra sc across the seam to compensate.
— Final Blocking and Finishing Rounds :
Round 1 :
Block the completed runner flat using pins and a steam iron on low or wet blocking depending on yarn fiber. Shape scallops and petals to lie as desired and let dry completely.
Round 2 :
Weave in all remaining ends on the wrong side using a tapestry needle. Trim excess threads and inspect for any loose petals that need additional tacking.
Info :
If any petals refuse to lie flat, apply a small amount of fabric stiffener sparingly on the petal back and reshape while drying. Avoid using too much product to maintain a soft look.
— Variation: Changing Runner Size and Motif Density :
Info :
To make a narrower runner, reduce the number of squares per row; for a longer runner, add more rows. You can also replace some sunflower squares with groups of smaller flowers for a more textured, mosaic look.
Info :
For table protectors, consider adding an extra backing layer in a solid color worked as a flat rectangle and sewn to the underside of the runner for extra durability and weight.
This cozy sunflower and cream daisy runner brings warm autumn charm to your table with rich colors and layered texture. Each floral motif is a small work of art — assembling them into a runner is endlessly satisfying. I hope this pattern inspires you to create a centerpiece full of seasonal cheer and handmade detail. 🧶🍁 Whether you keep it for your own table or gift it, it’s a heartfelt project to treasure. Happy stitching! 🌻