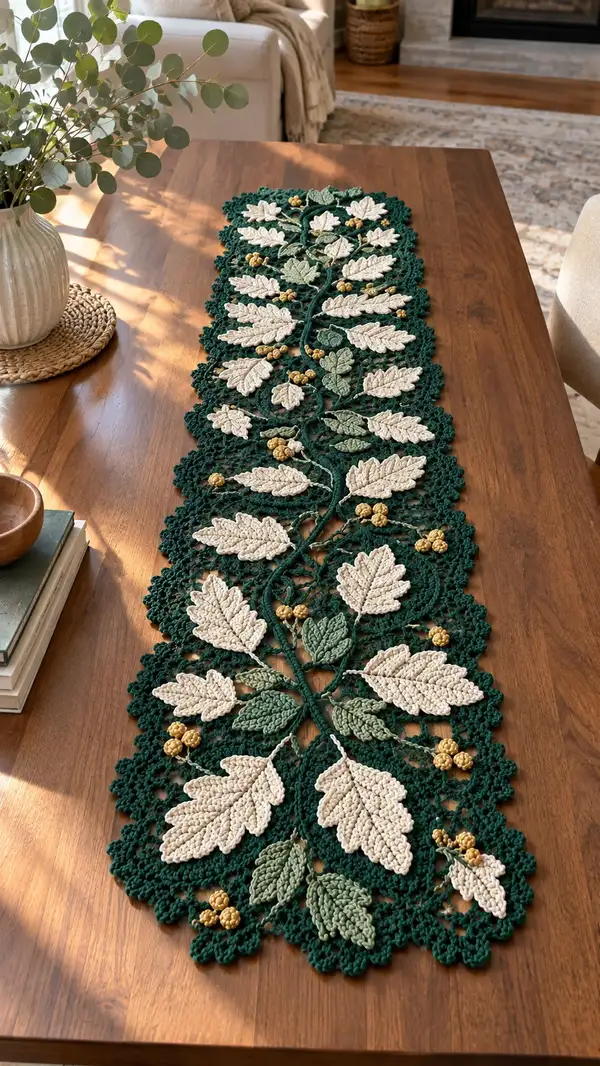
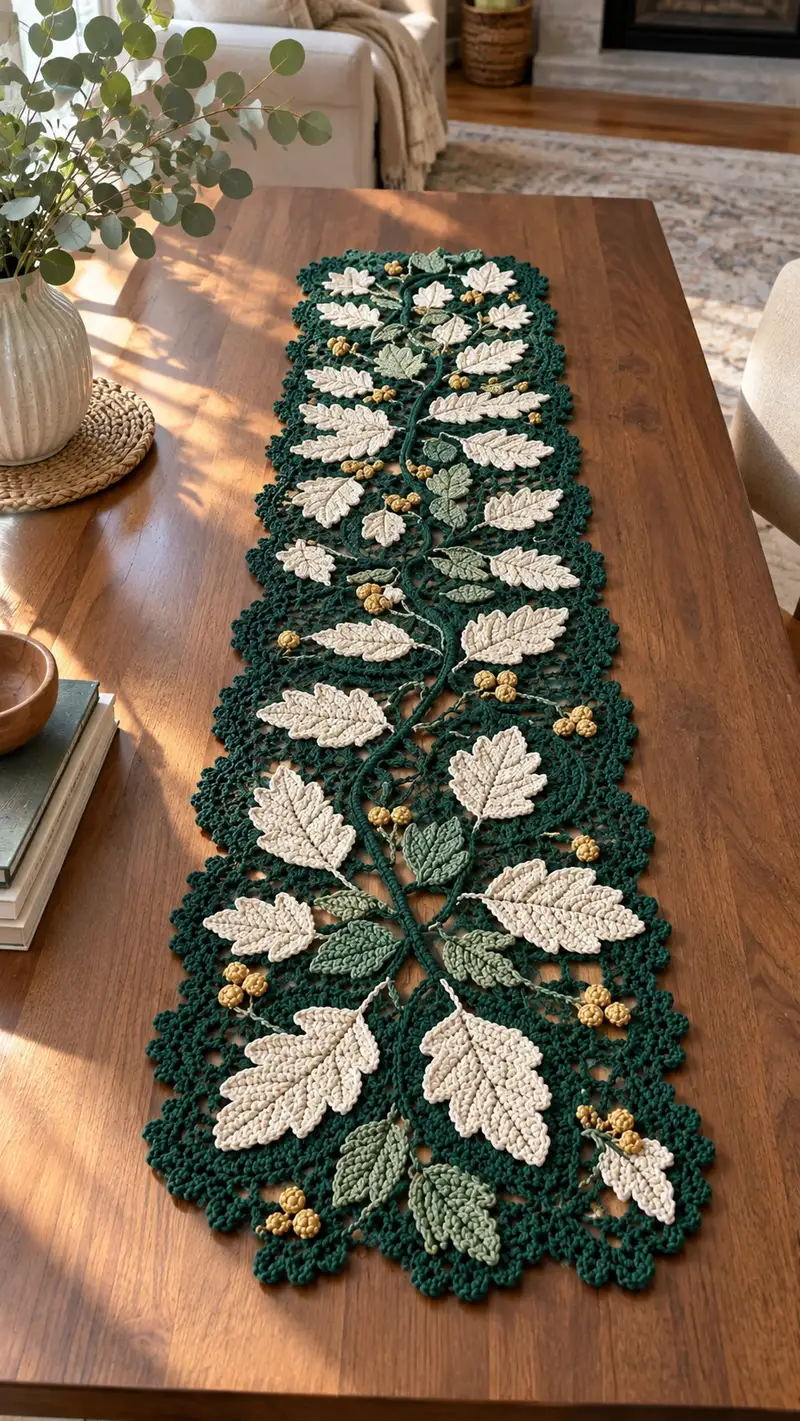
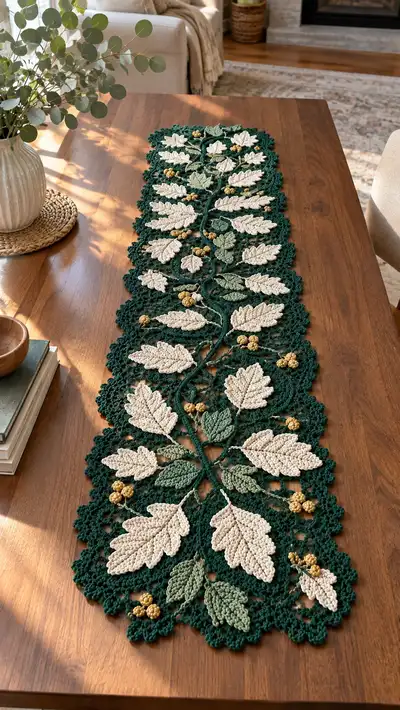
Create a stunning botanical table runner inspired by layered oak-like leaves, delicate vines, and tiny clustered berries. This pattern uses layered motifs in deep forest green, soft cream and muted sage with golden bobbles for a natural, vintage look. The runner is made from repeatable medallions, crocheted leaves and joined with a central braided vine — perfect for a dining table centerpiece or seasonal decor.
Progress Tracker
0% Complete
— Overview & Gauge :
Info :
This pattern is modular: you will make multiple lacy medallions, large cream leaves, small sage leaves and golden bobble clusters, join them along a surface-crocheted vine and finish with a scalloped edge. With worsted weight cotton and a 3.5mm hook the main medallion measures approximately 11.5cm (4.5 in) across; each large leaf measures about 10–11cm (4–4.5 in) long. Adjust the number of repeats to fit your table.
Info :
Gauge (example): One medallion center (Rounds 1-12) = approx. 11.5cm across when worked in worsted cotton and 3.5mm hook. Leaves are intentionally textured and use BLO/FLO techniques for ridges — tension will affect final size.
— Central Vine (make 1 long vine strip; work in sections to desired length) :
Round 1 :
Ch 60 (foundation chain length; make a longer chain if your runner will be longer). Turn and sl st in 2nd ch from hook and each ch back to beginning to form a dense cord (59 sl st). This creates the vine base. (59)
Round 2 :
Working along the back bumps or through both loops if preferred, ch1, 1 sc in same st and in each sl st across to end; fasten off and leave long tail for joining. (59)
Info :
If you prefer a rope-like vine, use sc through back loop only in Round 2 to create a subtle ridge. Work vine in sections of 60 chains and join sections by sl st and whipstitch to avoid lumps.
Round 3 :
To create a 3D twisted vine, with RS facing and using forest green, attach yarn to one end and *ch 3, sl st in next 2 sc, ch 3, fpdc around next 3 sc; rep from * across to end to make decorative texture. Fasten off. (Decorative repeats dependant on chain count)
Info :
Work vine in multiple strips and sew them together slightly overlapping so the vine has a slight braid; leave extra tail for surface crochet attachments when assembling leaves and medallions.
— Lacy Medallion (Make as many medallions as needed for runner length; typical runner pictured uses 9 medallions) :
Round 1 :
With forest green yarn, mr, 8 sc in mr. Pull tight. (8)
Round 3 :
(1 sc, 1 inc) x 8 (24)
Round 4 :
(2 sc, 1 inc) x 8 (32)
Round 5 :
(3 sc, 1 inc) x 8 (40)
Info :
Work these increases tightly to make a firm medallion center. If your mr is sloppy, work Round 1 as ch4 loop and sc into loop as an alternative.
Round 6 :
1 sc in each st (40)
Round 7 :
(4 sc, 1 inc) x 8 (48)
Round 8 :
1 sc in each st (48)
Round 9 :
*Ch 3, skip 2 sc, sl st in next sc; rep from * around to create spaced loops for leaf attachments. Join with sl st. Approximate loop count = 16
Info :
These loops are the anchor points where leaf stems will be attached. Position them evenly; if you have fewer loops, increase by adding ch5 loops in next round instead.
Round 10 :
Attach yarn in a ch-3 loop, ch1, work 8 sc into ch-sp to make a small raised cup; sl st to next loop and repeat in each loop around to create 16 small cups for a textured surface. (16 cups)
Round 11 :
With RS facing, *ch4, 3 dc in cup, ch4, sl st into space between cups; rep around forming slight petals. Fasten off. (16 petal groups)
Round 12 :
Join yarn and work 1 sc in each petal group working through both loops across petals (approx 48 sc around). (48)
Round 13 :
(6 sc, ch3, sl st into next st) x 6 - distribute these clusters evenly to form scalloped lobes between petal groups. Result will vary slightly depending on distribution but aim for 18 scallops.
Info :
The medallion scallops provide the background that frames leaves. Keep edges uniform by counting from the center point and blocking after assembly.
Round 14 :
Work picot scallop: *sc 5 in scallop base, picot, sl st in center of next petal; rep around forming a defined edge. Fasten off and weave in ends.
Info :
Light blocking of the medallion will open the picot scallops and ensure consistent joins when assembling the final runner.
— Large Leaf (Cream) : (Make 14 — or as many as medallions require) :
Round 1 :
mr, 6 sc in mr. (6)
Round 3 :
(1 sc, 1 inc) x 6 (18)
Round 4 :
(2 sc, 1 inc) x 6 (24)
Round 5 :
(3 sc, 1 inc) x 6 (30)
Info :
These first increases build the leaf base and width. Work firmly to keep the leaf flat; do not over-tighten in magic ring.
Round 6 :
(4 sc, 1 inc) x 6 (36)
Round 7 :
(5 sc, 1 inc) x 6 (42)
Round 8 :
1 sc in each st (42)
Round 9 :
1 sc in next 7 sts, ch4, skip 4 sts, 1 sc in next 14 sts, ch4, skip 4 sts, 1 sc in remaining sts — this begins shaping the midrib channel for leaf elongation. (42)
Info :
The ch4 spaces create the seam where the leaf will be folded slightly and the midrib worked on later. Keep these spaces even on left and right sides of the leaf.
Round 10 :
Turn to work along the leaf edge as if in rows: sc 10, (hdc, dc, tr) in next 6 sts to form raised serration, sc remaining sts to tip; this creates a textured tooth along the edge. (42)
Round 11 :
Working FLO only across this round to raise the ridge: 1 sc in each st FLO (42)
Round 12 :
Begin tapering: (6 sc, 1 dec) x 6 (36)
Round 13 :
(5 sc, 1 dec) x 6 (30)
Info :
Start stuffing the large leaf very lightly with fiberfill if you want a subtle three-dimensional curve; do not overstuff — leaves should lie fairly flat when blocked.
Round 14 :
(4 sc, 1 dec) x 6 (24)
Round 15 :
(3 sc, 1 dec) x 6 (18)
Round 16 :
(2 sc, 1 dec) x 6 (12)
Round 17 :
(1 sc, 1 dec) x 6 (6)
Round 18 :
6 dec (3) — do not close completely; fasten off leaving a long tail for sewing. Gently shape the leaf by pulling tip slightly to create a tapered point; weave tail along lower edge to secure and hide opening. (3)
Info :
After finishing, block the leaf on a flat surface with pins to open the serrated edge. Use a few drops of water or a fabric steamer to set the shape. When dry, your leaf will lay flat and show the raised ridges from the FLO round.
Round 19 :
Optional mid-rib: With contrasting taupe or cream (same color as leaf but thinner yarn), embroider a line from base to tip using stem stitch through the center; anchor ends with a couple of small stitches under leaf body.
— Small Leaf (Sage) : (Make 20–24) :
Round 1 :
mr, 6 sc in mr (6)
Round 3 :
(1 sc, 1 inc) x 6 (18)
Round 4 :
(2 sc, 1 inc) x 6 (24)
Round 5 :
1 sc in each st (24)
Info :
Small leaves are flatter and less sculpted — they fit between larger leaves to create layered depth. Work tightly at the mr so the leaf tip is neat.
Round 6 :
1 sc in next 6 sts, ch3, skip 3 sts, 1 sc in next 12 sts, ch3, skip 3 sts, 1 sc in remaining sts (24)
Round 7 :
FLO: 1 sc in each st BLO to create raised rib on the outer edge (24)
Round 8 :
(3 sc, 1 dec) x 6 (18)
Round 9 :
(2 sc, 1 dec) x 6 (12)
Round 10 :
(1 sc, 1 dec) x 6 (6)
Round 11 :
6 dec (3). Fasten off leaving long tail for sewing. Block gently to open the edges and make sure midrib spaces are visible. (3)
Info :
You can add a single line of stem stitch down the center with a thin matching yarn to suggest a vein if desired. Small leaves should be slightly less stuffed than large leaves to allow the layering effect.
— Golden Berry (Bobble) : (Make clusters of 3–6 small berries; each cluster uses 3–6 bobbles) :
Round 1 :
With mustard/golden yarn and 3.0mm hook, mr, 6 sc in mr (6)
Round 2 :
6 inc (12) — optional if you want a slightly larger bobble (12)
Round 3 :
Work 1 round of sc in BLO to create a bulging base: 1 sc in each st BLO (12) or (6 if you did not increase).
Round 4 :
Bobble formation: *yo, insert hook, pull up loop, yo, pull through two loops on hook* — repeat 3 times in same stitch, yo, pull through all loops, ch1 to close bobble. Sl st in next st. Rep around to create tightly packed bobble bumps; make 3–6 of these per cluster then fasten off leaving tails for sewing.
Info :
For compact bobbles work tightly and use a slightly smaller hook than medallions. Do not overstuff bobbles — a tiny pinch of fiberfill is enough before closing.
Round 5 :
Alternative single-bobble: ch2, 6 sc in 2nd ch from hook, sl st to join, fasten off (creates tiny round berry approx 6 sts). Leave tail to sew.
— Connector Tendrils & Leaf Stems :
Round 1 :
To make stems and tendrils, ch 20–30 (length as needed), sl st back along chain to form a cord (approx 19 sl st). Attach with sl st to vine or medallion at desired points. Repeat for each stem required. (cord)
Round 2 :
For thicker stems, work 1 sc in each sl st along cord (19) to enclose and create a sturdy stem. Fasten off and leave long tail. (19)
Info :
Surface crochet the stems onto the vine path when joining medallions: place stem, pin, then use a yarn needle and whipstitch to secure at several points. For a raised look, add a row of slip stitches on top of the stem after sewing it down.
Round 3 :
Make decorative spiraled tendrils by chaining 10–15, then 3 sc in 2nd ch from hook, 2 sc in next ch, 1 sc in each remaining ch; this will curl automatically into a spiral when released. Fasten off. (spiral)
— Leaf-to-Medallion Joining Motif (small connector motif; make many) :
Round 1 :
mr, 6 sc in mr (6)
Round 3 :
(1 sc, 1 inc) x 6 (18)
Round 4 :
1 sc in each st (18)
Round 5 :
Ch 6, sl st in opposite side of small circle to form an ovate connector loop; rep to make 2–4 loops per connector depending on placement; fasten off. (connector)
Info :
These small connectors are sewn between leaf stems and medallion loop spaces to secure and position the leaf orientation. They make assembly forgiving because they give precise anchor points.
— Edge Scallop & Final Border (work after all medallions are joined along vine) :
Round 1 :
With forest green and RS facing, join at any medallion outer picot. Ch1, sc evenly around medallion joins and connecting seams, placing 1 sc for every 3–4 sts or into each join space across runner edges to create a uniform foundation. (St count varies by runner width)
Round 2 :
*Ch3, skip 2 sc, sc in next sc; rep across entire runner edge to create looped border. At corners or rounded medallion outer edges, work 5 sc into one space to form a defined scallop. Fasten off. (looped border)
Round 3 :
With RS facing, rejoin yarn at any ch-3 loop: (sc, hdc, 3 dc, hdc, sc) into same loop to create a shell. Skip next loop and sc into next loop; rep across forming shell scallops spaced by one skipped loop. Fasten off after finishing edge. (shells)
Info :
Blocking the entire runner after the final border is essential to open scallops and lay the runner flat. Use pins and a spritz of water if using cotton yarn. Allow to dry completely before removing pins.
— Assembly Plan & Joining Sequence :
Info :
Layout plan: lay vine center strip on flat surface. Position medallions evenly along vine with approx 2–3cm gap between medallions; place large leaves on top of medallions in alternating directions (left/right) and fill gaps with small leaves and berry clusters. Pin everything in place before sewing.
Round 1 :
Sew each medallion to the vine using the long tail left on vine and medallion: use whipstitch through picot and vine at 6–8 equally spaced points to anchor medallion securely. Ensure medallions are centered over vine. (sewing steps)
Info :
When sewing leaves, attach leaf stems into the ch loops on the medallion (Round 9 loops) and secure with whipstitch through the base of the leaf and medallion. Use small connectors to prevent distortion of medallion shape.
Round 2 :
Sew large leaves into their positions: place them pointing outward from vine and sew through 5–7 stitches along the base of the leaf to the medallion cup to ensure a flat, secure attachment. Use ladder stitch when possible for invisible seams. (attachment)
Round 3 :
Sew small leaves and tendrils into spaces between large leaves and medallion scallops. Secure bobbles of golden berries in clusters near leaf bases: sew each bobble down using the tail and stitch into medallion center or to vine. (finishing)
Info :
For a natural look, stagger small leaves and berries so they do not mirror exactly across the runner centerline. Slightly rotate leaves as you sew them to create motion and organic flow.
— Final Blocking & Finishing Touches :
Round 1 :
After assembly, pin the entire runner onto blocking mats. Stretch gently to open scallops and align edges. Spray lightly with water and allow to dry completely (overnight).
Round 2 :
Weave in all tails securely on the WS. Use a small drop of fabric glue at key joins (vine to medallion) if the runner will be handled often, to prevent loosening. Trim any visible ends.
Info :
To adjust length, add or remove medallion units before adding the final border. If you need to make the runner narrower, omit a medallion in the center and rearrange leaf positions accordingly.
Round 3 :
Optional protective finish: apply a light spray starch following product instructions to give a stiffer tabletop protector. Test on a scrap piece first to ensure desired hand and sheen.
Info :
Care instructions: hand wash cold and lay flat to dry. Cotton may shrink slightly; blocking after washing will return shape. Avoid harsh chemicals on golden bobbles to prevent color change.
Round 4 :
Pattern variations: swap cream for deep ivory or blush for a softer palette; use linen blend yarn for a drapier runner; or substitute stitch patterns in medallion rounds to reflect your personal style.
This botanical table runner makes a memorable statement for seasonal tables or everyday elegance. Each medallion, leaf and golden berry is a tiny handcrafted element that comes together into a lush, organic centerpiece. Working modularly means you can tailor the runner to any table length — and you’ll enjoy the meditative rhythm of repeating motifs. 🧶🍂 I hope this makes your table feel warm and intentionally styled. Happy stitching and enjoy the glow of handcrafted decor! ✨