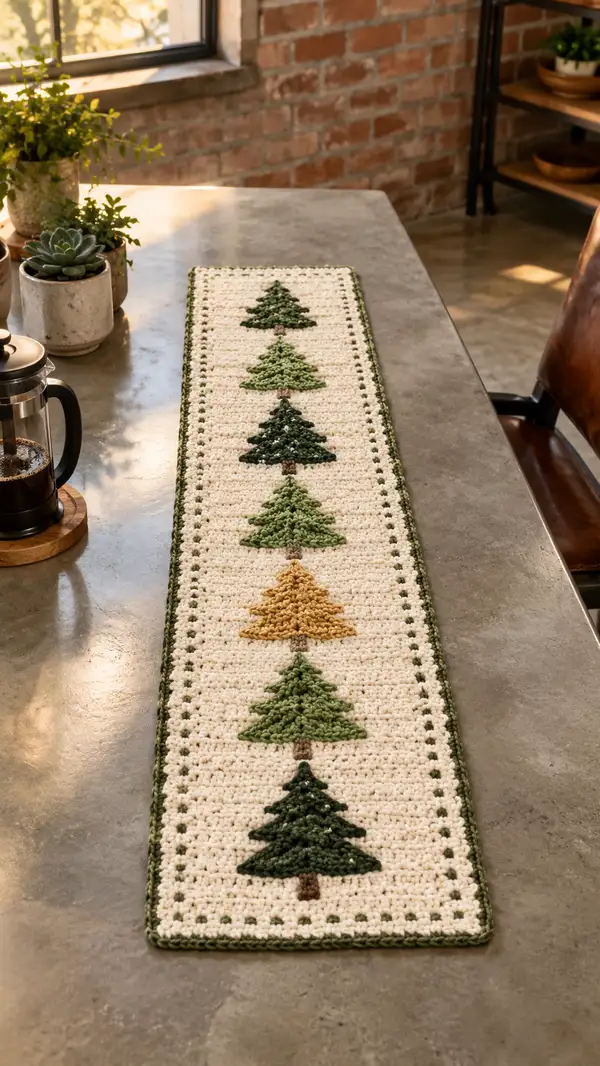
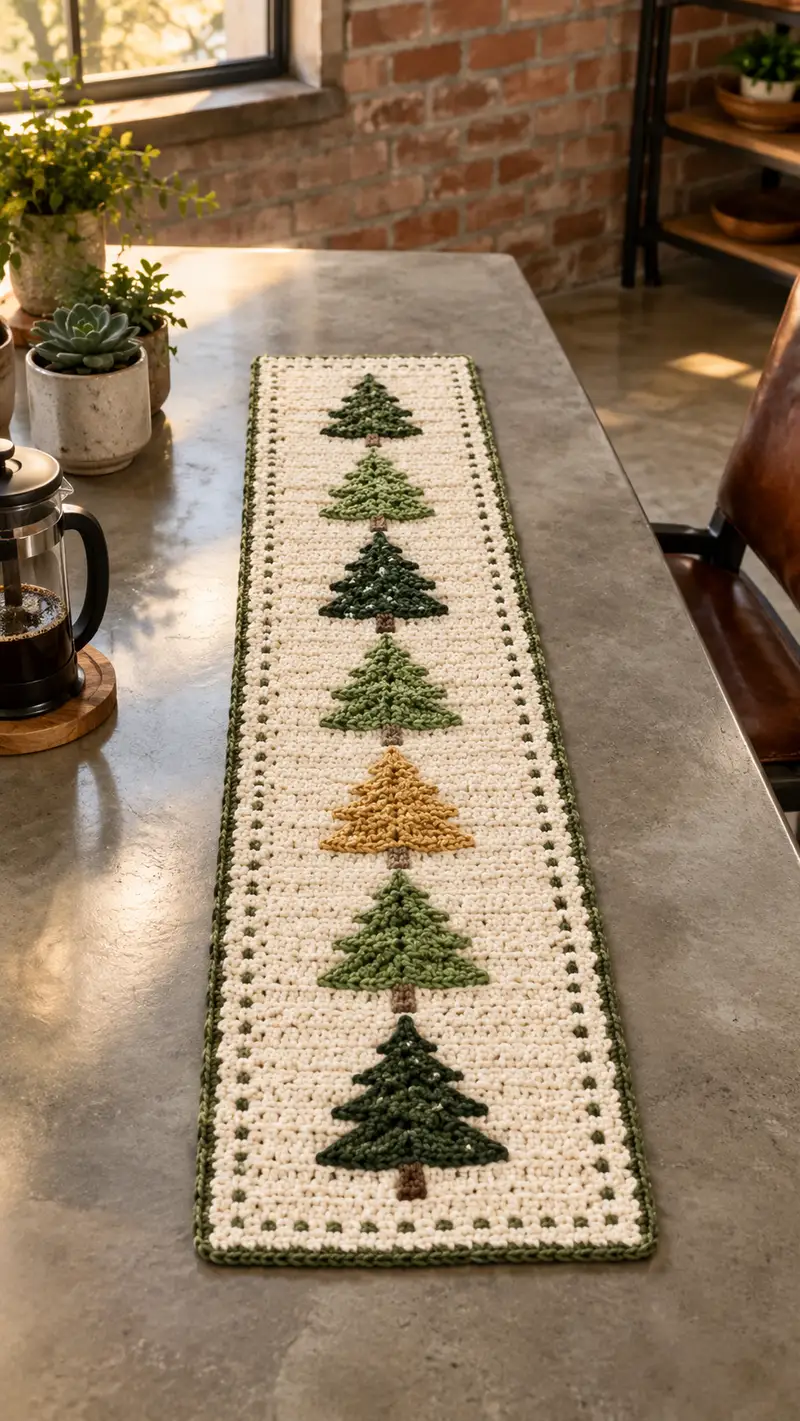
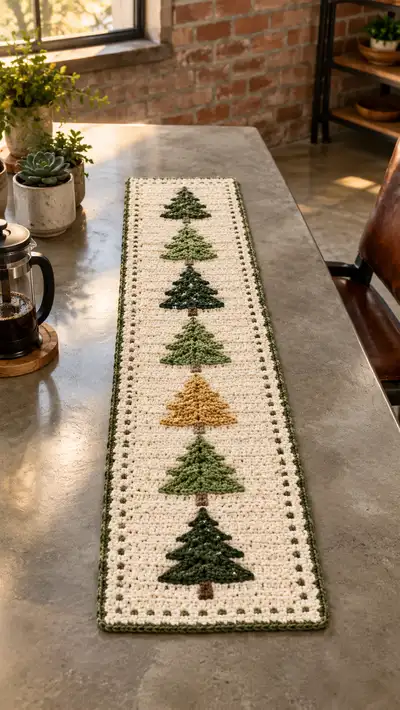
Create a long, cozy table runner featuring a repeated row of charming pine tree motifs set on a warm cream field with a contrasting green dotted border. This pattern uses simple single crochet construction with tapestry colorwork for the trees — perfect for seasonal decorating or year-round rustic charm. The finished piece is sturdy, textured, and works up quickly using worsted-weight yarn and a comfortable hook size.
Progress Tracker
0% Complete
— Notes & Gauge :
Info :
Worked flat in single crochet rows with tapestry color changes to create centered pine tree motifs. Gauge is not critical for fit but affects finished size and look. Sample gauge: 14 sc x 16 rows = 4 in (10 cm) in single crochet using 5.5mm hook. Adjust hook if your tension differs.
Info :
Finished dimensions (approx): Width 9-10 in (24-25 cm); Length depends on number of motif repeats. The sample photographed measures about 8-9 in wide and roughly 48 in long (122 cm) total with 8 tree motifs and borders. You can add or remove motif repeats to change length.
— Materials & Preparation :
Info :
Main color: Cream; Tree colors: Dark evergreen, Medium green, Light green, Gold; Trunk: Brown; Border accent: Deep green. Prepare bobbins or small balls for each color used in motifs to minimize tangling when carrying yarn.
Info :
We will work with an odd stitch count across the width so that each tree motif is perfectly centered on the runner. For the pattern below, foundation chain = 62, working 61 sc across each row.
— Foundation Row :
Round 1 :
Ch 62. Sc in 2nd ch from hook and in each ch across — 61 sc (61)
Info :
Mark the first stitch of the row with a removable marker; this makes it much easier to count stitches and to find the center stitch for motif work later on.
— Border and Body Start :
Round 2 :
Ch 1, turn. Sc in each st across (61)
Round 3-6 :
Ch 1, turn. Sc in each st across (61) — work 4 rows total (rows 3,4,5,6) to form a clean background band before the first motif (61)
Info :
These first rows form the top band and help center the first tree. Adjust the number of background rows if you prefer more or less spacing above the first tree.
— Tree Motif Structure (single tree = 6 rows) :
Info :
Each tree motif is worked across 6 rows. The runner width is 61 stitches each row. For an odd tree width, the center stitch is stitch number 31 (when stitches are counted from either side). Tree widths expand each row as follows: 1, 3, 5, 7, 9, 11 stitches (odd widths). For each motif row, work background color sc up to the left background count, sc in tree color for the tree stitches, then sc in background for the remainder. Always keep the total to 61 sc. The trunk will be worked after the tree panel rows as a 3-stitch brown block centered below the base of the tree (3 sc in brown centered on the final tree row).
Info :
We will list the exact stitch counts for each motif row. Left background count = (61 - tree width)/2; right background equals left for centering. Example: tree width 1 -> left bg = 30, tree = 1, right bg = 30 (30+1+30 = 61).
— Long Row-by-Row Pattern (Rows 1-122) :
Round 1 :
Ch 62, sc in 2nd ch from hook and across — 61 sc (61)
Round 2 :
Ch 1, turn; sc in each st across (61)
Round 3 :
Ch 1, turn; sc in each st across (61)
Round 4 :
Ch 1, turn; sc in each st across (61)
Round 5 :
Ch 1, turn; sc in each st across (61)
Round 6 :
Ch 1, turn; sc in each st across (61)
Info :
Rows 1-6 form the top plain band. Count carefully to ensure stitch count remains 61. Carry motif colors loosely along the wrong side when they are not in use for short spans (no longer than 6-8 sts) to avoid long floats.
Round 7 (Tree 1 - Apex row) :
Ch 1, turn; 30 sc in Cream, 1 sc in Dark Evergreen, 30 sc in Cream (61)
Round 8 (Tree 1) :
Ch 1, turn; 29 sc Cream, 3 sc Dark Evergreen, 29 sc Cream (61)
Round 9 (Tree 1) :
Ch 1, turn; 28 sc Cream, 5 sc Dark Evergreen, 28 sc Cream (61)
Round 10 (Tree 1) :
Ch 1, turn; 27 sc Cream, 7 sc Dark Evergreen, 27 sc Cream (61)
Round 11 (Tree 1) :
Ch 1, turn; 26 sc Cream, 9 sc Dark Evergreen, 26 sc Cream (61)
Round 12 (Tree 1 - Base row) :
Ch 1, turn; 25 sc Cream, 11 sc Dark Evergreen, 25 sc Cream (61)
Round 13 (Trunk) :
Ch 1, turn; 29 sc Cream, 3 sc Brown (center trunk), 29 sc Cream (61)
Info :
Change to the trunk color on the trunk row when you reach the center 3 stitches. For neat transitions, carry the background yarn behind and pick up trunk color yarn for the 3 center scs, then switch back to cream. Keep floats loose to avoid pucker. Weave trunk yarn tails later on the wrong side.
Round 14-21 (Background between Tree 1 and Tree 2) :
Ch 1, turn; sc in each st across (61) — work 8 rows plain cream to space to next motif (rounds 14,15,16,17,18,19,20,21)
Info :
These background rows set spacing between tree motifs. If you prefer closer trees, reduce this spacing to 6 rows; for a longer runner, increase to 10-12 rows. Always keep counts to 61 sc.
Round 22 (Tree 2 - Apex) :
Ch 1, turn; 30 sc Cream, 1 sc Medium Green, 30 sc Cream (61)
Round 23 (Tree 2) :
Ch 1, turn; 29 sc Cream, 3 sc Medium Green, 29 sc Cream (61)
Round 24 (Tree 2) :
Ch 1, turn; 28 sc Cream, 5 sc Medium Green, 28 sc Cream (61)
Round 25 (Tree 2) :
Ch 1, turn; 27 sc Cream, 7 sc Medium Green, 27 sc Cream (61)
Round 26 (Tree 2) :
Ch 1, turn; 26 sc Cream, 9 sc Medium Green, 26 sc Cream (61)
Round 27 (Tree 2 - Base)
Ch 1, turn; 25 sc Cream, 11 sc Medium Green, 25 sc Cream (61)
Round 28 (Trunk)
Ch 1, turn; 29 sc Cream, 3 sc Brown, 29 sc Cream (61)
Round 29-36 (Background between Tree 2 and Tree 3)
Ch 1, turn; sc in each st across (61) — 8 rows plain Cream (rounds 29-36)
Info :
Alternate tree colors for visual interest — in the sample photo the trees alternate darker and lighter greens. For a natural look, alternate Dark Evergreen, Medium Green, Dark Evergreen, Light Green, Gold, Light Green, Medium Green, Dark Evergreen for eight trees. Mark yarn changes for each motif to avoid tangling.
Round 37 (Tree 3 - Apex)
Ch 1, turn; 30 sc Cream, 1 sc Dark Evergreen, 30 sc Cream (61)
Round 38 (Tree 3)
Ch 1, turn; 29 sc Cream, 3 sc Dark Evergreen, 29 sc Cream (61)
Round 39 (Tree 3)
Ch 1, turn; 28 sc Cream, 5 sc Dark Evergreen, 28 sc Cream (61)
Round 40 (Tree 3)
Ch 1, turn; 27 sc Cream, 7 sc Dark Evergreen, 27 sc Cream (61)
Round 41 (Tree 3)
Ch 1, turn; 26 sc Cream, 9 sc Dark Evergreen, 26 sc Cream (61)
Round 42 (Tree 3 - Base)
Ch 1, turn; 25 sc Cream, 11 sc Dark Evergreen, 25 sc Cream (61)
Round 43 (Trunk)
Ch 1, turn; 29 sc Cream, 3 sc Brown, 29 sc Cream (61)
Round 44-51 (Background between Tree 3 and Tree 4)
Ch 1, turn; sc in each st across (61) — 8 rows plain Cream (rounds 44-51)
Round 52 (Tree 4 - Apex)
Ch 1, turn; 30 sc Cream, 1 sc Light Green, 30 sc Cream (61)
Round 53 (Tree 4)
Ch 1, turn; 29 sc Cream, 3 sc Light Green, 29 sc Cream (61)
Round 54 (Tree 4)
Ch 1, turn; 28 sc Cream, 5 sc Light Green, 28 sc Cream (61)
Round 55 (Tree 4)
Ch 1, turn; 27 sc Cream, 7 sc Light Green, 27 sc Cream (61)
Round 56 (Tree 4)
Ch 1, turn; 26 sc Cream, 9 sc Light Green, 26 sc Cream (61)
Round 57 (Tree 4 - Base)
Ch 1, turn; 25 sc Cream, 11 sc Light Green, 25 sc Cream (61)
Round 58 (Trunk)
Ch 1, turn; 29 sc Cream, 3 sc Brown, 29 sc Cream (61)
Round 59-66 (Background between Tree 4 and Tree 5)
Ch 1, turn; sc in each st across (61) — 8 rows plain Cream (rounds 59-66)
Round 67 (Tree 5 - Apex, Gold)
Ch 1, turn; 30 sc Cream, 1 sc Gold, 30 sc Cream (61)
Round 68 (Tree 5)
Ch 1, turn; 29 sc Cream, 3 sc Gold, 29 sc Cream (61)
Round 69 (Tree 5)
Ch 1, turn; 28 sc Cream, 5 sc Gold, 28 sc Cream (61)
Round 70 (Tree 5)
Ch 1, turn; 27 sc Cream, 7 sc Gold, 27 sc Cream (61)
Round 71 (Tree 5)
Ch 1, turn; 26 sc Cream, 9 sc Gold, 26 sc Cream (61)
Round 72 (Tree 5 - Base)
Ch 1, turn; 25 sc Cream, 11 sc Gold, 25 sc Cream (61)
Round 73 (Trunk)
Ch 1, turn; 29 sc Cream, 3 sc Brown, 29 sc Cream (61)
Round 74-81 (Background between Tree 5 and Tree 6)
Ch 1, turn; sc in each st across (61) — 8 rows plain Cream (rounds 74-81)
Round 82 (Tree 6 - Apex)
Ch 1, turn; 30 sc Cream, 1 sc Light Green, 30 sc Cream (61)
Round 83 (Tree 6)
Ch 1, turn; 29 sc Cream, 3 sc Light Green, 29 sc Cream (61)
Round 84 (Tree 6)
Ch 1, turn; 28 sc Cream, 5 sc Light Green, 28 sc Cream (61)
Round 85 (Tree 6)
Ch 1, turn; 27 sc Cream, 7 sc Light Green, 27 sc Cream (61)
Round 86 (Tree 6)
Ch 1, turn; 26 sc Cream, 9 sc Light Green, 26 sc Cream (61)
Round 87 (Tree 6 - Base)
Ch 1, turn; 25 sc Cream, 11 sc Light Green, 25 sc Cream (61)
Round 88 (Trunk)
Ch 1, turn; 29 sc Cream, 3 sc Brown, 29 sc Cream (61)
Round 89-96 (Background between Tree 6 and Tree 7)
Ch 1, turn; sc in each st across (61) — 8 rows plain Cream (rounds 89-96)
Round 97 (Tree 7 - Apex)
Ch 1, turn; 30 sc Cream, 1 sc Medium Green, 30 sc Cream (61)
Round 98 (Tree 7)
Ch 1, turn; 29 sc Cream, 3 sc Medium Green, 29 sc Cream (61)
Round 99 (Tree 7)
Ch 1, turn; 28 sc Cream, 5 sc Medium Green, 28 sc Cream (61)
Round 100 (Tree 7)
Ch 1, turn; 27 sc Cream, 7 sc Medium Green, 27 sc Cream (61)
Round 101 (Tree 7)
Ch 1, turn; 26 sc Cream, 9 sc Medium Green, 26 sc Cream (61)
Round 102 (Tree 7 - Base)
Ch 1, turn; 25 sc Cream, 11 sc Medium Green, 25 sc Cream (61)
Round 103 (Trunk)
Ch 1, turn; 29 sc Cream, 3 sc Brown, 29 sc Cream (61)
Round 104-111 (Background between Tree 7 and Tree 8)
Ch 1, turn; sc in each st across (61) — 8 rows plain Cream (rounds 104-111)
Round 112 (Tree 8 - Apex)
Ch 1, turn; 30 sc Cream, 1 sc Dark Evergreen, 30 sc Cream (61)
Round 113 (Tree 8)
Ch 1, turn; 29 sc Cream, 3 sc Dark Evergreen, 29 sc Cream (61)
Round 114 (Tree 8)
Ch 1, turn; 28 sc Cream, 5 sc Dark Evergreen, 28 sc Cream (61)
Round 115 (Tree 8)
Ch 1, turn; 27 sc Cream, 7 sc Dark Evergreen, 27 sc Cream (61)
Round 116 (Tree 8)
Ch 1, turn; 26 sc Cream, 9 sc Dark Evergreen, 26 sc Cream (61)
Round 117 (Tree 8 - Base)
Ch 1, turn; 25 sc Cream, 11 sc Dark Evergreen, 25 sc Cream (61)
Round 118 (Trunk)
Ch 1, turn; 29 sc Cream, 3 sc Brown, 29 sc Cream (61)
Round 119-122 (Bottom Plain Band)
Ch 1, turn; sc in each st across (61) — work 4 rows plain Cream (rounds 119,120,121,122)
Info :
These bottom rows form the bottom band mirroring the top band. Check overall length and add extra background rows if you want a longer runner before edging. Fasten off but DO NOT weave in ends until edging is complete — leaving tails makes joining border colors easier.
— Optional Surface Stitching for Branch Texture :
Info :
If you'd like extra texture similar to layered branches, work surface slip stitch rows across the green triangle areas before adding the trunk: with right side facing and contrasting greens, use a slip stitch or short surface single crochet to outline each triangle layer on the right side. Work slowly and follow motif edges; this step is purely decorative.
— Edging (Dotted Inner Border + Solid Outer Border) :
Info :
We will add a small dotted inner border with alternating cream and green, then a solid sc outer border in deep green. Join yarn at any corner and work continuously around the rectangle. Keep stitch counts consistent at corners to maintain shape.
Round 123 (Join for Edging)
With Deep Green join at any corner with sl st, ch 1.
Round 124 (Inner dotted row - part 1)
Round: *sc 5 in Deep Green along edge; at next short side work sc evenly across end; on long side: (sc 1 Deep Green, sc 5 Cream) repeat across seam to create dotted effect — precise counts will follow for each edge below.
Info :
Because exact edge stitch counts depend on total rows you worked, keep a note of how many stitches exist on each side. You should place the dotted points evenly. A simple, reliable method: work 1 sc Deep Green, skip 3 sts and then 1 sc Deep Green along long edges to create dotted effect, adjusting spacing at corners.
Round 125 (Outer Solid Border)
After completing the dotted inner row, rotate and work 2 rounds of sc in Deep Green evenly around the entire runner. For corners, work (sc, ch 1, sc) to keep corners flat and flexible. Fasten off and weave in ends securely.
Info :
For a plump, rounded edge like the sample photo, you can instead work an outer round of half double crochet (hdc) in Deep Green; this creates a slightly thicker frame. Block after finishing to even out edges and allow the dotted pattern to settle.
— Finishing :
Info :
Weave in all ends on the wrong side using a blunt needle. Trim stray fibers. Wet block or steam-block the runner: pin to shape on a blocking mat at the desired rectangular dimensions and allow to dry fully. This will flatten slight ripples from color carries and set the borders.
Info :
Optional: lightly press with an iron on low steam with a thin pressing cloth if you prefer a crisper finish — test on a spare swatch first to avoid flattening texture.
This cozy table runner pattern brings a bit of handmade warmth to your home with simple single crochet and charming tree motifs. Each careful color change and dotted border frame the runner beautifully, turning a practical piece into seasonal decor you'll be proud to display. The project is portable, rewarding, and customizable — you can change colors or add extra motifs for a family of runners. 🧶🌲 Give your table a handmade touch this season and enjoy every stitch! ✨