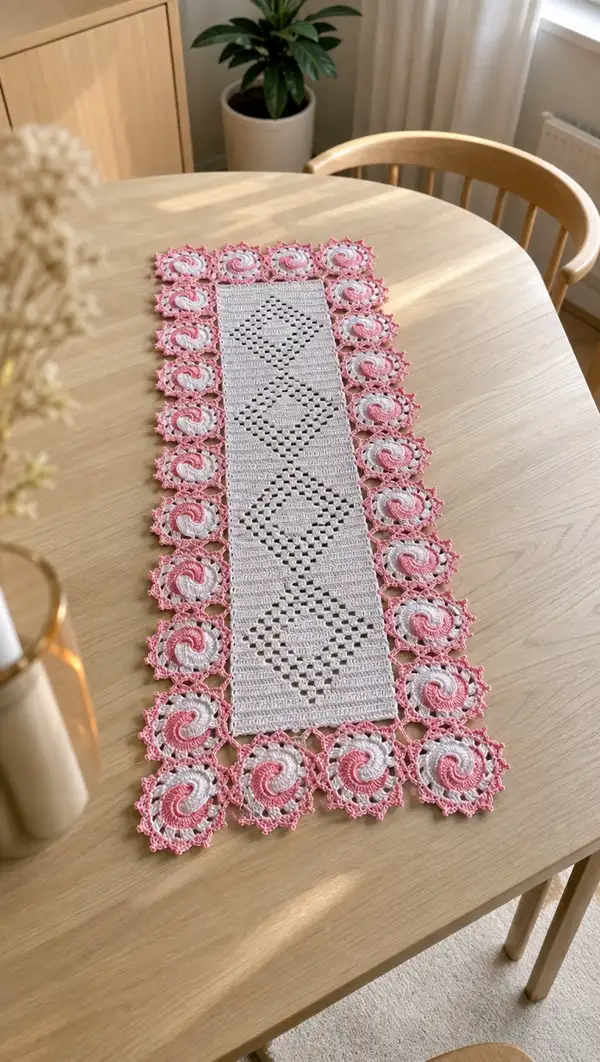
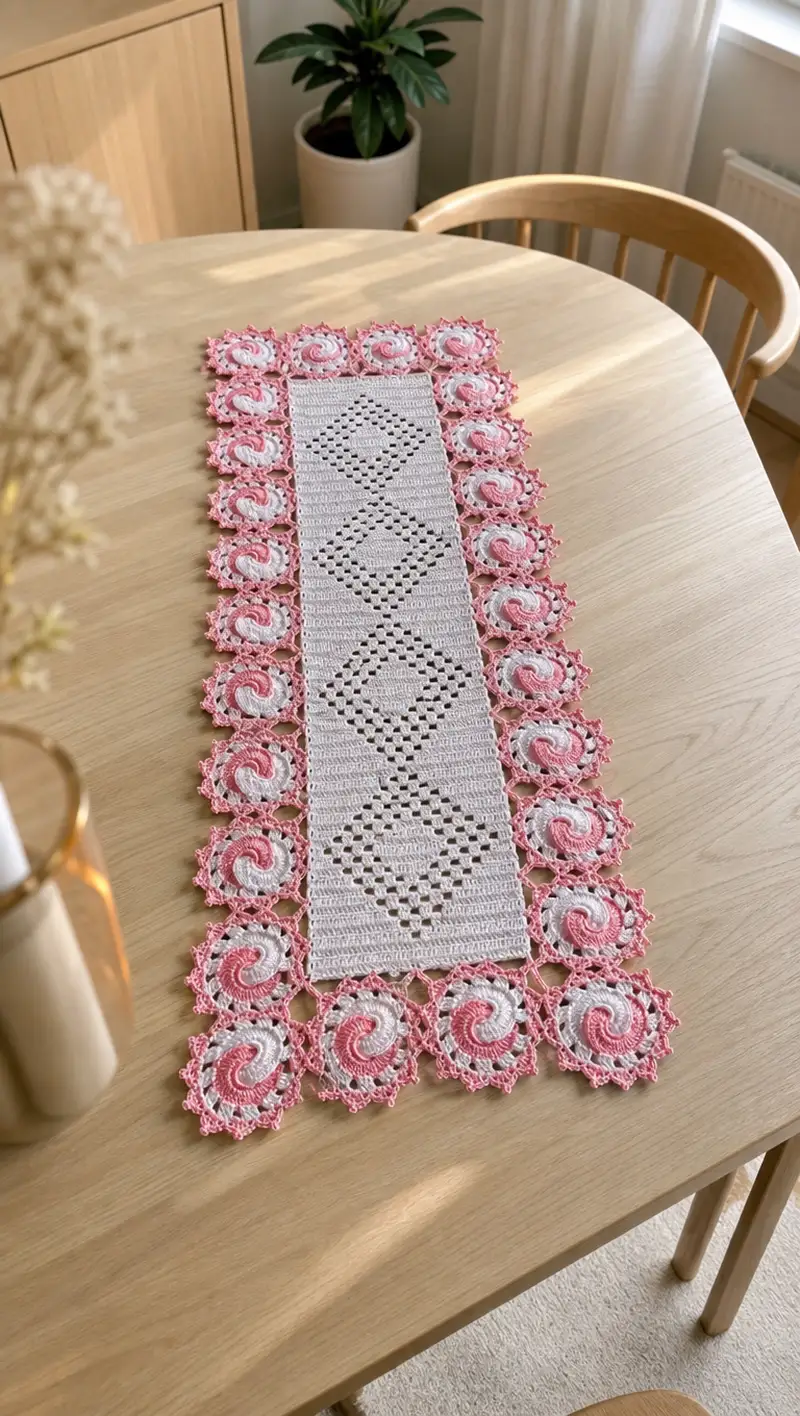
A delicate rectangular table runner featuring a central filet diamond panel framed by romantic pink-and-white spiral motifs. This pattern combines tidy rows of double crochet filet with decorative circular motifs linked into a lacy border. Perfect as a dining table accent or a thoughtful handmade gift, the finished runner has a vintage-inspired look with modern colors and crisp edges.
Progress Tracker
0% Complete
— Materials & Gauge :
Info :
Use a 2.5 mm hook and sport/fingering cotton yarn to achieve the delicate lacy look. Gauge is not critical for design, but sample: 10 cm x 10 cm in dc rows = approx 28 dc x 12 rows. If you want a larger runner, use slightly thicker yarn and a 3.0 mm hook and adjust counts proportionally.
— Central Panel (Filet Diamond Panel) :
Round 1 :
Foundation chain 74. Turn. (This chain produces a working width of 72 dc across before turning chains.)
Round 2 :
Ch 2 (counts as first dc), dc in 3rd ch from hook and across to end — 72 dc. Turn. (72)
Info :
Work the panel in rows (these are called rounds here) on the RS. Keep turning chain consistent as a dc. Place a marker at the first stitch of each row to help maintain count for long rows.
Round 3 :
Ch 2, dc in each st across (72). Turn.
Round 4 :
Repeat Round 3 (72). Turn.
Round 5 :
Begin diamond filet chart: Ch2, *dc in next 8 sts, ch2, sk next 2 sts*; rep from * to last 8 sts, dc in last 8 sts. Turn. (This row creates vertical openings where ch2 spaces replace two dcs; net stitch count remains 72 counting each ch2 as a mesh)
Info :
For filet work we treat each ch2 as an 'open mesh' and each block of consecutive dcs as 'filled mesh' — keep track using a tally or small chart for the diamond motif.
Round 6 :
Ch2, dc across filling dcs and working dc in the ch2 space as: dc in next 8 dcs, dc in ch2 space, continue as established across to maintain 72 dc equivalent.
Round 7 :
Ch2, dc in each st across (72). Turn.
Round 8 :
Ch2, dc in each st across (72). Turn.
Round 9 :
Filet decrease to start diamond waist: Ch2, dc in next 9 sts, ch2, sk next 2 sts, dc in next 9 sts, rep to end maintaining symmetry. Count should remain consistent with 72-equivalent stitch spaces across.
Info :
Work a small paper chart or note each row of the diamond: typically the diamond motif uses a progressive decrease of filled meshes until a single filled vertical center, then expands again. Each diamond repeats across 12 rows vertically.
Round 10-15 :
Work the next six rows following the diamond openwork chart: gradually reduce filled dc blocks on each side of the planned diamond center by shifting ch2 mesh positions inward by two stitches every second row. Maintain the total mesh count equivalent to 72 across.
Round 16 :
Center apex row of first diamond: Ch2, dc in each st across but with a single column of filled mesh at center (work dc in that column) and ch2 open meshes forming the diamond arms. Verify symmetry both sides. (72)
Round 17-22 :
Reverse the earlier decrease pattern to re-open filled meshes outward, restoring the filled blocks to original width by adding ch2 to mesh-to-dc transitions where the chart indicates. Continue to treat ch2 as mesh placeholders for diamond edges. (72)
Info :
This completes one diamond unit vertically. The central panel in the photo shows four large stacked diamonds; plan to repeat this 12-row diamond unit four times. Block the first diamond section lightly to ensure accurate shaping before proceeding to repeats.
Round 23-34 :
Repeat Rounds 5-22 to form the second diamond unit. Keep stitch counts consistent, tracking mesh and filled sections. (72 per row equivalent)
Info :
After two diamonds, check panel length against desired final dimensions. If adjusting for longer or shorter runner, you may add or subtract full 12-row diamonds as needed. The pattern here makes three to four diamonds depending on overall length; the pictured runner has four diamonds stacked.
Round 35-46 :
Repeat diamond unit again for the third diamond. Maintain the same charting logic: expand and contract filled meshes symmetrically. (72)
Round 47-58 :
Repeat diamond unit for the fourth diamond. After completing the last apex and expansion rows, work 2 extra plain dc rows to form a narrow plain band above the diamonds. (72)
Round 59 :
Work 4 rows of plain dc as a top border: Ch2, dc in each st across (72). Turn. Repeat 4 rows. (72)
Round 60 :
Fasten off center panel leaving a long tail for blocking and for joining to motifs. Block panel gently to rectangular dimensions (target width approx 28-30 cm as shown). Ensure edges are straight and diamonds centered.
Info :
Blocking is essential. Wet-block or steam-block the panel on a mat using pins to square the sides. Allow to dry completely before joining motifs. The panel will be joined to spiral motifs along both long edges.
— Spiral Motif (Make 28 or as needed) :
Info :
The border is built from identical spiral medallions worked in two main colors (soft pink and white/cream) and edged with a rose tone. Make enough motifs to match both long edges plus short-edge rows. For the pictured runner: 14 motifs per long side and 4 motifs across each short end = 32 motifs total. Adjust number to match your center panel length.
Round 1 :
Using accent color A (soft pink), make a magic ring. Work 6 sc into magic ring. Tighten ring. (6)
Round 2 :
Inc in each st around (12). Place marker at start. (12)
Round 3 :
(1 sc, inc) x 6 (18). Switch to accent color B (medium rose) at end of round by finishing last st with new color. (18)
Info :
Change color by completing the last pull through in the new color so the next round starts in that color. Carry yarn loosely at center if you prefer to avoid many ends, or plan to weave in later.
Round 4 :
Using color B, (2 sc, inc) x 6 (24). (24)
Round 5 :
Switch to color white/cream. Ch3 (counts as dc), dc in same st, *ch2, sk 1, 2 dc in next st* across to create a raised spiral arm. Finish with ch2, sl st to top of ch3 to close the spiral round. (Visual spiral formed by alternating small dc clusters and ch spaces)
Round 6 :
Work in white/cream: Ch1, sc in same st and around front loops of dc clusters to begin flattening the spiral. Work 24 sc evenly around the round to hold shape. (24)
Info :
To create a visible swirl, plan color transitions so that the spiral arms contrast. The technique here combines short dc clusters and ch spaces to give a curving, spiral suggestion; tension will shape the curl.
Round 7 :
Switch to color A (soft pink). Working into the back loops of the previous round's sc, (1 sc, inc) around to enlarge motif slightly. (36)
Round 8 :
Ch3, dc in next st, *ch1, sk 1, 2 dc in next st* repeat around to create small lobes forming the outer shell of the swirl. End with sl st to top of ch3. (36-dc-equivalent)
Round 9 :
Switch to rose/contrast color. Ch1, sc in each st and in chain spaces around to even out edges, working 36 sc around. (36)
Round 10 :
Edging round: *ch3, sl st in next st, ch1, sl st in next* around to create small decorative loops. Use the rose contrast color for nice definition. Maintain 36 edging loops (count visual spacing to be even as you join). (36 loops)
Round 11 :
Final lace picot round: In each loop from Round 10, work (sc, ch3, sl st in 3rd ch) forming picots separated by sc. This yields a delicate toothed edging. Fasten off leaving 20-25 cm tail for joining. (36 picots)
Info :
Block each motif flat. Slightly stretch into circular shape, pin carefully and mist with water. Allow to dry fully. Blocking ensures all motifs match size and lie flat for joining.
— Joining Motifs to Central Panel :
Info :
Lay the blocked center panel on a flat surface. Arrange motifs along both long edges so motifs touch and are centered along the panel edges. For ends, place 2 motifs across the short edge corners so the corners are similarly framed. Use pins to align.
Round 1 :
With a contrasting joining thread (same rose color) and RS facing up, attach yarn to a picot on a motif that will join to the panel. Position motif so its inner edge aligns with the panel's edge.
Round 2 :
Join with sl st to the edge of the panel every 4-5 sts: *sl st through motif picot and into center panel edge st, ch1, sl st back into motif picot*; continue around to join the first motif to the panel with 8-10 secure stitches spaced evenly. Fasten off and weave tail.
Info :
Attach motifs one by one. For a neat look, work from the middle outward along the long edge—this helps distribute slight size differences evenly. Use a tapestry needle and whip stitch if preferred for stronger attachment; whip stitch through back loops only for invisible joins.
Round 3 :
When two adjacent motifs meet at their sides (along the long edge), join motif-to-motif with sl st through adjacent picots from each motif every 3-4 loops to form a small lacy bridge. Repeat for all motifs along both sides.
Round 4 :
At the short ends, join motifs to each other across the corner so there is a continuous border around the whole panel. Use extra joining stitches at the corners to secure and prevent gaps.
Info :
Keep tension moderate when joining: too tight pulls the panel edge; too loose shows gaps. Adjust joins to ensure the motifs lay flat without puckering or pulling inward.
— Outer Lace Edging & Final Finish :
Round 1 :
With rose contrast color and RS up, join yarn at any motif outer edge picot. Work around the entire runner in a continuous round: *ch4, sc in next picot, ch2, sc in next picot* to create a scalloped chain-lace border following the motif shape. Keep spacing consistent for an even scallop.
Round 2 :
Work a decorative shell into each large scallop: in the center ch4 space, work (sc, hdc, 3 dc, hdc, sc) to form a small shell. This adds volume to the edge and completes the lacy look. (Shell per scallop)
Info :
Check the alignment frequently. If shells flare outward too much, reduce dc number to 5 instead of 7. If scallops lay flat, add one additional dc to shells.
Round 3 :
In each ch2 space between shells, add a tiny picot cluster: (sc, ch3, sl st into 3rd ch) for a delicate edged tooth. Fasten off and weave in all ends on the WS. Trim tails close after weaving securely.
Round 4 :
Final blocking: pin the entire runner flat to target dimensions, evening out the scallops and diamond centers. Use plenty of pins along motifs so the outer lace is symmetrical. Spray with water and allow to dry completely. Remove pins and press lightly if desired.
Info :
Weave all loose ends into the back of motifs and the panel. For a professional finish, run the yarn tails along seam lines and through multiple motifs before trimming to reduce work opening over time.
— Measurements & Customization Notes :
Info :
With the materials suggested and the pictured motif count, finished runner measures approximately 90-100 cm long and 24-28 cm wide. To lengthen, add additional diamond units to the central panel (12 rows per additional diamond) and add corresponding motifs. To widen, increase the panel chain by multiples of the filet repeat (add 4 dc equivalents per repeat) and increase motif count per side to match.
Round 1 :
Color change guidance: For crisp color transitions, finish the last stitch of a round before the color change with the new color to begin next round cleanly. Carry yarn along WS when motifs require small repeated color patches.
Info :
Edge reinforcement: If you expect heavy use, consider crocheting a narrow sc border on the WS around the entire runner to reinforce joins before final blocking.
This elegant table runner brings a handmade touch to your dining space with a balanced mix of geometric filet diamonds and romantic spiral motifs. The step-by-step instructions guide you through center panel construction, motif making, careful joining, and a lacy finish. I hope each stitch brings you a little joy as the runner comes together. 🧶✨ The finished piece makes a beautiful gift or a charming accent in your home. Enjoy the rhythm of the rows and the satisfaction of a well-blocked finish! 🌸