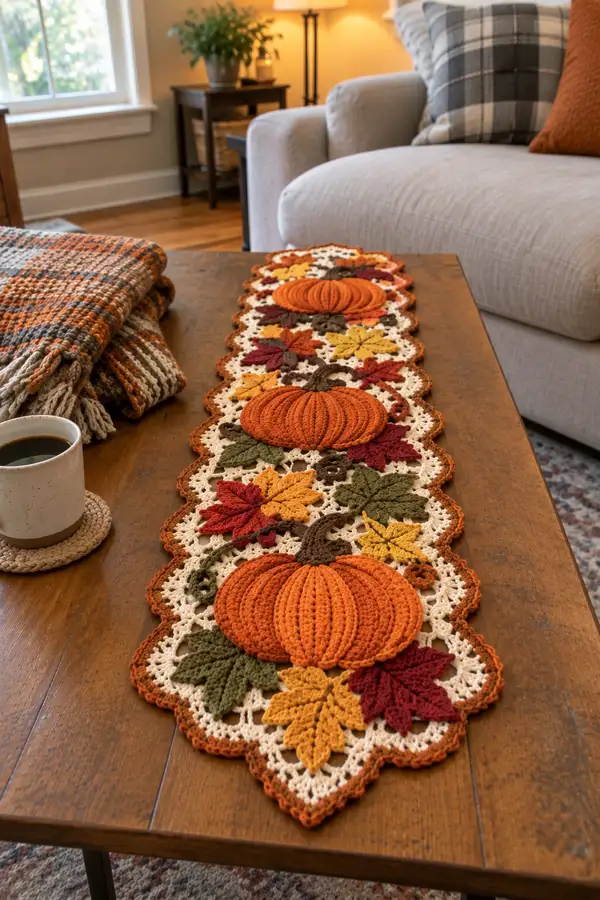
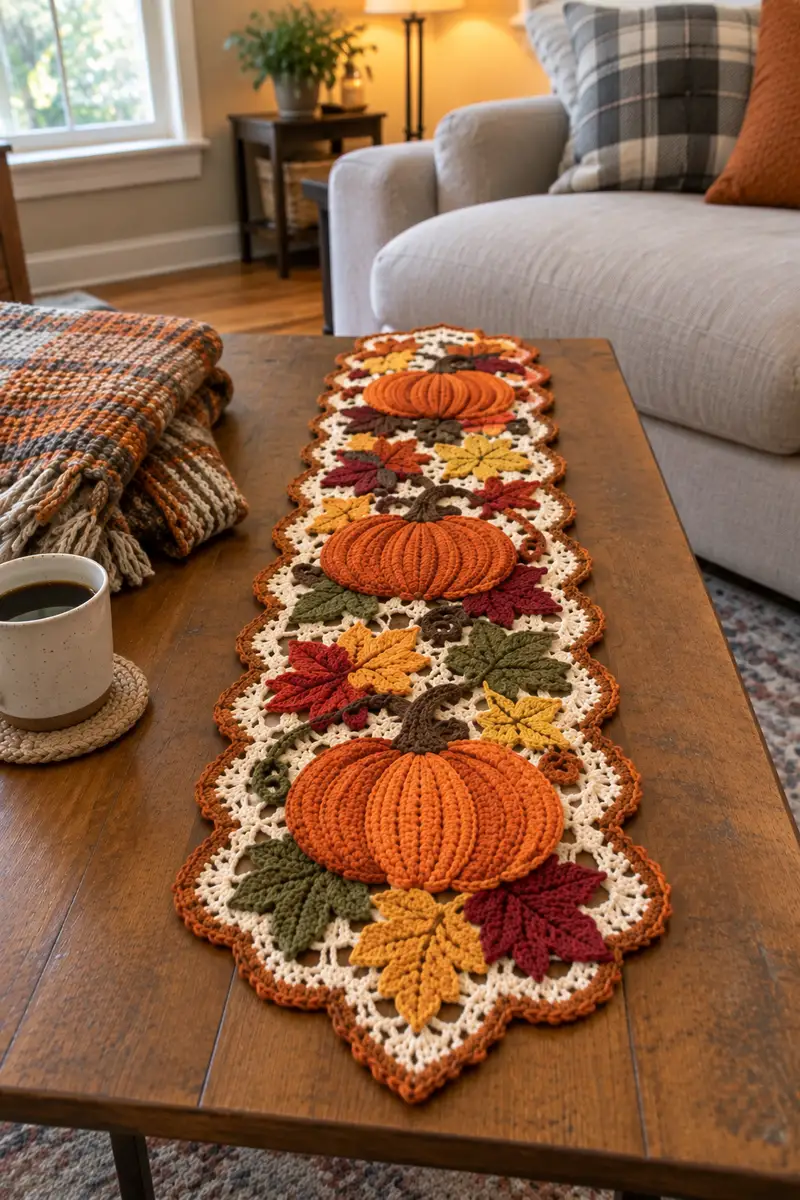
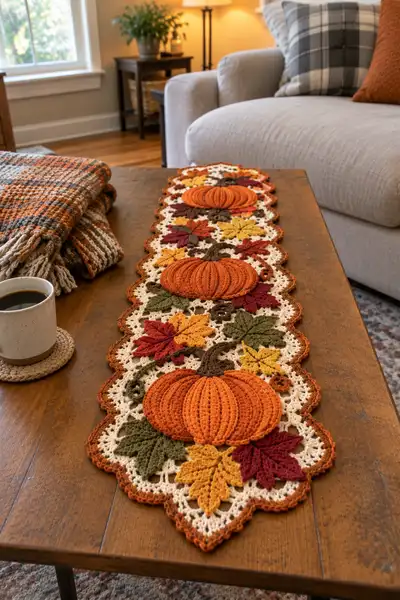
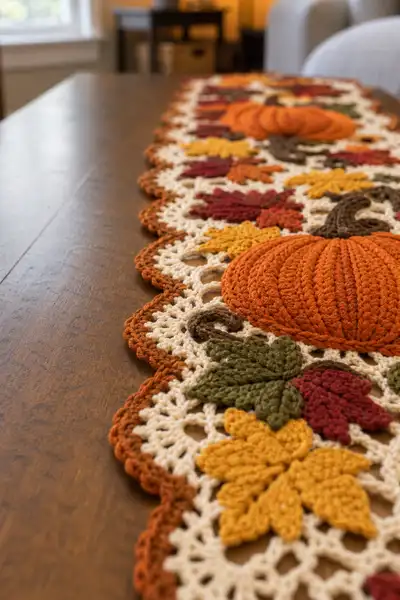
Create a warm, rustic table runner featuring raised 3D pumpkins, textured autumn leaves, curling vines and a lacy cream background. This pattern uses modular motifs joined into a scalloped-edge runner with rich fall colors and layered surface details. Finished runner shows three bold pumpkins spaced evenly with clusters of maple-style leaves and a decorative scalloped border. Ideal for seasonal decor or a handmade Thanksgiving centerpiece.
Progress Tracker
0% Complete
— Overview :
Info :
This pattern is modular: you will make three raised pumpkin motifs, a selection of leaves and vines, and a repeating lacy background panel. Join motifs in a linear chain and add a scalloped border. The sections that follow give complete round-by-round instructions to create each motif. Stitch counts are shown for each round. Use the yarn and hook size recommended to obtain similar scale; adjust hook +/- one size to change drape. Work tightly where you want firm texture (pumpkins) and more open where lace is desired (background).
— Pumpkin Dome (Make 3 identical) :
Purpose :
Raised pumpkin 'disc' with vertical ribs worked as surface/post stitches and gathered to create pleats for a dimensional pumpkin.
Materials :
Burnt-orange worsted weight yarn; small amount fiberfill; 4.0 mm hook.
Round 3 :
(1 sc, inc) x6 (18)
Round 4 :
(2 sc, inc) x6 (24)
Round 5 :
(3 sc, inc) x6 (30)
Round 6 :
(4 sc, inc) x6 (36)
Info :
We are now forming a flat circular disk; these increase form a diameter that will later be shaped into a shallow dome. If you prefer a wider pumpkin, continue one or two more increase rounds following the same (n sc, inc) pattern.
Round 7 :
(5 sc, inc) x6 (42)
Round 8 :
(6 sc, inc) x6 (48)
Round 9-12 :
1 sc in each st around (48)
Info :
At the end of round 12 disc measures approx 5.5 - 6 inches depending on tension. These even rounds build a short height for the dome. Place marker at start of each round to maintain count.
Round 13 :
(6 sc, inc) x6 (54)
Round 14-16 :
1 sc in each st around (54)
Info :
These rounds set a slightly larger circumference allowing the dome to have pronounced ribs when gathered. Use a stitch marker to mark the first stitch of each round and to place segment markers later for ribs.
Round 17 :
Change to FLO for next round - 1 sc in each st FLO (54)
Info :
Working in FLO creates a small ridge that helps delineate the top edge of the pumpkin. Now we will create visible ribs using fpdc rows worked around the disk.
Round 18 :
Ch1, *fpdc around next st, sc in next st* rep around to create alternating fpdc ridges and sc valleys (54). Join with sl st to first st.
Round 19 :
Ch1, repeat Round 18 making second layer of fpdc ridges aligned over previous fpdc (54). Join.
Info :
Count and plan for 8 or 10 rib segments. To make 8 ribs, convert 54 sts into 8 equal segments: 54/8 = 6.75. To achieve exact segmentation, after Round 19 place 8 small stitch markers spaced as follows: 7,7,7,7,7,7,6,6 (these add to 54). If you prefer 10 ribs use spacing 5 or 6 as needed; segmentation affects pleat depth.
Round 20 :
Working only into the fpdc stitches, work fpdc in each fpdc around (54 fpdc), creating taller ribs. Join with sl st.
Round 21 :
Ch1, sc in each st around (54) to lock ribs in place. Join.
Info :
We will now work vertical rib repeats to build a short height and make the ridges prominent. Each rib sequence is two rows of fpdc stacked with sc rounds between — this builds texture without adding too much bulk.
Round 22-26 :
Repeat Rounds 20-21 two more times (54) resulting in a total of three rib layers. After Round 26 your pumpkin disc should be gently domed with raised ribs approximately 0.5 - 0.75 inches high.
Info :
Begin stuffing lightly through the center hole and around ribs. Add small bits of stuffing until dome is modestly firm — not rock-hard. Stuff gradually as you work additional rounds so the stuffing distributes evenly between ribs.
Round 27 :
(6 sc, dec) x6 (48)
Round 28 :
(5 sc, dec) x6 (42)
Info :
As you decrease you are shaping the rim and beginning to gather the bottom of the dome slightly. Continue stuffing to keep the ribs full and round while leaving a small opening to finish gathering.
Round 29 :
(4 sc, dec) x6 (36)
Round 30 :
(3 sc, dec) x6 (30)
Round 31 :
(2 sc, dec) x6 (24)
Round 32 :
(1 sc, dec) x6 (18)
Info :
Fasten off leaving a long tail. Using the long tail, weave through the front loops of the final 6 sts and pull tightly to close the bottom, forming a shallow dome with pronounced ribs. Knot securely and weave tail into the interior. If additional firmness is desired, add a little more stuffing before final closure.
Round 34 :
Surface Rib Edge: With right side up, using same color, join in center top and work 8 rounds of sc around the very outer edge working evenly to create a narrow rim if needed; this will add stability for sewing down to background (optional) (approx 48 sc around).
Info :
For deeper ribs you may add an extra repeat of fpdc layers before decreasing. To create the deep vertical ridges seen in the photo, align your ribs into 8 segments and when closing, use a length of yarn threaded through each segment base and pull to accentuate pleats — tie at the bottom, bury yarn tail inside dome.
— Pumpkin Stem and Tendril :
Round 1 :
With dark brown, ch6, join with sl st to form small ring, ch1.
Round 2 :
Work 6 sc into ring (6)
Round 3 :
(1 sc, inc) x3 (9)
Round 4-6 :
1 sc in each st around (9)
Round 7 :
(1 sc, dec) x3 (6)
Info :
Stuff lightly and leave long tail for sewing. For a curling tendril, after sewing stem in place, make a small chain of 18-30 ch in brown and work sc back along chain to create a cord that can be wound into a spiral. Optionally insert thin floral wire inside the tendril for poseability before closing rope.
Round 8 :
Fasten off and leave tail for sewing to pumpkin top at center. Optionally embroider slight vertical grooves into stem by running a contrasting slub of yarn around stem and tacking down.
— Large Maple-Style Leaf (Make 6 - assorted colors) :
Purpose :
Decorative layered leaf with raised veins for texture. Make in gold, red, burgundy, olive.
Round 1 :
Ch9, sc in 2nd ch from hook and across to last ch, 3 sc in last ch; rotate to work along other side of foundation ch, sc across to first ch, sl st to join forming a small leaf center (16)
Round 2 :
Ch1, sc in each st around, working 3 sc in the tip stitch and 3 sc in the base stitch to create points (20)
Round 3 :
Ch2 (counts as hdc), hdc in next 2 sts, dc in next 2 sts, tr in next 2 sts (tip peak), dc in next 2 sts, hdc in next 2 sts, sl st across to base; repeat same on other half to mirror shape. This creates a pointed maple-like profile (20)
Info :
To create raised veins, we will work post stitches along center line. Use stitch markers to mark the center stitch at the tip and center base before working veins. These post stitches will be locked down by the next round.
Round 4 :
Join yarn at center base. Ch1, sc across first side until center, fpdc around center stitch for vein (3 fpdc), sc across remainder; mirror on other side. Join. (20)
Round 5 :
Edging to shape lobes: Ch1, [sc in next 2, (ch2, skip 1, sc) in next] rep across to create small picot-like lobes; when you reach each lobe tip, work (hdc, dc, hdc) to create rounded lobe. Continue around and join. (approx 28)
Round 6 :
Optional surface crochet veins: Using same color or darker shade, with a tapestry needle, stitch a running raised line from base to tip and split into three vein branches near tip; tack small stitches into leaf fabric to emulate natural veins.
Info :
Leaf sizes will vary with yarn. Block each leaf flat, pinning lobes gently outward. For sculptural depth, steam-block lightly to soften edges then reshape while damp.
— Small Simple Leaf (Make 8) :
Round 1 :
Ch7, sc in 2nd ch from hook and across to last ch, 3 sc in last ch; continue along other side of chain sc across to first ch, sl st to join (12)
Round 2 :
Ch1, sc in next 3, hdc in next 3, dc in next 2 (tip), hdc in next 2, sc in remaining sts; sl st to join (12)
Round 3 :
Edging: Ch1, sc evenly around with small picots at the outermost tip if desired; sl st to join (12)
Info :
These leaves are flatter and best used to fill spaces between pumpkins. Make color variety to match photo: mustard gold, deep red, olive green.
— Curly Tendril (Make many small curls) :
Round 1 :
With brown, ch30 (or desired length), sc in 2nd ch from hook and each ch across to form a cord (29)
Round 2 :
Optional: Insert thin floral wire and wrap chain around wire for sturdy curly tendril. Coil the cord around a pencil to form spiral and stitch the base to secure curl.
Info :
Vary lengths for visual interest; shorter tendrils 12-18 ch, longer 24-30 ch. Sew into place under stems so they appear to emerge naturally from pumpkin top.
— Lacy Background Panel (Make 5 panels to join into long runner) :
Purpose :
This rounded-diamond lacy panel serves as the background lattice where pumpkins and leaves attach. Five panels joined end-to-end yield a runner length similar to photo; make more or fewer to adjust length.
Round 1 :
With cream/ivory, mr, ch3 (counts as dc), work 11 dc into mr, pull ring closed and join with sl st to top of ch3 (12)
Round 2 :
Ch4 (counts as dc+ch1), *dc in next st, ch1* around (12 dc, 12 ch-1 spaces). Join. (24 counting ch-1 loops)
Round 3 :
Ch3, dc in same st, *skip next ch-1 space, (dc, ch1, dc) in next ch-1 space* rep around to create shell arches. Join. (12 shells)
Round 4 :
Ch4, *(ch3, sl st) between shell peaks to elongate lacy openings, dc in middle dc of shell, ch1* rep around. Join. (12 long loops)
Info :
These early rounds set the open lace. Count shells carefully; precise spacing ensures that pumpkins will align at centers of panels when joined.
Round 5 :
Ch1, sc in each dc and 3 sc in each ch-3 loop to make the panel a little more solid while retaining lacy holes (approx 48 sc).
Round 6 :
Ch5 (counts as dc+ch2), *skip 2 sts, dc in next, ch2* rep around to create taller lacy arches. Join. (approx 12 arches)
Round 7 :
Ch1, sc in each dc and 5 sc in each ch-2 arch to stabilize. Join (approx 72 sc)
Round 8 :
Form diamond shaping: Ch3, tr in next 2 sts, ch3, sl st to the top of opposite shell across to begin creating the diamond point. Continue working in rounds shaping into a rounded diamond — increase at corners using (2 dc, ch2, 2 dc) groups placed evenly to create points. (counts vary by placement; aim for symmetrical diamond of approx 9 x 14 inches per panel)
Info :
From Round 8 onward you will alternate rows of open arch stitches (ch loops) and sc rounds to build a firm background. Panels should be blocked to exact shape before joining. If you need exact stitch counts for your yarn/hook, do a gauge swatch and adjust number of initial dc in Round 1 to scale panel size.
Round 9-16 :
Repeat a pattern of: one round of arching loops (dc & ch loops) then one round of sc to stabilize. Each pair of rounds increases overall panel size. After Round 16 the panel will have a rounded diamond shape with 12 shell arcs around and a firm sc base for sewing. (counts will remain consistent at each sc round; around 72-84 sc depending on added corner groups)
Round 17 :
Edge prep: Ch1, sc in each st around working 3 sc in each corner arc to keep panel flat. Join. (approx 84)
Info :
At this stage the panel is ready for motif placement. Mark the center of the panel top to bottom with a removable marker to position the pumpkins evenly. Panels can be made slightly narrower to create a longer runner, or wider by adding more shell repeats.
— Joining Panels Into Runner Base :
Info :
Lay panels in order and mark centers. You will attach pumpkins to the center of panel 1, panel 3 and panel 5 (if making five panels). Leaves and vines will be attached around pumpkins and into the inter-panel spaces. Make sure panels are all blocked and flat before joining.
Round 1 :
Hold two panels with right sides facing up and align edges. Using cream yarn and whip stitch or join-as-you-go sl st method, join along one long edge by weaving through the outermost sc of each panel every 5 sts to create a firm seam. Repeat to join subsequent panels until the runner base is assembled in a long chain. (stitch counts vary by panel width)
Info :
If you plan to make a runner with a symmetric scalloped border, leave 1-2 extra sc at ends to allow scallops to form; pin panels before final joining to ensure scallops align.
Round 2 :
After joining panels, go back with a round of sc in cream around entire runner outline to unify join seams and create a working edge for the border. Place 3 sc in each corner/point to maintain shape. (approx 300-360 sc depending on number of panels)
Info :
Blocking after this sc round helps even out any tension differences between panels. Measure runner length and adjust number of panels accordingly — the pictured runner is approx 42-48 inches long when made with five panels.
— Placement and Attachment of Pumpkins, Leaves and Tendrils :
Info :
Arrange pumpkins on panel centers (panels 1, 3, 5). Place major leaf clusters near the lower left and upper right of each pumpkin (as in photo), with smaller leaves filling gaps. Use pins to tack each motif in place before sewing. Keep symmetry and spacing consistent.
Attachment Step 1 :
Sew pumpkin domes to the cream panel by using long tail from pumpkin closure and whip stitch through the sc round or surface rib edge you optionally made on pumpkin. Sew at 8 even intervals around base for secure hold. Ensure thread is taken through both pumpkin base and panel fabric, but not too many layers that cause a raised bump under the pumpkin.
Attachment Step 2 :
Sew stems into the center of each pumpkin and secure tendrils under stem with whip stitch and a few stitches into background to lock curl position. Tuck ends of tendril cords under leaves or under pumpkin edge.
Attachment Step 3 :
Sew large leaves in clusters around the pumpkins: position three larger leaves near each pumpkin and secure with small whip stitches through the broad base of each leaf. Add small leaves and acorn-like spirals to fill gaps and create a natural scattered look.
Info :
When sewing, take small stitches and use a yarn needle; if you want more invisible joins use ladder stitch to connect leaf edges to the cream panel. Sew through background's sc rounds so the join is secure without bulk.
— Scalloped Border (worked in burnt-orange) :
Round 1 :
With burnt-orange, join yarn anywhere along the outer sc edge of the runner. Ch3 (counts as dc), *skip 2 sc, 5 dc in next sc (shell), skip 2 sc, dc in next sc* rep around. Adjust spacing so shells fall evenly along outer edge. Join. (shells count varies with runner size)
Round 2 :
Ch1, sc in same st, sc in next dc, 3 sc in center dc of each shell, sc in next dc across. Join. This evens the shell openings and forms a neat scalloped edge.
Round 3 :
Optional double-shell highlight: In each 3-sc center of shell, work (ch2, 3 dc, ch2) to create a more pronounced scallop; sc between shells to anchor. Join. (creates pronounced scallop visible in photo)
Info :
If you prefer a two-color edge, work the first round in burnt-orange and the second in a darker rust to accent outer rim. Be sure to fasten off and weave all color joins neatly on the wrong side so they are not visible.
Round 4 :
Finish: Ch1, sc in each st around the scallop edge as a tidy finishing round. Work 3 sc in each deep valley to keep scallops rounded. Fasten off and weave ends. Block scalloped edge carefully to keep smooth curves.
— Final Blocking and Finishing :
Info :
Carefully press and block the entire runner by pinning it to shape on a foam board; use steam or a very light mist of water and allow to dry thoroughly. This helps open the lacy panels and set scallops flat. Trim any stray ends and secure all sewn joins. Ensure pumpkins are evenly spaced and sewn down so they cannot be shifted by handling.
Final Touch :
Optionally tack a few leaf edges down to keep them from curling up during use. If used as table decor with plates and glasses, consider applying small felt pads under pumpkin centers to avoid scratching the table surface.
Completing this runner is such a satisfying seasonal treat — the raised pumpkins and layered leaves create a rich, tactile centerpiece that instantly warms a table. Each stitched pumpkin, leaf and tendril adds handcrafted charm and personality to your autumn décor. I hope you enjoy blocking, arranging, and finishing every motif — it’s the little finishing touches that make this piece special. 🧶🍂✨