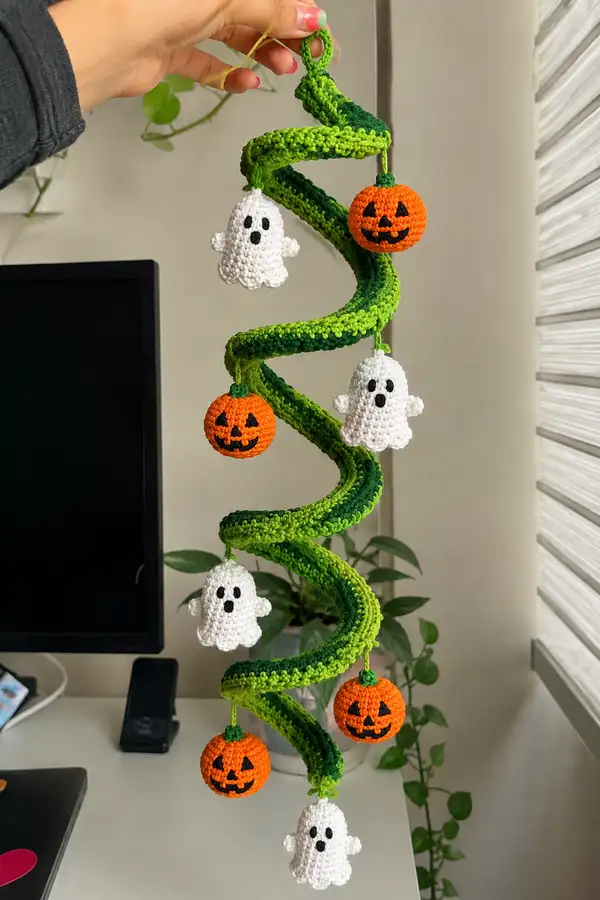
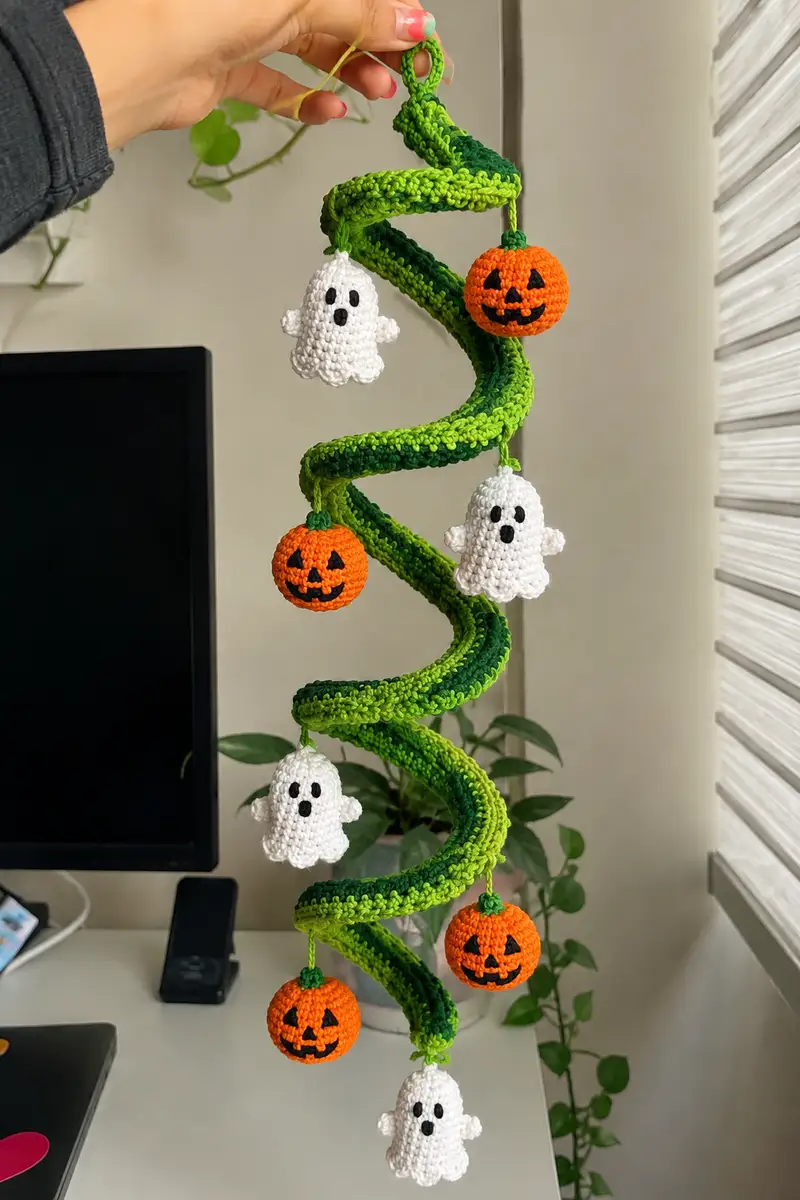
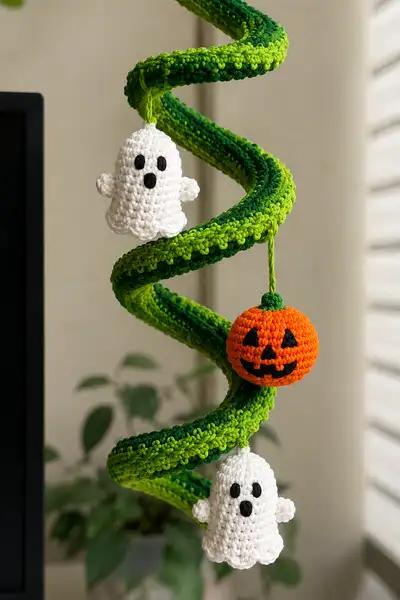
A whimsical spiral Halloween garland featuring bright lime-to-forest green spiral tubing with dangling crocheted ghosts and jack-o-lanterns. Perfect for mantel, doorway, or as a seasonal hanging mobile—each ghost has tiny arms and a scalloped skirt, and each pumpkin is round with a stitched jack-o'-lantern face.
Progress Tracker
0% Complete
— Overview :
Info :
This pattern contains full instructions for: 1 long spiral tube (crocheted in continuous rounds), 5 ghosts (each worked from a single body piece with small arm stubs and scalloped base), 4 pumpkins (spherical jack-o'-lanterns with small stems), and the hanging cords. The spiral is worked as a long tube and then shaped around a flexible core. Adjust the number of decorations as needed. All pieces are worked in continuous rounds unless otherwise specified; use a stitch marker at the start of each round.
Info :
Gauge is not critical for decorative items but affects final size. Using worsted weight yarn and a 3.25mm hook yields each pumpkin about 5-6 cm across and each ghost about 6-7 cm tall; spiral tube length approximately 110-130 cm when relaxed before shaping.
— Spiral Tube (Main Garland) :
Info :
This spiral is a long hollow tube built in continuous rounds. Work tight sc to prevent stuffing showing. We'll make a tube with 48 sts circumference (approx 3.5 - 4 cm diameter). Color changes: alternate 4 rounds bright lime, 4 rounds dark forest green, 4 rounds medium green, repeating to achieve a variegated glow.
Round 1 :
6 sc in magic ring (6)
Round 3 :
(1 sc, inc) x6 (18)
Round 4 :
(2 sc, inc) x6 (24)
Round 5 :
(3 sc, inc) x6 (30)
Round 6 :
(4 sc, inc) x6 (36)
Round 7 :
(5 sc, inc) x6 (42)
Round 8 :
(6 sc, inc) x6 (48)
Info :
Switch to working rounds in continuous spiral; place marker at the first stitch and move marker up each round. If you want a slightly slimmer tube, stop at 42 sts. For the sample, we will continue with 48 sts circumference for a sturdy tube.
Round 9-12 :
1 sc in each st (48)
Info :
Change to bright lime now and work R9-R12 in lime. To change color, join new color in the last loop of the previous stitch to keep joins tidy. Carry unused yarn inside the tube or break and rejoin at each color shift.
Round 13-16 :
1 sc in each st (48)
Info :
Change to dark forest green for R13-R16. Continue alternating colors every 4 rounds to create the striping effect visible in the photo. Keep tension even and stitches tight to avoid gap visibility when tube is stuffed.
Round 17-20 :
1 sc in each st (48)
Round 21-24 :
1 sc in each st (48)
Info :
At every 12 rounds, thread a short length of scrap yarn through two opposite stitches and knot to create faint ribs for texture, if desired. This is optional and purely decorative.
Round 25-28 :
1 sc in each st (48)
Round 29-32 :
1 sc in each st (48)
Info :
Continue alternating color blocks. Work in continuous rounds for the entire length of the tube until you reach the desired length of approximately 110-130 cm of tube (roughly 80-100 rounds depending on tension). The pattern provides a recommended sequence; adjust to match your desired final height and spacing for hanging decorations.
Round 33-60 :
1 sc in each st (48)
Info :
Work R33-R60 repeating the 4-round color stripes. At this stage the tube is long; every 12-20 rounds check that you're happy with striping. If you need extra rigidity, consider inserting a length of thin plastic tubing or rope as you go. If inserting later, leave a long tail for an opening.
Round 61-80 :
1 sc in each st (48)
Info :
When you reach the desired finished length (measure against your window or doorway), stop with a full color block. Fasten off leaving a long tail for closing and sewing. For the sample garland, the finished tube used about 80 rounds after the increase rounds (total ~88 rounds including shaping rounds).
Round 81 :
Optional: 1 sc in each st BLO around (48)
Info :
If you want a defined ridge on one edge of the tube (as in the sample image), work one round in BLO before stuffing and shaping. This will create a subtle ridge that gives the spiral more visual depth.
Round 82 :
Fasten off leaving long tail. If you didn't insert core yet, use a blunt yarn needle to create a small opening and thread in your flexible core (plastic rope or wrapped coat hanger). Insert core and center it. If you inserted core earlier, continue to next step.
Info :
Lightly stuff the tube with fiberfill. You want enough stuffing to fill gaps while keeping the tube flexible—do not over-stuff or the spiral will be rigid. Work in small amounts of stuffing every 8-12 cm to maintain even distribution.
Round 83 :
Using the long tail, whip-stitch the opening closed, weaving the tail through the final rounds and tucking the end inside the tube. Secure with several tight stitches and weave in the end.
Info :
Shape your tube into a spiral around the core. Form a loose S-shaped spiral matching the image. Use pins to mark where decorations will hang (approx every 18-22 cm along the outer edge) and secure those spots by stitching the tube to the internal core or by stitching a small loop of yarn through both sides of the tube so the spiral holds its shape.
— Hanging Loop :
Round 1 :
Ch 8, sl st in 2nd ch from hook and in each ch back to start (7 sl st chain loop). Fasten off, leaving a 15 cm tail for sewing. (This forms a small hanging loop.)
Info :
Sew loop securely to the top of the spiral tube using the long tail. Make several passes through the tube top and around the core to ensure secure hanging—especially if hung from a hook or nail.
— Ghost (Make 5) :
Info :
Each ghost is worked as a small amigurumi body with scalloped base and tiny arm stubs. Work in continuous rounds, stuffing lightly. Use white yarn and black for embroidered face or small stitched eyes.
Round 1 :
6 sc in magic ring (6)
Round 3 :
(1 sc, inc) x6 (18)
Round 4 :
(2 sc, inc) x6 (24)
Round 5 :
(3 sc, inc) x6 (30)
Round 6-11 :
1 sc in each st (30)
Info :
Place eyes between rounds 8 and 9, about 6-8 stitches apart depending on desired face width. If using safety eyes, install and secure washer now before continuing. If embroidering eyes and mouth, mark with pins to confirm placement.
Round 12 :
(3 sc, dec) x6 (24)
Round 13 :
(2 sc, dec) x6 (18)
Info :
Begin stuffing the ghost body firmly but not tightly; stuffing should be soft so the ghost has a gentle squish. Add filling gradually, working small tufts into the upper body and smoothing as you go.
Round 14 :
(1 sc, dec) x6 (12)
Info :
Close the top area with remaining stitches and fasten off leaving long tail. We will now create the scalloped base by working around the bottom edge so the ghost sits with a wavy skirt.
Round 16 (Scallop setup) :
Join yarn at base edge with sl st, ch1. (This attaches to the bottom center between final stitches.)
Round 17 (Scalloped skirt) :
*sc 1, hdc 1, dc 2, hdc 1, sc 1 in next stitch; sl st to next base stitch; rep from * around to make 6 scallops (adjust to fit base circumference). Fasten off and weave in ends.
Info :
The scalloped skirt is made by working small groups across the lower edge. If your base circumference differs slightly, increase or decrease scallop stitch counts evenly to create 6 even scallops. The goal is a gentle wavy hem like the sample ghosts.
Arm Stub (Make 2 per ghost) Round 1 :
6 sc in magic ring (6)
Round 3 :
1 sc in each st (12)
Round 4 :
dec x6 (6) Fasten off leaving long tail for sewing
Info :
Stuff arm stubs very lightly to keep flat and soft. Sew each stub to the sides of the ghost body roughly between rounds 9-10, spaced slightly forward. In the sample, arms are small and slightly cupped—stitch only through the outer shell for a rounded appearance.
Face Embroidery :
Use black yarn to embroider oval eyes approx 6-8 stitches tall and a small round 'o' mouth beneath. Start by making a satin stitch for the eyes: weave the needle across the center of each eye several times for an opaque look. Alternatively, use black felt cutouts glued on with fabric glue. Secure all ends and hide tails inside the body.
Info :
Attach a 12-18 cm yarn hanging cord to the top center of each ghost by pulling a loop of yarn through a top stitch and knotting or sewing securely; hide the knot inside the head. Leave a 4-6 cm tail above the knot to tie to the spiral and adjust hang height so ghosts dangle just outside the spiral, not inside the tube opening.
— Pumpkin (Make 4) :
Info :
Each pumpkin is a small sphere with an embroidered jack-o'-lantern face. Work in continuous rounds; orange main body, green stem cap. Add a hanging cord from the stem center. You can embroider the face freehand or use duplicate stitch for crisp triangles.
Round 1 :
6 sc in magic ring (6)
Round 3 :
(1 sc, inc) x6 (18)
Round 4 :
(2 sc, inc) x6 (24)
Round 5 :
(3 sc, inc) x6 (30)
Round 6 :
(4 sc, inc) x6 (36)
Round 7-11 :
1 sc in each st (36)
Info :
After Round 11, this is the widest point of the pumpkin. Begin stuffing slightly to create a round shape; stuff gradually before you start the decreases so you can control roundness.
Round 12 :
(4 sc, dec) x6 (30)
Round 13 :
(3 sc, dec) x6 (24)
Round 14 :
(2 sc, dec) x6 (18)
Round 15 :
(1 sc, dec) x6 (12)
Round 16 :
6 dec (6) Fasten off, leaving a long tail for sewing or closing. Finish stuffing firmly to maintain spherical shape then close opening tightly with the yarn tail and needle.
Info :
To create a pumpky ribbed look, you can run 6 evenly spaced lines of embroidery from top to bottom using contrasting darker orange or black yarn. See assembly for face placement details. For the sample, the face is embroidered in black with triangular eyes, a small triangular nose, and a crescent smile.
Stem Cap :
Round 1: 6 sc in magic ring (6). Round 2: inc x6 (12). Round 3: 1 sc in each st (12). Round 4: 6 dec (6). Fasten off leaving long tail. Sew stem cap to top center of pumpkin, tuckinged end inside and securing tightly. Leave a 12-14 cm yarn tail loop for hanging attached through the center of the stem cap before final sewing.
Face Embroidery :
Using black yarn and a yarn needle, embroider two small triangles for eyes (approx 3-4 stitches across at widest), a small triangle for nose and a curved mouth with 3-5 stitches forming triangular teeth. Use satin stitch or duplicate stitch for filled features. Secure and hide ends inside the body.
Info :
For a neat look, embroider while the pumpkin sits on a flat surface using pins to mark feature corners. If you prefer, use black felt cutouts glued on for the face, but stitched features look more durable.
— Small Details and Cording :
Info :
All decorations hang from the spiral by yarn cords approx 12-18 cm long. For each decoration, fold a length of yarn in half and thread the loop through the top center of the toy using a yarn needle; knot the ends inside the toy or through the stem and leave the loop free for hanging.
Round (Cord formation) :
Make a 16-18 ch cord for each item; option A: crochet an i-cord by chaining 16 and working sl st back along the chain to create a tidy cord. Option B: braid three 55 cm strands and knot securely. In the sample, simple folded single-strand yarn cords were used for lightweight hanging.
Info :
Tie or sew each cord to the spiral at marked positions on the outer edge so pumpkins and ghosts hang outward from the spiral. Alternate ghost and pumpkin placement for visual balance (e.g., Ghost, Pumpkin, Ghost, Pumpkin, Ghost, Pumpkin, Ghost, Pumpkin, Ghost).
— Assembly and Finishing :
Info :
Before permanently attaching any items, lay the spiral flat and mark positions with pins where the decorations will hang. Consider spacing to create even visual balance; in the sample, decorations appear spaced 18-22 cm apart down the spiral length.
Info :
Sew each hanging loop of the decoration to the spiral by passing the loop over a couple of the spiral stitches and securing with several tight whip stitches from the tube's inside. For a very secure finish, stitch through the tube and around the internal core to distribute load.
Info :
Add a few small securing stitches where the spiral crosses itself to maintain shape (sew through the tube seam and into the internal core or wrap yarn around the core and tube). Weave and hide all tails neatly.
Round (Optional Shine) :
If you want the spiral to have a little shimmer, weave a fine metallic thread into a few rounds randomly. Make sure it’s securely woven and not loose to avoid catching on anything.
Info :
Trim any stray fibers and do final shaping. Hang the garland from the loop and adjust each hanging cord length until items dangle as desired. If necessary, slide a bit of optional clear thread through the hanging loop to make the decoration sit slightly away from the spiral.
— Care Instructions :
Info :
Spot clean with a damp cloth and mild soap. Do not submerge if internal core is metal; always dry thoroughly. Store flat or hanging to retain spiral shape.
This green glow spiral garland turns simple yarn into show-stopping seasonal decor! Each carefully crocheted ghost and pumpkin brings playful character and charm to your doorway or mantel. The modular approach makes this pattern perfect for customization—add more ghosts, change colors, or trim with ribbon to match your style. 🧶🎃 You're creating more than a decoration; you're making a little Halloween tradition. Happy stitching and enjoy displaying your handmade spiral! ✨