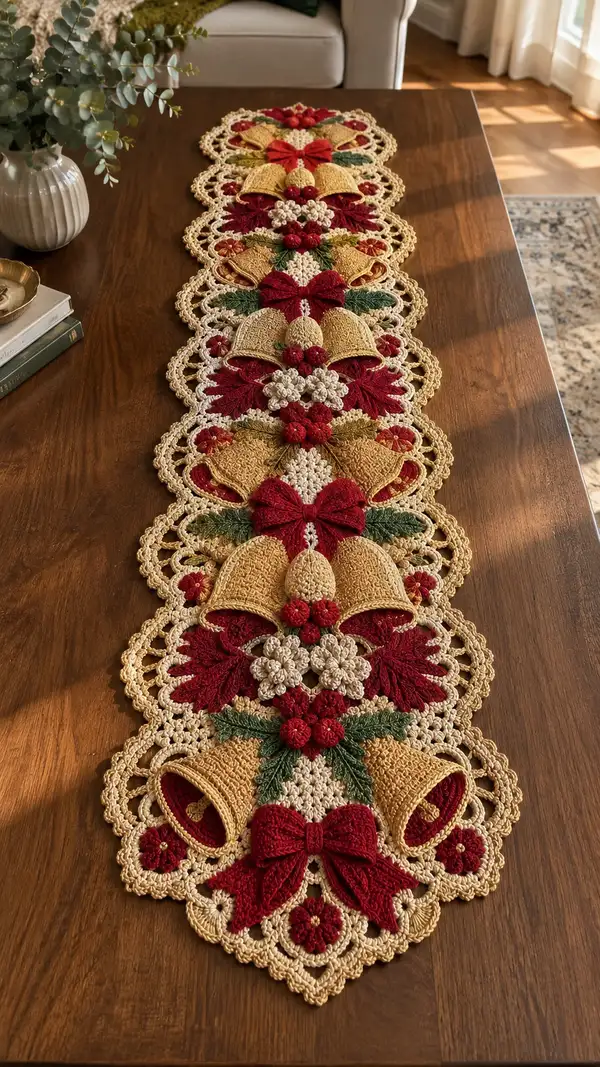
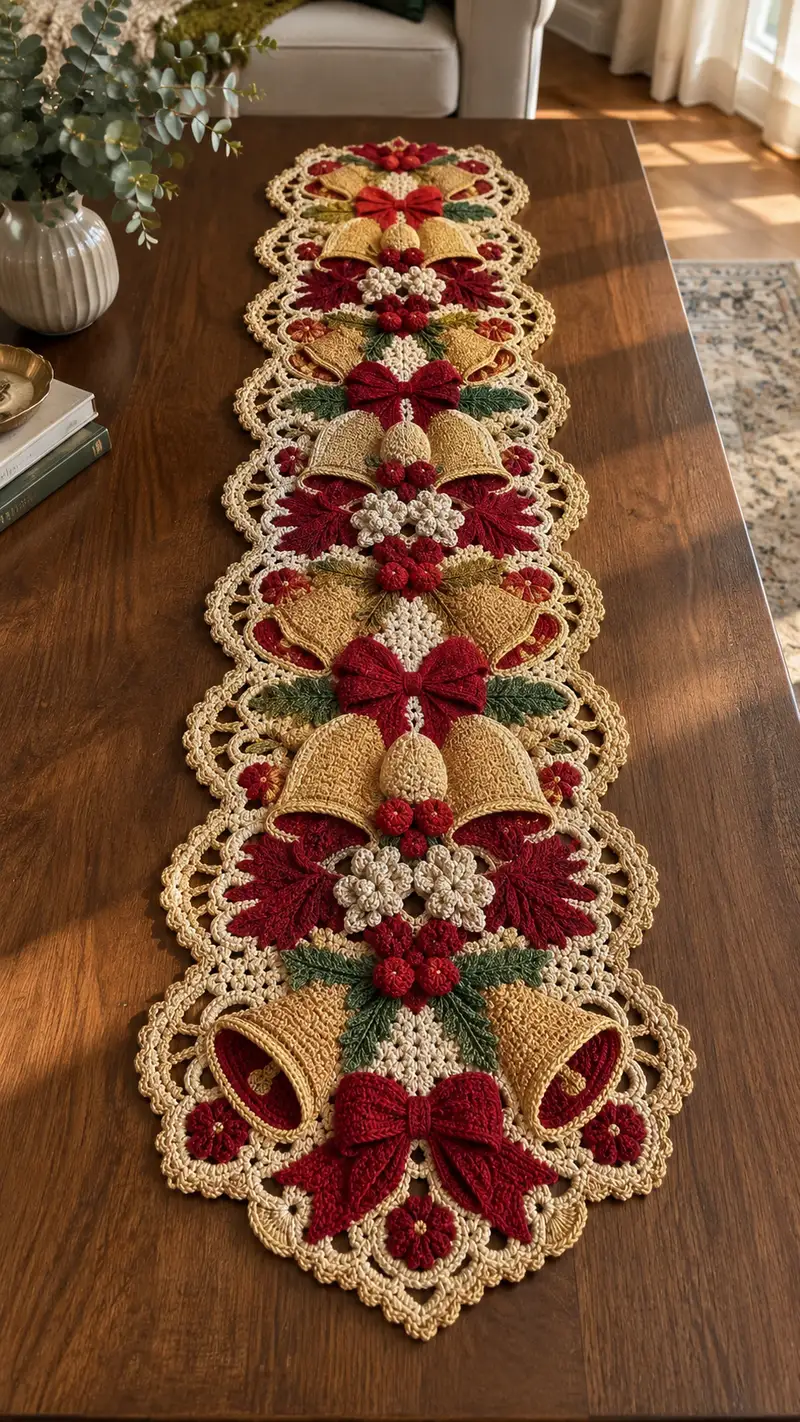
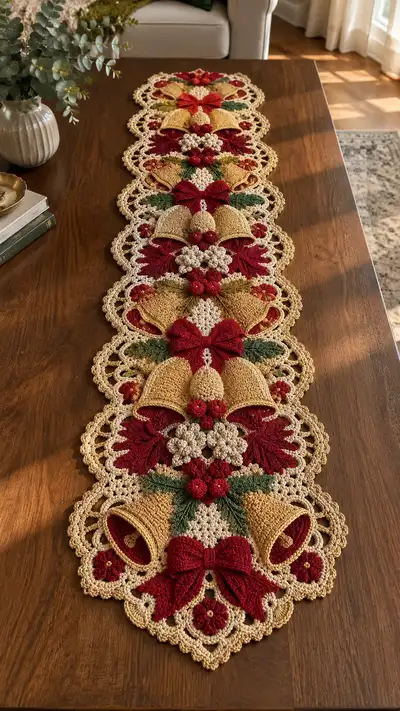
Create a timeless holiday table runner featuring layered gold bells, deep red bows, green fern-like leaves, and delicate cream lace connecting medallions. This richly textured runner is worked as repeat motifs and appliqued details to create a dramatic seasonal centerpiece. The finished piece sits beautifully on a dining table and uses contrasting colors and raised elements for a professional, heirloom look.
Progress Tracker
0% Complete
— Project Notes :
Info :
This pattern is written in rounds and rows for modular units. Work loosely for the lace base and slightly tighter for 3D appliques to ensure they sit on top. Block each motif flat before assembly. Join motifs using whip stitch or slip-stitch join and finish with a final scalloped border in cream.
Info :
Recommended hook sizes are 3.5mm for the lace base and 3.0mm or 2.75mm for smaller elements. Adjust for your tension. Keep stitch markers handy and count often.
— Central Lace Medallion Unit (Make 8-10 repeats depending on table length) :
Round 1 :
With cream, mr, ch1, 8 sc into mr (8)
Round 2 :
Inc in each st around (16)
Round 3 :
(1 sc, inc) x8 (24)
Round 4 :
(2 sc, inc) x8 (32)
Round 5 :
(3 sc, inc) x8 (40)
Info :
At this point you have a round disc that will form the base of the medallion. Maintain even tension; this disc will be the center that anchors later petals and motifs.
Round 6 :
1 sc in each st around (40)
Round 7 :
1 sc in each st BLO (40) to create a slight ridge for applique anchoring
Round 8 :
(4 sc, inc) x8 (48)
Round 9 :
1 sc in each st (48)
Round 10 :
Ch3, *skip1, dc in next 3, ch2, sc in next, ch2; rep from * around to create openwork (48 dc total approx)
Info :
Use this round to create the open scallop pockets that will accept bell appliques. Pin motifs to ensure pockets align before final joining.
Round 11 :
1 sc in each st and ch space to stabilize (48)
Round 12 :
(6 sc, ch4, skip 2) x6 around outer edge creating 6 larger scallops for bells (48)
Round 13 :
Work into each ch4 space: (sc, hdc, 3 dc, hdc, sc) to form scallop arches (6 scallops)
Info :
Make sure scallops are evenly spaced; these are the base that defines each bell/leaf grouping. This medallion sits beneath 3D elements and should be flat—block if necessary.
Round 14 :
1 sc around entire medallion, working evenly into scallop peaks and valleys to create a clean join (estimate 72)
Round 15 :
Work picot decorations between scallops: *ch3, sl st into base, 3 sc around next valley; rep around
Round 16 :
Fasten off cream for now and set medallion aside. You will attach appliques to the scallop pockets later.
— Bell Applique (Make 2 per medallion - left and right) :
Round 1 :
With gold, mr, ch1, 6 sc in mr (6)
Round 3 :
(1 sc, inc) x6 (18)
Round 4 :
(2 sc, inc) x6 (24)
Round 5 :
(3 sc, inc) x6 (30)
Info :
This initial dome builds the inner top portion of the bell. Keep stitches tight for structure so the bell bowl will hold shape when folded.
Round 6 :
1 sc in each st (30)
Round 7 :
1 sc in each st BLO (30) to create a ridge toward the rim
Round 8 :
(4 sc, inc) x5, (3 sc, inc) x1 (36) — even increase to shape wider rim
Round 9 :
1 sc in each st (36)
Round 10 :
Switch to 3.0mm hook. Work 1 sc in each st; at the end of round fold the bell rim slightly outward and slip stitch across the rim to form a crisp edge (36)
Info :
To create a bell bowl, after Round 10 you will fold the bell so the rim flares out. Optionally block over a small cup to shape. You will stitch the base of the bell onto the scallop pockets from the medallion.
Round 11 :
Work 1 sc in each st, then ch1 and turn; sc evenly across the rim edge to reinforce (36)
Round 12 :
Fasten off leaving long tail for sewing. If you want a deeper bell, add two extra rounds of 1 sc each before finishing (optional)
Info :
Make a second bell mirror image by working the same rounds and shaping. Use pins to place each bell into the medallion scallop and tack in place before permanent sewing.
— Bell Clapper (Small Egg Shape, Make 1 per bell) :
Round 1 :
With gold, mr, ch1, 6 sc into mr (6)
Round 3 :
(1 sc, inc) x6 (18)
Round 4 :
1 sc in each st (18)
Round 5 :
(1 sc, dec) x6 (12)
Round 6 :
6 dec (6) - close slightly leaving short tail for sewing under the bell rim
Info :
Stuff clapper lightly with tiny bit of fiberfill or leave unstuffed for a flatter look. Sew to inside of bell so it nestles beneath the rim and adds dimension.
— Small Berry Cluster (Make 3 per bell cluster) :
Round 1 :
With red, mr, ch1, 6 sc in mr (6)
Round 2 :
Inc in each st (12)
Round 3 :
(1 sc, inc) x6 (18)
Round 4 :
Work 3 rounds of puff stitches around the berry to create a textured cluster: *yo, insert, pull up loop 4 times, yo and pull through all loops, ch1; rep 2 more times. Finish with 1 sc around (18)
Info :
Use minimal stuffing to keep berries compact. Make 3 small berries per cluster and sew them together in a triangular group to form the clusters seen between bells and bow center.
— Large Bow (Make 1 per medallion center) :
Round 1 :
With red, ch12, sc in 2nd ch from hook, sc across (11)
Round 2 :
Ch1, turn, sc across (11)
Round 3 :
Work 6 rows of sc to create a rectangular band (11) — total 6 rows
Round 4 :
Fold rectangle in half widthwise, whip stitch open edge to form a loop; cinch center tightly to create bow shape
Info :
To create fuller bow loops, before cinching, add two small semicircle wings: attach yarn and work (sc, hdc, 3 dc, hdc, sc) across each short edge then gather. Secure with small wrapped band of red yarn and stitch band closed.
Round 5 :
Optional: add decorative topstitch with surface slip stitch to emphasize bow folds. Fasten off and weave in ends.
— Bow Tail/Petal Details (Make 2 tails per bow) :
Round 1 :
With red, ch20, sc in 2nd ch, sc across (19)
Round 2 :
Ch1, turn, sc across (19)
Round 3 :
Work 2 rows of (sc, hdc, 3 dc, hdc, sc) centered to form tapered tail edging. Fasten off and attach to bow lower corners.
Info :
Bows are intentionally flat and oversized to sit in front of the bells. Pin bow centered above the bell pair and sew the wrapped band through the lace medallion to anchor firmly.
— Leaf Sprig (Make 4 sprigs per medallion — 2 long, 2 short) :
Round 1 :
With green, ch12, sc in 2nd ch from hook, sc across (11)
Round 2 :
Ch1, turn, (sc in next 2, hdc, 3 dc, hdc, sc2tog across) to create a tapered leaf tip (11)
Round 3 :
Work BLO along one side to create a raised central vein: *sc in next 3, fpdc around next stitch; rep to end. Fasten and leave long tail
Info :
For larger fern-like leaves, chain longer (16-20) and increase the centre dc cluster to 5 dc. Press and steam or block leaves so they fan outward under the bow.
Round 4 :
Make smaller sprigs by ch8 and repeating shaping instructions. Make 4 sprigs per medallion: two long, two short to layer under berries and bows.
— Clustered Small Flower (Make 3 clusters per medallion) :
Round 1 :
With cream, mr, ch1, 6 sc in mr (6)
Round 2 :
In each st: (ch2, picot, sc) creating 6 little petals around center; fasten off (12 petal points)
Info :
Each small flower cluster is a trio of such flowers sewn together to imitate the clustered cream blossoms seen in center. Add a tiny gold french knot by sewing with gold yarn to mimic bead center.
— Decorative Mini Flower (Make 6 per medallion for outer scallops) :
Round 1 :
With red, mr, ch1, 6 sc (6)
Round 2 :
Work (ch3, sl st into same st) x6 to create 6 tiny loops forming petals. Fasten off with short tail and stitch into scallop valleys.
Info :
Add a gold bead or titch of gold yarn in the center for sparkle. Make 6 to evenly space around the outer edge.
— Connecting Central Spine Strip (Make 1 long strip matching medallion repeats) :
Round 1 :
With cream, ch6, join to first ch to form a ring, ch1, 12 sc in ring (12)
Round 2 :
Work 6 rounds of 1 sc in each st to build a strong central spine for joining motifs (12)
Round 3 :
Next row: ch4, (skip 1, dc in next) repeat across to create open loop texture to allow medallions to be whip-stitched to the spine (12 dc approx)
Info :
The spine should be as long as the number of medallions you intend. Join medallions to this strip by sewing along the inner edge of each medallion center to create a straight runner.
— Outer Scalloped Border (Final Border for entire runner) :
Round 1 :
With cream, join at any outside scallop point and work 1 sc evenly around the full runner to prepare for border (work into medallion outer sts and between motifs) — keep even stitch count across entire runner (estimate 720-900 sts depending on length)
Round 2 :
*(ch3, skip 2, sc in next) repeat around to establish scallop foundations; adjust spacing to fit the outer profile* (approx 1 scallop per medallion scallop)
Round 3 :
In each ch3 space: (sc, hdc, 3 dc, hdc, sc) to create large scallop shell (work carefully to keep shells even)
Round 4 :
Between each shell work a small picot: ch3, sl st into base. Fasten off and weave ends.
Info :
Final border creates the scalloped lace edge seen in the photo. Blocking at this point is essential to open shells and achieve even curves.
— Assembly & Attachment Steps (Applique and Join Instructions) :
Info :
Block all medallions, bells, bows, leaves, berries and flowers individually before assembly. Use rust-proof pins and spray starch lightly for a crisp finish. Lay out medallions and decorative pieces to match photo before sewing.
Round 1 :
Attach bell pair: place two bell bowls into their medallion scallop pockets, slip stitch or whip stitch the bell bases to the medallion at 6-8 evenly spaced points around the base (no numeric count; sew to match shape).
Round 2 :
Sew clapper under bell rim so it tucks into bell interior and is centered between paired bells. Secure with several passes to ensure it won’t snag or come loose.
Round 3 :
Position bow centered beneath the top scallop area between the two bells; tack with 6-8 small invisible stitches through the bow band into the medallion base to anchor firmly.
Round 4 :
Layer leaf sprigs beneath bow arranged in a fan: long sprigs toward the top and smaller sprigs beneath. Secure at the base by sewing through central spine of the leaf into the medallion.
Round 5 :
Sew berry clusters into place where medallion center meets bell bases; stitch 3 small berries together then anchor down with a few stitches. Add small flower clusters in the center group to complete composition.
Info :
Take care when sewing to use a yarn needle and matching thread. Weave tails inside medallion or between layers so they don’t show on final piece. Add extra stitches at stress points to keep appliques secure.
— Detailed Stitch Techniques & Tips :
Info :
Popcorn (pc) technique: work 5 dc into same st, remove hook from loop, insert hook into first dc, reinsert loop and sl st to close the popcorn. Puff stitch: yo, insert, pull loop repeatedly as indicated, yo and pull through all loops then ch1 to lock.
Info :
Invisible decrease (dec): insert hook into front loop of next st, then into front loop of following st, yo and draw through both loops as you would a sc2tog; maintains a neat surface for decorative items.
Info :
To mirror appliques (bells, leaves) make the first piece, then use it as a template for the second so shapes match. Block both pieces stacked to ensure identical curve and size.
Info :
When joining medallions to the central spine, use mattress stitch or whip stitch from the reverse of the work to make the join nearly invisible on the front. Make sure medallion centers are aligned straight along the spine.
Info :
Final pressing: after all pieces are sewn and ends woven, pin entire runner to blocking board in final shape. Spray lightly with water or sprayed starch and allow to dry completely for crisp scallops and even profile.
— Variation Ideas :
Info :
Change the palette for different seasons: soft pastels for spring, navy and silver for winter. Swap bells for tiny hats or hearts to create other holiday motifs while using the same medallion base.
This festive table runner brings classic holiday charm to your table with layered 3D bells, bold bows and delicate lace. Each medallion is a small work of art, and the repeating pattern creates a dramatic centerpiece that will be admired year after year. Make it as a family heirloom or a special gift — it's the kind of project that rewards patience with a stunning finished piece. 🎄🧶