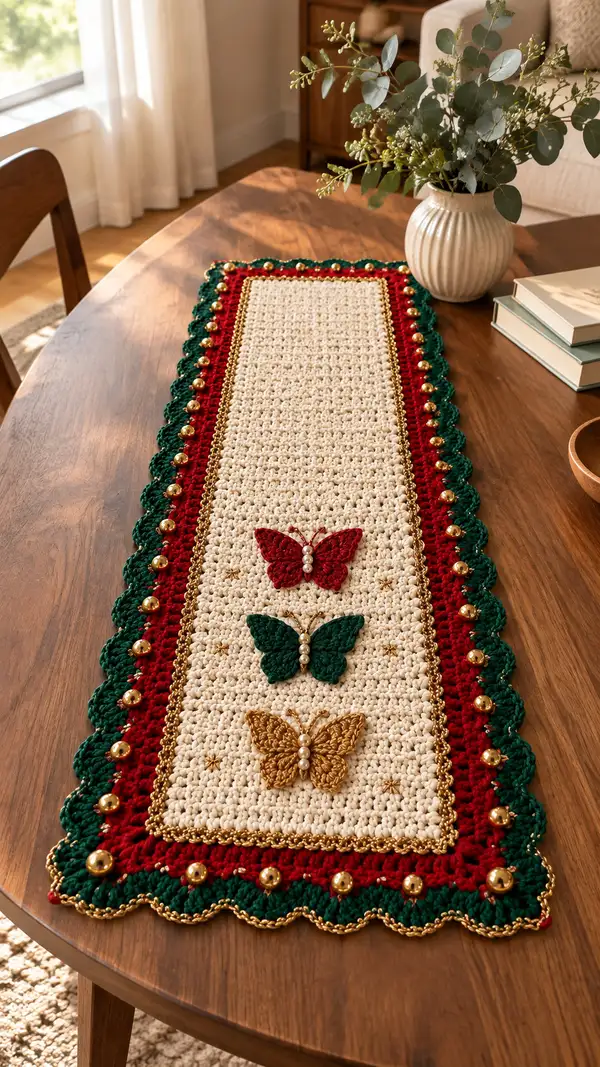
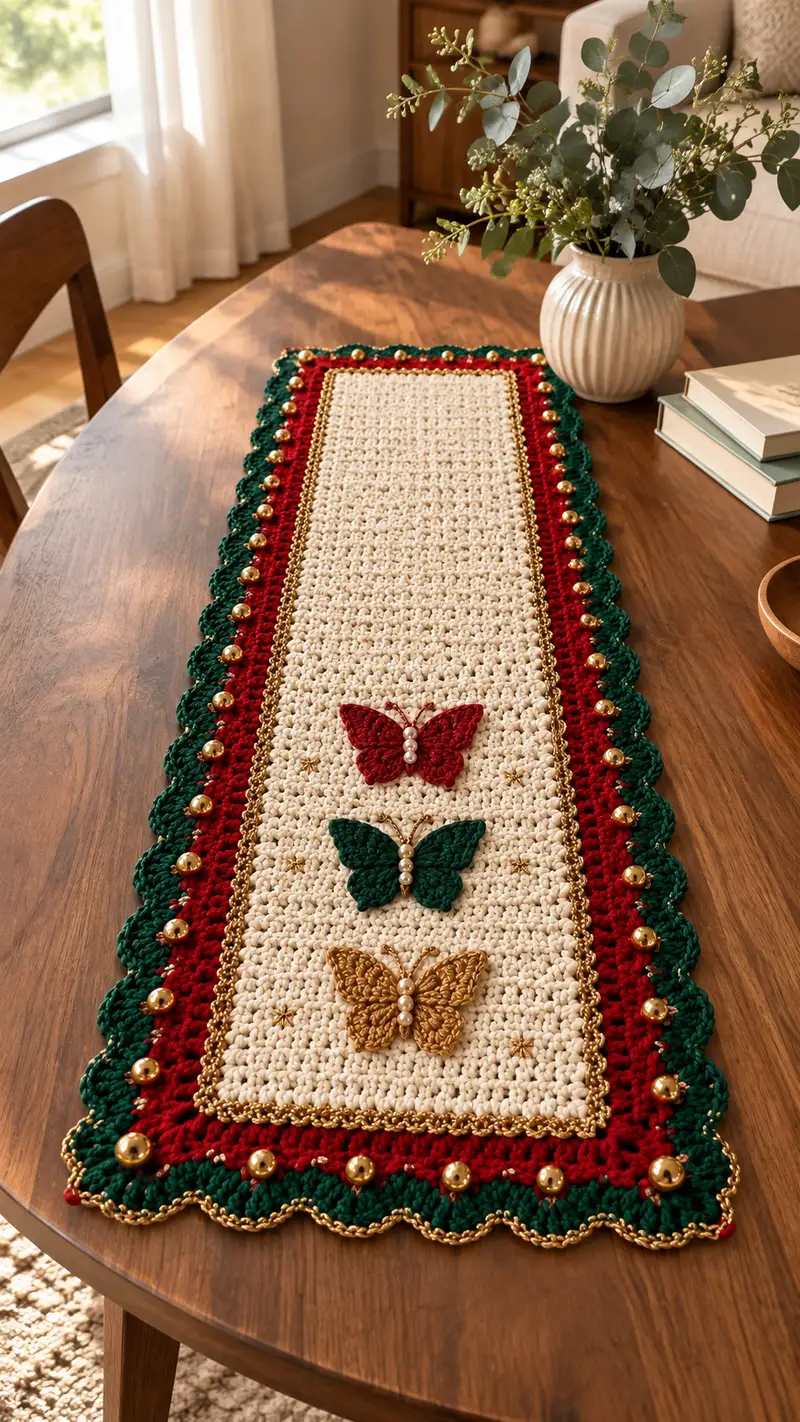
A warm, elegant table runner featuring a textured cream center, layered red and green scalloped borders, gold trim and bead accents, and three raised crochet butterfly appliques. This pattern recreates the layered holiday-inspired runner pictured, complete with metallic chain edging, sewn gold beads, and decorative embroidered stars. Suitable for decorating a dining table or sideboard, it blends classic crochet stitches with a few simple finishing techniques for a polished look.
Progress Tracker
0% Complete
— Materials & Gauge :
Info :
Finished runner in photo measures approximately 12" wide x 48" long. Gauge is not critical for pattern repeat, but for similar sizing aim for 18 sc and 16 rows = 4" in single crochet using 4.0mm hook in cream yarn. Adjust hook to match gauge or desired width/length.
— Center Panel (Cream) :
Round 1 :
Foundation chain 121 (adjust length in multiples of 2 to change width). For pictured size use ch121 (121 ch).
Round 2 :
Row 1 (RS): Sc in 2nd ch from hook and in each ch across. Turn. (120 sc)
Round 3 :
Row 2 (WS): Ch1, turn, sc in BLO of each st across. Turn. (120 sc)
Round 4 :
Row 3 (RS): Ch1, turn, sc in FLO of each st across. Turn. (120 sc)
Round 5-12 :
Rows 4-11: Repeat Rows 2-3 alternating BLO and FLO sc to create linen/granite texture. Keep stitch count at 120 sc in every row. (120 sc)
Info :
This alternating BLO/FLO single crochet creates the tightly woven texture seen in the photo. Use stitch markers at the first and last st of the first four rows to ensure a square edge, remove after shape set.
Round 13-40 :
Continue repeating Rows 2-3 (alternating BLO/FLO sc) for a total of 64 rows of texture for the central panel (including the initial rows). After completing Row 64 you should have a rectangular panel approximately 48" long; shorten or lengthen by adding/removing 2-row repeats as desired. (120 sc each row)
Info :
Measure your center panel as you work. For a shorter runner reduce repeats in pairs to keep the pattern balanced. Keep edges straight by placing a scrap stitch marker into the first and last st every 8-12 rows until comfortable with tension.
Round 41 :
RS: Work an even round of sc across the top edge to create a clean edge for border attachment: Ch1, turn, sc in each st across. Fasten off cream but leave tail for sewing if you prefer to seam borders. (120 sc)
— Gold Inner Chain Border :
Info :
Use metallic gold thread or very thin metallic yarn held single. This is worked as a decorative chain stitch attached to the edge of the cream panel to form a framed line before the red border.
Round 42 :
With RS facing, join gold thread in the first st at one short end with a sl st. Ch1, *sc in next st, ch1; rep across the top edge to short end. The gold will create a fine chain-like ridge. (120 sc/ch1 loops)
Round 43 :
Turn to work down the long side: Ch1, sc evenly spaced along the long edge placing approx 120 sc total across long edge (count may differ slightly; keep spacing even). Continue around the perimeter following the rectangle: sl st in corners to turn, sc evenly along next side, ending with a sl st to join at starting point. Fasten off gold and weave tails neatly. (perimeter attachment)
Info :
Technique Tip :
When working metallic thread, keep tension loose enough to avoid puckering the fabric. If metallic is slippery, use a small bead of fabric glue at the start tail to secure before weaving in.
— Red Main Border (Rowed Shell Foundation) :
Info :
Switch to deep red worsted yarn. This border sits on top of the gold chain and provides a full band before the scalloped green outer border. Work in rounds around the entire panel.
Round 44 :
Join red in any corner with sl st. Round 1 (border): Ch2 (counts as hdc), work 1 hdc in each cream edge st around working approximately 120 sts along each long side and equal on short sides; adjust slightly to maintain corners square. Join with sl st to top of starting ch2. (approx 484 hdc around - actual stitch number will depend on spacing; maintain even tension)
Info :
If you counted 120 sc per cream row, aim to place approximately 120 hdc along each long side; the total perimeter count will be 2*(120)+2*(short side count). You can increase or decrease the number of hdc slightly to keep shell placement even in the next round.
Round 45 :
Ch1, turn, 1 sc in each hdc around. Join with sl st. This creates a stable base for shell stitches. (perimeter sc)
Round 46 :
Ch3 (counts as dc), *skip 2 sc, (3 dc, ch2, 3 dc) in next sc (shell made), skip 2 sc, 1 dc in next sc; rep from * around, placing shells evenly across long and short sides. Join with sl st to top of ch3. (Shells approx every 6-8 sts; adjust spacing to have whole shells fit evenly on each side)
Round 47 :
Ch1, sl st into centre ch2 space of each shell, ch1, 1 sc around each shell centre to define the shell row; join. This row tightens the shell forms and gives an even platform for the green scallops. Fasten off red but leave tail for weaving. (shell centres defined)
Info :
Work shell spacing so that the green scallops will sit centered on each red shell. If your shell spacing doesn't divide evenly, add or remove small sc spacers on Round 45 to rebalance before working shells.
— Green Scallop Outer Border :
Info :
Outer scallops are worked in green as large shells over the red shell foundation creating the final scalloped edge. You will increase into the shell centre used in the red row to form pronounced scallops. This is where bead placement occurs later.
Round 48 :
Join green in any shell centre ch2 space with sl st. Ch1, *(sc, ch1, (5 dc, ch2, 5 dc) in next shell centre, ch1, sc) in next sc between shells; rep from * around. This places large 10-dc scallops across the edge. Join with sl st. (one large scallop per red shell centre)
Round 49 :
Ch1, 1 sc in each st around working through both loops; when you reach the top loops of each scallop work an additional 1 sc, then 3 sc into the top centre to slightly point the scallop. Join and fasten off green leaving tail for bead sewing. (defined scallops)
Info :
Make sure scallops are evenly spaced and rounded; if a scallop looks too flat, add one more dc into the top centre on Round 49. Use stitch markers to mark every 5th scallop while working to count bead placement easily.
— Gold Bead Placement :
Round 50 :
Using a small sewing needle and matching thread, sew a large gold bead to the base of each green scallop where the red and green borders meet. Space beads so they are centered in the small ch1 spaces of the red shell row. Secure each bead with 3 passes of thread and a small knot on the WS; bury the end ends. Add smaller gold seed beads in the little spaces between scallops if desired. (beads applied)
Info :
Place pins in the centre of each scallop first, then lay a bead to check spacing before sewing. For uniform look keep bead centers approximately 1.5 cm from outer edge. Use matching metallic thread for invisible stitches.
— Gold Picot Edge (Final Trim) :
Round 51 :
Join metallic gold thread in outermost top of any scallop with sl st. *Ch3, picot (ch3 sl st into first ch), sl st into top centre st of next scallop; rep from * around to create small gold picot loops along the outer edge. Join and weave in ends. (decorative picot edge)
Info :
This final metallic picot creates the subtle gold outline visible in the photo. If metallic thread is too fine, you can hold it with a strand of cream or red for more body and a subtle shimmer.
— Decorative Gold Embroidered Stars :
Info :
Small embroidered star motifs are worked on the cream panel between the butterflies using metallic gold thread. They are simple 6-8 stitch starbursts sewn in place to match photo placement.
Round 52 :
Using metallic gold and a sewing needle, bring thread through to RS at desired star location, make 6 straight stitches radiating from the centre about 6 mm long, then pass the needle under the central point and pull to cinch slightly. Add a small french knot or tiny bead to the centre. Repeat stars spaced evenly between butterflies. (stars embroidered)
Info :
Embroider the stars after butterflies are placed so you can judge spacing visually. Keep stitches small and even; practice on a scrap first if needed.
— Butterfly Appliques (Make 3) :
Info :
Each butterfly is worked flat as two mirrored wing halves, then joined and embellished with a bead body. The butterflies in the photo are worked in gold, green and red respectively. Use 3.5mm hook for tighter small work.
Round 53 :
Butterfly Wing (Make 2 halves per butterfly) - Round 1: With chosen color (e.g., gold for bottom), ch8. In 2nd ch from hook work: 1 sc, hdc, 3 dc in next ch (forming a small fan), hdc, sc in last ch. This creates a small wing tip. (approx 7 sts)
Round 54 :
Round 2: Ch1, turn, working along opposite side of foundation ch: sc in first 2 ch, 2 sc in next 3 ch (increase to shape), sc in last 2 ch. Join to first sc by sl st. This rounds the wing. (approx 12 sts)
Round 55 :
Round 3: Ch1, sc around wing making 2 sc in the top centre to create a slight ridge for body placement. Fasten off leaving long tail for joining halves. Repeat to make second mirrored wing half. (wing shaped)
Info :
Keep wings symmetrical by working the same increases on opposite side when making the second half. You can pin wings on a flat surface and block lightly with a damp cloth to get a crisp shape before joining.
Round 56 :
Assembly of Butterfly: Place two wing halves RS together aligning centres. Using matching yarn and whip stitch sew along the curved outer edge leaving the bottom edge open to join and shape. Turn RS out if desired and press lightly to set shape. (assembled wings)
Round 57 :
Body & Beads: Using metallic gold or pearl beads, string three pearl beads onto a thin beading thread or sewing thread. Stitch beads through the centre joining point of the wings to create the butterfly body, secure thread ends tightly on WS and weave in. (beaded body)
Round 58 :
Antennae & Embellish: With gold thread and a small needle, stitch two small antennae from top of body using a chain of 3 stitches and a tiny bead on the tip or a bullion knot. Add small decorative embroidery lines on wings if desired. Make three butterflies in colors gold (bottom), green (middle), red (top) and place spaced evenly along centerline of runner.
Info :
Position butterflies visually on the cream panel before anchoring them permanently. They should be spaced evenly with the bottom gold one approx 5-6" from the short end, middle around center, top 5-6" from opposite short end. Use pins to hold in place carefully.
— Butterfly Attachment & Final Embroidery :
Round 59 :
Pin each butterfly to the cream panel, aligning centre of body to the linen stitch gaps. Using invisible stitch (ladder stitch) or small whip stitches with matching yarn, sew each butterfly body down through the centre line only so wings remain slightly lifted for a 3D effect. (attach butterflies)
Round 60 :
Secure edges with small stitches at three points: top wing tip, bottom wing tip, and centre body base so butterfly is stable but wings still have dimension. Hide knots on WS and weave tails well. (secure attachments)
Round 61 :
Final Embroidery: Using metallic gold thread add small decorative lines and 4-6 tiny stars around the butterflies. Place these details sparsely to mimic the delicate golden stars in the photo. Add tiny seed beads at star centres if desired. (decorative embroidery)
Info :
Use a small stitch length for embroidery to keep lines tidy. If unsure about placement, sketch lightly with a washable fabric pen and then stitch.
— Alternate Decorative Rowing (Optional) :
Round 62 :
If you prefer a double gold chain effect as in the photo’s inner trim, work an additional narrow chain on the cream edge inside the red border by joining gold thread and working sc into the row just inside the perimeter. This creates a framed double-gold line.
Round 63 :
Ch1, sc evenly into the cream row just inside the red border, join and fasten off. Weave in ends. (double gold line optional)
Info :
This optional line adds more shimmer and matches the gold rope-like line visible in the photo. Keep the metallic tension even to prevent puckering.
— Blocking & Final Finish :
Round 64 :
Block the finished runner: soak lightly or spray and pin to proper rectangular dimensions on a blocking mat, stretching gently to flatten and get even edges. Allow to dry fully. (blocking)
Round 65 :
After blocking, double-check bead security and re-tack any beads that have loosened. Trim any visible thread tails on WS and press gently with a cool iron on a cloth if desired. (final finish)
Info :
Blocking is essential to open up the textured center and set the scalloped border correctly. Place a towel between iron and metallic threads to avoid flattening the sheen.
— Optional Size Adjustments & Notes :
Round 66 :
To make runner wider: increase foundation chain by multiples of 2 (recommended increments of 20 ch = approx 2.5") and add proportional number of hdc on border foundation. To make longer: add 2-row repeats to the center texture pattern to maintain symmetry. Keep border shell counts even by adjusting Round 45 sc counts before shelling.
Round 67 :
To convert to table mat or pillow panel: shorten center rows and adapt border rounds as a closed square/rectangle; when working shells, space evenly so corners receive shells as in runner.
Info :
Always work border shell placement after measuring the perimeter; it's easier to add a few sc on the base round than to redistribute shells after they are placed.
This festive table runner combines texture, color blocking and metallic accents to create a refined centerpiece you’ll be proud to display. The layered borders, beaded scallops and three-dimensional butterflies turn simple stitches into a stunning seasonal statement. Work slowly, pin often, and enjoy the transformation from yarn to heirloom. 🧶✨ Add your personal touches and watch it become a favorite table accent. Happy stitching and proud displaying! 🎀