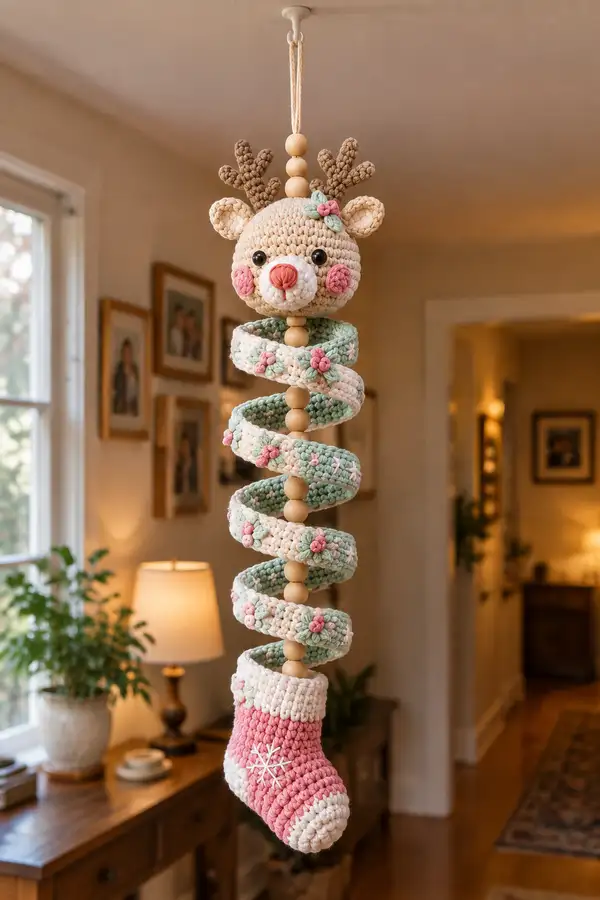
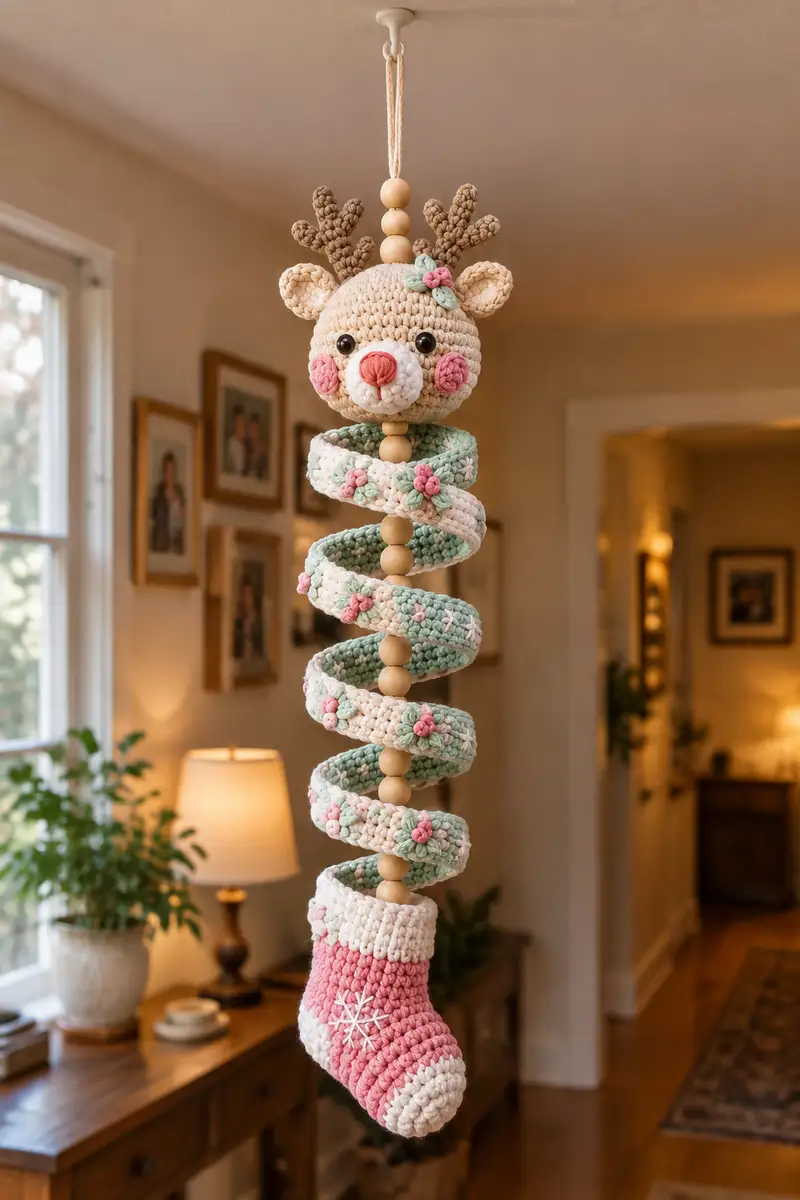
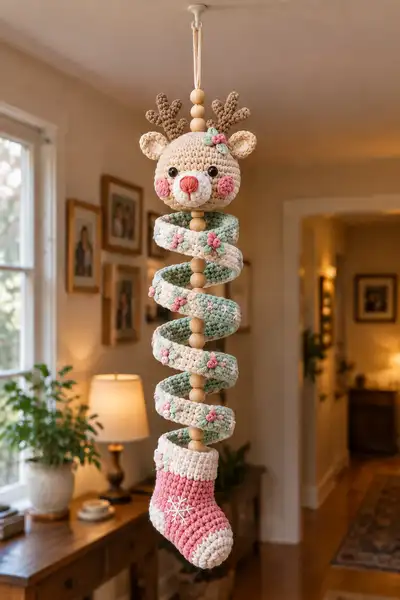
Create a charming hanging spiral garland featuring a sweet deer head, wooden bead spine, floral spiral coils and a tiny pink stocking. This cozy holiday decoration combines plush amigurumi shaping and textured spiral coils for a whimsical, cottage-style accent. Soft pastels, wooden beads and delicate embroidered flowers bring this garland to life — perfect for doorways, nurseries, or mantel displays. Detailed step-by-step instructions make this a delightful seasonal craft to gift or display.
Progress Tracker
0% Complete
— Head :
Round 1 :
6 sc in magic ring (6)
Round 3 :
(1 sc, inc) x 6 (18)
Round 4 :
(2 sc, inc) x 6 (24)
Round 5 :
(3 sc, inc) x 6 (30)
Info :
Work with pale beige/cream yarn. Keep stitches tight to avoid showing stuffing later. Place a stitch marker in first stitch and move each round.
Round 6 :
(4 sc, inc) x 6 (36)
Round 7 :
(5 sc, inc) x 6 (42)
Round 8 :
(6 sc, inc) x 6 (48)
Info :
By round 8 you will have a round, slightly flattened sphere beginning shape. If using safety eyes, plan eye placement before working more height. Typical placement: between rounds 13-15, spaced 6-8 sts apart.
Round 9 :
1 sc in each st (48)
Round 10 :
1 sc in each st (48)
Round 11 :
1 sc in each st (48)
Info :
Place safety eyes between rounds 13 and 14 approximately 6-8 sts apart depending on how wide you want the face. If crocheting for a child, embroider eyes instead of using safety eyes for safety.
Round 12 :
1 sc in each st (48)
Round 13 :
1 sc in each st (48)
Round 14 :
1 sc in each st (48)
Info :
Attach safety eyes now if using. Mark center stitch between eyes for nose placement. Begin light facial embroidery later. Start stuffing slightly — the top will be closed later and needs volume to keep shape.
Round 15 :
1 sc in each st (48)
Round 16 :
1 sc in each st (48)
Round 17 :
1 sc in each st (48)
Info :
Continue even rounds to build head height. Stuff gradually from this point; add small amounts of fiberfill and smooth between rounds to keep an even surface.
Round 18 :
1 sc in each st (48)
Round 19 :
(6 sc, dec) x 6 (42)
Round 20 :
(5 sc, dec) x 6 (36)
Info :
Begin gentle decreases to shape the lower part of the face and prepare for muzzle attachment. Keep stuffing moderate so the head remains round but not overfilled.
Round 21 :
(4 sc, dec) x 6 (30)
Round 22 :
(3 sc, dec) x 6 (24)
Round 23 :
(2 sc, dec) x 6 (18)
Info :
Muzzle will be worked separately and sewn on between rounds 20 and 23 area. Leave an opening for neck/neck-stitching later. Continue stuffing to desired firmness for a hanging ornament (slightly firmer than plush toy to hold shape).
Round 24 :
(1 sc, dec) x 6 (12)
Info :
Fasten off leaving a long tail for sewing the neck to the bead spine or body. Finish stuffing firmly, smoothing surface and ensuring eyes and cheeks are in correct alignment.
— Muzzle / Snout :
Round 1 :
6 sc in magic ring (6)
Round 3 :
(1 sc, inc) x 6 (18)
Round 4 :
1 sc in each st (18)
Info :
Use white or very pale cream for muzzle to contrast slightly with head. Slight stuffing here will give a rounded snout. Embroider nose center with a small round in pink or coral before attaching or attach a small safety nose bead if desired.
Round 5 :
(2 sc, inc) x 6 (24)
Round 6 :
1 sc in each st (24)
Round 7 :
(2 sc, dec) x 6 (18)
Round 8 :
1 sc in each st (18)
Info :
Stuff muzzle moderately; flatten slightly against head when sewing to create a natural snout. Sew muzzle to head centered between eyes, aligning bottom of muzzle around rounds 20-22 of head for a balanced face.
Round 9 :
Fasten off leaving tail for sewing
— Cheeks (Make 2) :
Round 1 :
6 sc in magic ring (6)
Round 3 :
1 sc in each st (12)
Info :
Work in blush pink, leave a long tail for sewing. These are flat, slightly padded discs. Sew one on each side of muzzle slightly below eye level and secure tightly.
Round 4 :
Fasten off and weave tail through center to flatten slightly, leaving tail for sewing
— Ears (Make 2) :
Round 1 :
6 sc in magic ring (6)
Round 3 :
(1 sc, inc) x 6 (18)
Round 4 :
1 sc in each st (18)
Info :
Use same cream as head for outer ear and a slightly lighter shade for inner ear if you prefer to sew an inner ear piece. Flatten the ear slightly and shape with a few short stitches across the base to create a natural curve.
Round 5 :
(2 sc, dec) x 4,(1 sc) x 2 (14)
Round 6 :
1 sc in each st (14)
Round 7 :
Fasten off, leaving long tail for sewing. Fold base slightly and stitch to head between rounds 6-8, angled forward for a natural deer ear.
— Antlers (Make 2) :
Info :
Antlers are worked in dark brown. They are sculptural and worked flat then sewn to head. Optional: insert thin wire into antler stem for stability, wrap wire in yarn if exposed ends might show.
Round 1 :
6 sc in magic ring (6)
Round 3 :
(1 sc, inc) x 6 (18)
Round 4 :
1 sc in each st (18)
Round 5 :
1 sc in next 5 sts, turn and work along opposite side to create a flat short horn: 1 sc in next 13 sts (18)
Info :
Create forked tips by stitching small 'branch' bumps: attach yarn at desired branch point, ch2, sc back into same st, fasten off and seam closed. Repeat for 2-3 small branches along each antler to mimic deer antler forks.
Round 6 :
Decrease across base to taper: (2 sc, dec) x 4,(1 sc) x 2 (14)
Round 7 :
1 sc in each st (14)
Round 8 :
Fasten off leaving long tail for sewing. Sew antlers to top of head between rounds 4-6, behind ears, and angle slightly backward.
— Neck Bead Cap :
Round 1 :
6 sc in magic ring (6)
Round 3 :
(1 sc, inc) x 6 (18)
Info :
This short tube will sit over the topmost wooden bead and conceal the hole where the head attaches to the bead spine. Fasten off with a long tail to stitch through bead hole and secure around cord.
Round 4 :
1 sc in each st (18)
— Spiral Coil Tube (Make 10 coils, each coil = 6 rounds) :
Info :
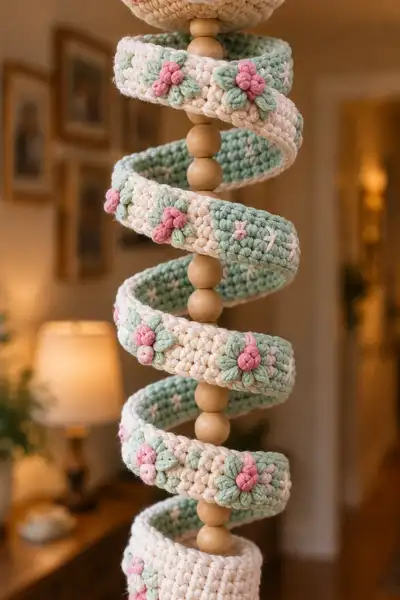
Each coil is a shallow tube crocheted in the round, worked in bulky yarn. Coils are approximately 6 rounds high and ~48 sts circumference depending on bead spacing. Alternate colors cream (outside) and mint (inside) as shown. We'll give detailed rounds for one coil; repeat to make total coils (10-12 depending on final length).
Round 1 :
6 sc in magic ring (6) — if you prefer to start with a chain tube, ch 18 and join and sc in each ch to form round base (48 sts) instead of magic ring for longer start
Round 2 :
Increase evenly to reach desired circumference: (4 sc, inc) x 9 (54) — adjust repeats to reach between 48-56 sts depending on tension
Round 3 :
1 sc in each st (54)
Round 4 :
1 sc in each st (54)
Round 5 :
1 sc in each st BLO (54)
Round 6 :
1 sc in each st (54) — fasten off leaving long tail for sewing and joining coils to beads
Info :
Make 10 identical coils for a medium-length garland. Stagger color changes: Coil 1: cream outer / mint inner, Coil 2: mint outer / cream inner, repeat pattern for a balanced look. If your stitch count differs, keep all coils consistent for even spiral spacing.
— Variation: Coil width and shaping :
Info :
For narrower coils decrease total rounds to 4 and adjust circumference to 40-46 sts. For chunkier coils add 2 more rounds and increase circumference to 58+ sts. Use BLO row to create a crisp upper edge that helps coil hold its shape around beads.
— Decorative Flowers (Make 18) :
Round 1 :
Make with pink yarn: ch4, sl st into first ch to form ring, ch1
Round 2 :
Work 5 petals: (sc, hdc, dc, hdc, sc) into ring, sl st to join — make 5 petals (5 petals)
Round 3 :
Fasten off leaving tail for sewing. Make small french-knot style center by working 3 sc tightly in center with a slightly darker pink or using bobble stitch for a raised center.
Info :
Flowers are sewn to the outside of coils at repeating intervals, three per coil face as shown. Add leaves separately using mint yarn for contrast.
— Leaves (Make 18) :
Round 1 :
With mint yarn ch6
Round 2 :
Starting in 2nd ch from hook: sc, hdc, dc, hdc, sc (5 sts) — fasten off leaving tail for sewing
Info :
Sew 2-3 leaves around each flower cluster to achieve the look in the photo. Stitch leaves flat to the coil surface to hold shape; you can add a small running stitch with matching yarn to create a central vein.
— Small Cross-Stitch Stars (Embroidered, Many) :
Info :
Use a contrasting light pink yarn to embroider small X stars across the inner face of some coils. These are simple crossed stitches over two adjacent sc stitches and add a soft, stitched look. Space evenly.
— Stocking (Base) :
Round 1 :
With pink yarn ch10, join to form ring (or magic ring and 10 sc) (10)
Round 2 :
Inc in each st around (20)
Round 3 :
(1 sc, inc) x 10 (30)
Round 4 :
(2 sc, inc) x 10 (40)
Round 5-7 :
1 sc in each st (40)
Info :
These rounds form the base of the stocking (toe area). Check that circumference matches coil diameter since stocking hangs at bottom as a decorative weight.
Round 8 :
Work 20 sc, turn and sc in next 10 sts only to shape cuff heel (20), leave remaining 10 sts unworked for heel gap
Round 9 :
1 sc in each active st (20)
Round 10 :
(2 sc, dec) x 5 (15)
Round 11 :
1 sc in each st (15)
Info :
Fold toe to meet heel gap and seam across to create a toe box. Use mattress stitch or invisible seam to join. Stuff lightly if you want the stocking to be plush; otherwise leave unstuffed for a flat decorative stocking.
Round 12 :
Rejoin along cuff edge, work 1 sc in each st around total 40 sts (40)
Round 13-15 :
Change to cream yarn for cuff: 1 sc in each st (40)
Round 16 :
Work snowflake embroidery using surface slip stitch or simple crossed embroidery stitches in white across the toe area — see Info for stitch details
Info :
Snowflake: Using white yarn and yarn needle, make a central straight stitch, then make 6 radial stitches around it and small crossed stitches between the radial lines to create a stylized snowflake. Secure ends inside cuff.
Round 17 :
Fasten off leaving long tail for attaching to bead spine. Sew top cuff to bottommost coil opening so stocking hangs freely.
— Flower Buds (tiny three-stitch buds) :
Round 1 :
With darker pink, ch3, in 2nd ch from hook do 3 sc, sl st to first to form a tight bud
Round 2 :
Fasten off leaving long tail for sewing. Sew a bud cluster center to each flower for dimension.
— Bead Spine & Hanging Cord :
Info :
String wooden beads onto a strong cord or twine in this order from top to bottom: loop for hanging, 1 large bead, 1 coil cap (will be stitched over top bead), alternating bead per coil spacing until lower bead, then attach stocking. Final count in photo shows approximately 8-9 beads creating spacing between coils. Use beads large enough to create visible gaps and to take up vertical space between coils.
Round 1 :
Slide topmost bead near loop, then position neck bead cap over bead and stitch around cord so head is secured above bead. Tie strong knots in cord and secure with a dab of fabric glue if needed (hide knot inside top bead).
Info :
Test how coils wrap by sliding them loosely onto cord over beads and adjusting bead spacing so each coil nests naturally into a helix. Beads act as spacers to create the spiral; adjust number and spacing for desired length.
— Assembly Prep :
Info :
Before sewing coils and beads into a final assembly, thread all beads and coil tubes onto cord in the correct order, alternating colors as planned. Slide coils into place and pinch where you will join them to bead or cord. Pin head in place and check orientation of ears and antlers before sewing.
— Attaching Coils to Beads (Repeat for Each Coil) :
Round 1 :
Slide coil onto cord so it rests around bead, align seam if present to back of coil
Round 2 :
Using tail left from coil, whip stitch the lower edge of the coil to the bead hole area or to the cord between beads to secure it so it doesn't slide; do not fully close the coil — it should be free enough to form a spiral when beads are spaced
Info :
Sewing each coil with a few secure stitches to the bead or cord prevents rotation and keeps the spiral stable. Ensure stitches are small and hidden inside the coil fabric. Repeat for all coils.
— Flowers & Leaves Attachment :
Round 1 :
Arrange flowers and leaves on outer curved side of each coil. Position clusters with three tiny flowers per coil segment as shown in the photo (two larger clusters per full coil wrap).
Round 2 :
Sew each flower center and leaf base to the coil with matching thread. Add small tacking stitches to secure petals so they maintain dimensional shape when hanging.
Info :
Stitch leaves flat against coils and sew the small buds into the center of each flower. Add two or three embroidered stars to the inner face of each coil for the look in the images.
— Final Head Detailing :
Round 1 :
Embroider small eyelashes or eyebrows above eyes with two short stitches in dark brown yarn; keep expression gentle and round.
Round 2 :
Sew on cheeks and muzzle if not already attached. Use small running stitches around muzzle base and hide knots inside head. Add blush with chalk or diluted fabric paint if desired.
Info :
Arrange small floral accent between one ear and the antler on the head; stitch through head stitches into place so it lies flat and secure. Use same pink and mint yarn used on coils for cohesive color palette.
— Final Assembly & Hanging :
Round 1 :
With head fixed to top bead and neck cap sewn to hide cord, slide coils down the cord and space beads evenly to form a consistent spiral. Adjust bead spacing and sew coils with a few stitches to cord to lock placement.
Round 2 :
Sew stocking to bottommost bead or to cord below last bead, ensuring it hangs straight and is secure. Tidy any visible ends by weaving into coil interiors.
Info :
Final check: move garland gently to ensure coils rotate into a spiral shape. If coils sag, add one or two extra beads or move stitches securing coil slightly to increase tension around cord.
— Troubleshooting & Tips :
Info :
If coils are too loose and collapse, remove and resew with a slightly smaller stitch gauge (use smaller hook) or add a spacer bead to increase coil separation. Keep consistent tension and check bead sizes if using different suppliers; bead diameter greatly affects spiral look.
Info :
For a more toddler-safe version, avoid small beads and safety eyes; embroider eyes and either crochet a stuffed tube instead of beads or use large, securely attached wooden rings.
Info :
Finish by weaving all yarn tails into the core of coils and head to hide them. Steam lightly to relax any uneven stitches (avoid direct contact with beads or painted surfaces).
This adorable deer spiral garland is such a joyful holiday project to make — soft, floral, and full of cottage charm! Each stitch brings the deer to life, from the blushing cheeks to the tiny embroidered snowflake on the stocking. The spiral coils and wooden beads add movement and texture, making this a truly special seasonal decoration you will love displaying. 🧶🎀✨