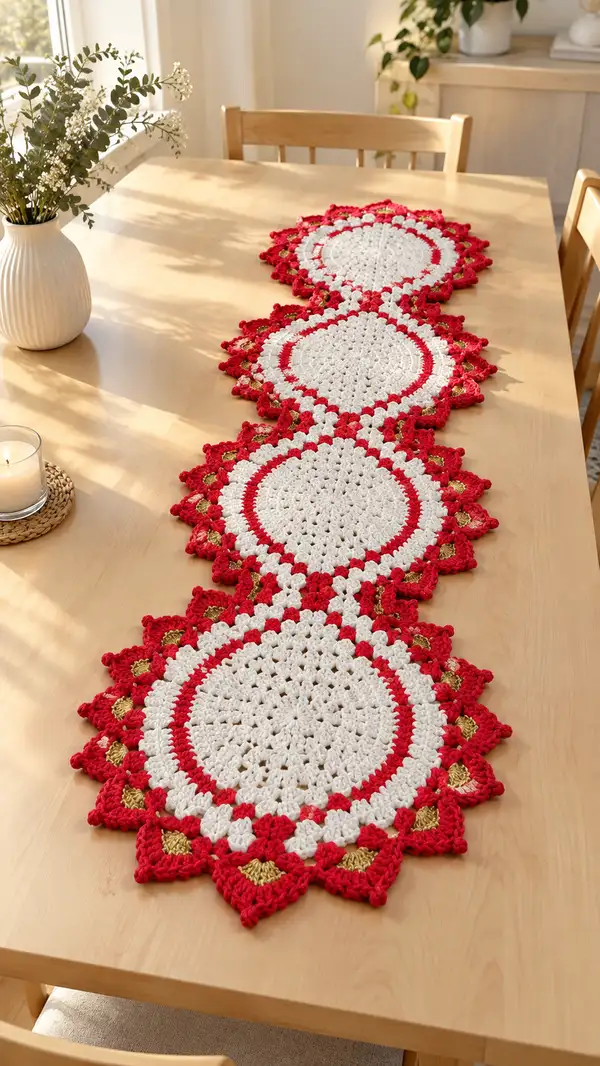
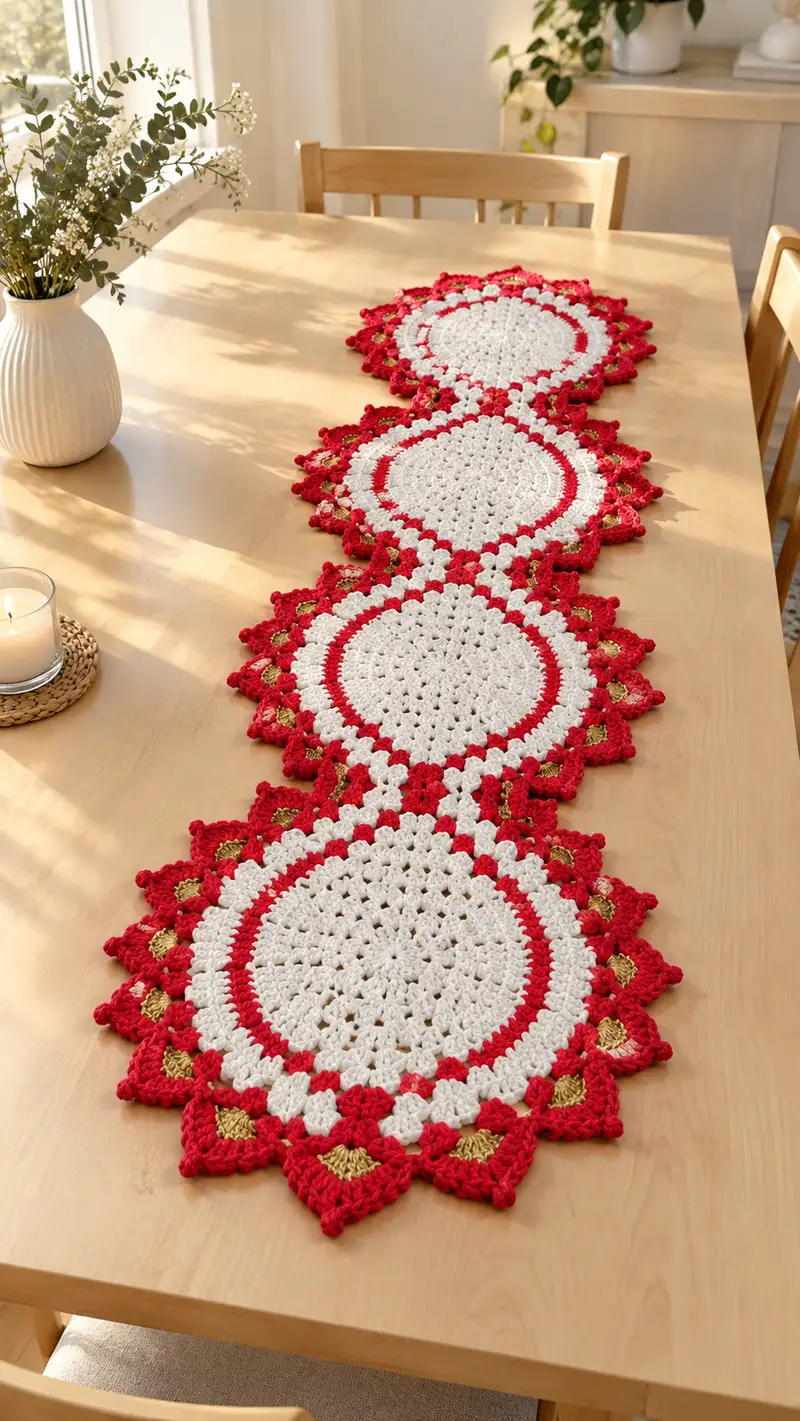
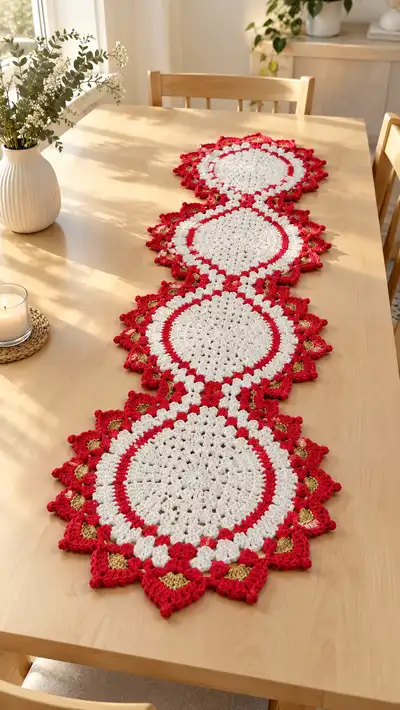
Create a striking festive table runner made from linked circular motifs with bright red scalloped edges and gold highlights. This runner features four large round medallions joined in a straight line, with a textured white center and decorative red-and-gold points. The pattern uses simple repeats, join-as-you-go techniques, and clear, step-by-step rounds to guide you from the first magic ring to blocking and finishing.
Progress Tracker
0% Complete
— Circular Motif (Make 4 identical motifs) :
Round 1 :
6 sc in magic ring (6)
Round 3 :
(1 sc, 1 inc) x 6 (18)
Round 4 :
(2 sc, 1 inc) x 6 (24)
Round 5 :
(3 sc, 1 inc) x 6 (30)
Round 6 :
(4 sc, 1 inc) x 6 (36)
Round 7 :
(5 sc, 1 inc) x 6 (42)
Round 8 :
(6 sc, 1 inc) x 6 (48)
Info :
You now have a stable flat circle base of 48 stitches. Place a stitch marker in the first stitch of this round to mark round starts. Work tightly but not so tight the fabric curls.
Round 9 :
Change to US dc if you prefer a slightly taller stitch. 1 dc in each st around (48)
Round 10 :
1 dc in each st (48)
Round 11 :
1 dc in each st (48)
Info :
Rounds 9-11 build body height and give a slightly lace-like texture. Keep all dc even; do not increase on these rounds to maintain a circular plane.
Round 12 :
Change to Bright Red. 1 sc in each st (48)
Round 13 :
(ch3, sc in next st) x 48 (48 ch-3 loops formed)
Info :
Round 13 creates small looped spaces that will accept 3-dc cluster stitches in the next round, forming the red accent ring. Keep consistent tension so loops sit flat.
Round 14 :
Change to Cream/White. *(3 dc in next ch-3 sp), sc in next sc* repeat around (48 shells; each shell sits in a ch-3 sp)
Round 15 :
1 sc in each st and in each shell base around to anchor shells (count: 48 sc anchors around shells)
Info :
This pair of rounds (14–15) gives a band of texture in white that reads as a second, slightly raised band after the red ring. If you prefer a subtler transition, work Round 15 in BLO to create a ridge.
Round 16 :
1 hdc in each st around (48)
Round 17 :
*(2 hdc, ch2, 2 hdc) in next st, sk next 3 sts, sc in next st* repeat 12 times around (creates 12 arch spaces and 12 small sc anchors)
Info :
Round 17 begins grouping the 48 base sts into 12 larger sections (12 x 4 sts). Each arch will become the foundation for the outer scallop points. Place markers at quarter points (after every 3 repeats) to keep count reliable.
Round 18 :
Change to Bright Red. In each arch work: (sl st to center of arch, ch1, 7 dc in arch center, ch1, sl st back to base sc) across all 12 arches (12 large red clusters)
Round 19 :
sc around the cluster bases to anchor them: *sc in each sc anchor, (3 sc across the top of each 7-dc cluster)* (total anchors and top sc combined maintain 48 base positions conceptually)
Info :
Round 18 forms the tall scallop points you see in the photograph. The 7-dc cluster produces a sharp, triangular point. On Round 19, anchor the tops so points are stable for the final decorative diamonds.
Round 20 :
Change to Gold. Working into the small V space at the base of each red scallop (the space created by previous sc anchors), work: *ch2, (3 dc in same sp), ch2, sl st in next anchoring sc* repeat 12 times to create 12 small gold fan motifs nested inside the scallop bases
Round 21 :
Change to Bright Red. Working around all clusters and gold fans, make a decorative picot ridge: *(sc in next 2 sc, picot: ch3, sl st in picot base), sc in next 2 sc, sl st in next top of red cluster* repeat across 12 repeats to form pointed edging (final outer points form)
Info :
The gold fans are deliberately smaller than the red points and sit near the base of each scallop. Use a smooth metallic gold yarn with good drape; work the gold motifs with light tension to keep them nestled inside the red points.
Round 22 :
Trim and weave in all tails from this motif. Fasten off leaving a 12–18 in tail if you plan to join-as-you-go to the next motif; otherwise fasten off and finish ends separately.
Info :
Make four identical motifs. Block each motif gently to open the scallops and flatten the center. Pin to a blocking board and spray lightly or pin wet depending on yarn type; allow to dry completely before joining.
— Circular Motif (Repeat for Motif 2) :
Round 1 :
6 sc in magic ring (6)
Round 3 :
(1 sc, 1 inc) x 6 (18)
Round 4 :
(2 sc, 1 inc) x 6 (24)
Round 5 :
(3 sc, 1 inc) x 6 (30)
Round 6 :
(4 sc, 1 inc) x 6 (36)
Round 7 :
(5 sc, 1 inc) x 6 (42)
Round 8 :
(6 sc, 1 inc) x 6 (48)
Info :
Repeat motif 1 exactly for motif 2. If you are joining-as-you-go, keep a long tail on the side that will meet the previous motif so you can join in round 21–22 area; mark the connecting scallop edges with a removable clip.
Round 9 :
1 dc in each st (48)
Round 10 :
1 dc in each st (48)
Round 11 :
1 dc in each st (48)
Round 12 :
Change to Bright Red. 1 sc in each st (48)
Round 13 :
(ch3, sc in next st) x 48 (48 ch-3 loops)
Round 14 :
Change to Cream/White. *(3 dc in next ch-3 sp), sc in next sc* repeat around (48 shells)
Round 15 :
1 sc in each st and in each shell base around (48)
Info :
If joining-as-you-go: At the end of Round 15 of Motif 2, line Motif 1 and Motif 2 scallops next to each other and prepare to join in the next red scallop rounds. You'll join at the outer scallops on Round 21–22 area described for Motif 1.
Round 16 :
1 hdc in each st around (48)
Round 17 :
*(2 hdc, ch2, 2 hdc) in next st, sk next 3 sts, sc in next st* repeat 12 times around
Round 18 :
Change to Bright Red. *(sl st to center of arch, ch1, 7 dc in arch center, ch1, sl st back to base sc)* repeat 12 times
Round 19 :
sc around bases and across tops of red clusters to firm edges
Round 20 :
Change to Gold. In each scallop base: ch2, 3 dc in base V, ch2, sl st to anchor (12 gold fans)
Round 21 :
Bright Red: *(sc in next 2 sc, picot: ch3, sl st in picot base), sc in next 2 sc, sl st in next top of red cluster* repeat to form decorative edging
Round 22 :
Fasten off leaving tails for joining if joining-as-you-go; otherwise finish ends and block motif
Info :
Complete motifs 3 and 4 using the identical sequence above. Keep consistent tension and the same hook for all motifs so the runner lies flat and joins evenly.
— Circular Motif (Repeat for Motif 3) :
Round 1 :
6 sc in magic ring (6)
Round 3 :
(1 sc, 1 inc) x 6 (18)
Round 4 :
(2 sc, 1 inc) x 6 (24)
Round 5 :
(3 sc, 1 inc) x 6 (30)
Round 6 :
(4 sc, 1 inc) x 6 (36)
Round 7 :
(5 sc, 1 inc) x 6 (42)
Round 8 :
(6 sc, 1 inc) x 6 (48)
Round 9 :
1 dc in each st (48)
Round 10 :
1 dc in each st (48)
Round 11 :
1 dc in each st (48)
Round 12 :
Bright Red: 1 sc in each st (48)
Round 13 :
(ch3, sc in next st) x 48
Round 14 :
Cream/White: *(3 dc in next ch-3 sp), sc in next sc* repeat around
Round 15 :
1 sc in each st and shell base to anchor (48)
Round 16 :
1 hdc in each st (48)
Round 17 :
*(2 hdc, ch2, 2 hdc) in next st, sk next 3 sts, sc in next st* repeat 12 times
Round 18 :
Bright Red: *(sl st to center of arch, ch1, 7 dc in arch center, ch1, sl st back to base sc)* repeat 12 times
Round 19 :
sc around cluster bases and tops to create firm scallop shape
Round 20 :
Gold: ch2, (3 dc in base V), ch2, sl st anchor — repeat for each scallop base (12 gold fans)
Round 21 :
Bright Red decorative picot ridge around all outer cluster tops to finalize scallops
Round 22 :
Fasten off and weave ends or leave long tail for joining
Info :
By motif 3 you should be comfortable with the repeat counts and scallop shaping. If a scallop feels too small, check that the arch grouping was done consistently every 4 base sts (12 groups total).
— Circular Motif (Repeat for Motif 4) :
Round 1 :
6 sc in magic ring (6)
Round 3 :
(1 sc, 1 inc) x 6 (18)
Round 4 :
(2 sc, 1 inc) x 6 (24)
Round 5 :
(3 sc, 1 inc) x 6 (30)
Round 6 :
(4 sc, 1 inc) x 6 (36)
Round 7 :
(5 sc, 1 inc) x 6 (42)
Round 8 :
(6 sc, 1 inc) x 6 (48)
Round 9 :
1 dc in each st (48)
Round 10 :
1 dc in each st (48)
Round 11 :
1 dc in each st (48)
Round 12 :
Bright Red: 1 sc in each st (48)
Round 13 :
(ch3, sc in next st) x 48
Round 14 :
Cream/White: *(3 dc in next ch-3 sp), sc in next sc* repeat around
Round 15 :
1 sc in each st and shell base to anchor (48)
Round 16 :
1 hdc in each st (48)
Round 17 :
*(2 hdc, ch2, 2 hdc) in next st, sk next 3 sts, sc in next st* repeat 12 times
Round 18 :
Bright Red: *(sl st to center of arch, ch1, 7 dc in arch center, ch1, sl st back to base sc)* repeat 12 times
Round 19 :
sc around cluster bases and tops to create firm scallop shape
Round 20 :
Gold: ch2, (3 dc in base V), ch2, sl st anchor — repeat for each scallop base (12 gold fans)
Round 21 :
Bright Red decorative picot ridge around all outer cluster tops to finalize scallops
Round 22 :
Fasten off and weave ends or leave long tail for joining
Info :
Once all four motifs are complete and blocked, place them on a flat surface in the order you want them joined (photo shows a straight, linear arrangement). Align scallop points and gold fan positions so the join looks even.
— Joining Motifs & Runner Assembly :
Info :
We use a join-as-you-go technique to create an invisible seam between two adjacent scallops. You will join motifs edge-to-edge at the large red scallop bases: identify corresponding scallop base V on each motif (there are 12 scallops; choose the three closest scallops that touch between adjacent motifs to distribute the join evenly).
Join Step A :
Begin with Motif 1 and Motif 2 placed with scallops touching. On Motif 2, reattach Bright Red yarn at the base of the first scallop to be joined; ch1, sl st into the corresponding sc on Motif 1, sc in next sc on Motif 2, sl st into next sc on Motif 1. Repeat sl st+sc pairing across the 3–4 adjacent sc anchors until motifs sit snug and flat. Fasten off and weave ends.
Info :
Pin motifs first to ensure alignment. The join uses alternating sl st into motif 1 and sc into motif 2 so the seam is sturdy but lies flat. If you prefer, use a yarn needle and whipstitch through corresponding stitches for a nearly invisible seam.
Join Step B :
Repeat the join process for Motif 2 to Motif 3, then Motif 3 to Motif 4. Make sure the runner remains straight; measure from runner edge to edge as you progress and adjust joins to keep motifs aligned.
Info :
When joining, avoid pulling too tightly—the runner should lie flat without puckering. If a join seems loose, reinforce with a few additional slip stitches along the inside edge of the seam.
Join Step C :
If you prefer an uninterrupted decorative border across joins, after joining all motifs add a continuous red edging that crosses the seams (see Final Edging rounds below) to create a unified scalloped outline.
Info :
Once motifs are joined, block the entire runner as a single piece. Wet-block and pin outer scallops flat and even, stretching gently to align scallops and flatten centers. Allow to dry fully before final finishing.
— Final Continuous Edging (After joining all motifs) :
Round 1 :
With Bright Red, join yarn at any seam gap. Ch1, sc evenly along the inner edge where motifs meet across the long sides to create a consistent inner border (work approximately 1 sc in each sc anchor; keep count consistent so edges remain even)
Round 2 :
*(sc in next 2 sc, picot: ch3, sl st in picot base), sc in next 2 sc, (7 dc cluster over next arch) repeat across runner edge to reinforce each scallop point. Work all outer edges continuously so the scallop points read as one unified border across motifs.
Round 3 :
Gold highlight: working into the inside V of each scallop, make small gold fan: join gold, ch2, 3 dc in V, ch2, sl st back to red, fasten off. Repeat at each scallop base across entire runner (total approx. 12 fans per motif x 4 motifs = 48 gold fans)
Round 4 :
Re-attach Bright Red and work a delicate finishing round: 1 sc evenly around all exposed edges, placing an extra sc at each point base to keep scallops upright. (Edge stitch count will vary; space sc evenly so fabric lies flat.)
Info :
If you prefer a neater scallop outline, work the final sc round in BLO of the previous round to create a defined ridge that frames the runner. This is purely decorative and helps the scallops hold their shape.
Round 5 :
Optional: Add small decorative loops between each scallop using ch5 picots joined back to the outer tip with a sl st to create a lacy fringe. Repeat between every scallop across both long sides and short ends as desired.
Info :
Weave in all ends securely to the wrong side and trim. For extra durability, use a tiny dab of clear fabric glue at points where multiple yarn tails meet (test on scrap first if your yarn is delicate).
Blocking & Finishing :
Lay the runner flat on a blocking mat, pin each scallop point exactly where you want it, and mist lightly with water. Stretch gently to level the runner and align joins. Let dry fully. For starched crispness, apply light fabric starch evenly and press according to yarn care instructions.
Info :
Final dimensions will depend on yarn weight and tension; using worsted weight yarn and 4.5mm hook you can expect each motif to be approximately 10–12 inches in diameter, and a 4-motif runner roughly 40–46 inches long (allowing for seam overlap). Adjust motif count for longer or shorter runners.
This festive table runner celebrates texture, color, and handcrafted detail in one striking piece. Each circular medallion blooms with a crisp white center, a bold red ring, and gilded accents that catch the light. As you stitch motif to motif the runner begins to feel like a carefully composed work of art you can be proud to display. 🧶 Lay it out on a holiday table or use it year-round for a bold accent — every stitch tells a story. 🎉