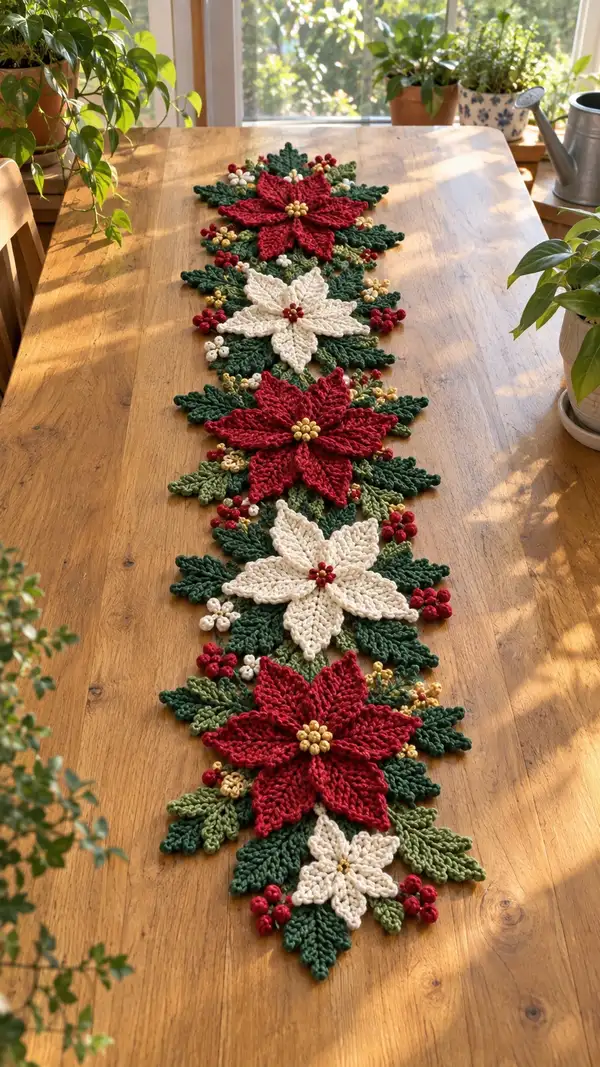
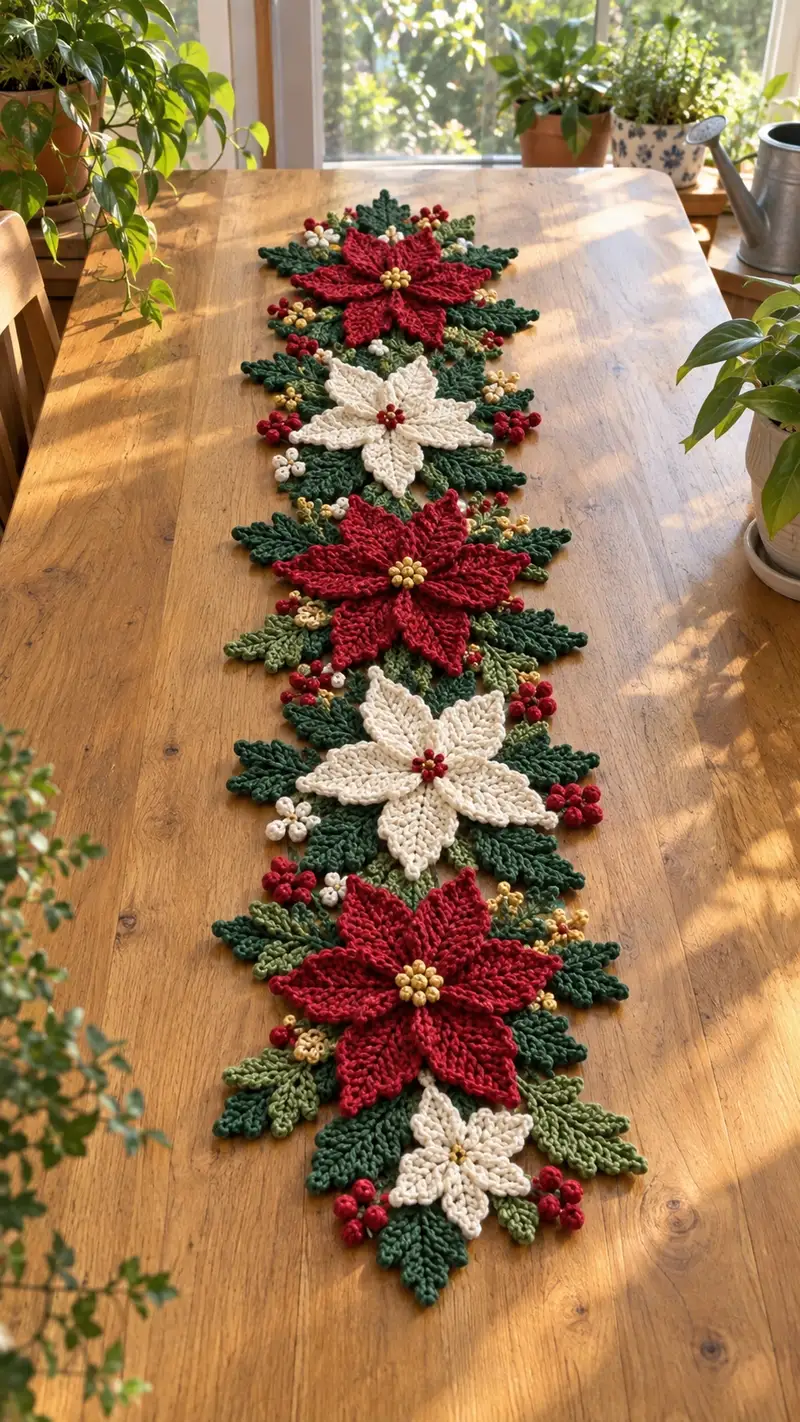
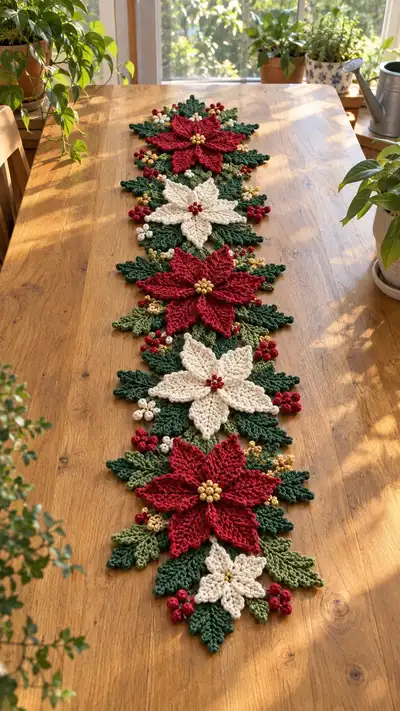
This elegant table runner features layered poinsettia motifs in deep red and creamy white, framed by lush dark and olive green leaves and scattered berry clusters in red, white and gold. Perfect for holiday tables, the runner is made from modular floral and foliage pieces joined into a long, graceful strip. Each motif is worked individually and assembled for a flexible, customizable length and unique texture.
Progress Tracker
0% Complete
— Overview :
Info :
This pattern is modular: it is made up of large poinsettia motifs (make 3-5 depending on runner length), small filler poinsettias, leaf clusters (two sizes), berry clusters, and beaded centers. Each major element is worked flat or in the round then blocked and sewn in layers. Use worsted weight yarn and a 4.0 mm hook for the main elements; use a 3.5 mm hook for tiny berries and details for tighter texture.
Info :
Gauge is not critical for this decorative piece, but consistent tension will ensure motifs stack and join evenly. For reference, each large poinsettia (full layered motif) finishes approximately 22-24 cm (9-9.5 in) across when using worsted weight and a 4.0 mm hook.
— Large Poinsettia Petal Module (Make 3 large motifs, each with 8 petals) :
Round 1 :
ch 2, 6 hdc in 2nd ch from hook; join with sl st to first hdc (6)
Round 2 :
ch 2 (counts as first hdc), 1 hdc in same st, 2 hdc in each st around; join with sl st (12)
Round 3 :
ch 2, (1 hdc, inc) x 6 around; join (18)
Info :
This small disk becomes the base for petal placement. Use stitch markers to mark every 3rd stitch to align petal placement later.
Round 4 :
ch 1, sc in same st, *ch 5, skip next 2 sts, sc in next st; rep from * around to create 6 ch-5 loops for petals; join (6 loops)
Round 5 (Petal foundation) :
Work into first ch-5 loop: (sc, hdc, 3 dc, hdc, sc) into loop - this completes petal 1. Repeat in each loop to make 6 petals total. Join. (6 petals)
Info :
Petals will be worked flat with shaping to create raised ridges. Keep consistent tension and block each petal after assembly for crisp points.
Round 6 (Petal deepening) :
For EACH petal work as follows: join yarn at petal base, ch 2, (hdc, dc) in next st, 3 tr in center of petal, (dc, hdc) mirroring other side, sl st into base to fasten. Repeat for all 6 petals to create a deeper three-dimensional petal (no overall count)
Round 7 :
Switch to BLO on the base round 3 stitches around each petal base: 1 sc in each BLO to create a defined ridge joining petals (approx 18 sc across base - exact depends on spacing)
Round 8 :
Ch 1, working behind first layer of petals, *into the gap between petal bases, ch 3, sc to anchor, rep around* to create 6 ch-3 loops for second layer of petals; join
Round 9 (Second layer petal foundation) :
Into each ch-3 loop: (sc, hdc, 3 dc, hdc, sc) to form second layer larger petal. Finish all 6 loops (6 larger petals)
Info :
The second layer should be slightly offset so petals alternate with first layer for a full poinsettia look. Pin pieces on a blocking mat to offset before sewing centers.
Round 10 (Petal texture) :
Working each large petal: ch 2 at base, (hdc, dc) down one side then 5 tr in center then (dc, hdc) up other side, sl st to base. Add a second row of tr in the center for height if you want extra sculpting (this is optional).
Round 11 :
Fasten off each petal; weave tails toward center. After all petals are completed, arrange in two offset layers of 6 petals each (12 petals total) for a fuller motif—however the pictured runner shows 8 larger pointed petals; to replicate 8-point look, work 8 petal placement loops at Round 4 and modify counts to create 8 instead of 6. To convert to 8: increase loops by shortening spacing at Round 3 (make 8 ch-4 loops instead of 6 ch-5 loops). Adjust second layer accordingly.
Info :
If you choose the 8-petal version, the initial round 3 should create 8 base loops; distribute increases across round 2 accordingly so there are 16-24 base stitches to anchor loops (example: (2 hdc, inc) x 6 becomes (1 hdc, inc) x 8 to give 24 base stitches).
Round 12 (Optional extra petal ridge) :
With the dominant petal color (red or cream), work 1 sc in each st around the petal base to tidy and create a uniform edge (total count depends on number of base sts, typically 24-30). Fasten off and weave in ends.
Round 13 (Inner small petals)
Create a small inner star of 4-6 tiny pointed petals: Join yarn at center, ch 2, *ch 4 loop, sc in next anchor* repeat to form loops, then (sc, hdc, 3 dc, hdc, sc) into each to make inner petals. This produces a layered look similar to photographed motifs.
Info :
For the photographed runner the large poinsettia uses a combination of large pointed outer petals (8), medium inner petals (6) and a small central cluster. Use blocking to make petals lay flatter before assembly.
Round 14 (Center bead anchors) :
In center, form a tight ring of 6-8 sc to anchor beads or small yellow-gold puff clusters (6-8 sc). Fasten off leaving long tail to sew on beaded center or to attach bead cluster.
Round 15 (Finishing large motif) :
Sew inner and outer petals together using mattress stitch or whip stitch, stacking inner petals above outer to match the image. Attach beaded center (see Beaded Center section) and weave in all ends. Block lightly to shape points.
Info :
Make three large motifs in alternating colors (red, cream, red in the photographed example). If you want more motifs lengthen runner by adding another repetition of the large motif plus filler motifs.
— Small Poinsettia / Accent Star (Make 4-6) :
Round 1 :
mr, ch 2, 8 hdc in mr; pull tight and join (8)
Round 2 :
ch 2, hdc in same st, (1 hdc, inc) x 4 around; join (12)
Round 3 :
ch 1, *ch 4, sl st into next sc* repeat around to create 6-8 tiny loops depending on desired number of points; join
Round 4 :
Into each ch-4 loop: (sc, hdc, 3 dc, hdc, sc) to make small petals; finish and fasten off. Attach 3-5 tiny berry clusters at base if desired.
Info :
These small stars are used as filler motifs between main poinsettias. Work them in cream or red to contrast the large motif as in the photo.
— Leaf Module A (Large dark leaf) (Make 18-24) :
Round 1 :
ch 10, sc in 2nd ch from hook, sc in next, hdc in next, dc in next 2, tr in next 2, dc in next, hdc in next, sc in last ch; do not turn; now work on opposite side of foundation chain: sc in first foundation loop opposite, sc, hdc, dc, tr 2, dc, hdc, sc. Sl st to join at base - leaf shaped row complete (approx 18 sts total across both sides)
Round 2 :
Working from base, ch 1, 1 sc in base st, *ch 2, skip 1 st, 1 sc* repeat across to create picot anchors around leaf; join
Round 3 :
For central vein texture: join yarn at leaf base, ch 2, (hdc, dc, tr, dc, hdc) working up center top of leaf as a raised ridge; fasten off. This forms the central vein and raises the surface similar to the photograph.
Info :
Make leaves in both dark green and olive green to get the layered look. Use light blocking to shape tips and curl edges slightly to mimic the photo. Leaves are worked flat and sewn under poinsettias in clusters.
Round 4 :
Optionally work 1 sc in each st around leaf edge to neaten (stitch count equals the number of edge anchors, approximately 18-22). Fasten off and weave ends.
— Leaf Module B (Small filler leaf) (Make 24-36) :
Round 1 :
ch 6, sc in 2nd ch from hook, hdc, dc, hdc, sc in last; continue on opposite side of chain: sc, hdc, dc, hdc, sc; sl st to base (approx 10 sts)
Round 2 :
Ch 1, sc in base, *ch 1, sc* along edges to create tiny ridges; join, fasten off. Add central vein by stitching with tapestry needle if desired.
Info :
Use these small leaves to fill gaps around the larger leaf modules and to create staggered texture beneath petals.
— Berry Cluster (Make many in red, white, gold) :
Round 1 :
Using 3.5 mm hook and chosen berry color, ch 2, 6 sc in 2nd ch from hook; do not join; continue working small bobble: (ch 1, 3 dc in next st, sl st) around to create a tight puff (6 little bumps)
Round 2 :
Gather and pull yarn through hole to form a tight cluster. Secure with several sl sts through base and fasten off leaving tail to sew. Optionally add a tiny dab of fiberfill before cinching for plumper berries.
Info :
Group berries in clusters of 3-6 and sew to leaf clusters and around petal edges as shown. Use bright red and cream berries in alternating small clusters and gold for tiny metallic accents.
Round 3 :
For 3-berry clusters: make three berries and chain 4, join berries to chain at intervals then knot and weave ends to create a little spray. Sew entire spray into runner where needed.
— Beaded Center (Make for each large poinsettia) :
Round 1 :
Using gold yarn or small beads, string 6-8 small beads onto thread; sew through central sc ring (created in Large Poinsettia Round 14) in a circular pattern to create a raised beaded center. If using yarn: create 6-8 tiny puffs (see Berry Cluster) and sew together in a circle.
Info :
If using beads, secure with strong knot and apply a small dab of fabric glue on the knot for added security if the runner will be handled frequently.
— Assembly & Joining Modules into Runner :
Info :
Lay out your runner template on a table: alternate a large poinsettia (red), leaf cluster, small star, large poinsettia (cream), leaf cluster, etc., as in the image. Aim for symmetry: photographed layout shows central axis of three large poinsettias with small stars and clusters between them.
Round 1 :
Arrange a large motif, place 4-6 large leaves around it at compass points with leaf tips pointing outward; position small poinsettia opposite each large leaf as filler; pin everything in place so shapes flow into one another without large gaps.
Round 2 :
Begin joining pieces using whip stitch: sew leaf edges to petal bases through the back loops only to preserve front texture. Use the long tails left from petals and leaves. Stitch small star petals into gaps between large petals to create continuous edge.
Round 3 :
When attaching berries, insert them into seams where two leaves meet or cluster them at petal bases. Use small stitches and ensure berries are securely attached as they will protrude from runner surface.
Info :
For strength, when joining two motifs, use a double thread of yarn and make close stitches along the perimeter so the join becomes nearly invisible. Keep consistent tension so motifs lie flat; if a join pulls, add an extra small leaf behind to balance tension and appearance.
Round 4 :
Continue adding motifs left and right to achieve desired runner length. For photographed runner: sequence is small star, large poinsettia (red), leaf cluster, small cream poinsettia, leaf cluster, large red poinsettia, small star, repeating to total three large red/cream alternations across the runner.
Round 5 :
Once all modules are sewn together loosely, check runner edges for gaps. Fill gaps with small leaves or single berries to create the organic, dense look in the photo. Tack every filler piece with a few secure stitches.
Info :
Remember to stitch through both pieces' back loops if you want to preserve the front-facing texture and maintain a clean seam. Use pins extensively to pre-visualize the flow before final sewing.
— Decorative Edging and Surface Details :
Round 1 :
With dark green yarn and 4.0 mm hook, work 1 sc around the entire perimeter of the assembled runner to unify the look. Where petals protrude, work 2 sc around the protruding edge to flatten and secure.
Round 2 :
Optional scallop edge: *skip 1 st, 5 dc in next st, skip 1 st, sl st* along edge to add soft scallops; adjust spacing so scallops fall evenly along outermost leaves and petal tips. Fasten off and weave in ends.
Info :
This edging helps hold the runner together and prevents edges from curling. It also adds a finished look for placement on a table without a protective runner underneath.
Round 3 :
Surface embroidery (optional): Use gold yarn to add veins on larger leaves by stitching from base to tip with long running stitches; add small French-knot style seed stitches around centers with cream or white for extra sparkle.
— Final Finishing Touches :
Round 1 :
Weave in all ends at least 3 cm into the fabric and trim close. Secure any loose beads with a tiny knot and a dab of glue if desired. Lightly steam or spray-block the finished runner to relax any distortions and shape points precisely.
Info :
Place a non-slip felt or thin runner under crochet runner on varnished or polished surfaces to prevent sliding. Avoid heavy furniture pressing onto raised berries to prevent crushing decorative elements.
— Assembly Chronology & Row-By-Row Checklist (Helpful to reach full project rounds) :
Step :
1. Crochet all petals for 3 large motifs (Rounds 1-15 each motif).
Step :
2. Crochet 4-6 small poinsettias (Rounds 1-4 each).
Step :
3. Crochet 18-24 large leaves and 24-36 small leaves (Rounds 1-3 each).
Step :
4. Crochet berry clusters and beaded centers (Rounds 1-3 for berries, 1-2 for centers).
Step :
5. Block petals and leaves; assemble motif layers; sew bead centers.
Step :
6. Lay-out runner, pin modules, and sew edge seams and filler pieces as outlined in Assembly rounds.
Info :
Following this chronology will produce a cohesive workflow and prevent mismatched pieces at the final stage.
— Troubleshooting & Tips :
Info :
If a petal looks too large, steam block it slightly and pinch the base to tighten. If a join causes puckering, remove the stitches and resew with a more open spacing. Work one section at a time and keep a small sewing kit nearby to finish pieces while other motifs are in progress.
Info :
For a longer runner, add another large motif plus filler units and mirror layout symmetrically. For a table centerpiece of different width, scale motif quantity, not motif size, to maintain the photographed scale and proportion.
Finishing this runner is so rewarding — the layered petals, sculpted leaves and tiny berry clusters come together into a luxurious holiday accent that catches light and compliments any table. Each stitch builds texture and charm, and the modular construction means you can adapt length and color for any season. 🌿✨ Enjoy placing it on your table and sharing it as a handmade centerpiece that sparks conversation and warmth. 🧶