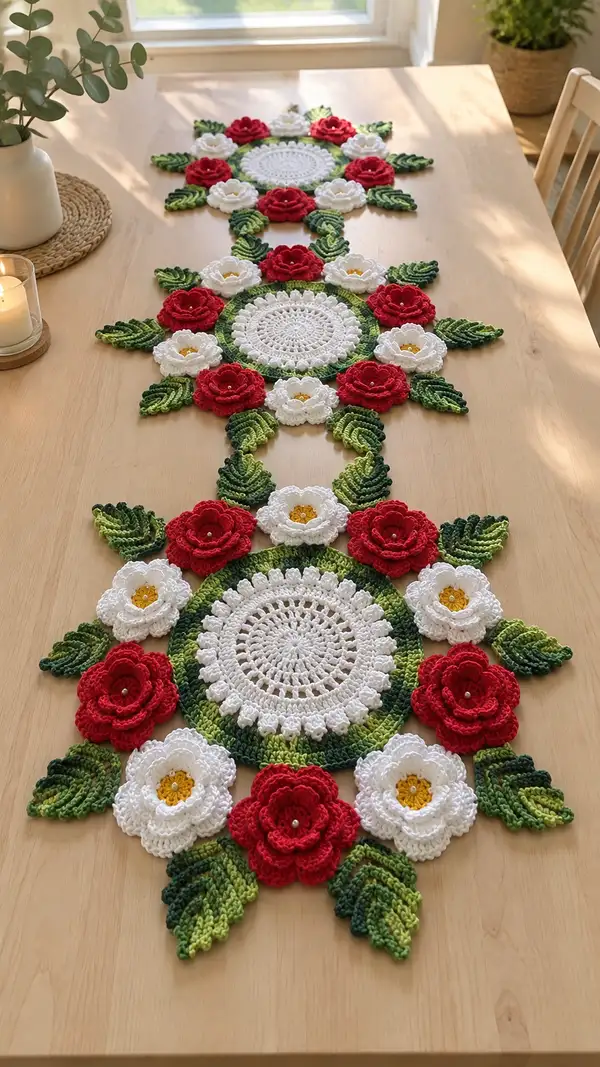
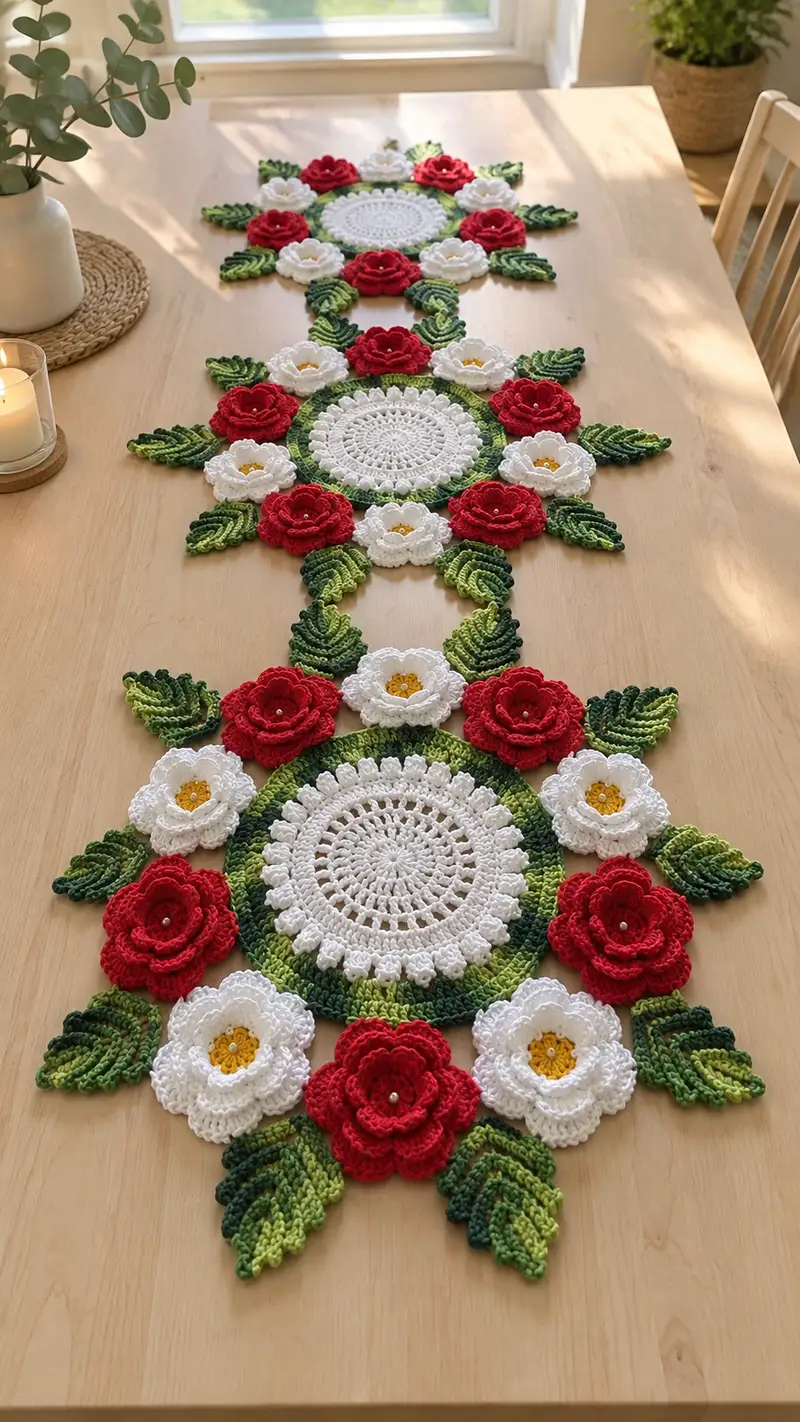
Create a stunning floral table runner made of three large circular doilies joined by leafy bridges and clustered roses. This pattern uses layered petals, sculpted leaves, and a textured doily center in crisp white, bright red and variegated greens. The finished runner is elegant, tactile, and perfect for seasonal tables or year-round decor. Detailed instructions guide you through every stitch, color change and assembly step.
Progress Tracker
0% Complete
— Large Circular Doily Motif (Make 3) :
Note :
These are the main large motifs that form each of the three circles in the runner. Work these in white for the center, then change to variegated green for the outer ring. Each motif is worked in rounds; stitch counts below are exact and sectors are repeated 12 times unless stated otherwise.
Round 1 :
12 sc in magic ring (12)
Round 3 :
(1 sc, 1 inc) x 12 (36)
Round 4 :
(2 sc, 1 inc) x 12 (48)
Round 5 :
(3 sc, 1 inc) x 12 (60)
Info :
Keep tension even. Place a stitch marker at the start of each round to track counts — these increases create a flat circle up to R9.
Round 6 :
(4 sc, 1 inc) x 12 (72)
Round 7 :
(5 sc, 1 inc) x 12 (84)
Round 8 :
(6 sc, 1 inc) x 12 (96)
Round 9 :
(7 sc, 1 inc) x 12 (108)
Round 10 :
1 sc in each st (108)
Info :
At rounds 10–16 we begin to add more texture for the doily center. Maintain stitch count on even decorative rounds. If your circle cups, block each completed motif flat before adding heavy petals.
Round 11 :
(8 sc, 1 inc) x 12 (120)
Round 12 :
1 sc in each st (120)
Round 13 :
(9 sc, 1 inc) x 12 (132)
Round 14 :
1 sc in each st (132)
Round 15 :
(10 sc, 1 inc) x 12 (144)
Round 16 :
1 sc in each st (144)
Info :
Change to variegated green yarn at the end of Round 16 by completing last sc with new color. Carry tails to wrong side and weave in later. The variegated ring will form a raised frame for petals.
Round 17 :
Ch 3 (counts as dc), *sk next st, (5 dc in next st), sk next st, sl st in next st*; rep from * to * around to create a spaced cluster shell look; sl st to join (144 shells formed visually but stitch count remains 144 because clusters are worked into individual base sts)
Round 18 :
1 sc in each st (144)
Round 19 :
*(1 sc, ch 2, 1 sc) in next st (creates decorative picot space), 1 sc in next 11 sts* x12 (144)
Round 20 :
Work in BLO: 1 sc in each st BLO (144)
Info :
BLO round creates a ridge for the flower base to sit on and gives the outer ring a defined edge. If you prefer a flatter ring, skip BLO and work regular sc.
Round 21 :
*(1 sc in next 6 sts, 1 pop (4 dc popcorn) in next st, 1 sc in next 6 sts, sl st in ch-2 sp)* x12 (144)
Round 22 :
1 sc in each st (144)
Round 23 :
(10 sc, 1 dec) x 12 (132)
Round 24 :
(9 sc, 1 dec) x 12 (120)
Info :
Begin slight shaping inward to support petals without creating a domed center. Start stuffing lightly if you intend to add any dimensional connectors (most of these motifs remain flat and unstuffed).
Round 25 :
1 sc in each st (120)
Round 26 :
(7 sc, 1 dec) x 12 (108)
Round 27 :
(6 sc, 1 dec) x 12 (96)
Round 28 :
1 sc in each st (96)
Round 29 :
(5 sc, 1 dec) x 12 (84)
Round 30 :
(4 sc, 1 dec) x 12 (72)
Round 31 :
(3 sc, 1 dec) x 12 (60)
Round 32 :
1 sc in each st (60)
Round 33 :
*(ch2, picot, 1 sc) in each st around to form small decorative edge* (60)
Round 34 :
Fasten off, weave in ends. Block flat before attaching flowers and leaves.
Info :
Make 3 identical large motifs. Blocking: pin motifs to a flat surface and spray lightly or steam-block to set round edges. This will make subsequent joining easier and neater.
— Large Rose (Make 9) :
Note :
These larger red roses are layered, created by increasing a central disc then working several spur-of-petal rounds that stack. Work tightly for crisp petals. Each rose uses the same round structure and is repeated nine times for the runner clusters (three per main motif).
Round 1 :
6 sc in magic ring (6)
Round 3 :
(1 sc, 1 inc) x 6 (18)
Round 4 :
(2 sc, 1 inc) x 6 (24)
Round 5 :
(3 sc, 1 inc) x 6 (30)
Info :
Center is a small disk; keep it flat by blocking briefly if needed. We now create petal layers—each petal is a small group of dc and hdc worked into the next stitches to form a raised petal edge.
Round 6 :
*ch2, (1 dc, 1 hdc, 1 dc) in next st, ch2, sl st in next st*; rep around to create petal base (30 petals visually; stitch count remains 30)
Round 7 :
*sl st to center of petal, ch3, (2 dc, ch1, 2 dc) in same sp, ch3, sl st in next sl st*; rep around to form first petal layer
Round 8 :
*sl st to base between petals, ch2, (1 dc, 2 hdc, 1 dc) in base, sl st*; rep—this raises petal height and overlaps previous layer
Round 9 :
*sl st to back of petal, ch4, (3 dc, ch1, 3 dc) in same sp, ch4, sl st*; rep around to form outer prominent petals
Info :
Each round increases the visual size rather than stitch count; you are working petals into chain spaces and previous loops. Use a smaller hook (3.0mm) for the petal rounds if you want crisper edges.
Round 10 :
Work a filler round: 1 sc in each base st and sl st into petal backs to tidy edges (30)
Round 11 :
Repeat a petal round similar to R9 for an additional outer layer to get a fuller bloom
Round 12 :
Work a tidy base round: 1 sc in each st (30). Fasten off and leave long tail for sewing. Optionally sew a small pearl or yellow French knot center for accent.
Info :
Make 9 large roses in red and block lightly by pinning into a circular shape if petals curl. Sew a bead or tightly stitched French knot center with yellow if desired to catch light.
— Medium Rose / Layered White Flower (Make 9) :
Note :
Medium white flowers are similar in construction to large roses but with fewer petal layers to create contrast. These are placed alternating with large roses around each motif.
Round 1 :
6 sc in magic ring (6)
Round 3 :
(1 sc, 1 inc) x 6 (18)
Round 4 :
1 sc in each st (18)
Round 5 :
*ch2, (1 dc, 1 hdc, 1 dc) in next st, sl st in next st*; rep around to create petal loops (18)
Round 6 :
Work an outer petal round: *sl st to petal base, ch3, (2 dc, ch1, 2 dc) in same sp, ch3, sl st*; rep around for fuller petals
Round 7 :
1 sc around to tidy base (18)
Round 8 :
Optional small picot round or ch2 & sl st into spaces to create a neat base. Fasten off leaving tail for sewing. Add a yellow French knot or small yellow disk for the center: in a small circle, ch2, 8 sc in mr, fasten off; sew to center.
Info :
Make 9 medium white flowers. They pair with the larger red roses to create a balanced look. Slight variation in petal tension will give each bloom personality.
— Small Accent Flower (Make 6) :
Note :
These smaller white flowers with yellow centers fill gaps and add layering. They are quick to make and give a delicate touch.
Round 1 :
6 sc in magic ring (6)
Round 3 :
*(ch2, (2 dc) in next st, sl st in next st)*; rep around forming 6 small petals (12)
Round 4 :
Work a tiny tidy round of 1 sc in each st (12). Make a small yellow disk center: ch2, 8 sc in mr (8), fasten off and sew to center. Fasten off leaving long tail for sewing.
Info :
Make 6 of these to place at join points for visual continuity. They take about 6–8 minutes each once you get the rhythm.
— Sculpted Leaf (Make 36) :
Note :
Leaves are worked flat with center ridge texture and then slightly shaped. These use variegated green to give the runner a natural, gradient look. Make 36 leaves (12 per main motif grouping including connectors).
Round 1 :
Ch 10, sc in 2nd ch from hook, sc next 3 sts (4 sc), 3 hdc in next ch, sc next 4 sts, sl st in last ch to create a long base (10 sc along chain including hdc groups)
Round 2 :
Turn work to work along opposite side of foundation chain: sc in next 4 sts, 3 hdc in base of earlier 3 hdc cluster, sc next 4 sts, sl st to join. (10)
Round 3 :
FLO: 1 sc in each st around (10) — this creates a ridge when next worked in BLO
Round 4 :
BLO: *1 sc in next 2 sts, 1 hdc in next st, 2 dc in next st, 1 hdc in next st, 1 sc in next 2 sts*; rep across both sides building a central increase shape (10)
Round 5 :
Work a set of raised rows for texture: *ch1, 1 sc in BLO in each st across, sl st into tip*; turn and repeat on the opposite side so the leaf shows raised 'vein' texture (10)
Round 6 :
*(ch2, picot, 1 sc) in tip to define leaf point*, then continue 1 sc around base to tidy. Fasten off leaving tail for sewing. (10)
Info :
Leaves are worked small but use variegated green to mimic light-to-dark shading. Block lightly over a curved form (pin edges slightly up) so leaves hold a subtle curve and sit naturally around flowers.
Round 7 :
Optional contrast edging: join darker green and 1 sc evenly around leaf edge to create depth. Fasten off.
Round 8 :
Repeat shaping for each leaf until you have 36 leaves total.
— Small Connector Medallion (Make 4) :
Note :
These small round medallions sit between the large motifs and become anchor points for the leafy bridges. Make 4 identical connectors to form two bridges (one between each pair of motifs).
Round 1 :
6 sc in magic ring (6)
Round 3 :
(1 sc, 1 inc) x 6 (18)
Round 4 :
1 sc in each st (18)
Round 5 :
*ch3, sl st in next st*; rep around to create small loops for attaching leaves and chains (18)
Round 6 :
1 sc in each st to tidy (18). Fasten off leaving tail for sewing into place.
Info :
Place medallions between main motifs, then attach leaves and small flowers symmetrically to build a neat bridge.
— Leafy Bridge / Spacer (Make 2) :
Note :
The bridges link large motifs. Each bridge uses two small medallions and a series of three leaves and two small flowers on each side to form a gently arched connection. Work connectors with variegated green for cohesion.
Round 1 :
Join variegated green to a loop on one connector medallion, ch 8, sl st into loop on opposite connector medallion to create a chain bridge. Repeat to form 3 parallel chains for stability (counts are chains, not stitches that change motif stitch count).
Round 2 :
Sew or sl st a leaf at positions along the chains: place a leaf at ch-3 positions on each chain and secure with a few transparent stitches through leaf base and chain. Repeat symmetrically on both sides. Fasten off.
Info :
When joining chains and leaves, adjust tension to make the bridge lie flat but slightly arched so motifs sit evenly on the table. Use spare ends to tack pieces invisibly on the wrong side.
— Edge Scallop and Finish :
Round 1 :
After assembly, join variegated green around the entire outer perimeter where motifs meet and leaves sit: join at any seam with 1 sc, then *ch3, sk 2 sts, sl st in next st* to create small chain scallops. Continue around whole runner to create a cohesive edge.
Round 2 :
Work a final decorative shell: *in each ch-3 sp of previous round work (5 dc, ch1, 5 dc), sl st in next base st*; rep around. This creates a pronounced scallop edging that mirrors floral curves.
Round 3 :
1 sc in each base stitch to tidy and flatten shells. Fasten off and weave in all ends carefully on the wrong side.
Info :
Blocking final assembled runner is essential. Pin the runner flat, pulling scallops evenly and shaping leaves and petals as desired. Spray lightly and allow to dry completely for a professional finish.
Additional Assembly Info :
All flower and leaf pieces are sewn to the doily using a yarn needle and matching thread. Use a ladder stitch or whip stitch for nearly invisible joins. Where clusters meet, sew through several layers to secure flowers firmly. If using beads for centers, sew through the bead several times and knot on the wrong side, securing with a dab of fabric glue if desired.
Finishing Touches :
Check for stray threads, weave all tails into the wrong side of the runner by threading them through multiple stitches, trim close. Optionally add a small backing fabric to the underside where plates may scratch, but typically the runner lays smoothly on a table when blocked correctly.
Completing this floral table runner is a joyful process — each large motif, layered rose and sculpted leaf comes together into a gallery-worthy centerpiece. The contrast of crisp white centers, bright red roses and variegated greens is eye-catching and elegant. Blocking and careful assembly turn individual motifs into a professional-looking runner you'll be proud to display. Enjoy the rhythm of repeated motifs and the satisfaction of a beautiful finished piece. 🧶🌿🌹