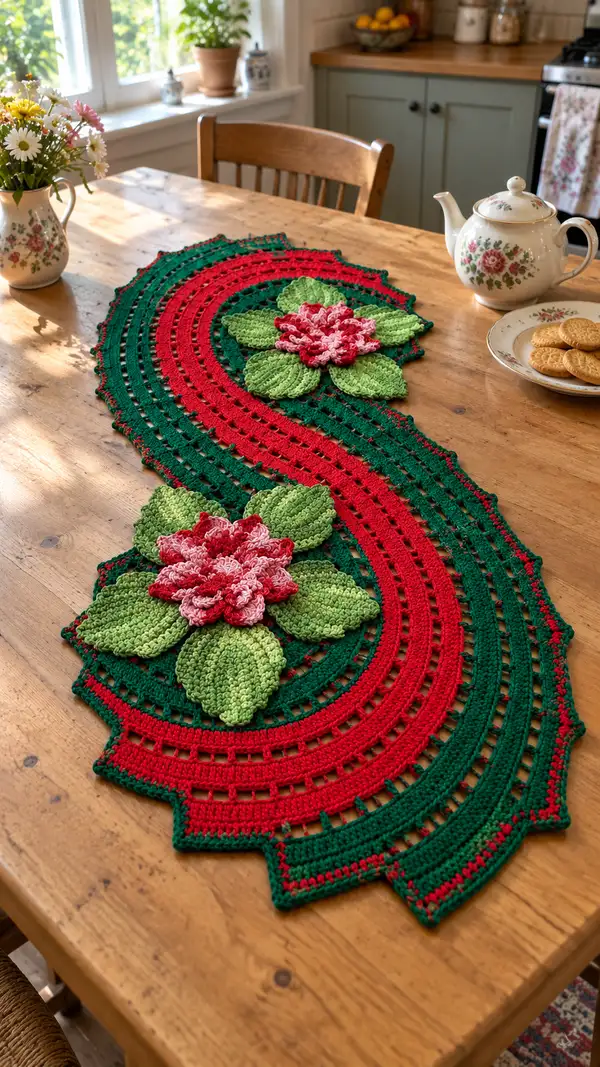
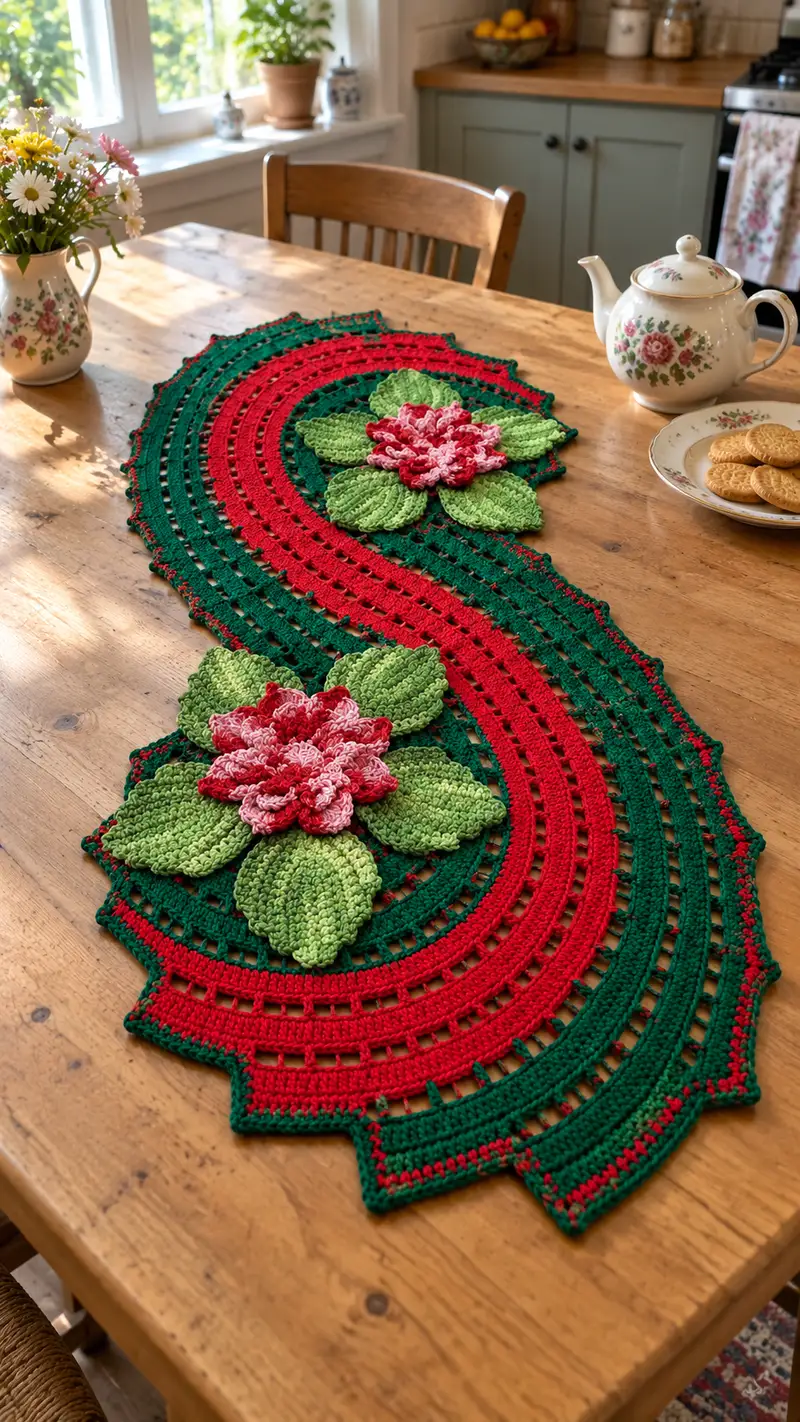
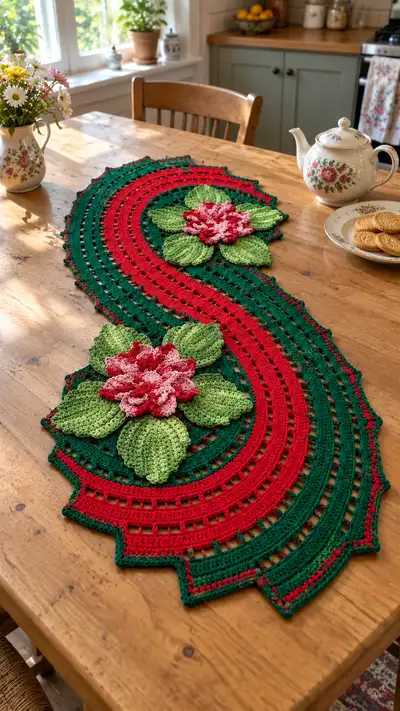
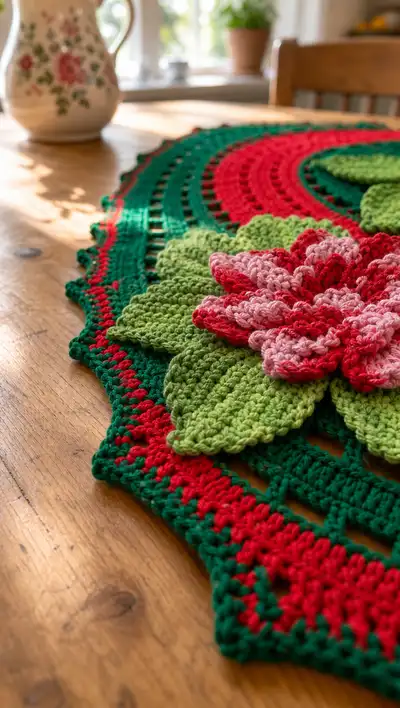
A long, elegant table runner featuring alternating red and forest green openwork bands and two large layered floral motifs with bright green leaves and variegated pink/red petals. This pattern creates a decorative S-shaped runner perfect for holiday tables or year-round farmhouse charm. Detailed stitch-by-stitch instructions, color change notes, and assembly tips are included so you can recreate the textured petals and scalloped border exactly as shown.
Progress Tracker
0% Complete
— Notes & Prep :
Info :
Work this runner flat in joined rounds forming an elongated oval. The runner is constructed by creating a central medallion then expanding the sides with alternating solid ribs and openwork rows. Two large layered flower motifs and several leaves are made separately and appliqued on top. Gauge is not critical but consistent tension is essential to maintain shape. Block pieces lightly before assembly.
Info :
Colors used: A = Forest Green, B = Holly Red, C = Leaf Green, D = Variegated Pink/Red. Carrying yarn is optional; I recommend fastening off to keep clean color stripes.
— Runner Base :
Round 1 :
6 sc in magic ring (6)
Round 3 :
(1 sc, inc) x 6 (18)
Round 4 :
(2 sc, inc) x 6 (24)
Round 5 :
(3 sc, inc) x 6 (30)
Round 6 :
(4 sc, inc) x 6 (36)
Round 7 :
(5 sc, inc) x 6 (42)
Round 8 :
(6 sc, inc) x 6 (48)
Info :
These first 8 rounds create a stable central medallion. Keep tension even so the initial circle lies flat. Use A (Forest Green) for these rounds to match the photo base.
Round 9 :
(7 sc, inc) x 6 (54)
Round 10 :
(8 sc, inc) x 6 (60)
Round 11 :
(9 sc, inc) x 6 (66)
Round 12 :
(10 sc, inc) x 6 (72)
Info :
To begin elongating the oval for the runner, increases are worked evenly around; areas opposite each other will become the longer sides. Continue with the same color for a solid medallion to anchor the beginning of the runner.
Round 13 :
(11 sc, inc) x 6 (78)
Round 14 :
(12 sc, inc) x 6 (84)
Round 15 :
(13 sc, inc) x 6 (90)
Round 16 :
(14 sc, inc) x 6 (96)
Round 17 :
(15 sc, inc) x 6 (102)
Info :
Round counts are increasing by 6 each round. These rounds set the runner’s central width; maintain smooth, flat tension. If you prefer a wider central medallion, add extra increase rounds in the same pattern before proceeding.
Round 18 :
(16 sc, inc) x 6 (108)
Round 19 :
(17 sc, inc) x 6 (114)
Round 20 :
(18 sc, inc) x 6 (120)
Info :
Now we have 120 stitches around — this will form a generous central oval. At this point we will begin working even rounds to build length rather than adding circumference until we introduce lengthening increases on the long sides.
Round 21-24 :
1 sc in each st (120)
Info :
Work four even rounds in A to set a solid rib; this creates the first solid band seen in the runner. Keep stitches tight enough to avoid gaps, but not so tight that fabric curls.
Round 25 :
Switch to B (Holly Red). Join with sl st to first st and ch1. 1 sc in each st (120)
Round 26-28 :
1 sc in each st (120)
Info :
This solid red band visually contrasts the green. Fasten off B at end of round 28 if you want clean joins; rejoin for openwork rows later. If you prefer carried yarn, hide along the inside of the runner, but be careful when changing to leaves/flowers placement.
Round 29 :
Join A. ch3 (counts as dc), *sk2, dc in next 3, ch2, sk2, dc in next 3* repeat around inserting extra dc clusters at long sides to lengthen runner (120 dc clusters total spaced to maintain pattern)
Round 30 :
Sl st into ch2 space, ch3, 3 dc in same ch2 space, *ch2, 3 dc in next ch2 space* repeat around (this forms openwork arches, 40 arches)
Info :
Openwork rows are worked across the runner creating the characteristic ladder-like windows. On the long sides add an extra ch2 space to allow for the S-curve shaping; place stitch markers at the beginning of each long side to help monitor increases or decreases that will gently curve the runner as you progress.
Round 31 :
1 sc in each st and in each dc across, working 3 sc across each 3-dc cluster and 1 sc in chain spaces (120)
Round 32 :
Switch to B. 1 sc in each st (120)
Round 33 :
Join A. ch4 (counts as tr), tr in next 4 sts, *ch2, sk2, tr5* repeat around placing slightly larger clusters on the long sides to encourage lengthening (120)
Round 34-36 :
1 sc in each st (120)
Info :
Alternate color bands every few rounds to create the striped effect. Keep track of which rounds are in A and B; the pictured runner uses sequences of 3–4 sc rounds in each color between openwork rounds.
Round 37 :
Increase rounds on the long sides only: working markers placed at the side centers, work 3 incs (3 sc in same st) evenly spaced across a 20-st segment on each long side. Elsewhere work 1 sc in each st. Total increases: 6 sts (126)
Round 38-40 :
1 sc in each st (126)
Info :
These selective increases at the long sides subtly lengthen and shape the runner into the S curve seen in the photos. Repeat this lengthening procedure twice more later in the sequence to deepen the curve.
Round 41 :
Working openwork again: switch to B, ch3, *sk2, dc in next 3, ch2, dc in next 3* repeat around aligning ch2 spaces with previous ch2 spaces, maintain increases on long sides by doing (1 extra dc) in marked side segments (126)
Round 42 :
1 sc in each st (126)
Round 43 :
Switch to A. ch3, dc across with (dc, ch1, dc) clusters located in each previous ch2 space to create raised ridges, 126
Round 44-46 :
1 sc in each st (126)
Info :
At around rounds 40-46 the runner length is established. Compare to your table; if you need a longer runner, repeat the block of openwork + even sc rounds (approx Rounds 29–36) until desired length is reached. The pictured runner has two floral motifs spaced about 1/3 and 2/3 along its length; plan placement now.
Round 47 :
Selective increases again at long sides: (work 4 incs across a 24-st segment on each long side) = +8 (134)
Round 48-52 :
1 sc in each st (134)
Round 53 :
Work a decorative ladder row: *ch4, sk3, sc in next st* repeat around aligning ladders with earlier openwork (134)
Round 54-56 :
1 sc in each st (134)
Info :
Count stitches at the end of Round 56. At this point you will have a comfortably long runner. If your stitch count differs, reconcile by adding or removing small increase blocks on the long sides to keep the runner balanced and symmetrical.
Round 57 :
Prepare for scalloped border: join B, ch1, sc around for a neat edge; maintain placement of sc along ladder ch spaces (134)
Round 58 :
Border shaping round: *skip 2, 5 dc in next st (shell), skip2, sc in next st* repeat around (number of shells approximately 22 depending on st count)
Round 59 :
Edge picots: in each shell: (sl st into next dc, picot: ch3, sl st into top of last dc) then sl st to next transition, repeat across shells. Secure and fasten off. weave in ends.
Info :
Border detail gives the scalloped outline visible in the image. You can add a contrasting tiny thread of the alternate color through the picots by working a surface slip stitch before joining shells to get the dotted accent around the edge.
— Flower Motif (Make 2 identical motifs) :
Info :
Each large flower is worked in 3 main layers: a small central disc, a middle set of larger petals, and an outer set of broad petals. Petals are worked as short rows attached to a center ring. Make two complete flowers in D (variegated) for petal layers and C (Leaf Green) for base petal supports between the petals. Use smaller hook (3.5mm) if you prefer crisper petals.
Round 1 :
mr, 8 sc in ring (8)
Round 3 :
(1 sc, inc) x 8 (24)
Info :
This small disc forms the base for attaching the first row of small inner petals. Keep this center slightly firm; a touch of stuffing is optional but usually not needed since petals lay flat.
Round 4 :
Join D in front loop only around to create a ridged join if desired. Ch1, sc in same st, *ch3, skip 1, sc in next st* repeat 24 times (24 ch3 loops)
Round 5 :
Work inner petals into each ch3 loop: sl st into loop, (ch1, 3 dc, ch1, sl st) forming a small petal. Repeat 24 petals. Fasten off D after finishing inner ring.
Info :
Inner petals are small and tight — they create fullness at the center. Make them in a contrast section of variegated yarn to show the color shifts. Block slightly with pins to open petals for a flower-like look.
Round 6 :
Join C (Leaf Green) behind the inner petal base: work 24 sc evenly across the base of the petals, placing 3 sc under each petal cluster to create a solid platform for the next petal layer (72 sc)
Round 7 :
(2 sc, inc) x 24 (96)
Round 8 :
Outer petal anchors: ch4 spaces across around: *sc in next st, ch4, sc in next 3* repeat to create 24 ch4 spaces for larger petals
Round 9-14 :
Work large petals into each ch4 space: For each petal: sl st into ch4 space, ch1, (2 tr, 2 dc, 2 tr) in same space, ch1, sl st. Repeat across 24 petals. On Round 11, work an extra elongated tr at the center of each petal to create a double-layered texture if desired.
Info :
These larger petals create the voluminous look in the photo. Use D variegated yarn to get the pink-to-red gradation. Work petals tightly and block flat to keep them from curling.
Round 15 :
Fasten off D. Flip motif over and with C join behind large petals to create leaf-like supports: sc around base catching petal stems. Work (1 sc, ch2, 1 sc) between each petal base to create a gap for seam-on placement later (approx 96 sc and 24 ch2 gaps)
Round 16 :
Make an optional outer frill: join a contrast thread and work picot edging around each outer petal tip to give a crisp finish (sl st, picot: ch3, sl st to same stitch) across petal tips
Info :
Make two complete flower motifs following these rounds. Block flat and shape by pinning petals outward. Trim any long tails but leave long sewing tails for attachment to the runner.
— Leaf (Make 8–10 leaves) :
Info :
Leaves are worked in C (Leaf Green). Make at least 8 leaves per runner to tuck under each flower and for additional accent. Leaves are worked flat with shaping and a central ridge created by working in BLO for one round.
Round 1 :
ch12, sc in 2nd ch from hook and across to end (11 sc), 3 sc in last ch to turn work and work along the opposite side of chain, sc back across 10 sc, sl st to first sc. (24)
Round 2 :
ch1, sc in same st, (sc in next 5, inc, sc in next 5, inc, sc in next 5, inc) shape the tip with (2 sc, sl st) at the end and down the other side mirroring increases to keep leaf symmetrical (approx 30–36 depending on inc placement)
Round 3 :
Work in BLO for a ridge: ch1, sc in each st BLO around to create a slight raised midrib texture (same stitch count as previous round)
Round 4 :
Decrease rounds to taper the base: work (sc2tog, sc in next 4) around both sides to create a tapered stem, finishing with sl st. Fasten off leaving long tail for sewing.
Info :
For visual interest, make half the leaves in a slightly darker tone of C or work a surface slip stitch vein down the center. Block leaves with a little spray starch to help them hold their shape when sewn beneath flowers.
— Additional Small Inner Petals / Filling (Optional) :
Round 1 :
mr, 6 sc in ring (6)
Round 3 :
Work tiny ruffles around center: *ch2, 3 sc in same st* repeat into each st to create gentle frill ring (12 frills)
Info :
These small fillers can be tacked into the center of the flower to add more depth. Use leftover variegated yarn to pick up highlights that echo the main petals.
— Edging & Finishing Rounds (Runner) :
Round 1 :
After attaching flowers and leaves, re-examine runner edges. Join A and work 1 sc all around to tidy transitions, working evenly across ladder holes and shells (stitch count will remain approx what it was after attachment, aim for consistent spacing)
Round 2 :
Scallop round: *skip 2, 7 dc in next st, skip 2, sc in next* repeat around to create bold scallops (approx 22 scallops)
Round 3 :
Picot highlight: join B and work a single round of slip-stitch dots into the trough between scallops, or surface slip stitch a thin contrasting line across each scallop crest for the two-tone look shown
Info :
Use contrasting thread sparingly on the edge to mimic the fine red/green accent dots visible in the photo. This creates a professional, finished look and ties the colors together.
— Assembly & Attaching Motifs :
Info :
Arrange motifs on the runner before sewing. The pictured layout has one flower placed near one end and another near the center third, roughly staggered so their leaf clusters overlap the runner bands. Pin each flower down and place 4–5 leaves around each flower, tucking leaf tips under petals to hide sewing stitches.
Round 1 :
Sewing method: using long tail from each motif, use a whip stitch or ladder stitch through the base ring of the flower and the runner fabric. Take small, closely spaced stitches to secure without puckering the runner. Sew through the support ring created on Round 15 of the flower.
Round 2 :
Attach leaves by sewing the tapered base into the runner edge and under the petals. Use two passes if needed: one to anchor from the underside, a second to invisibly catch petal stems on top for a clean finish.
Info :
Weave in all remaining tails into the runner base and motifs. For extra security, take a small dab of fabric glue at the underside seam, then hide the glue with a few stitches. Block the entire runner flat after assembly to ensure everything lies nicely.
— Variation: Single-Petal Details and Extra Texture :
Info :
For more texture, add small raised slip-stitch rows in the runner bands (FLO or BLO) to echo the leaf ribbing. You may also add beads at the flower centers prior to final sewing for subtle sparkle, taking care to stitch beads securely and hide ends.
Round 1 :
Optional tiny centers: sew a cluster of three beads to the center of each flower for a focal shine; secure thread by stitching through the motif center several times and knotting on the underside.
Info :
When adding beads, choose bead sizes that sit low in the flower so they do not catch on table linens. Alternatively, embroider a small French knot cluster in embroidery floss for a soft center finish.
— Final Blocking & Care :
Info :
Gently wash runner by hand in lukewarm water with mild detergent. Reshape and pin flat to block, paying special attention to scalloped edges and petal placement. Air dry flat. For maintenance, spot clean and re-block as needed. Avoid machine drying to protect delicate petals and shaping.
Info :
Small repairs: if a petal loosens, re-sew using the original long tail or attach with matching yarn and slip-stitch seams hidden under petals. Keep a small spool of matching yarn for future maintenance.
Finishing this runner is such a rewarding experience — watching the flat rows blossom into 3D flowers is always magical! The combination of rich green ribs, vibrant red bands, and soft pink petals give a classic yet cozy aesthetic that looks beautiful on a wooden table. Each stitch contributes to a piece you’ll be proud to display or gift. 🧶🌸 Happy crocheting and enjoy your beautiful handmade centerpiece! 🎁