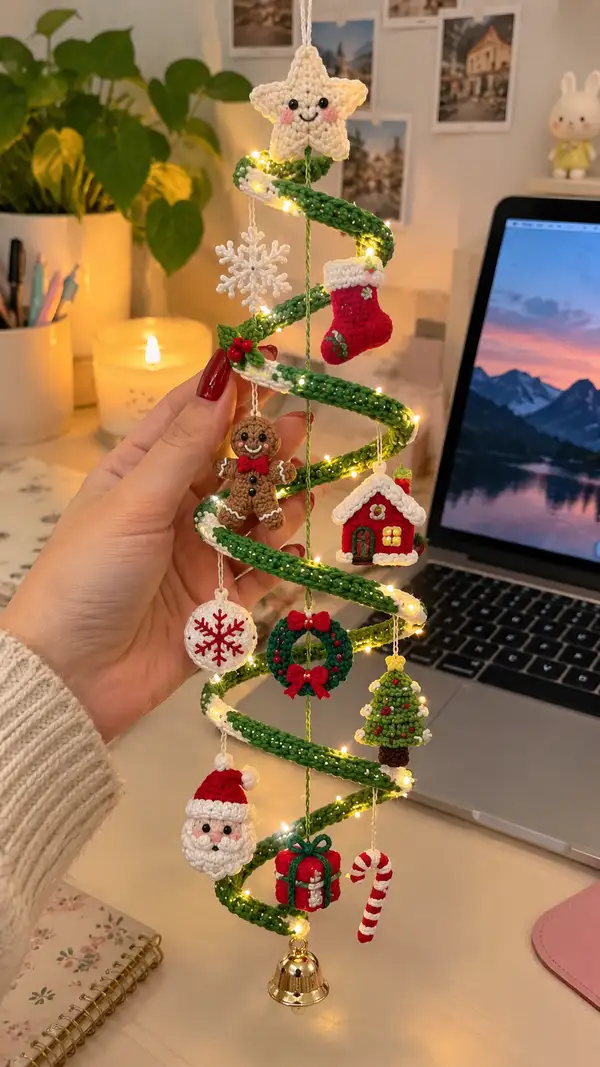
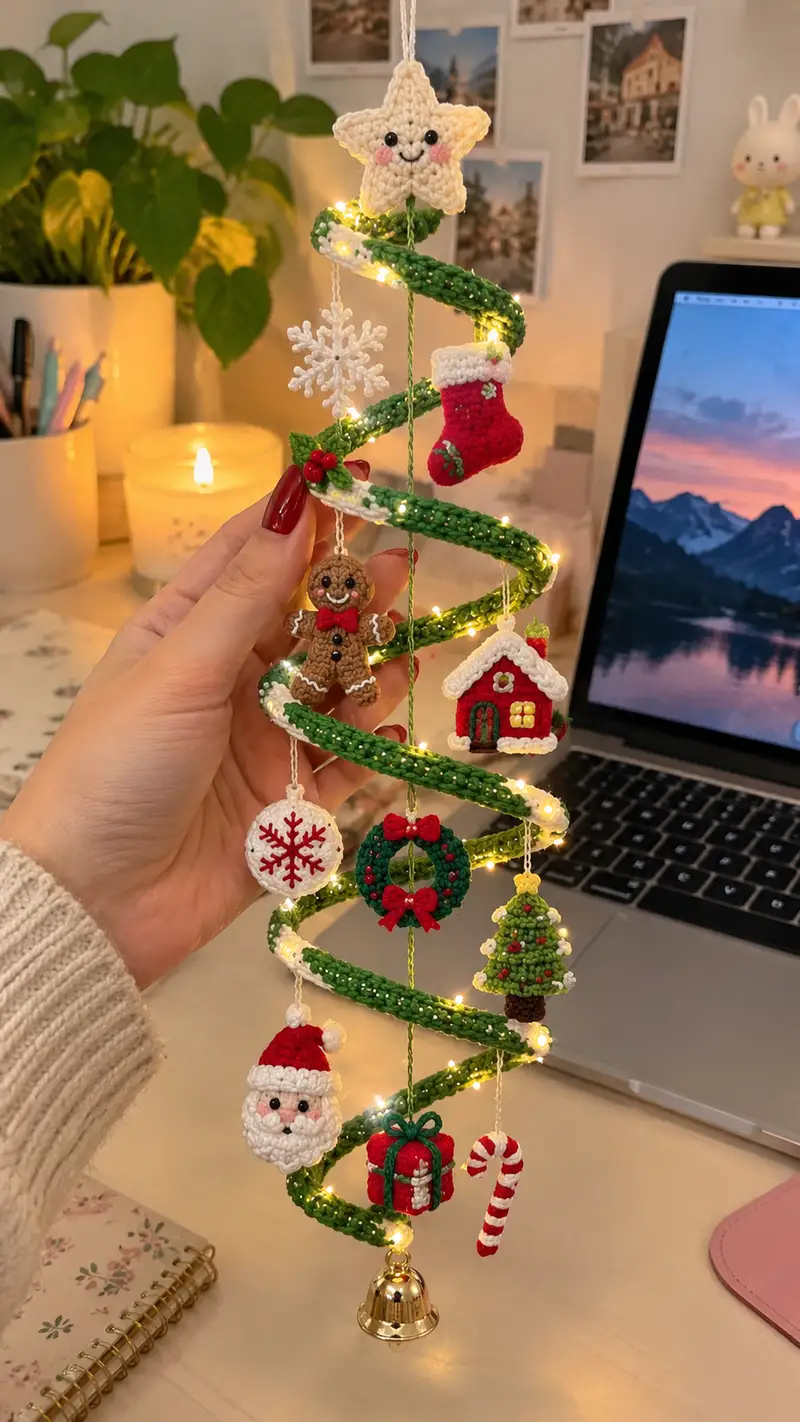
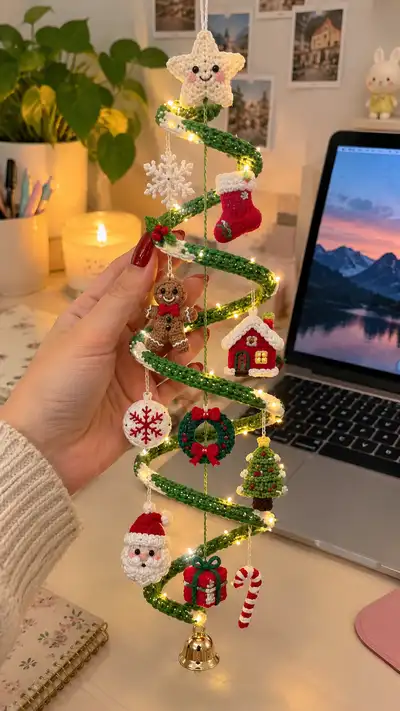
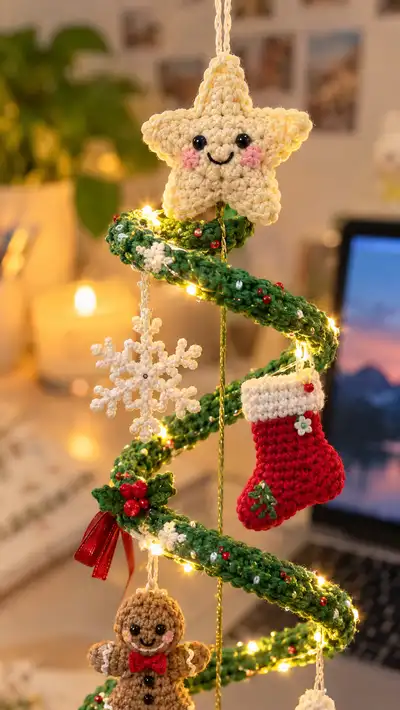
Create a whimsical spiral Christmas tree mobile decorated with tiny amigurumi ornaments — a smiling star topper, snowflakes, gingerbread, stocking, Santa, wreath, gift and more. This pattern uses small-weight yarn, a flexible core or wire to shape the spiral, and clear step-by-step rounds so you can recreate every tiny detail. Perfect for mantel displays, desk decor, or a handmade holiday gift filled with twinkling LED lights and festive charm.
Progress Tracker
0% Complete
— Materials & Notes :
Info :
Use DK/sport weight yarn and a 2.75mm hook for a tight fabric appropriate for tiny ornaments. If you prefer larger ornaments, use a thicker yarn and larger hook but the final size will change. Work in continuous rounds for amigurumi unless otherwise noted. Use stitch markers at the beginning of each round.
— Star Topper (Make 1) :
Round 1 :
6 sc in magic ring (6)
Round 3 :
(1 sc, inc) x 6 (18)
Round 4 :
(2 sc, inc) x 6 (24)
Round 5 :
(3 sc, inc) x 6 (30)
Round 6 :
1 sc in each st (30)
Info :
We will begin shaping five points from the round border. Mark the first stitch of each point (every 6 stitches) to help placement for symmetrical points.
Round 7 :
*Point: sc in next 4 sts, ch2, (hdc, dc, hdc) in ch2 loop, sl st back into base; rep from * around to create 5 points (30)
Round 8 :
1 sc in each st (30)
Round 9 :
For each point work: (sc, inc, hdc, dc, tr, dc, hdc, inc, sc) across the 6-stitch wedge to form a pointed spike; repeat for all 5 points (30)
Round 10 :
1 sc in each st around to even fabric (30)
Info :
Make a second identical star piece following rounds 1-10. We will join these two pieces and stuff between them.
Round 11 :
Place star fronts together and whip stitch or sc through both loops around to join; work first 20 stitches leaving a 10-st opening for stuffing (30)
Round 12 :
Stuff lightly with fiberfill, making sure points are plump but not overstuffed. Continue to join remaining 10 sts (30)
Round 13 :
Fasten off leaving long tail. Weave tail inside and close any gap securely. Embroider smile using black embroidery thread and stitch small blush circles with pink yarn. Attach 6mm safety eyes between the two top points, approximately centered on the main disc.
Info :
For a clean finish, insert a short piece of cord or loop at the top before final closing so the star can be hung from the central core. You may also add a small inner washer to secure safety eyes if desired.
— Spiral Tree Coil (Main Structure) :
Info :
This long tube will form the green spiral. Work in rounds to create a narrow tube, then thread a flexible core (wire or cord) through it. We will increase to working circumference then make many even rounds for the length. Add beads and metallic thread as you go for decoration.
Round 1 :
6 sc in magic ring (6)
Round 3 :
(1 sc, inc) x 6 (18)
Round 4 :
(2 sc, inc) x 6 (24)
Round 5 :
(3 sc, inc) x 6 (30)
Round 6 :
(4 sc, inc) x 6 (36)
Round 7 :
(5 sc, inc) x 6 (42)
Round 8 :
(6 sc, inc) x 6 (48)
Round 9-12 :
1 sc in each st (48)
Info :
At the end of round 12, thread your flexible wire or cord through the center of the tube. If using a wire, fold a 2-3cm loop at one end or secure with tape to prevent poke-through. This core will let you shape the spiral and suspend the tube.
Round 13-68 :
1 sc in each st (48) — continue for 56 rounds to build the length of the spiral tube (48)
Info :
To mimic the snow-dusted edge seen in the photos, every 8th round switch to cream yarn for a short ridge round: change to cream and work 1 sc in each st BLO for one round then return to green. Add small red and white seed beads threaded onto the yarn at random intervals as you crochet to create berry and snow bead accents.
Round 69 :
Change to cream yarn. 1 sc in each st BLO (48)
Round 70-84 :
Change back to green. 1 sc in each st (48) continue building length until your tube measures approximately 18-22cm when relaxed (48)
Info :
Once the tube length is complete, fasten off leaving long tails at both ends for secure tying or sewing. Shape the tube into a spiral by wrapping around a cardboard cone or by hand around the central cord. Anchor the top loop to a small stitched ring and secure the bottom to a decorative bell or bead.
— Snowflake Ornament (Make 1) :
Round 1 :
6 sc in magic ring (6)
Round 3 :
(1 sc, inc) x 6 (18)
Round 4 :
Slip stitch pattern to convert circle into 6 spokes: *ch 4, sl st in next base stitch* repeat 6 times forming 6 loops (18)
Round 5 :
Work into each ch-4 loop: sc, hdc, dc, hdc, sc to make a delicate arm (18)
Round 6 :
Embellish by adding picots: into each arm: (sc, ch3, sl st into top of arm) creating pointed tips (18)
Round 7 :
Fasten off leaving tail. Attach small bead to center and secure with thread. Block lightly to open arms into snowflake shape.
Info :
Work snowflake in cream cotton or a slightly stiffer yarn for best definition. Add a short loop for hanging and a tiny bead in the center as shown in photos.
— Mini Stocking (Make 1) :
Round 1 :
6 sc in magic ring (6)
Round 3 :
(1 sc, inc) x 6 (18)
Round 4 :
(2 sc, inc) x 6 (24)
Round 5-9 :
1 sc in each st (24) — work 5 rounds to build height for foot
Round 10 :
Work heel shaping: 12 sc across half the tube, turn and continue working back and forth in rows for 4 rows forming a flat heel section (12)
Round 11 :
Rejoin in the round and resume 1 sc in each st (24)
Round 12 :
Change to cream yarn for cuff. 1 sc in each st BLO for one round (24)
Round 13 :
1 sc in each st with cream (24)
Round 14 :
Fasten off leaving tail for sewing. Add tiny embroidered holly and bead for decoration as shown in photo
Info :
Stocking is worked flat into a tube then heel is shaped by working half the stitches in rows. Stuff lightly or leave flat depending on desired look. Sew a short hanging loop at the cuff.
— Gingerbread Man (Make 1) :
Round 1 :
6 sc in magic ring (6)
Round 3 :
(1 sc, inc) x 6 (18)
Round 4 :
(2 sc, inc) x 6 (24)
Round 5 :
1 sc in each st (24)
Round 6 :
Begin body shaping: (3 sc, dec) x 4 (20)
Round 7 :
1 sc in each st (20)
Round 8 :
Shape head and shoulders with targeted decreases: (2 sc, dec) x 4 (16)
Round 9 :
1 sc in each st (16)
Round 10 :
Separate arms — work first 4 sts for left arm in rounds (4 sc in tube) for 8 rounds (4)
Round 11 :
Slip stitch across body to next arm base then repeat for right arm (4)
Round 12 :
Resume body rounds for 6 rounds to create belly (16)
Round 13 :
Stuff lightly. Embroider facial features and add two black seed beads for eyes. Add a red bow tie using small flower stitch and two black buttons sewn to torso.
Round 14 :
Fasten off and weave in ends. Use white yarn to pipe 'icing' around arms and feet using slip stitches or surface crochet to replicate trim seen in photo.
Info :
Gingerbread is worked as a single small amigurumi figure — keep it lightly stuffed and use small eyes (6mm) for a cute scale. Pipe icing after assembly for best placement.
— Mini House (Make 1) :
Round 1 :
6 sc in magic ring (6)
Round 3 :
(1 sc, inc) x 6 (18)
Round 4-7 :
1 sc in each st (18) — build walls for 4 rounds
Round 8 :
Shape base of roof: (2 sc, dec) x 4 (14)
Round 9 :
Change to white yarn for roof trim. 1 sc in each st (14)
Round 10-12 :
Work small triangular roof by decreasing evenly over 3 rounds: Round10 (1 sc, dec)x4 (10); Round11 1 sc in each (10); Round12 (dec)x5 (5)
Round 13 :
Fasten off leaving long tail. Sew roof to body making sure edges align. Embroider door and window using green and yellow yarn and add small white trim as shown.
Info :
House shape is a small cylinder with a peaked roof sewn on. Add tiny holly trim with red beads for berries where desired.
— Wreath (Make 1) :
Round 1 :
6 sc in magic ring (6)
Round 3 :
(1 sc, inc) x 6 (18)
Round 4 :
Slip stitch around to make a flat ring then work 1 sc in each st for 2 rounds (18)
Round 5 :
Work small leaf clusters on ring: *ch3, 3 sc in ch3 loop, sl st into next st* repeat around 6 times to form textured wreath (18)
Round 6 :
Fasten off leaving tail. Add red bow made with small ribbon or crocheted bow and a few red bead 'berries' sewn to front.
Info :
Wreath is intentionally shallow and flat so it hangs nicely. Sew a small hanging loop at the top.
— Little Christmas Tree Ornament (Make 1) :
Round 1 :
6 sc in magic ring (6)
Round 3 :
(1 sc, inc) x 6 (18)
Round 4 :
Change to darker green. 1 sc in each st (18)
Round 5 :
Begin shaping tree tiers: *ch2, (hdc, dc, hdc) in next st, sl st in next 3 base sts* repeat 3 times creating 3 scalloped tiers (18)
Round 6 :
Work trunk in brown: attach yarn to bottom center, ch2, 6 sc in chain backing, fasten off (6)
Round 7 :
Embellish by sewing on white french knots or tiny beads to mimic lights and a small yellow star bead on top
Info :
Use a small amount of stuffing at the top tier only to keep shape. Add a short hanging loop at the crown of the tree.
— Santa Head (Make 1) :
Round 1 :
6 sc in magic ring (6)
Round 3 :
(1 sc, inc) x 6 (18)
Round 4 :
(2 sc, inc) x 6 (24)
Round 5 :
(3 sc, inc) x 6 (30)
Round 6-9 :
1 sc in each st (30) — create head height
Info :
Place safety eyes between rounds 7-8 about 6-8 stitches apart depending on desired expression. Mark eye placement before continuing. Embroider nose with a small single sc bump or use a tiny bead for a nose.
Round 10 :
(3 sc, dec) x 6 (24)
Round 11 :
(2 sc, dec) x 6 (18)
Round 12 :
Begin beard placement using white yarn: join to bottom front and work 1 sc in each st for a round then work additional textured loops with lop stitches to mimic a beard. Continue shaping neck with (1 sc, dec) x 6 (12)
Round 13 :
6 dec (6) Fasten off leaving tail for sewing. Add tiny pom on hat, and stitch rosy cheeks using pink yarn. Sew beard loops neatly and secure eye washers.
Info :
Santa is mostly decorative — avoid heavy stuffing. Use a small hanging loop sewn to the top of his hat so he dangles cleanly from the spiral.
— Gift Box (Make 1) :
Round 1 :
6 sc in magic ring (6)
Round 3 :
(1 sc, inc) x 6 (18)
Round 4-6 :
1 sc in each st (18) — build small cube height
Round 7 :
Flatten top by decreasing: (2 sc, dec) x 4 (14)
Round 8 :
Fasten off. Sew a contrasting ribbon (crocheted or real) around the box and a small bow on top using green yarn for the ribbon.
Info :
Work gift slightly firm so it keeps shape. Use a contrasting yarn to stitch a neat cross-ribbon for an authentic look.
— Candy Cane (Make 1) :
Round 1 :
Ch7, join to make a small ring and work 6 sc around (6)
Round 2-8 :
1 sc in each st switching colors every other stitch to create red/white stripes. Continue in spiral until length approx 2.5-3cm then shape top curve by decreasing 3 sts over next round (6)
Round 9 :
Fasten off and bend into cane shape. Secure with a few stitches to hold the curve.
Info :
Work candy cane flat and then bend into shape. You can also crochet a small tube and then steam shape gently around a small dowel for a perfect curve.
— Round Ornament Disc (Make 1) :
Round 1 :
6 sc in magic ring (6)
Round 3 :
(1 sc, inc) x 6 (18)
Round 4 :
1 sc in each st (18)
Round 5 :
Attach contrasting yarn and embroider snowflake motif across disc with small stitches and a red center bead
Info :
This small flat disc becomes a classic tree bauble when embellished. Leave a top loop for hanging.
— Tiny Bell & Bottom Finish :
Round 1 :
Use gold embroidery thread or metallic yarn to make a decorative little wrapped loop and secure a small bell with thread to the bottom of the central cord
Info :
If using micro LED lights, secure the battery pack near top loop and weave the lights along the outer edge of the spiral, anchoring with small stitches. Hide wires inside the tube when possible.
— Hanging Loops & Attachment Points :
Round 1 :
For each ornament make a 6-10 ch loop and slip stitch into a base stitch on the ornament; sew the other end of the loop through the spiral tube so the ornament hangs centered between coil tiers
Info :
Vary the lengths of your loops to achieve the staggered look in the photos. Pin ornaments in place and adjust spacing before final sewing. Attach a central vertical cord inside the spiral and attach some ornaments directly to this cord for stability.
— Finishing Touches :
Round 1 :
Weave in all ends carefully, trim, and block ornaments lightly using pins to shape points and curls. Add small beads and bows as final decoration.
Info :
To create the twinkling look, add a micro LED string wrapped around the spiral. Secure battery pack to top loop and hide it among the star topper. Light will reflect on seed bead accents for a magical finish.
This little spiral tree is a wonderfully compact celebration of holiday craft — every tiny ornament brings a story and personality to the piece. Working this pattern is like making a tiny winter village that floats and twinkles on your desk or mantle. 🧶 Add your own color accents and tiny trinkets for a delightful personalized decoration you can enjoy every season. Happy stitching and enjoy the sparkle! ✨🎄