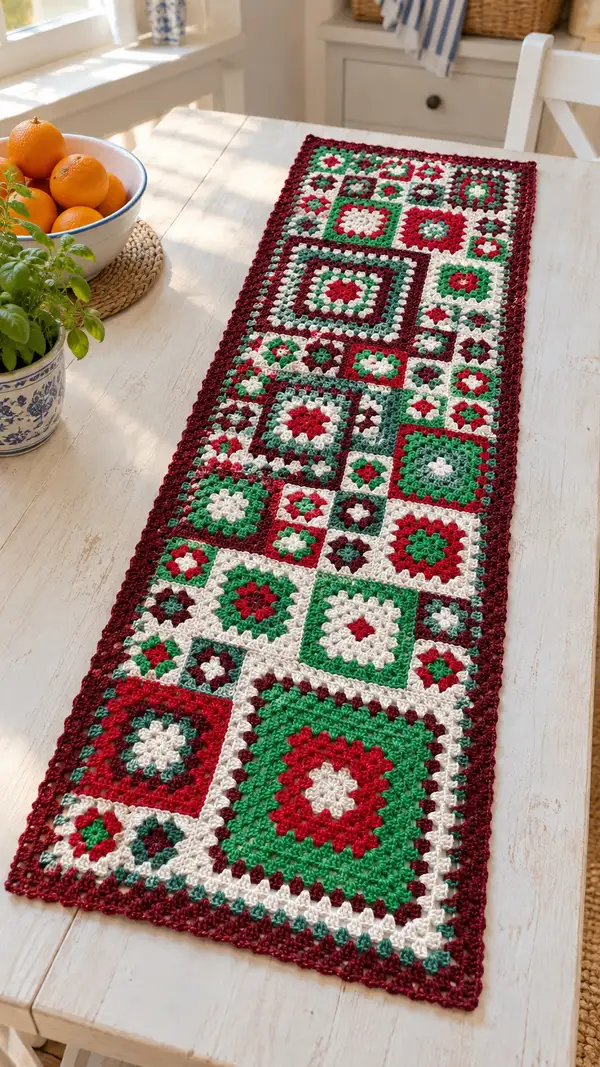
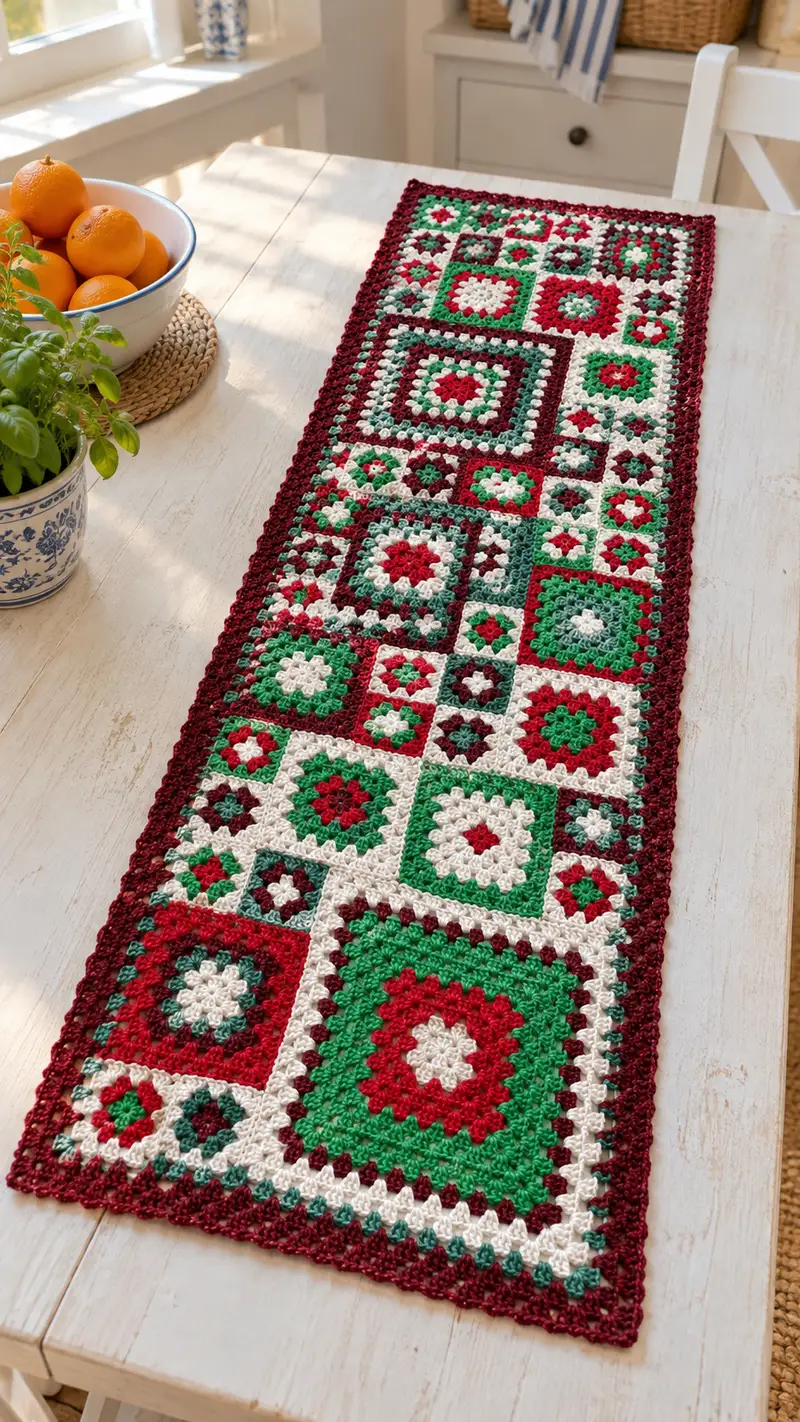
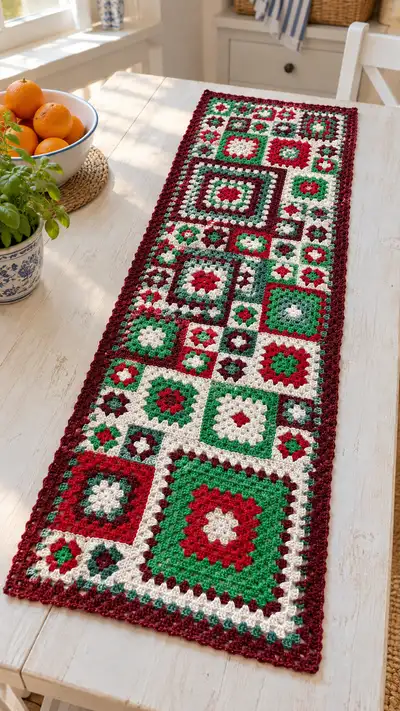
A long, joyous table runner built from mixed-size granny squares in classic holiday colors — deep burgundy, bright red, evergreen and warm cream. This pattern walks you through making multiple square variations, assembling them into a striking linear mosaic and finishing with a scalloped burgundy border. The runner is modular, customizable and perfect for seasonal tabletops or as a year-round accent to add handmade warmth.
Progress Tracker
0% Complete
— Overview :
Info :
This table runner is built from a collection of granny-square variations in 4 main sizes: Large, Medium, Small and Tiny, plus a couple of decorative variations. The finished runner in the photograph measures approximately 12" wide by 48" long when made with worsted weight yarn and 4.0mm hook; adjust the number of squares per row to change width and length. Work all squares flat in rounds and fasten off at color changes. Block each square lightly to square up before joining. Use the provided suggested layout or create your own mosaic.
Info :
General construction: make the listed number of each square. Block and lay out squares in the chosen arrangement (see Assembly section). Join squares using slip-stitch join or whip stitch, then work a multi-round border in burgundy for a neat finish. Info sections throughout provide color-change tips, blocking guidance and joining suggestions.
— Large Granny Square (Make 6) :
Round 1 :
With green, make a magic ring. Ch3 (counts as first dc), work 2 dc into ring, ch2, *(3 dc into ring, ch2) repeat from * two more times. Join with sl st to top of ch3. You now have 4 clusters (12 dc) and 4 ch-2 corner spaces. (12 dc, 4 ch-2)
Round 2 :
Sl into the first ch-2 corner space. Work (3 dc, ch2, 3 dc) in that ch-2. *Ch1, (3 dc) into the next ch-2 space, ch1, (3 dc, ch2, 3 dc) into the next ch-2; repeat from * around so that each side has one side cluster separated by ch1. Join with sl st to top of starting ch3. After finishing this round you will have 12 clusters total (=36 dc) and 4 ch-2 corner spaces. (36 dc total clustered)
Info :
Change color at the end of the round by finishing the last sl st with the next color (cream) to produce crisp color rounds. Carry small color tails along the back, or cut and weave ends if you prefer a cleaner backside.
Round 3 :
With cream, in each corner ch-2 space work (3 dc, ch2, 3 dc). On each side work ch1, 3 dc into each ch1 space from previous round. Join with sl st. This round increases clusters by +8 (standard granny growth). After Round 3 you will have 20 clusters (60 dc). (60 dc, 4 ch-2)
Round 4 :
With red, repeat Round 3's structure: (3 dc, ch2, 3 dc) in corner ch-2, ch1, 3 dc in each side ch1 space. Join with sl st. This will produce 28 clusters (84 dc). (84 dc)
Info :
Work tidy joins at color changes: when changing to a new color, pull through the last yarn over of the last sl st with the new color to reduce tails. Maintain consistent tension to keep the square flat.
Round 5 :
With green, repeat the cluster round pattern to produce 36 clusters total (108 dc). Keep corners as (3 dc, ch2, 3 dc); sides remain ch1 between clusters. (108 dc)
Round 6 :
With cream, repeat cluster round to reach 44 clusters (132 dc). Join and fasten off. This gives a large square approximately 8" - 9" depending on tension. (132 dc)
Info :
For the large square seen in the photo some rounds feature contrasting thin stripes (one round only) in dark plum; add a single-round motif with plum before the final cream round to mimic the look. To add that, change to plum for Round 6, then cream for Round 7 as described in the alternate layout.
Round 7 :
Optional decorative round in plum: join plum in any corner ch-2. Work (3 dc, ch2, 3 dc) in each corner and ch1, 3 dc into each side space as before. Join and fasten off. (If using this option, follow with one final cream round to even the edge.)
— Medium Granny Square (Make 8) :
Round 1 :
With cream, make magic ring. Ch3, 2 dc, ch2, (3 dc, ch2) x2, join — 12 dc, 4 ch-2. (12 dc)
Round 2 :
With red, work into corners as (3 dc, ch2, 3 dc); between corners work ch1, 3 dc. Join — this round yields 12 clusters (36 dc). (36 dc)
Round 3 :
With green, repeat cluster round to produce 20 clusters (60 dc). Join and continue. (60 dc)
Round 4 :
With cream, repeat cluster pattern — 28 clusters (84 dc). Join and fasten off if you prefer medium size. (84 dc)
Info :
Medium squares in the photo alternate dominant color by round — e.g., cream center, red then green — to create a checkerboard look. Switch colors at round joins and always block squares after finishing for consistent assembly.
Round 5 :
Optional: With burgundy, add one extra cluster round for more presence (36 clusters = 108 dc). Join and fasten off. Adjust rounds to suit your desired finished square size. (108 dc)
— Small Granny Square (Make 12) :
Round 1 :
With red, mr, ch3, 2 dc, ch2, (3 dc, ch2) twice more. Join — 12 dc, 4 ch-2. (12 dc)
Round 2 :
With cream, (3 dc, ch2, 3 dc) in each corner, ch1, 3 dc in each side space. Join — 12 clusters (36 dc). (36 dc)
Round 3 :
With green, repeat cluster round to reach 20 clusters (60 dc). Join and fasten off to keep a small square about 5" across. (60 dc)
Info :
Small squares are abundant in the runner and act as bright punctuation marks. Make them in contrasting two-color combos to keep the layout lively.
Round 4 :
Optional: add a thin border round in burgundy (3 dc into side spaces, chain 1 between clusters; corners remain 3 dc, ch2, 3 dc) for a framed look. Join and fasten off. (If added, counts increase accordingly.)
— Tiny Granny Square (Make 20) :
Round 1 :
With cream, magic ring, ch3, 2 dc, ch2, (3 dc, ch2) x2, join. (12 dc)
Round 2 :
With green, (3 dc, ch2, 3 dc) in each corner, ch1, 3 dc in each side space. Join. This yields 12 clusters (36 dc). Fasten off for tiny square about 3.5" wide. (36 dc)
Info :
Tiny squares are ideal to fill gaps, create borders between larger motifs or sit as accent blocks. Make several color pairings to create the mosaic seen in the photo.
— Filled Center Square Variation (Make 8) :
Round 1 :
With burgundy, mr, ch4 (counts as tr), work 11 tr into ring, join — 12 tr, creates a denser center. (12 tr)
Round 2 :
Ch3, turn to dc pattern: (3 dc into ring clusters) switched to dc in following rounds to convert to granny clusters. Work Round 2 as standard granny cluster placement into the established spaces to expand into a 3-round small square. After Round 2 you will have 12 clusters (36 dc equivalent). (36 dc)
Round 3 :
With cream, add one more cluster round for 20 clusters (60 dc equivalent). Join and fasten off. This creates a denser central motif that echoes the photo’s larger textured blocks. (60 dc)
Info :
This variation uses taller stitches in the center to create a gathered, textured flower-like center. Use sparingly to emulate the mosaic in the image.
— Starburst / Flower Square (Make 6) :
Round 1 :
With red, mr, ch3, 11 dc into ring, join. (12 dc)
Round 2 :
With cream, *ch3, sl st into next dc stitch* around to create small picot-like posts (12 picots), join. This round creates decorative posts rather than full cluster growth and will be the base for a flower round.
Round 3 :
With green, create petals by working (5 dc) into each picot — this creates a floral round. Join and then work two granny rounds (as in earlier patterns) to square up into a 4-round square. Final counts will reflect two granny rounds (20 then 28 clusters equivalent). Join and fasten off.
Info :
Use this block sparingly as a focal square. Adjust petal stitch counts to suit your tension if petals pull.
— Color Change and Carrying Tips :
Info :
When changing colors at the end of a round, complete the final sl st by pulling through the new color. Carry yarn along the back for one or two rounds only to avoid bulk — otherwise cut and weave. For a cleaner front side, work color changes in the last yarn over of the last stitch as described so the new color starts where you need it.
Info :
Keep consistent loop height at beginning ch3-per-round to ensure even rows; if ch3 is too tall or too short, switch to ch2 + 1 dc into first stitch and adjust counts to keep edges even.
— Blocking :
Info :
Lightly wet-block each square to even tension and straighten sides. Pin to measurements on blocking mat to square up. Allow to dry fully before joining — proper blocking will make joining and final look much cleaner.
— Layout and Placement Instructions :
Info :
Suggested layout (as photographed): a single-column linear runner composed of mixed-size squares placed in an offset mosaic. From one end to the other, place arranged blocks with two large squares separated by clusters of medium, small and tiny squares. Use a photograph or sketch to reproduce exact placement; label each finished square and lay them out before joining.
— Joining Squares (Slip-Stitch Join and Whip Stitch Options) :
Round 1 :
Method A - Slip-Stitch Join (visible but tidy): With RS together, join yarn in the corner ch-2 of two adjacent squares, sc into corner ch-2 of square A, sl st into corner ch-2 of square B, then *sl st into next st of both squares across the side*. Work evenly spaced sl sts across the side; at the next corner work sl st into both ch-2 spaces to join. Maintain a consistent gauge to avoid pulling. Repeat for all adjacent sides. This method joins one side at a time and gives a textured ridge on the RS.
Round 2 :
Method B - Whip Stitch Join (invisible from RS): Using a tapestry needle and matching color, whip stitch through the back loops of both squares along the side, sewing through equivalent points around clusters and ch1 spaces. Pull tension evenly and avoid distorting corners. Slip stitch over the seam on the RS if needed to neaten edges.
Info :
For the runner, a combination is used: slip-stitch joins on long seams for a continuous look, whip stitch on smaller or decorative seams to hide joins. Practice on two squares first to choose your preferred finish.
Round 3 :
When joining squares with different sizes, align centers and allow the smaller square to sit centered on the side of the larger — add small filler tiny squares at off-set spaces to maintain rectangular outline. Use pins to hold positions before joining.
— Joining Sequence (Suggested Order) :
Info :
1) Join small clusters into rows horizontally first so you create repeatable strips. 2) Block each row lightly. 3) Join rows together vertically with slip-stitch join in burgundy to create a strong seam that highlights the mosaic design. 4) Finish with border rounds to unify all pieces.
— Border & Edging (Multi-Round Scallop Border) :
Round 1 :
With burgundy, join in any corner ch-2. Work 1 sc into each stitch and 3 sc into each corner ch-2 (work evenly along edges). This evens out the perimeter and creates a foundation for subsequent decorative rounds. Work all the way around and join with sl st. Count the number of sc around and divide by 4 to ensure even corner spacing. (Count will vary based on assembled runner size; ensure even increments.)
Info :
If the perimeter is slightly wavy, add or reduce side single crochet density by adding an occasional extra sc into large gaps or skipping one sc into tight spots — do this evenly on opposite sides to preserve symmetry.
Round 2 :
With burgundy, ch3, (2 dc, ch2, 3 dc) into each corner sc group to accent corners, then work *ch1, skip 1 sc, 3 dc into next sc* along each side creating mini-granny clusters spaced along edges. Join and fasten off. This round begins the scalloped effect.
Round 3 :
With cream, work a delicate row of (sc, ch2, sc) into each gusset space created by previous round corners and 3 dc groups along sides to soften the edge. Join and fasten off. This cream round provides contrast and ties the interior cream squares to the border.
Round 4 :
With burgundy, work a scallop round: *skip 2 sts, 5 dc in next st, skip 2, sl st into next st* repeating around. Work 3-4 scallops into each side space between corner groups. Join and finish carefully at a seam where two large burgundy squares meet for neatness.
Round 5 :
With plum (optional), work a surface decorative picot round (sc around, ch3 picot every 6 sts) to mimic the photo’s textured outer rim. Join and weave ends. If you prefer a flatter edge, stop after Round 3 and weave ends for a tidy finish.
Info :
Border rounds are flexible; adjust number of scallops and picots to match the photograph’s density. Make sure corner groups are always worked consistently so border lies flat.
— Finishing Rounds and Surface Details :
Round 1 :
Surface slip stitch: with contrast green, work horizontal surface sl sts to create faint banding across some squares to replicate the photo’s subtle linear texture. Choose two or three long seams to surface-slip for a cohesive look. Work evenly spaced sl sts and test on the underside to ensure no bunching.
Round 2 :
Embroider small centers: using tapestry needle and red yarn, embroider french-knot-like small centers into the smallest tiny squares to recreate the bright pinpoint centers. Use a small sewing stitch or duplicate stitch as preferred. Knot securely and weave threads through the seam allowance on the back.
Info :
Weave all ends on the WS through multiple passes and trim close. A small dab of fabric glue on knots can provide extra security when used on decorative runners that will be laundered often.
— Care & Maintenance :
Info :
Hand wash gently in cool water and block flat to dry, or use delicate machine cycle in a mesh bag if your yarn label permits. Avoid hot water and high-spin cycles to prevent stretching and color bleeding. Store flat to preserve scalloped edge shape.
Info :
Reinforce high-traffic corners with a few extra whip-stitches if you plan to drape heavy items across the runner frequently.
This festive granny-square table runner brings cozy handmade charm to any table — every square tells a little story of color and stitch. The modular design makes it endlessly customizable and satisfying to assemble. Whether you recreate the exact mosaic or make your own color arrangement, you’ll finish with a show-stopping centerpiece you’ll be proud to display. 🧶❤️✨