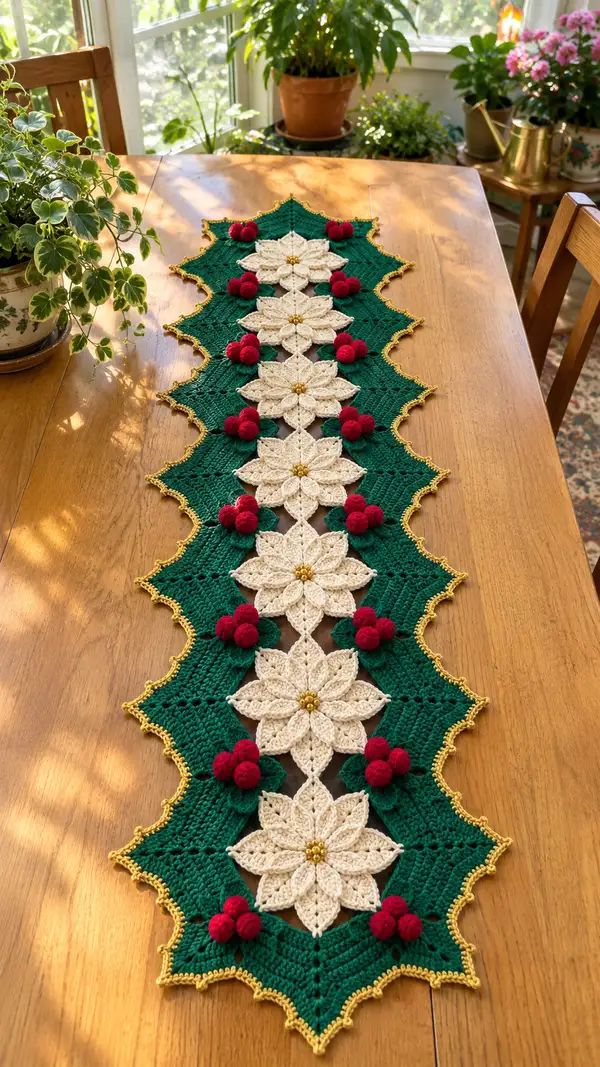
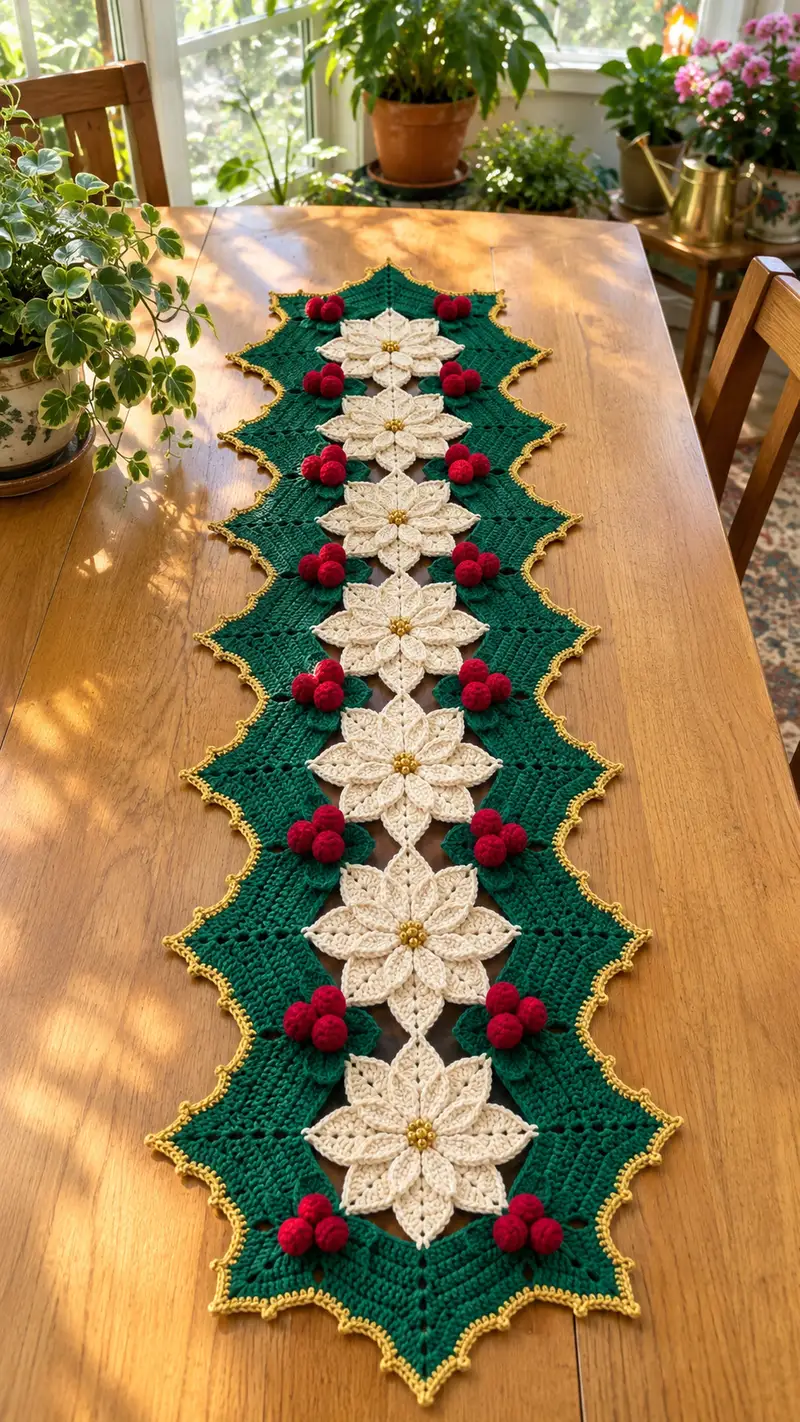
Create an elegant holiday table runner featuring cream poinsettias, deep green scalloped panels, bright red berry clusters and a metallic gold picot edge. This striking runner is made from modular motifs joined into a long, decorative centerpiece. The pattern includes detailed stitch-by-stitch instructions, placement tips, and assembly notes so you can recreate the layered floral design seen in the photo.
Progress Tracker
0% Complete
— Overview :
Info :
This runner is built from 6 repeating poinsettia motifs flanked and joined by scalloped green connector panels. Make all individual motifs first: poinsettias (cream), small backing leaves (dark green), berry balls (red), then make the long green connector panels (deep green) and finally assemble. Finish with metallic gold picot edging worked around the entire joined runner. Use a 3.5mm hook for main work; if you prefer tighter fabric, use 3.25mm.
Info :
Throughout the pattern, count your stitches at the end of each round. Use a stitch marker to mark round starts. Block each completed motif flat before assembly to ensure neat joins.
— Poinsettia Motif (Make 6) :
Round 1 :
Make mr, 8 sc into magic ring, pull tight (8)
Round 2 :
Inc in each st around (16)
Round 3 :
(1 sc, inc) x 8 (24)
Round 4 :
(2 sc, inc) x 8 (32)
Round 5 :
(3 sc, inc) x 8 (40)
Info :
These initial rounds create a compact disc that will anchor the petals. Keep tension firm so center holds shape.
Round 6 :
1 sc in each st around (40)
Round 7 :
1 sc in each st around (40)
Round 8 :
*Ch 6, skip next 5 sts, sc in next st* repeat 8 times creating 8 ch-6 loops around (40 base sts unchanged)
Info :
These ch-6 loops will each become a foundation for one petal. Ensure loops are evenly spaced; if a loop seems loose, tighten before next round.
Round 9 :
Working in first ch-6 loop: (sl st, ch2, 3 dc, ch2, sl st) into loop to make small fan. Join to next loop with sl st into base sc. Repeat for each loop to form 8 small fans (no change to base stitch count)
Round 10 :
In each fan: sl st into center chain, ch3 (counts as dc), 3 dc in same place, ch2, 4 dc across fan top, ch2, 4 dc (petal shell); join with sl st to base. Repeat for all 8 petals. (40 bases plus petal stitches worked into loops)
Info :
Work petals with even tension. Each petal is built on a loop and does not change the base count; treat petals as decorative rounds anchored to base.
Round 11 :
Turn petals into layered shape: In each petal center, work (sl st, ch1, sc) then (ch3, tr, ch3) cluster anchored at petal tip to create a raised ridge; repeat in each petal (8 ridges)
Round 12 :
Work around petals to define edges: *sc evenly across first petal edge (7 sc across), sl st to base between petals* repeat around. This neatens petal edges and stabilizes the motif.
Round 13 :
Change to a slightly lighter-cream or remain same cream for a layered look. In the valley between petals, work small picot clusters: *sc in base between petals, (ch3, sl st in first ch) x2, sc in base* to add lace detail (base stitch count unchanged)
Info :
If you want deeper layering, you can create a second set of petals by repeating rounds 9-12 in a slightly smaller scale, anchoring between the first petals for a double-petal poinsettia. This pattern uses a single large petal layer with raised ridges for crisp definition.
Round 14 :
Edging round for petals: BLO around petal bases - 1 sc in each st BLO across the base stitches to create a neat, slightly raised rim (40)
Round 15 :
Surface detail: Using slip-stitch surface crochet, work small veins on each petal by weaving short sl st lines from base toward tip (no stitch count change). This is optional but gives texture.
Round 16 :
Center bead loop: Using metallic gold yarn and tapestry needle, sew 6 gold seed beads into the center in a small flower arrangement. Alternatively, make a small picot ring by ch6 and join, then place beads on threads and sew through.
Info :
Block the poinsettia motif flat. Pin the petals evenly so the motif lies flat and the center beads are evenly spaced. Allow to dry if wet blocked before assembly.
Round 17 :
Fasten off and leave a long tail for sewing to connector panel (no additional stitches). Weave in ends except the sewing tail.
— Small Backing Leaf (Make 12) :
Round 1 :
With dark green, ch 6, sc in 2nd ch from hook and sc across last 4 ch (4)
Round 2 :
Ch1, turn, 2 sc in first st, 1 sc in next 2 sts, 2 sc in last st (8)
Round 3 :
Ch1, 1 sc in each st across (8)
Round 4 :
Work around leaf edge to make pointed tip: (sc, hdc, dc, tr, dc, hdc, sc) across one long edge to form a neat tip; repeat on the other side to mirror. This shapes a leaf with a pointed top (st count varies by shaping)
Info :
These small leaves tuck behind berry clusters at each flower pair. Make sure leaves are blocked flat to tuck cleanly under the flower motif when sewing.
Round 5 :
Fasten off leaving a long tail for sewing. Weave in remaining ends once leaf is attached.
— Berry Ball (Make 18 small balls for clusters — or make more as desired) :
Round 1 :
Make mr, 6 sc into magic ring, pull tight (6)
Round 2 :
Inc in each st around (12)
Round 3 :
(1 sc, inc) x 6 (18)
Round 4 :
1 sc in each st around (18)
Info :
Begin stuffing very lightly at the end of round 3 and continue as you fill the ball. The berry should be firm but not rock-hard so the cluster looks natural.
Round 5 :
(1 sc, dec) x 6 (12)
Round 7 :
Fasten off leaving long tail for sewing. Close opening by threading tail through remaining 6 sts and pull tight; weave tail into ball to secure.
Info :
Make clusters of three balls for each accent point. Sew three balls close together and secure to small backing leaf for a holly-like cluster that tucks against the green panel and poinsettia edges.
— Green Connector Panel Module (Make 6 panels to join between the flowers) :
Round 1 :
Ch 6, join with sl st to form ring, ch3 (counts as dc), 11 dc into ring, join (12)
Round 2 :
Ch3, dc in same st, 2 dc in each st around (24)
Round 3 :
(1 dc, 2 dc in next) x 8, (2 dc in next 4 sts) x2 to shape a longer diamond (40) — this round starts the stretch to a diamond/leaf-shaped panel.
Info :
This module is worked as an elongated diamond that, when joined together, forms the broad green scalloped panels visible along the runner sides. Shape carefully by increasing more on the points and fewer on the short edges.
Round 4 :
1 dc in each st around (40)
Round 5 :
(3 dc, inc) x 8 (48)
Round 6 :
1 dc in each st around (48)
Round 7 :
BLO round: 1 sc in each st BLO to create a decorative ridge for joining (48)
Round 8 :
Work two mirrored shaping wings to stretch module into scalloped long shape: On one short side, ch3, 3 dc in same st, (ch2, sk1, 4 dc) across 6 times, then mirror on opposite short side (st count increases by 16 to 64)
Info :
At this point you've created an expanded panel that will be trimmed into the scalloped border later. Keep panels consistent in stitch count so joins are smooth.
Round 9 :
1 dc in each st around (64)
Round 10 :
Work shell rows to form scallop ridges: *skip 2, 5 dc in next st (shell), sk 2, sl st* repeat around, spacing 8 shells across long edges to create sizable scallop bases.
Round 11 :
Ch1, turn, work shells again staggered to create pronounced scallops: *sc in shell center, (ch3, 3 dc, ch3) in center sc of shell* repeat around for depth
Round 12 :
Even round: 1 dc in each st to blend shell rows (count will depend on shells; aim for consistent edge loops for final picot edging)
Info :
Make sure the long edges on both sides of the module mirror each other; pin modules flat to ensure shells sit uniformly. Block these modules flat before joining to the flowers.
Round 13 :
Fasten off leaving long tail for joining to poinsettia motifs. Weave ends in partially but leave sewing tail on one edge to join into runner length.
— Joining Strategy (How modules and flowers fit together) :
Info :
The runner alternates: [connector panel] — [poinsettia motif] — [connector panel] — [poinsettia motif] etc. Each poinsettia sits centered in the diamond gap between two connector panels. Use the sewing tails and mattress stitch or whip stitch to join edges. Pin each join carefully so petals fall straight along the runner center.
Info :
Place three berry clusters and two small backing leaves around each poinsettia — positioned on the green panel near the scalloped notches just outside each petal tip. See assembly instructions for exact placement coordinates.
— Gold Picot Edge (Worked around fully assembled runner) :
Info :
Attach metallic gold yarn at one corner. The picot edge will be worked evenly around all outer scalloped edges to give the runner a subtle, bright frame. Keep tension loose enough to allow the scallops to ripple slightly.
Round 1 :
With gold yarn and 3.25mm hook, sc evenly along outer edge placing 1 sc at each space created by outer shells (work 1 sc per 2-3 dc depending on spacing) Continue around to end (count will vary with final assembly length)
Round 2 :
*Ch3, sl st into 3rd ch from hook to create a small picot, sc into next space* repeat around to create uniform picots on each scallop tip
Info :
For a pronounced gold ridge, work one additional gold round of single crochet directly behind the picot row and then add a final picot row if desired. Fasten off neatly and weave ends into the edge to avoid catching on fabric.
Round 3 :
Optional reinforcing round: 1 sc in each st behind picot row (no picots) to reinforce the edge and keep the runner flat
— Finishing Touches and Assembly Notes :
Info :
Before joining: block each poinsettia, connector panel, and backing leaf. Arrange modules on a flat surface and pin in the full runner layout: start and end with half-panel scallops aligned so edge remains symmetric. Place the flowers in a centered vertical line and pin berry clusters between petals as shown in photo.
Info :
Sewing method: use mattress stitch or whip stitch with sewing tail left from each module. Use long, even stitches and check frequently by unpinning and re-pinning sections to keep everything even.
Info :
When securing berry clusters, sew through the base of each small ball into the panel and through the backing leaf to secure. Apply a tiny dab of fabric glue behind beads if you wish for extra security.
Info :
After full assembly, perform final blocking to open shells and flatten joins. Press gently if needed and allow to dry fully. The metallic yarn in the picot edge will accent the runner edges and provide a finished look.
Info :
Edge note: If you prefer a non-metallic finish, substitute cream or green for a softer, tonal look. The pattern counts will remain similar but the metallic picot row uses smaller gauge yarn so adapt tension carefully.
— Optional: Double Layer Poinsettia Variation :
Info :
To create a fuller poinsettia, make smaller inner petals: after Round 6 of cream motif, create 8 smaller ch-4 loops between the larger ch-6 loops and work rounds similar to 9-12 scaled down. This gives a two-tiered flower. Adjust bead count so center remains balanced.
Info :
When making double flowers, ensure the larger petals are well blocked and flat; stitch the smaller inner petals to the center of the larger petals before attaching bead centers to keep symmetry.
— Troubleshooting and Tips :
Info :
If modules pucker at joins, ease out adjacent shells by steam blocking and re-sewing with slightly larger stitches to flatten joins. For long runner consistency, use the same lot of yarn and keep a gauge swatch for panel repeats.
Info :
If your berry clusters appear too large relative to poinsettias, reduce number of rounds in berry ball by omitting Round 4 (work rounds 1-3, then close). This reduces diameter significantly.
Info :
To size up or down: change hook by one size and adjust number of connector panels rather than altering motif size. Adding or removing one connector panel and poinsettia pair will elongate or shorten the runner proportionally.
Completing this runner is such a satisfying project — each layered poinsettia and bright berry cluster comes together to create a truly festive centerpiece. The combination of cream petals, deep green scallops and gold edging is classic holiday elegance. Block your pieces, join with care, and enjoy the glow it adds to your table this season. 🧶✨🎄