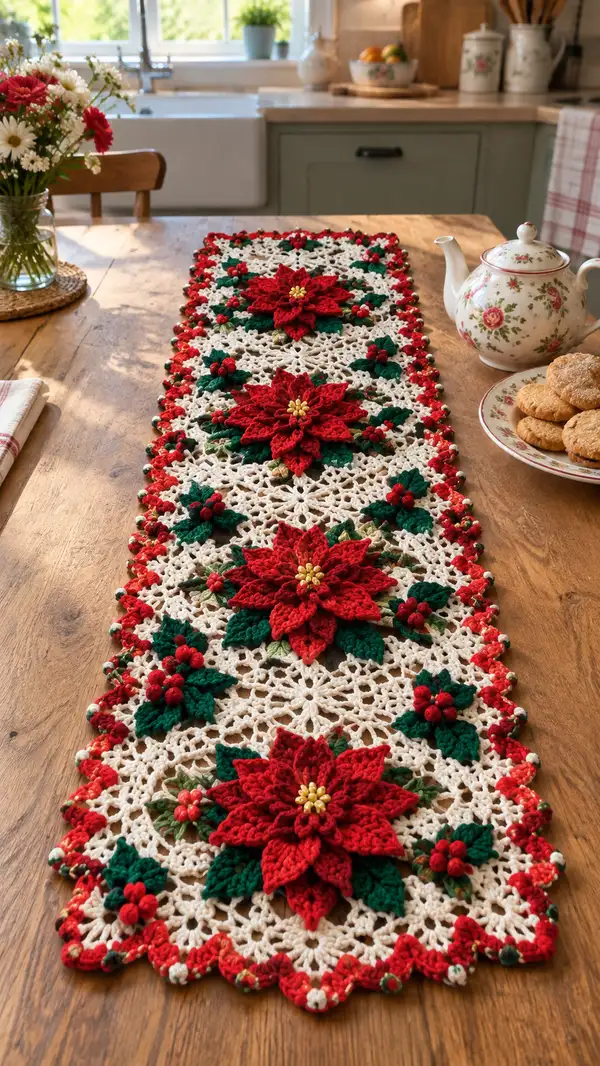
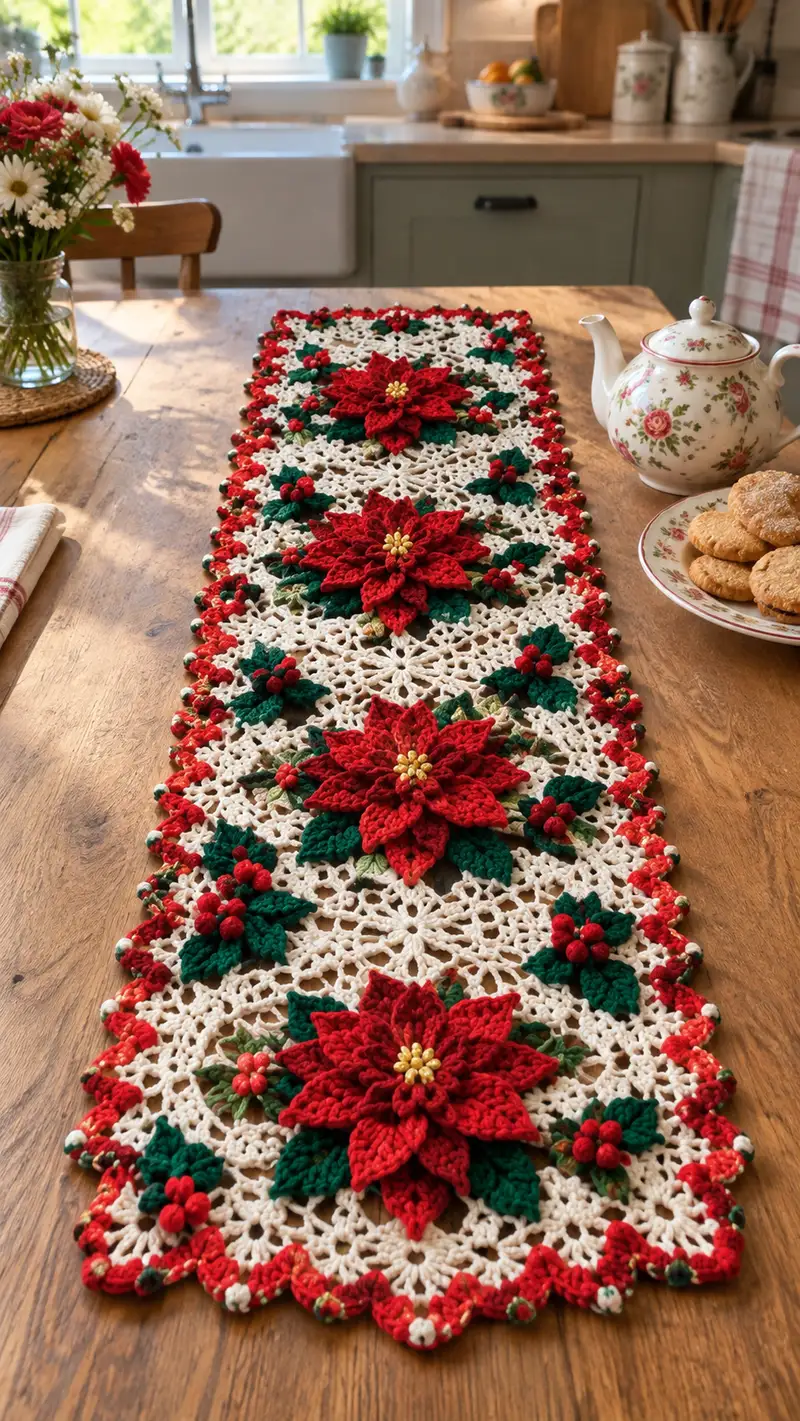
Create a stunning holiday table runner featuring raised 3D poinsettias, lush green leaves and delicate lacy motifs. This pattern builds a long runner from repeating lace motifs joined together, with layered red poinsettia appliques, tiny holly berries and a scalloped red-and-gold border. Perfect for holiday decor or as a thoughtful handmade gift — finished piece shows rich texture and dimensional floral accents that sit beautifully on a wooden table.
Progress Tracker
0% Complete
— Overview :
Info :
This runner is constructed from repeated lacy square motifs worked in cream/ivory, joined-as-you-go into a long strip. Each motif is embellished with a layered 3D poinsettia worked in red with gold bead centers, accompanied by dark green leaves and small berry clusters. Blocking motifs before assembly ensures consistent shape. The pattern below details one lace motif (make 8), one large poinsettia (make 4), leaf units, berry clusters and a multi-round decorative border. Abbreviations listed above apply throughout.
— Lace Square Motif (Make 8) :
Round 1 :
Ch 8, join with sl st to first ch to form ring. Ch 3 (counts as dc), work 15 dc into ring, join with sl st to top of beginning ch-3 (16 dc)
Round 2 :
Ch 4 (counts as tr), *sk next dc, tr in next dc, ch 1; rep from * around to form 8 tr clusters separated by ch-1, join with sl st (8 tr clusters, 8 ch-1s)
Round 3 :
Sl st into next ch-1 sp, ch 1, 7 sc in same ch-1 sp, *ch 3, 7 sc in next ch-1 sp; rep from * around, join with sl st (8 sc groups, 8 ch-3 sps)
Info :
Use soft tension for this lace round so groups puff slightly; place a stitch marker at the beginning of the round for reference
Round 4 :
Sl st into first sc of a 7-sc group, ch 5 (counts as dc+ch2), dc in 3rd sc of same group, *ch 3, (dc, ch2, dc) into the center sc of next 7-sc group; rep from * around forming 8 corner points, join with sl st (8 corner clusters)
Round 5 :
Working in ch-3 and ch-2 spaces: sl st to first ch-2 sp, ch 3, 2 dc in same sp, ch 2, 3 dc in same sp (corner shell made), *sk to next ch-2 sp, 3 dc in ch-3 sp, ch 1, 3 dc in same ch-3 sp (side shell), sk to next corner ch-2 sp; rep from * around ending with corner shells at corners, join with sl st (8 corner shells, 8 side shells)
Round 6 :
Ch 1, sc in same sp, *ch 5, sk next shell cluster, sc into center dc of next side shell; rep around to create decorative openwork; join with sl st (8 sc, 8 ch-5 sps)
Info :
This round begins to create the square outline. Keep counts even so the final square sits flat. If motif curls, block before continuing.
Round 7 :
Sl st into first ch-5 sp, ch 3, 3 dc in same ch-5 sp, *ch 3, 4 dc in next ch-5 sp; rep around, join with sl st (8 sets of dc clusters separated by ch-3)
Round 8 :
Ch 1, sc in same, *ch 7, sc in center dc of next dc cluster; rep around to form long loops creating lace body, join with sl st (8 sc, 8 ch-7 sps)
Round 9 :
Into each ch-7 sp: (sc, hdc, 5 dc, hdc, sc) to create a petal-like fan in each side; join with sl st (8 fans)
Info :
Fan clusters form the airy lattice — keep consistent stitch height for balanced edges. If yarn shows stretch, work slightly tighter hdc and sc.
Round 10 :
Ch 1, sc in first st, *ch 5, sc between petal fans; rep around to create small connecting loops, join with sl st (8 sc, 8 ch-5 sps)
Round 11 :
In each ch-5 sp: sl st, ch 3, 2 dc, ch 2, 3 dc (corner-like shells at the midpoints), and between these shells work (ch 3, 3 dc) into the next ch-5 sp to create mini-arches; join with sl st (total 16 small shells/arches)
Round 12 :
Ch 1, sc in each dc and shell top across to tidy the lace edge; work 2 sc into the tightest points to maintain square shape; join with sl st (approx 64 sc depending on tension)
Info :
Count across after this round — you should have an even number of sc around (approx 64). Adjust by adding or removing a sc at a less visible join to keep motif flat.
Round 13 :
Ch 2, hdc in next 3 sc, *ch 2, sk 1 sc, hdc in next 4 sc; rep around to create small ribbed texture; join with sl st (approx 64 hdc positions)
Round 14 :
Ch 1, sc in each hdc across to strengthen edge, placing (sc, ch1, sc) in each corner area to keep square shape; join with sl st (same count)
Round 15 :
Ch 1, BLO: 1 sc in each st around to create a neat ridge for appliques to sit on; join with sl st (same count)
Round 16 :
Fasten off leaving long tail (~30cm) for seaming. Block square to exact measurements (approx 20cm square when using worsted yarn and 4mm hook). Make 8 motifs (or enough to reach desired runner length).
Info :
Make all lace motifs first and block flat. This ensures the join-as-you-go and appliques sit tidy. Label motifs A-H as you work to plan flower placement (flowers are centered on alternating motifs to achieve the staggered poinsettia look shown).
— Large Poinsettia Applique (Make 4) :
Round 1 :
Work a small center: with red, ch 3, join to form ring. Work 12 sc into ring, join with sl st (12)
Round 2 :
Ch 1, 2 sc in same st, *sc in next sc, 2 sc in next sc; rep around (18)
Round 3 :
Ch 1, (sc, ch 3, sc) in every 3rd stitch around to create 6 petal base loops; join with sl st (6 petal loops)
Info :
This center ring will anchor the petal layers later. Keep it compact — it should measure about 2.5–3 cm across before petals.
Round 4 :
Join red in one ch-3 loop: ch 1, (sc, hdc, 3 dc, hdc, sc) in loop to form a deep petal; sl st to next loop and rep to make 6 large petals in first layer; join (6 large petals)
Round 5 :
Fasten off red, join second red yarn slightly behind first layer (work from back loop of the base), ch 3, sc around base between petals to secure first layer, then ch 4 and sl st behind each petal to create anchors for next layer; join
Info :
Work the second layer slightly smaller than first to create a tiered look. Petal shaping is achieved by varied stitch heights — stronger dc group in center and hdc/sc at edges.
Round 6 :
Second petal layer: in each anchor ch-4 sp work (sc, hdc, 5 dc, hdc, sc) forming 6 more petals that sit between the first layer, join with sl st (6 petals)
Round 7 :
Third petal layer (smaller): join red to back of the second layer, ch 3, *work (sc, 3 dc, sc) into the space between each second-layer petal making 12 small petals; rep around and join (12 small petals)
Round 8 :
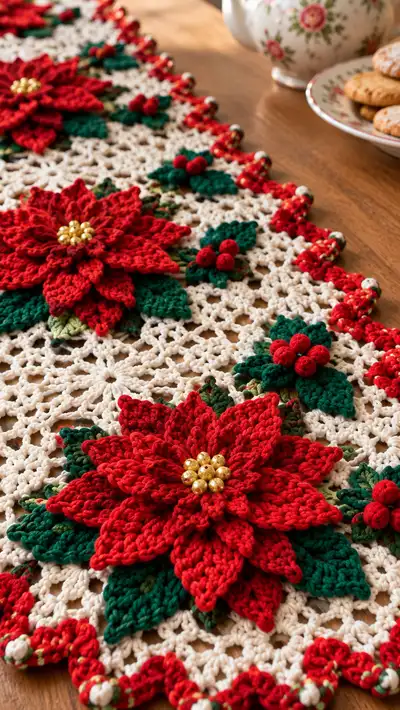
Fasten off leaving a long tail for sewing. Sew golden bead cluster (7 beads) to the center: thread 7 beads onto short piece of embroidery thread and sew through center, knot at back. Repeat to make a tight golden center (7-bead flower).
Info :
Golden bead center gives a professional focal point. For a raised center, sew beads onto a small circle of felt attached to the back of the bead cluster then sewn into the motif; otherwise stitch beads directly through the crochet center for a secure hold.
Round 9 :
Edge finishing: With red, work a round of sc around entire flower, placing 2 sc at petal tips to prevent curling; fasten off and leave tail for sewing to motif (approx 30 cm).
Info :
Make four of these large poinsettias. You can vary petal counts to taste (6-6-12 layers is recommended for fullness). Block lightly by pinning petals flat to preserve shape.
— Poinsettia Petal Variation: Raised Veined Petals (Optional Extra Layer) :
Round 1 :
For each extra petal: ch 7, sl st to form a small loop; in loop work (sc, hdc, 3 dc, hdc, sc) to shape petal; fasten leaving tail to sew. Make 12 and stitch around second layer centers for dramatic fullness.
Info :
These are worked individually and sewn in place under upper layers to add depth. Use a slightly smaller hook (3.5mm) for firmer petals that hold shape.
— Leaf Units (Make 24 large + 12 small) :
Round 1 :
With deep green, ch 8, sc in 2nd ch from hook, hdc, 2 dc, tr, 2 dc, hdc, sc in last ch — turn to work along opposite side of foundation ch: sc, hdc, 2 dc, tr, 2 dc, hdc, sc; sl st to first sc, fasten off (leaf made, counts approx 18 sts)
Round 2 :
Rejoin dark green at leaf base, ch 1, sc around leaving small picot at tip: in tip ch-3 add (sc, ch1, sc) for visual point; fasten off leaving tail for sewing.
Info :
Make 24 large leaves for under each large flower (6 leaves per flower) and an additional 12 small leaves to tuck with the holly clusters. For a leaf vein effect, use olive variegated yarn and work a chain-stitch embroidery down center after sewing in place.
— Holly Berry Cluster (Make 16 clusters) :
Round 1 :
With red, ch 2, work 6 sc into first ch to make a small bobble; sl st to join (6 sc) — do not fasten off. Pull tightly to form a bobble shape and add a tiny bit of stuffing if needed.
Round 2 :
Using the tail, sew 3 bobbles together to make a cluster of 3 berries or alternately sew single bobbles in groups of 3 on leaf clusters. Secure tightly and weave in tail at back.
Info :
Bobbles are tiny and should be stuffed very lightly. Use a contrasting back stitch to anchor each berry cluster to the lace motif at the points indicated in assembly below.
— Small Accent Sprigs (Make 16) :
Round 1 :
With olive, ch 10, sl st into 2nd ch from hook and every ch across to create a slender cord (approx 9 sl sts). Fasten off leaving tail for sewing as a tiny vein or stem under leaves and berries.
Info :
These sprigs are sewn under leaf clusters to give a natural layered look. Vary lengths and tuck under petals for realism.
— Joining Motifs (Join-As-You-Go) :
Round 1 :
Lay first motif flat and position second motif adjacent. Starting at a corner, reattach ivory yarn in a corner stitch of motif 2, ch 1, work sc across edge until you reach the matching join point on motif 1; instead of sl st, insert hook into corresponding stitch on motif 1, sc through both motifs to join. Continue across full edge, matching arches and fans. Repeat for all adjoining edges to assemble runner strip (join motifs edge-to-edge).
Info :
Join-as-you-go gives seamless connections. For a long runner, join motifs in a single long strip: lay out motifs in desired order before joining. Keep joins flat and avoid pulling tight — slight tension allows the border rounds to lie flat.
Round 2 :
After joining all motifs into a strip, work one round of sc around the entire perimeter of the assembled runner (with ivory) to tidy join edges and prepare for border. Place 3 sc in each seam corner to keep corners flat.
— Attaching Large Poinsettias and Leaves :
Round 1 :
Position a large poinsettia centered on a chosen motif: use pins to hold center of flower over motif center and space petals symmetrically. With long tail from flower, sew through motif at several anchor points around the inner circle (at least 6 stitches) and pull tight so the center sits flat and petals remain free.
Info :
Sew through base of first and second petal layers into the BLO ridge made on motif Round 15 to secure without visible stitches. Check top view frequently so petals are evenly spaced.
Round 2 :
Arrange 6 large leaves under each flower by overlapping them slightly and sewing at the leaf base. Add small olive sprigs and 3-berry clusters at natural points (two clusters per flower) and secure with whip stitch at motif interior stitches.
Info :
Stitch from the back of the motif when possible for a clean finish on the top. Use matching thread or yarn color to hide securing stitches.
— Adding Small Holly Clusters Between Flowers :
Round 1 :
For spaces between large flowers on alternate motifs, position a small trio leaf cluster (3 leaves) and attach three berry bobbles at its center. Sew through motif anchors and weave tails into the motif background.
Info :
These small clusters help the runner read as a continuous garland. Mix single and double clusters so the eye moves along the runner naturally.
— Decorative Scalloped Border (Final Border Rounds) :
Round 1 :
With scarlet red, join at any corner sc: ch 1, sc in same st, *ch 3, sk 2 sc, sc in next sc; rep around to create a spaced picot chain along outer edge; join with sl st.
Round 2 :
Into each ch-3 sp: (sc, hdc, 5 dc, hdc, sc) to create scallop shells around perimeter; at corners work (sc, hdc, 7 dc, hdc, sc) to keep corner puff; join with sl st.
Info :
Make tip of scallop slightly larger at corner transitions. Work consistently for a uniform scallop edge around entire runner.
Round 3 :
Ch 1, sc in first st, *ch 1, into center of each shell work a bead picot: (sl st, bring in white bead onto yarn, ch 1, sl st) securing bead at crest of each scallop; then sc between scallops; rep around. This places tiny white beads at every scallop tip.
Round 4 :
With a short strand of metallic gold, surface stitch small gold loops between scallops following the runner edge approximately every 3 scallops. Fasten securely and weave ends to back.
Round 5 :
Final edging: With red, work a round of crab stitch (reverse sc) around the outer edge to create a neat corded finish; fasten off and weave in ends. Add any extra bead accents with embroidery thread as desired.
Info :
Blocking after border is crucial — pin scallops to even spacing and steam block lightly to set the shape. Ensure beads are secured tightly so they don't move during blocking.
— Optional Extra Flourish: Gold Bead Fringe :
Round 1 :
Create small fringe nodes by threading a 6mm gold bead onto yarn, ch 6, sl st back into same st forming a loop with bead at base; place at each motif join for an accented look. Secure well and knot on backside.
Info :
Bead fringe gives a luxurious finish but adds weight — if the runner will be draped at ends, distribute beads evenly to avoid pulling the runner off balance.
— Finishing Touches and Blocking :
Round 1 :
Weave in all remaining tails and hide ends in the back of motifs using a yarn needle. Cut excess close to work but not flush to avoid slipping.
Round 2 :
Lightly spray with water and pin the runner on blocking mats to exact rectangular shape. Gently steam or allow to dry flat. Do not overheat beads; cover them with a damp cloth if steaming nearby.
Info :
Final blocking evens lace and sets scallops; ensure petals are arranged attractively before final drying. Once dry, press beads into place gently if needed with a soft cloth.
Completing this runner is such a rewarding project — the layered poinsettias pop beautifully on the lacy cream background and the red scalloped edge truly finishes it with holiday glamour. Each stitch brings the runner closer to an heirloom-quality centerpiece that will be cherished season after season. 🧶 Place it on a wood table and watch the poinsettias glow — a perfect festive touch for gatherings. Happy stitching and proud displaying! 🎄✨