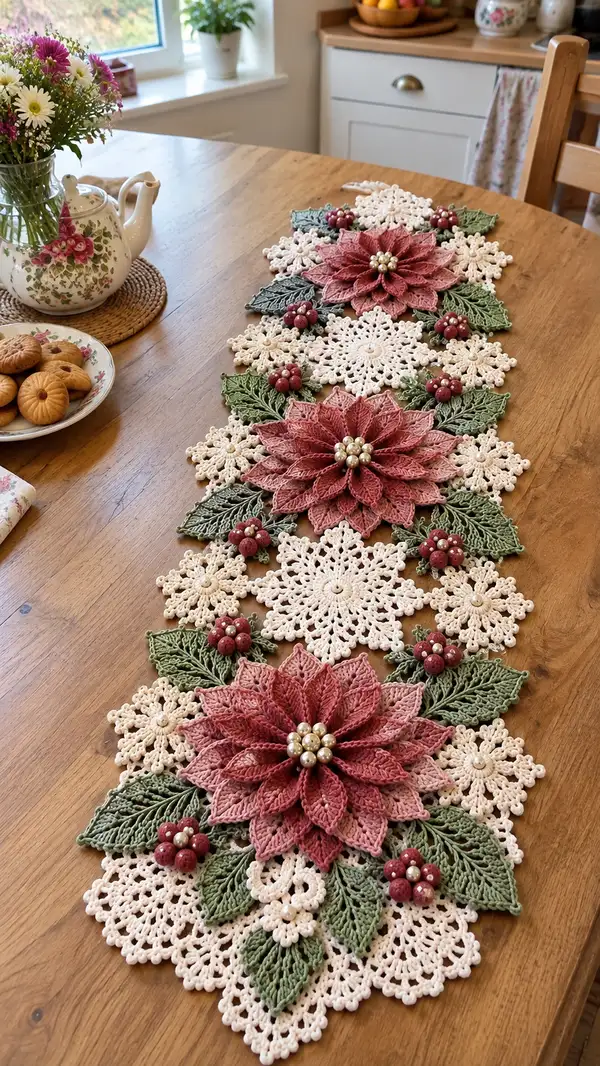
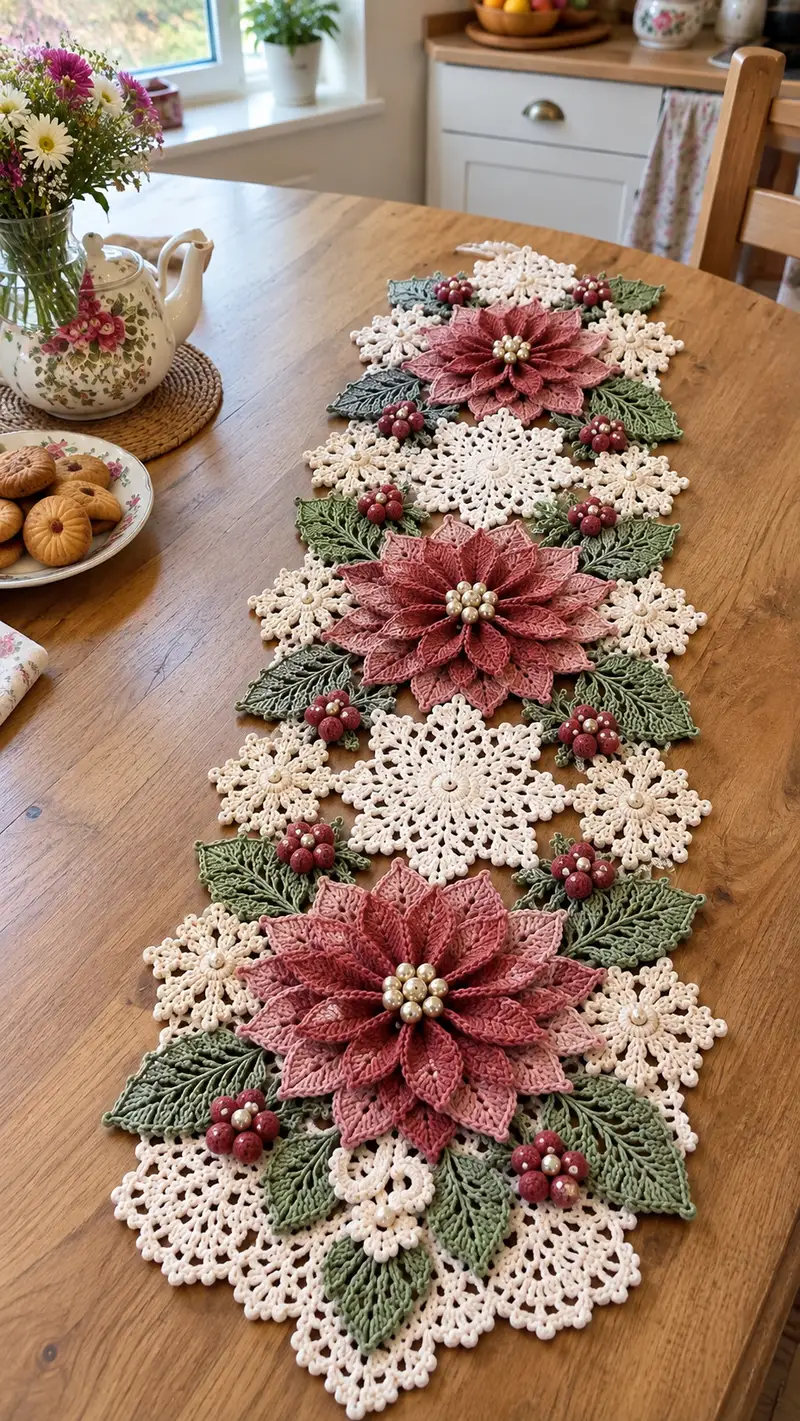
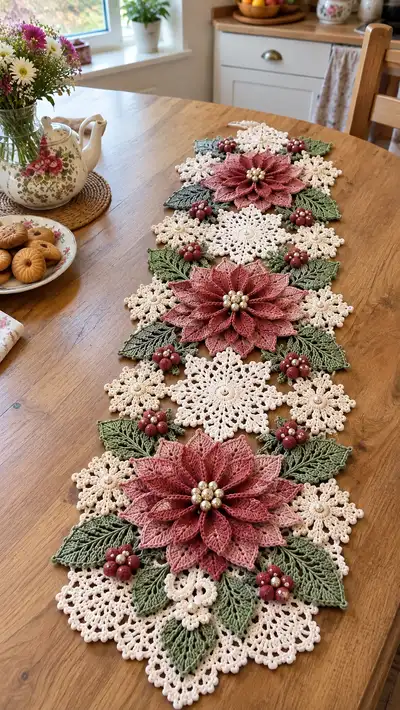
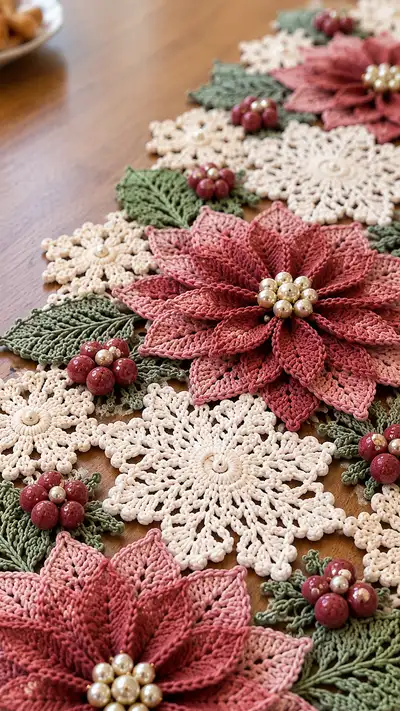
Create a stunning floral table runner featuring layered poinsettia blooms, delicate snowflake medallions, textured leaves and berry clusters. This lace-style runner uses cotton or cotton-blend yarn in soft cream, muted rose and sage green to create a timeless centerpiece that lies flat and photographs beautifully. Each motif is crocheted separately and assembled for a dimensional, heirloom-quality finish that's perfect for holidays or every-day table styling.
Progress Tracker
0% Complete
— Overview & Notes :
Info :
This runner is modular and built from repeating motifs: Large Poinsettia motif (1), Snowflake Medallion motif (2 sizes), Leaves, Small filler rosettes, and Berry clusters. Make motifs as separate pieces, block flat, then join with whip stitch and decorative stitches. Use a small hook for crisp lace; the pattern uses sport/DK cotton. Number of repeats in parentheses indicate stitch counts for that round.
Info :
Gauge is not critical for a runner, but consistent tension is. Use stitch markers to track petal repeats. Block every motif to the same dimension before joining for neat edges. For a runner like the sample: make 3 large poinsettias, 6 large snowflakes, 8 small snowflakes, 18 leaves and 9 berry clusters.
— Large Poinsettia (Make 3) :
Round 1 :
Begin with mr, 8 sc into magic ring (8)
Round 2 :
Inc in each st around (16)
Round 3 :
(1 sc, inc) x 8 (24)
Round 4 :
(2 sc, inc) x 8 (32)
Round 5 :
(3 sc, inc) x 8 (40)
Info :
This creates a small, flat disc that will be the base for petal attachment. Keep the disc slightly domed so petals sit naturally. Change to main poinsettia color now if starting from cream.
Round 6 :
1 sc in each st around (40)
Round 7 :
1 sc in each st BLO (40)
Round 8 :
Slip stitch evenly into every 2nd stitch to create 20 loops to form petal foundations (20 loops). Do not fasten off.
Info :
You will work petals into the 20 foundation loops. The poinsettia has two layers: inner (smaller) petals worked into alternate loops, outer (larger) petals into remaining loops. Mark the first loop as starting point for repeat counting.
Petal - Inner (Make 10) :
Attach yarn in loop. Petal Round 1: ch2 (counts as hdc), 3 hdc in same loop, (ch2, sl st in same loop) to form base — 4 hdc total including ch2 (4)
Petal - Inner Round 2 :
Turn work, into front of petal: (hdc, dc, tr, dc, hdc) across top of petal panel, sl st to base join (7 stitches across petal top)
Petal - Inner Round 3 :
Work a shell on top edge to create point: (ch1, sc, ch1, 3 dc, ch1, sc, ch1) into top center. Fasten off and weave tail. Shape with a slight fold lengthwise and press after blocking.
Info :
Make 10 inner petals. Petal shaping relies on stitch height variation and blocked fold. Keep tension consistent. Block petals with a slight fold down the center to achieve the sculpted ridge.
Petal - Outer (Make 10) :
Attach yarn at alternate foundation loops. Outer Petal Round 1: ch2 (hdc), 5 hdc in loop (6 including ch2) (6)
Petal - Outer Round 2 :
Turn. (hdc, dc, tr, dtr, tr, dc, hdc) across petal top, sl st to base join (9 stitches across petal top)
Petal - Outer Round 3 :
Edge round to narrow tip: ch1, sc in next 3 sts, picot (ch3 sl st in first ch), sc in next 3 sts, sl st to base. Fasten off and weave tail. Make 10 outer petals.
Info :
Petals should be staggered so outer petals overlap and sit behind inner petals. Use a small amount of starch or diluted fabric stiffener while blocking to hold petal shape. Place petals on base disc to check spacing before sewing.
Round 9 :
After all petals are tacked in place, work 1 sc evenly around the base edge through the back loops of base disc to create a neat rim (40 sc)
Info :
Center: thread and sew a cluster of 7–9 medium-size faux pearls (or large beads) stitched through reinforced stitches at the center. Use matching thread and knot well on the wrong side. If using beads, sew them on after blocking and before final assembly.
Petal - Second Layer (Optional) (Make 12 small petals) :
For an extra sculptural look add a second inner-most layer. Attach yarn in center base between petals: ch2, 3 dc in loop base, ch2, sl st in center (3 dc cluster). Next round work small pointed petals: (ch2, 1 dc, 1 tr, 1 dc) into each ch2 space, sl st to center. Make 12 and block to form a slight rosette under the bead cluster.
Info :
Count petals and ensure symmetry: if you have 10 outer and 10 inner, add 12 small rosette petals only if your base has room; otherwise keep to two layers. Use pins to hold petals in place before sewing to the base disc.
— Snowflake Medallion - Large (Make 6) :
Round 1 :
mr, 10 sc into ring (10)
Round 2 :
2 sc in each st around (20)
Round 3 :
(1 sc, inc) x 10 (30)
Round 4 :
1 sc in each st (30)
Round 5 :
Begin point formation: *(ch6, sl st in 3rd ch from hook to make small loop, 1 sl st back into base), sl st in next 4 sts* repeat 6 times to form 6 scallop points around (6 loops)
Info :
These loops are the arms of the snowflake. Use a fine hook and keep loops even. Block each medallion flat and pin every loop at equal distance to preserve symmetrical snowflake shape.
Round 6 :
Work into each loop: (sc, ch3, 3 dc, ch3, sc) in each ch6 loop to form a fuller arm (6 arms, each arm has 5 elements)
Round 7 :
Between arms: sl st, ch4, picot, ch4, sl st into next arm base to create lacy connections. Continue around for 6 lace bridges.
Round 8 :
Edging: (sc, picot, sc) in each outer stitch of each arm for a detailed scalloped edge. Fasten off and weave ends.
Info :
To create two sizes of snowflakes, reduce Round 2 / Round 3 increases or shorten ch loops. The runner uses a mix: larger snowflakes (6) and smaller ones for filler (8). Block to equal diameters: approx 12–14cm for large, 8–10cm for small with 2.75mm hook and sport yarn.
— Snowflake Medallion - Small (Make 8) :
Round 1 :
mr, 8 sc into ring (8)
Round 2 :
2 sc in each st (16)
Round 3 :
(1 sc, inc) x 8 (24)
Round 4 :
*(ch5, sl st into 3rd ch to make small loop), sl st into next st* repeat 8 times (8 loops)
Round 5 :
Into each loop: (sc, ch2, 2 dc, ch2, sc) to form mini arms. Fasten off and block flat.
Info :
Small snowflakes act as connectors and fill between larger motifs. Space them evenly and use them to build the lace background. Add a small pearl or seed bead at center if desired.
— Leaf Motif (Make 18) :
Round 1 :
ch6, sl st into first chain to form small ring, 6 sc in ring (6)
Round 2 :
Ch3 (counts as dc), 2 dc in same st, (2 dc in next st) x 5, sl st to top of ch3 (12 dc)
Round 3 :
Work along one side of chain: ch1, (sc, hdc, dc, tr, dtr) down center, then mirror across other side: (tr, dc, hdc, sc), sl st in base to shape leaf (leaf has a ridge center formed by tall stitches)
Round 4 :
Edge row: sc around leaf, adding picots at tips: (sc, picot, sc) at leaf tip rows to form delicate serrated edge. Fasten off.
Info :
To make veins more defined work a FPdc ridge down the center before edging. Alternatively embroider a vein with a contrasting thread after blocking. Block leaves flat with a slight curve for natural appearance.
Round 5 :
Optional vein: With same color, attach yarn at leaf base and work fpdc across center spine for 1 round. Fasten off and weave ends.
Info :
Leaves are sized to tuck under the poinsettia petals; make as many as needed to create balanced clusters. Use a slightly smaller hook for a crisp edge than used for snowflakes for structural contrast.
— Filler Rosette / Small Flower (Make 9) :
Round 1 :
mr, 6 sc into ring (6)
Round 2 :
Inc in each st (12)
Round 3 :
(sc, inc) x 6 (18)
Round 4 :
*(ch4, sl st in 2nd ch from hook), sl st into next st* repeat 6 times to make 6 loops
Round 5 :
Work small petals into loops: (sc, hdc, dc, hdc, sc) into each loop. Fasten off and block gently.
Info :
These are used to fill space between snowflakes and large flowers and to support bead clusters. Sew a small pearl into center for a polished look.
— Berry Cluster (Make 9 clusters) :
Info :
Berry clusters in the sample are constructed by crocheting small spheres or covering wooden beads in crochet, then gathering 5–6 together with a central pearl. For speed you can use pre-made wooden/ceramic beads that match the runner colors. If crocheting berries, use the following tiny berry pattern.
Berry - Tiny Sphere Round 1 :
mr, 6 sc into ring (6)
Berry Round 2 :
Inc in each st (12)
Berry Round 3 :
(1 sc, inc) x 6 (18)
Berry Round 4 :
1 sc in each st (18)
Berry Round 5 :
(1 sc, dec) x 6 (12)
Berry Round 6 :
6 dec (6) - fasten off leaving tail, stuff lightly, close and weave tail.
Info :
Make 5–6 berries per cluster. Arrange berries in a circular cluster and sew through centers to secure. Add a small pearl in center to mimic the sample and to add weight and shine. If using pre-made beads, stitch them together with sewing thread and glue for extra security.
— Small Decorative Leaves and Scrolls (Make many) :
Round 1 :
ch5, sl st in first ch to make ring, 5 sc into ring (5)
Round 2 :
ch3, (dc, hdc) into each st around to produce a tiny teardrop. Sl st to join. Fasten off.
Info :
Use these small elements to nestle between leaves and snowflakes for natural fill. They are quick and help disguise seams when joining motifs.
— Joining and Edging :
Info :
All motifs are joined after blocking. Use mattress stitch or whip stitch with matching thread/yarn for invisible joins. The runner in the photo is built in a linear pattern: alternating snowflake, poinsettia, snowflake, poinsettia—connected with leaves and filler rosettes to create a continuous column. Lay out motifs in final arrangement before sewing.
Round 1 :
Place two motifs together with right sides up. Using tapestry needle and yarn tail from one motif, sew through both edges using whip stitch spaced about 2–3mm apart. Continue along the seam until motifs are secured. Fasten off and weave tails.
Round 2 :
When three motifs meet at a junction (for example, leaf between snowflake and flower), place the leaf with its tip under the edge of the adjacent motifs and sew through all three layers to anchor the leaf in place. Repeat for all junctions.
Info :
For a flexible seam that still lies flat, use small backstitches every 3–4 single crochet equivalent spaces. Keep tension even and avoid pulling too tight, which will pucker the lace. Use pins to hold pieces before sewing.
Edging Round 1 :
After all motifs are joined into the runner layout, work a neat round of sc along the entire peripheral edge through both layers where motifs overlap: sc every 3–4 mm to produce an even border. This locks the runner together and creates a finished edge.
Edging Round 2 :
Decorative scallop: *(ch4, sl st into 2nd ch from hook) picot, sl st into base* repeat along edge to create small scallops that echo snowflake points. Fasten off and weave ends.
Info :
If the runner edge is uneven, add small filler motifs and stitch them into gaps. Block the assembled runner again lightly to set joins and flatten seams. If desired, spray with a light starch solution and shape petals and snowflake arms while damp.
— Final Shaping & Bead Attachment :
Info :
After assembly and initial blocking, position bead clusters and center pearls. Sew each bead firmly through multiple threads into reinforced stitches in the motif centers. For added security use small stitches crossing back through the bead several times and knot the thread on the wrong side.
Round 1 :
For the poinsettia center, sew 7 medium pearls in a tight circle; then secure with thread through each bead three times. Tuck thread tails inside the base disc and knot; weave away excess.
Info :
Test the runner on your table — if petals or snowflake points lift undesirably, re-block and apply a small amount of diluted fabric stiffener on those points only. Allow to dry fully before using on fabric-sensitive surfaces; use felt pads under beads if needed.
— Alternate Color & Size Options :
Info :
To change scale: use thicker yarn and a larger hook for a larger runner; conversely, use finer thread and a 1.75–2.0mm hook for a delicate doily runner. Color changes: make snowflakes in soft gold or silver thread for a festive twist; use ombre rose yarn for dramatic petals that shift tone from center to tip.
Info :
If making a longer runner, repeat the central module (snowflake + poinsettia + snowflake) the desired number of times. Ensure you have enough motifs for symmetrical ends. Adjust bead quantities proportionally.
This elegant poinsettia table runner brings warmth and handmade charm to your table with a mix of lace snowflakes, sculpted petals and glossy bead centers. Each motif is a small work of art, coming together to form a show-stopping centerpiece you can be proud of. The layered textures and subtle color palette make it a perfect gift or heirloom for holiday seasons or cozy everyday styling. 🧶✨ Add your personal touch with color or bead choices and enjoy the meditative process of creating something beautiful by hand. 🌿