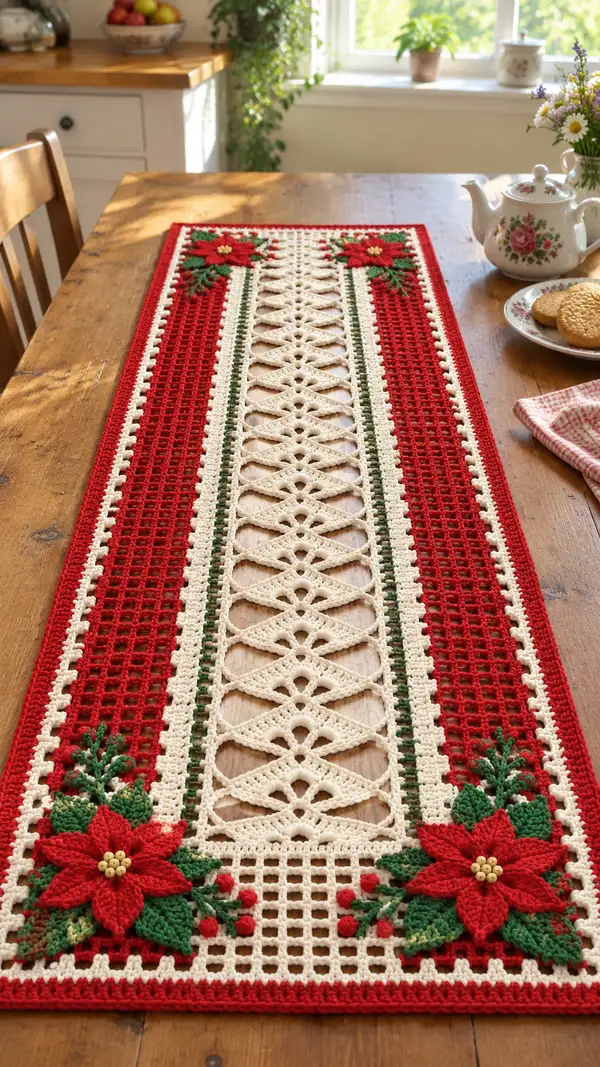
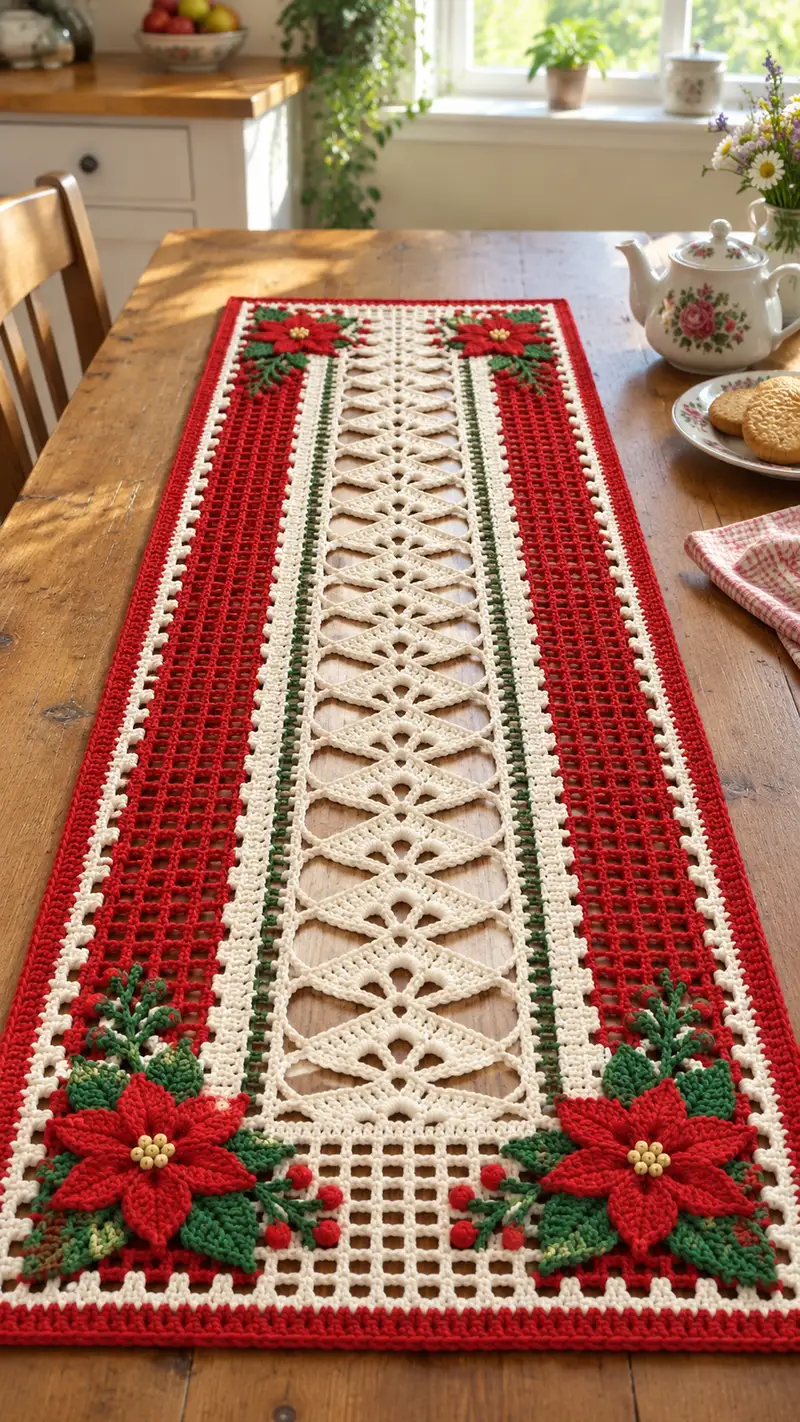
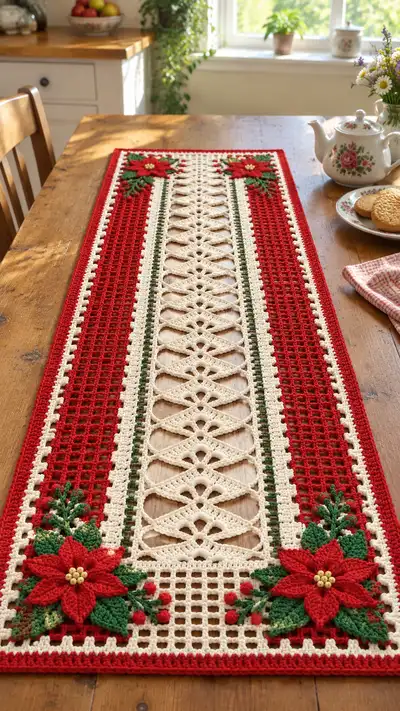
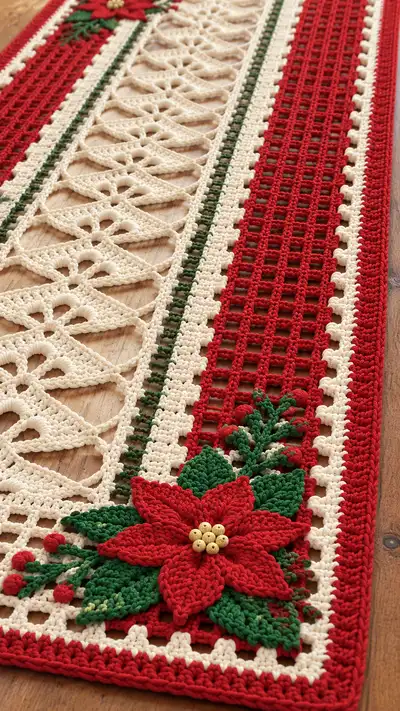
A beautiful rectangular table runner featuring an openwork central lace panel framed by crimson filet columns and edged with cream trim. Two dimensional poinsettia appliques with layered petals, textured leaves and tiny berries decorate each end. The runner uses three main colors — rich red, warm cream and deep green — with gold bead centers for the flowers to create a classic holiday look.
Progress Tracker
0% Complete
— Notes & Gauge :
Info :
Finished measurements approximately 14" (36 cm) wide by 48" (122 cm) long. Gauge is not critical for lace look but important for final proportion: 14 dc x 8 rows = 4" (10 cm) in double crochet when worked tightly in worsted cotton with 3.5mm hook
Info :
Keep a stitch marker at the first stitch of each row when working long even rows to keep counting accurate. Work flat and turn unless otherwise specified.
— Central Lace Panel (work one piece 61 sts wide) :
Row 1 :
Ch 63, dc in 4th ch from hook and in each ch across – total 61 dc (61)
Row 2 :
Ch 3 (counts as dc), turn. *Sk 2 sts, (5 tr cluster shell in next st), sk 2 sts, dc in next st; rep from * across ending with dc in last st (61)
Row 3 :
Ch 3, turn. Dc in each st across working around shells where appropriate to maintain 61 dc (61)
Row 4 :
Ch 3, turn. *Ch 3, sk 2, dc in next 2 sts, ch 3, sk 2, dc in next st; rep from * to end to create lace arches (61)
Row 5 :
Ch 3, turn. Work dc across, placing 3 dc across each ch-3 arch to maintain stitch count and shape (61)
Info :
Begin forming the open diamond motif now. The sequence of shell rows and dc rows creates an alternating arch and diamond silhouette. Maintain consistent tension; if central diamonds draw in too much, loosen tension or increase to 3 tr per cluster instead of 5 where noted.
Row 6 :
Ch 3, turn. *Dc in next 3 sts, (3 tr cluster over next st) sk next 2; rep from * to end (61)
Row 7 :
Ch 3, turn. Dc across, working 3 dc across every tr cluster base (61)
Row 8 :
Ch 3, turn. *Ch 6, sk next 6 sts, dc in next 1; rep from * across to form elongated loops that will be anchored in later rows (61)
Row 9 :
Ch 3, turn. Dc in each dc and in ch loops anchor points: work 3 dc into each ch-6 loop base where it meets the row below to begin forming lace diamond bridges (61)
Row 10 :
Ch 3, turn. *Dc in next 4 sts, (sk 1, tr cluster over next st), sk 1; rep from * across (61)
Row 11 :
Ch 3, turn. Dc across working evenly (61)
Info :
Check width frequently. If your panel narrows, adjust by working 2 dc in select stitches near edges to regain 61 sts. The lace repeats will be established by Row 12 and repeated for the central length.
Row 12 :
Ch 3, turn. Begin diamond shaping: *sk 3, dc in next, ch 3, dc in same st (creates a small eye), sk 3, (5 tr cluster) in next st; rep to end (61)
Row 13 :
Ch 3, turn. Dc across and anchor clusters by working 3 dc along their bases as needed (61)
Row 14 :
Ch 3, turn. *Dc 2, ch 4, sk 4, dc 1, ch 4, sk 4, dc 2; rep to end keeping total count 61 (61)
Row 15 :
Ch 3, turn. Work around ch-4 arches: 3 dc across each arch base and 1 dc in uninterrupted dc spaces (61)
Row 16 :
Ch 3, turn. Work a bridging row: *ch 5, sl st into the apex of the next arch (forming diamond straps), ch 1, dc in following st; rep (61)
Row 17 :
Ch 3, turn. Dc across including working 3 dc along each ch-5 strap base and anchoring with dc in main stitches (61)
Row 18 :
Ch 3, turn. Work repeat of Rows 10-17 pattern to lock lace diamonds into place; follow established pattern exactly to maintain 61 sts (61)
Info :
At this point the diamond lattice should be clearly visible. Continue repeating the established 8-row lace repeat (Rows 10-17) for the full center length. Count the repeats to reach required runner length: repeat the 8-row sequence 4 times for approximately the length shown in photo (32 rows of repeat). Adjust number of repeats if you want a shorter or longer runner.
Row 19-50 Repeat :
Repeat Rows 10-17 four full times (Row count through Row 50 inclusive) to form the central diamond lattice (61)
Info :
After completing central repeats, fasten off cream yarn and block panel carefully, pinning each diamond open to the same width as others. Blocking will dramatically improve the lace appearance and maintain measurements for joining side panels.
— Left and Right Filet Side Panels (make two, 21 sts wide grid) :
Row 1 :
Ch 23, dc in 4th ch from hook and in each ch across – 21 dc (21)
Row 2 :
Ch 3, turn. Dc in first st, *ch 2, sk 2, dc in next st; rep across to create filet grid with alternating open spaces (21)
Row 3 :
Ch 3, turn. Dc in each dc and dc in each ch-2 space to form solid alternate grid (21)
Row 4 :
Ch 3, turn. Repeat Row 2 to keep grid (21)
Row 5 :
Ch 3, turn. Repeat Row 3 (21)
Info :
Work 24 rows for each side panel to match the length of the central panel (or until both pieces are equal in length after blocking). Keep panels identical in repeat count for symmetry.
Row 6-24 :
Repeat Rows 2-5 until you have completed 24 total rows (21)
Row 25 :
Ch 3, turn. Dc across, working 1 sc in each ch-2 space to tidy the grid edge (21)
Info :
Fasten off and block each fileted panel to match the central panel height. The red panels are worked in solid color to give a strong visual frame to the cream center.
— Narrow Green Accent Rows (two strips to join center and side panels) :
Row 1 :
Using green yarn, ch 13, dc in 4th ch from hook and across = 11 dc (11)
Row 2 :
Ch 3, turn. Dc in each st across (11)
Row 3-10 :
Repeat Row 2 for a total of 10 rows per strip. Make two strips (11)
Info :
These narrow strips are placed between the central cream panel and the red filets for a crisp dividing line. Block gently and set aside for assembly.
— Border Roundwork (work continuous rounds around assembled rectangle) :
Info :
After assembling panels (see Assembly section), work the border in rounds around the entire runner using cream then red for the final rounds. Work with right side facing up, join yarn at any corner with sl st and work evenly around edges.
Round 1 :
With cream, join with sl st to any corner ch-2 space. Ch 1, *3 sc in corner ch-2, sc evenly along edge placing 1 sc per dc across sides (estimate 2 sc per inch); at next corner work 3 sc in ch-2; continue around. Join with sl st to first sc
Round 2 :
Ch 1, sc in same st, sc around placing (sc, ch 1, sk 1) along sides to create small picot-like spacing, 3 sc in each corner over previous 3 sc. Join (maintain stitch count proportional to rectangle perimeter)
Round 3 :
Change to red. Ch 2, work 1 hdc in each sc around keeping hdc even and neat; in corners work (hdc, ch 2, hdc) to slide around corners smoothly. Join with sl st
Round 4 :
Ch 1, sc around working 2 sc in corner sets for a framed edge; join. Fasten off and weave in ends
Info :
For a more decorative edge, add an optional crab stitch (reverse sc) in red around final round. This gives a neat twisted rope effect around the entire runner.
— Poinsettia Applique (make 2 identical flowers, each composed of petals, small inner petals and stamen) :
Petal Overview :
Each flower has 8 large outer petals, 8 medium inner petals and 6 small central petals along with 6 beaded stamens. Petals are worked flat with a small number of shaping rows to create the curved teardrop shape. Work petals in red yarn unless specified.
Large Petal (make 8 per flower) Round 1 :
Ch 10, sc in 2nd ch from hook, sc across to end (9)
Large Petal Round 2 :
Ch 1, turn. Inc in first st, sc in next 7 sts, inc in last st (11)
Large Petal Round 3 :
Ch 1, turn. Inc, sc 1, inc, sc 5, inc, sc 1, inc (15)
Large Petal Round 4 :
Ch 1, turn. Sc across 15, at tip work (sc, hdc, dc, hdc, sc) to form rounded tip (19)
Large Petal Round 5 :
Ch 1, turn. Work sc across decreasing gently down the back side: sc 3, dec, sc 10, dec, sc 2 (17)
Large Petal Round 6 :
Ch 1, turn. Sc across working 2 sc together at symmetry points to shape base: sc 2, dec, sc 8, dec, sc 2 (15)
Large Petal Round 7 :
Ch 1, turn. Sc 15 across. Fasten off leaving 12" tail for sewing (15)
Info :
Make 8 large petals per flower. Starch or steam lightly and pin to a cardboard template so petals all have consistent shape before assembly. Use tail to sew petals together overlapping slightly in a circular arrangement.
Medium Petal (make 8 per flower) Round 1 :
Ch 8, sc in 2nd ch from hook and across (7)
Medium Petal Round 2 :
Ch 1, turn. Inc, sc 5, inc (9)
Medium Petal Round 3 :
Ch 1, turn. Sc 2, inc, sc 3, inc, sc 2 (11)
Medium Petal Round 4 :
Ch 1, turn. Sc across, at tip work (sc, hdc, dc, hdc, sc) (15)
Medium Petal Round 5 :
Ch 1, turn. Sc across shaping base: sc 3, dec, sc 6, dec, sc 2 (13)
Medium Petal Round 6 :
Ch 1, turn. Sc across. Fasten off leaving tail for sewing (13)
Small Petal (make 6 per flower) Round 1 :
Ch 6, sc in 2nd ch and across (5)
Small Petal Round 2 :
Ch 1, turn. Inc, sc 3, inc (7)
Small Petal Round 3 :
Ch 1, turn. Sc across, work small tip (sc, hdc, sc) at top (9)
Small Petal Round 4 :
Ch 1, turn. Sc back shaping base, fasten off leaving long tail for sewing (7)
Info :
Arrange panels of petals in concentric circles: place 8 large petals as outer ring, 8 medium petals overlapping them more inward, then 6 small petals clustered in center. Sew through the base of petals with tapestry needle and strong thread or yarn tail to create a firm flat flower.
Stamen (make 6 per flower) Round 1 :
Using gold or yellow, ch 6, sl st to first ch to form ring. Ch 1, 6 sc in ring. Sl st and leave tail (6)
Stamen Round 2 :
Embellish by sewing a small wooden bead to the center or slipping the ring over a bead and sewing through bead to secure. Make 6, then sew them together in a small cluster in the flower center.
Info :
For a more three-dimensional stamen, stuff a tiny pinch of fiberfill into the ring before sewing center bead, then secure tightly. Make sure bead assembly is sewn down through several petals to keep it secure during use.
— Leaves and Berry Clusters (per flower) :
Large Leaf (make 4 per flower) Round 1 :
With green, ch 12, sc in 2nd ch from hook, sc across (11)
Large Leaf Round 2 :
Ch 1, turn. Inc, sc 9, inc (13)
Large Leaf Round 3 :
Ch 1, turn. Sc 2, inc, sc 7, inc, sc 2 (15)
Large Leaf Round 4 :
Ch 1, turn. Work dec shaping towards tip: sc 3, dec, sc 7, dec, sc 3 (13)
Large Leaf Round 5 :
Ch 1, turn. Sc 13. Fasten off leaving long tail and add a line of alternating back-stitch embroidery with contrasting lighter green down the center for a vein effect (13)
Medium Leaf (make 4 per flower) Round 1 :
Ch 9, sc in 2nd ch from hook and across (8)
Medium Leaf Round 2 :
Ch 1, turn. Inc, sc 6, inc (10)
Medium Leaf Round 3 :
Ch 1, turn. Sc 10, shape tip with (sc, hdc, sc) then sc back down. Fasten off leaving tail (10)
Berry (make 6 small berries per flower) Round 1 :
With red, ch 3, work 6 sc in 2nd ch from hook to round, sl st, pull tail through to close; stuff slightly if desired (6)
Info :
Sew leaves around the flower base in a slightly offset arrangement, alternating large and medium leaves. Sew berries in little clusters on short stem pieces created by chaining 6-8 stitches in green then attaching berries at ends.
— Assembly of Poinsettia Applique :
Info :
Arrange petals over a blocked circle of scrap fabric or directly on the finished border area. Layer petals in this order: large petals first, medium petals slightly overlapping and rotated between large ones, small petals clustered at center. Stitch firmly through petal bases using long tails and several passes to prevent movement.
Attachment :
Sew the entire flower to the runner corner area over the cream border grid, centering it 2¼" (6 cm) from the outer edge and 3" (7.5 cm) from the short edge of the runner. Sew leaves and berries into place, and secure bead cluster at the center.
Info :
For neatness, baste each applique first by tacking with large running stitches, then remove pins and perform final invisible stitches. Trim and weave tails into the underlying fabric to hide them.
— Final Edge and Decorative Details :
Round 1 :
With cream yarn, work a delicate scallop join around petal bases to tidy connection: join at petal base with sl st, *ch 3, sc in base of petal, sl st into runner fabric; rep around flowers to hide sewing lines
Round 2 :
With red yarn, work a final 1-round crab stitch (reverse sc) all around runner edge to create a twisted rope finish. Work evenly placing 1 reverse sc in each stitch and 3 reverse sc in corners. Fasten off and weave in ends (perimeter adjusted)
Info :
Press lightly with steam from the wrong side using a towel to protect yarn and shape petals and leaves. Do not press beads directly. Allow fully to dry on blocking board before use.
— Optional Variation: Raised Cable Straps in Center :
Info :
If you prefer the central diamonds to have more relief, work a raised rope row before anchoring the ch-5 straps: use 2 tr in front-post technique to create vertical ridges. Incorporate these into the repeat after Row 8.
Info :
When finished, check all beads and appliques for stability. Reinforce each bead with a second pass of thread if necessary. Trim any visible ends and weave them into the fabric for a tidy finish.
This festive table runner brings heirloom charm to holiday tables with its delicate lace center and bold poinsettias. The layered petals, textured leaves and tiny bead centers add handcrafted magic to every celebration. Finished runner makes a heartfelt gift or a treasured seasonal treasure to display year after year. 🧶🌟🎄