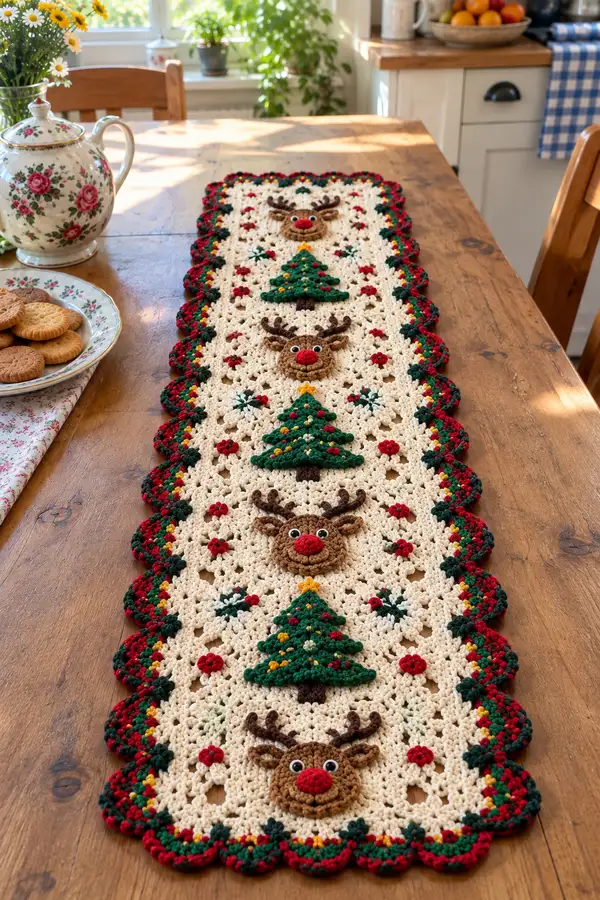
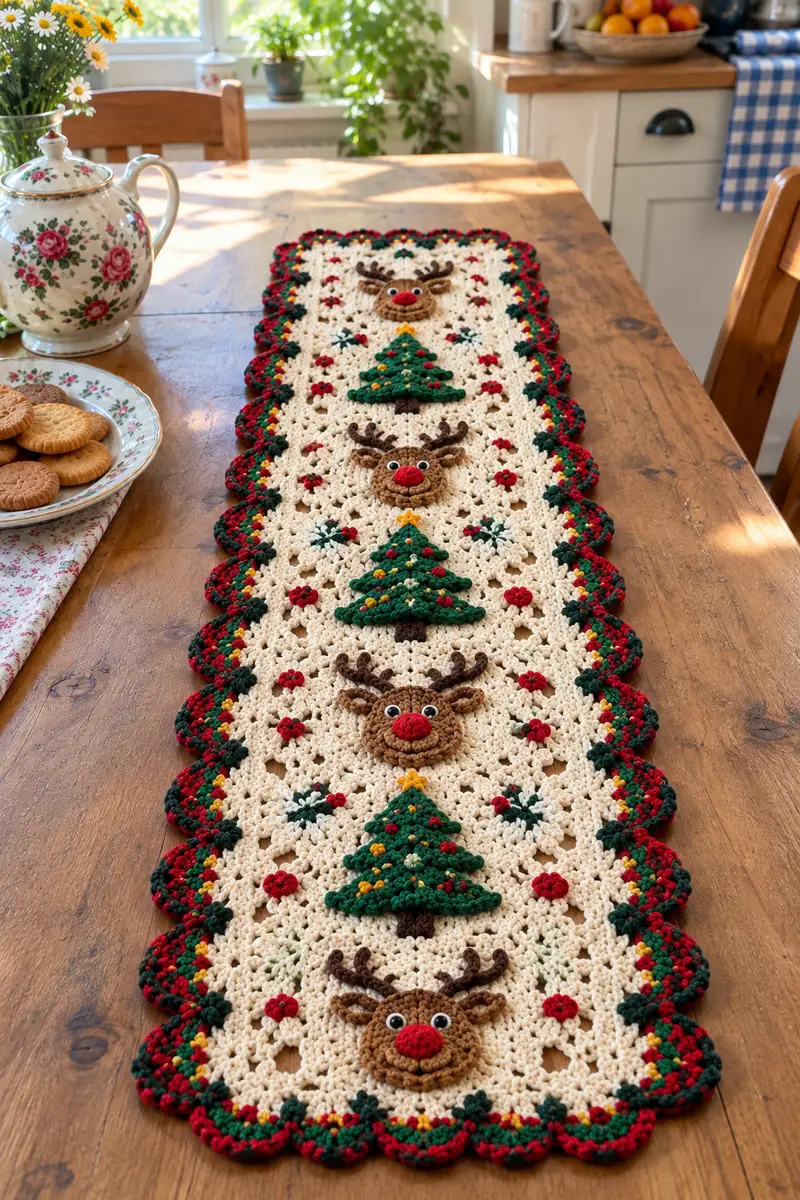
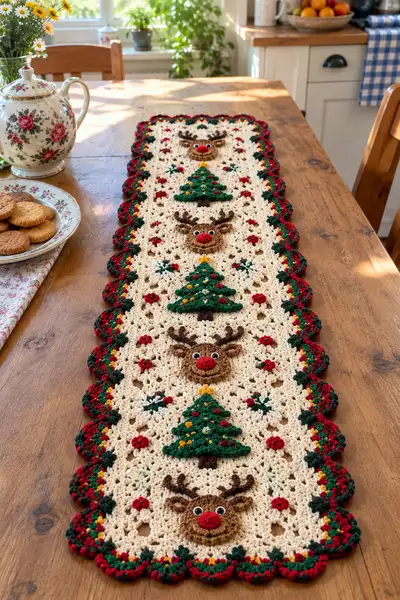
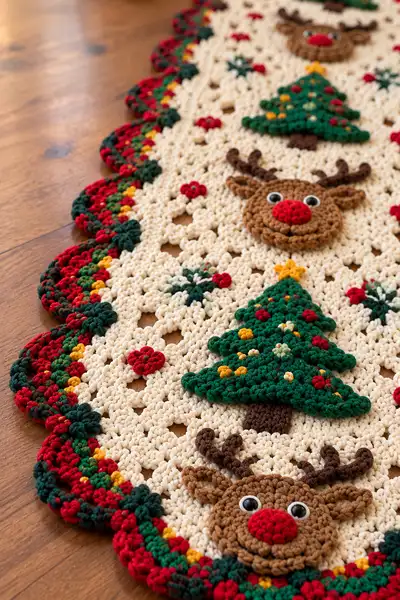
A cozy holiday table runner featuring three cheerful reindeer faces and three layered Christmas trees set on a warm cream openwork background. Detailed applique motifs (reindeer, antlers, trees, berries) sit proudly on a lacy granny-style base with a multicolored scalloped border. This pattern guides you through each motif and the assembly for a festive centerpiece that brightens any holiday table.
Progress Tracker
0% Complete
— Runner Base (Granny-Style Openwork Panel) :
Round 1 :
With cream yarn, foundation chain 121 (multiple of 8 +1). Join with sl st to form loose ring without twisting. (121 ch)
Round 2 :
Ch3 (counts as dc), dc in same ch, *skip 2 ch, 3 dc in next ch (cluster), ch1, skip 2 ch, 3 dc in next ch*; rep from * to * across, end with dc into final ch, join with sl st to top of ch3. You will have 15 clusters across width. (15 clusters)
Info :
Keep the panel flat as you work; do not tug tightly. The panel is worked in joined rows (rounds) forming a rectangle - treat each row as a round for counting.
Round 3 :
Ch3, turn; dc into first st, *ch1, 3 dc in ch1 space of cluster, ch1, dc into next dc*; rep across, join with sl st. (15 clusters)
Round 4-6 :
Repeat Round 3 for three rows to build body; keep stitch count consistent (15 clusters each row)
Info :
Measure width now; this pattern assumes a width of roughly 12-14 inches using worsted yarn and 4.0mm hook. Adjust chain multiple for a wider or narrower runner.
Round 7 :
Ch3, turn; dc into first st, *ch1, 3 dc in ch1 space, ch1, dc into next dc*; rep across, join. (15 clusters)
Round 8-12 :
Continue as Round 7 for five more rows (rows 8-12). This creates the lower field where the first tree and reindeer will be placed. Keep edges straight by ensuring the turning ch3 is counted as first dc.
Info :
Place marker at the start of round 9 (center row) to align central appliques later. You will repeat a module of 12 rows per motif; this runner uses three modules stacked.
Round 13-18 :
Work six rows of the openwork pattern (repeat Round 7). The panel should now measure roughly 1/3 of your final length. (15 clusters per row)
Info :
Block the panel lightly if you prefer even spacing before attaching appliques; pin to flat rectangle keeping edges square.
Round 19-24 :
Repeat the 6-row openwork module for the middle motif area. Keep counting clusters; these rows will host the central tree and reindeer.
Round 25-30 :
Repeat the 6-row module again for the final section of the runner. At this point you will have 36 rows total (12 rows x 3 modules) plus the initial rows made earlier depending on your chosen length. (15 clusters per row)
Info :
If you want a longer runner, add additional repeated 6-row modules until you reach desired length; motifs will be evenly spaced within these modules.
Round 31 :
Ch1, turn; sc evenly around entire perimeter edge along the long sides and short ends, placing 3 sc in each corner to prevent curling. Work 2 sc in each dc top and 1 sc in each ch1 space for a neat edge. Join with sl st. (Approx stitch count varies with size; aim for even tension)
Info :
We are creating a neat foundation edge so the scalloped border can attach cleanly later. Fasten off cream yarn and weave in ends temporarily but leave tails near where appliques will be sewn.
— Reindeer Head (Make 3) :
Round 1 :
With light brown, mr, 6 sc in mr (6)
Round 2 :
Inc in each st around (12)
Round 3 :
(1 sc, inc) x6 (18)
Round 4 :
(2 sc, inc) x6 (24)
Round 5 :
(3 sc, inc) x6 (30)
Round 6 :
(4 sc, inc) x6 (36)
Info :
Switch to 3.5mm hook if you want a denser fabric for appliques. Maintain consistent tension; these heads are decorative so they should lie fairly flat against the runner.
Round 7 :
(5 sc, inc) x6 (42)
Round 8 :
(6 sc, inc) x6 (48)
Round 9-14 :
1 sc in each st around (48)
Info :
Place eyes: For the reindeer, position plastic or embroidered eyes between rounds 11-12 approximately 8-10 sts apart for a friendly expression. If using safety eyes, attach and secure before stuffing.
Round 15 :
(6 sc, dec) x6 (42)
Round 16 :
(5 sc, dec) x6 (36)
Info :
Begin light stuffing now: use a small amount of fiberfill just to give the head a slight dome. These appliques should be lightly padded so they rest flat when sewn on.
Round 17 :
(4 sc, dec) x6 (30)
Round 18 :
(3 sc, dec) x6 (24)
Round 19 :
(2 sc, dec) x6 (18)
Round 20 :
(1 sc, dec) x6 (12)
Round 21 :
6 dec (6) — leave a long tail for sewing
Info :
Finish stuffing before closing fully. We left a small flange for sewing; this small circle is used to position the head flat onto the cream panel. Weave tail through remaining sts and pull closed, leaving tail long for sewing.
Round 22 :
Using light brown, with tail from closing, create a surface round of sc around the outer edge of the head (48 sc) by working evenly spaced sc into the outer circumference to create a neat rim for sewing. This is made by working 1 sc in each visible stitch around; ensure 48 points around.
Info :
Make three heads identical. One head will sit near each tree within each module. Block slightly if needed; keep them flat but softly domed.
— Reindeer Nose (Make 3) :
Round 1 :
With red, mr, 6 sc in mr (6)
Round 2 :
Inc in each st around (12)
Round 3 :
(1 sc, inc) x6 (18)
Round 4 :
1 sc in each st around (18)
Round 5 :
(1 sc, dec) x6 (12) — fasten off, leaving tail for sewing
Info :
Stuff nose very lightly to keep it plump but not bulky. Sew onto center front of the reindeer head using ladder stitch for a neat attachment. Make sure the nose sits comfortable over the lower rounds of the head.
— Reindeer Antlers (Make 6 - 2 per head) :
Round 1 :
With dark brown, ch6, sl st in second ch from hook and across to make a short chain cord (5 sc equivalent), turn to work back along chain: 4 sc in back loops of chain, sl st to join to first loop to create a small curled base. (4)
Round 2 :
Join at base of cord: ch1, sc in same st, *ch3, sl st back in ch1 to create a branch, sc in next base st*; repeat making two small branches, finishing with sc at base. Create two short prongs (approx 2-3 ch loops) per antler (pattern yields small curly antler look).
Round 3-6 :
Work around the base adding short picot-like loops and small sc clusters to thicken the antler base. Suggested: sc in base 4 sts, (ch3, sl st) x2 to make curled prongs, sc to finish. Fasten off leaving a long tail for sewing. Make 2 mirrored antlers for each head. (Base size variable)
Info :
Shape antlers by lightly steaming/blocking or by sewing prongs into curls. When attaching, curve slightly upward for a playful expression. You can make taller antlers by increasing chain length to ch8 for longer prongs if desired.
— Reindeer Ears (Make 6 - 2 per head) :
Round 1 :
With light brown, mr, 6 sc in mr (6)
Round 2 :
Inc in each st around (12)
Round 3 :
(1 sc, inc) x6 (18)
Round 4 :
1 sc in each st around (18) — fold ear in half and sc across top 6 sts to create slight ear cup. Fasten off leaving tail for sewing.
Info :
Make sure ears are slightly cupped to sit forward on each head. Pin to head prior to sewing to find best tilt (slightly forward and outward looks natural).
— Eyes & Facial Details :
Info :
Use 10mm safety eyes or embroider eyes with white and black yarn. Position eyes between rounds 11-12, 8-10 stitches apart. If embroidering, use satin stitch for whites and French knots or small black satin stitches for pupils. Add a small embroidered smile under the nose with darker brown or black yarn if desired.
— Christmas Tree Motif (Make 3) :
Round 1 :
With green, ch4; join to form ring. Ch3 (counts as dc), work 11 dc into ring, join with sl st (12)
Round 2 :
Ch3, dc in same st, *ch1, skip next dc, (2 dc, ch1, 2 dc) in next dc (forming small shell)*; rep across creating 6 small shells, join. (6 shells)
Round 3 :
Ch3, dc into base of each shell, creating larger shells: (3 dc, ch1, 3 dc) into each ch1 space around to form the first tier (6 big shells). Join. (6 big shells)
Round 4 :
Switch to 3.5mm hook if you prefer crisper tiers. Ch3, dc into center of each big shell, working (4 dc, ch1, 4 dc) into alternating spaces to lengthen the second tier. Join. (6 wider shells)
Info :
We are building a layered triangular tree from concentric shell tiers. The trunk will be added last with brown yarn. You can vary tier counts to make tree taller or shorter.
Round 5 :
Ch2, switch to front post shell technique: work 3 dc around the post of a previous shell to create an outward leaning branch effect. Work around to define each tier's edge. Join.
Round 6 :
Ch1, working in rows across the bottom to create a tree silhouette: sc across the bottom base of the last round to form a flat trunk-attachment line (approx 9 sc across). This prepares for trunk addition.
Round 7 :
With brown, join at center bottom, ch1, sc in each bottom st across for 3 rows to form trunk (3 sts width x 3 rows). Fasten off trunk and weave ends. Fasten off green leaving tail for sewing. (3 x 3 trunk)
Round 8 :
Decorations: Using yellow and red, embroider small star/ornament bobbles. To make a bobble: in chosen spot, *yarn over, insert, pull up loop 3 times, complete bobble as 3-dc bobble, secure and anchor on back. Make 6-8 ornaments per tree spaced over tiers. Fasten off
Info :
Make three trees identical. Sew them onto the runner centered within each module. Trees are slightly dimensional and will sit proud of the panel by 4-6 mm — this gives the 3D look seen in the photo.
— Small Rose/Berry Applique (Make many small) :
Round 1 :
With red, ch4, join to ring, 8 sc in ring (8)
Round 2 :
Ch2, (dc, ch1) in each st around to form a rosette appearance (8 small petals). Fasten off leaving tail for sewing.
Info :
These little rosettes are placed around the trees and heads to evoke berries and small flowers. Make 12-18 per runner depending on spacing and personal preference.
— Small Star Motif (Make 6) :
Round 1 :
With yellow, mr, 5 sc in mr (5)
Round 2 :
*ch4, sl st into next st* around to form tiny points; fasten off leaving thread for sewing.
Info :
These are used as tree toppers. Sew one star at the peak of each tree and secure well with small stitches.
— Attachment Placement Info :
Info :
Divide runner into three even modules along its length. In each module, position the tree centered in the upper half of the module and the reindeer head centered in the lower half. Mark placement with pins then remove motifs and begin sewing with mattress/ladder stitch.
— Border Preparation :
Round 1 :
With cream, rejoin at any point on perimeter edge and sc evenly around the entire piece, placing 3 sc in each corner and 1 sc in each ch1 opening for a tidy frame. Join with sl st. (Even stitches around)
Round 2 :
Switch to deep green. Ch3, *3 dc into next sc, ch1, skip 1 sc, sl st into next sc* across to create a scalloped guideline. Join. (Approximate scallop count = 28-32 along long sides depending on width)
Info :
We will build multi-row scallops in alternating colors (green, red, variegated or gold). Keep tension consistent; mark opposite scallops to ensure symmetry when working around corners.
Round 3 :
With red, work in each ch1 space from previous round: *(sl st in space, ch3, 2 dc, ch3, sl st) to make puffed scallop*; rep around. Join. (Matching scallops)
Round 4 :
With variegated/festive accent, work cluster picots between scallops: sl st into top of scallop, ch3, (3 dc, ch1, 3 dc) into same point for extra layered look. Join and fasten off. (This adds the striped accent seen on photo edges)
Round 5 :
With deep green, rework a finishing round: *(sl st, ch1, 5 dc in next shell, ch1, sl st)* to emphasize the scallop edge and produce a rounded, bobbled finish. Fasten off and weave in ends. Block edge slightly to open scallops evenly.
Info :
The scalloped border uses three colors worked in sequence: green foundation, red puff scallop, variegated accent. Use small amounts of yarn for color changes and weave ends on the backside to keep the front clean.
— Finishing & Detailed Assembly :
Round 1 :
Position appliques: Pin each tree and reindeer head to its marked module position; place small rosettes and stars around motifs as desired. Take photographs of placement before sewing to ensure symmetry.
Round 2 :
Sewing heads: Using matching light brown tail from head finishing, use a yarn needle to stitch the head flange to the cream panel with small evenly spaced whip or mattress stitches. Use 10-12 stitches around each head for secure hold, tacking inside edges to keep dome flat.
Round 3 :
Sew antlers and ears: Position antlers slightly above head and ears to sides; stitch using long tails and secure with multiple passes so antlers do not droop. Reinforce by stitching antler bases to the back of head and to the panel for extra stability.
Round 4 :
Sew trees: Attach the trunk first with a few sturdy passes, then tack the green tiered portions at 3-6 anchor points each to prevent shifting. Sew through the back of the panel to secure motifs flat but slightly raised.
Round 5 :
Attach small rosettes and stars by sewing through center with a few short secure stitches. Add tiny french-knot like stitches using yellow or light green yarn to mimic small buds where desired.
Info :
Weave all tails on the wrong side using a yarn needle and trim. Ensure motifs are firmly attached, especially in high-traffic areas. If runner will be laundered frequently, consider securing small motifs additionally with a drop of fabric glue on the back before stitching.
Round 6 :
Final pressing/blocking: Lightly steam-block the entire runner on blocking mats, pinning scalloped edges to open and align. Allow to dry fully for long-lasting shape and flat placement of motifs.
Info :
Store folded with acid-free tissue to prevent crushing appliques. For washing, hand wash gently in cool water and lay flat to dry to preserve shape and color richness.
Finishing this runner is such a rewarding moment — watching the three cheerful reindeer and three layered trees come together on a lacy cream background feels like wrapping your table in holiday magic! The textured scalloped edge ties the whole piece together with festive color and charm. I love how this runner makes every meal feel special and adds a handcrafted centerpiece to holiday gatherings. 🧶🎄✨