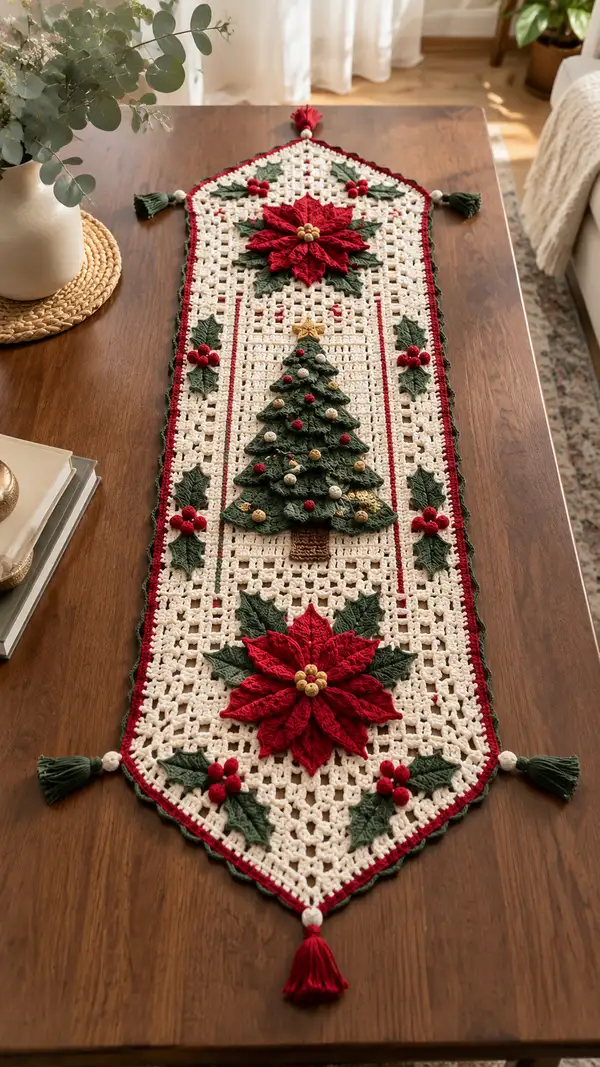
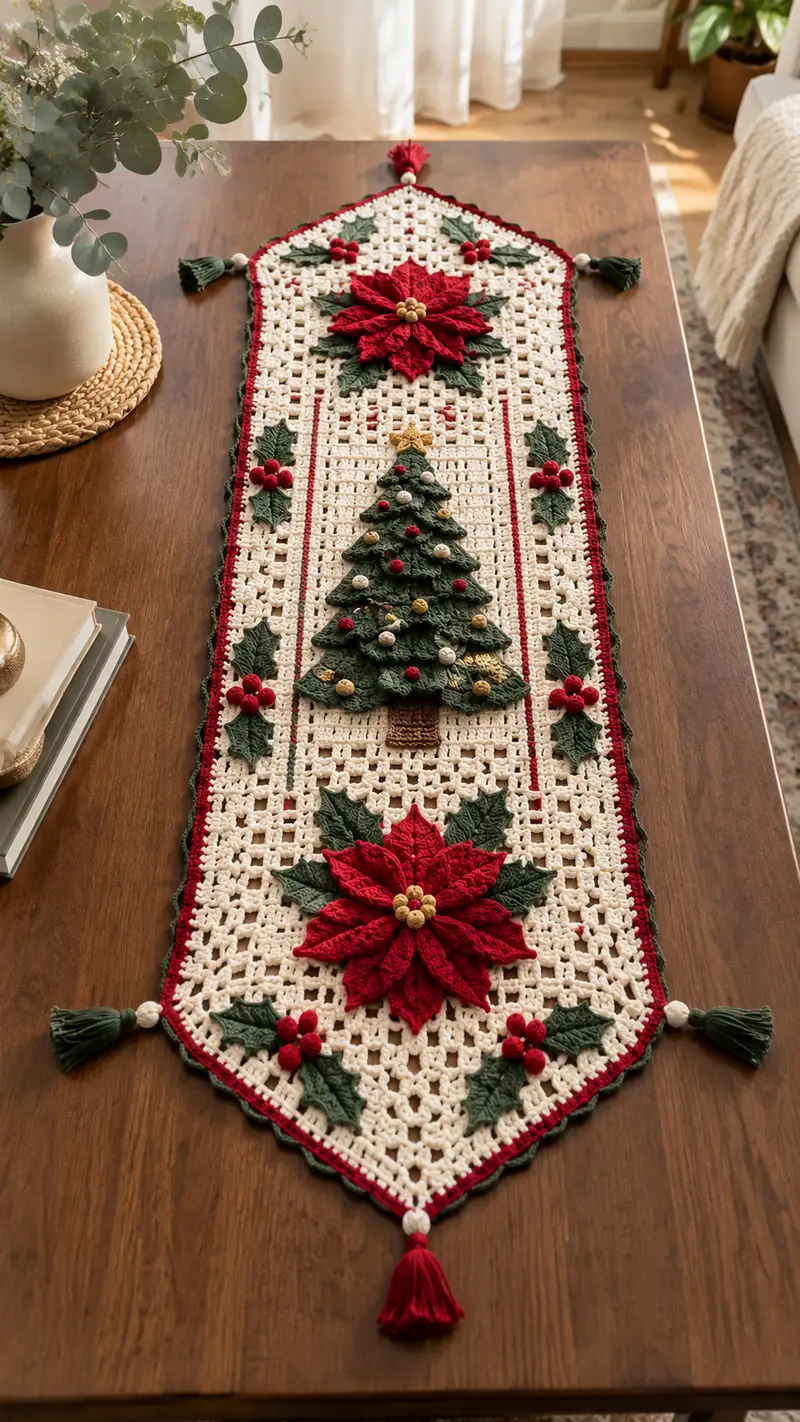
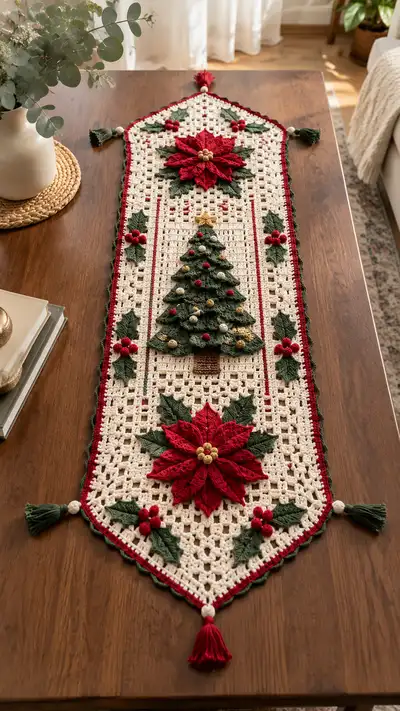
Create a stunning holiday table runner featuring raised poinsettias, a layered Christmas tree applique, holly leaves with clustered berries, and elegant tasselled points. This richly textured runner uses a neutral lattice base with classic red, deep green and gold accents to deliver a timeless seasonal centerpiece. Detailed step-by-step instructions guide you through each motif and the surrounding border so you can recreate the exact heirloom look.
Progress Tracker
0% Complete
— Materials & Notes :
Info :
This pattern uses US crochet terminology throughout. Work tightly enough so the mesh supports the raised appliques; however do not over-tighten or the lace effect will be lost. Keep an extra ball of each color on hand for tension match. Block all appliques flat before attaching. The runner is designed to be worked flat in rounds for the diamond points, then worked in joined rows for the long center panel; we will call every completed row or pass a 'Round' for clarity and counting.
— Gauge & Finished Size :
Info :
Gauge isn't critical for fit but affects final size. Using worsted weight (#4) and 4.0mm hook expect approximately 14 dc clusters (3-dc cluster groups) across a 10 cm width in the mesh. Finished dimensions are approximately 14" wide at widest point and 48-52" long including tassels, depending on blocking and number of center rows worked.
— Special Stitches & Constructions :
Info :
Cluster: 3 dc worked into same sp (US dc). Join rows: when instructed to join, sl st to turn and ch to begin next row, or work in continuous rounds if you prefer invisible joins. Poinsettia petals are worked in rounds and layered; leaves are crocheted flat and shaped using FLO/BLO and short rows.
— Base Panel (Top Point to Mid - Increasing Diamond Rounds) :
Round 1 :
Make a magic ring. Ch3 (counts as first dc), work 3-dc cluster, ch2, (3-dc cluster, ch2) repeat to make 4 clusters total — finish with sl st to top ch3. (4 clusters / 12 dc total, plus chain corners)
Round 2 :
Sl st into first ch2 corner sp, ch3, work (3-dc cluster, ch2, 3-dc cluster) into same corner; *ch1, work 3-dc cluster into next ch2 corner; ch1* repeat across corners and finish with corner cluster (8 clusters total). (8 clusters / 24 dc)
Round 3 :
Turn work slightly, sl st to corner sp, ch3, (3-dc cluster, ch2, 3-dc cluster) in corner, then *ch1, 3-dc cluster in side sp (between clusters on previous round), ch1* repeat around and finish corner; you will have 12 clusters. (12 clusters / 36 dc)
Round 4 :
Repeat increasing at the four corner points as established: corner = (3-dc cluster, ch2, 3-dc cluster); side spaces receive single 3-dc clusters separated by ch1. Clusters this round = 16 (16 clusters / 48 dc).
Round 5 :
Continue same increase logic. This increases cluster count by 4 each round. Clusters = 20 (20 clusters / 60 dc).
Round 6 :
Follow the corner and side increase pattern. Clusters = 24 (24 clusters / 72 dc).
Round 7 :
As before, increase at corner positions only. Clusters = 28 (28 clusters / 84 dc).
Round 8 :
Increase in corners; maintain side clusters. Clusters = 32 (32 clusters / 96 dc).
Info :
By round 8 the small diamond has opened into a broader pointed shape. Check that the fabric lays flat; if ruffled, block lightly before proceeding. This is the widest portion you will build before working straight rows to lengthen the runner. Use stitch markers at the four corner points to help identify increases in the future.
Round 9 :
Increase round as before. Clusters = 36 (36 clusters / 108 dc).
Round 10 :
Increase round. Clusters = 40 (40 clusters / 120 dc).
Round 11 :
Increase round. Clusters = 44 (44 clusters / 132 dc).
Round 12 :
Final increase round for the top diamond shaping. Clusters = 48 (48 clusters / 144 dc). Fasten off cream color if you plan to add thin red pilasters or stripes down the body (we add those later in surface slipstitch). If you will keep continuous cream, do not fasten off; place a removable marker on the last join.
Info :
At the end of Round 12 you will have the runner width established. From here we will lengthen the piece by working joined rows across two opposite sides to create the long central panel. Place markers at the top and bottom center stitches to help maintain symmetry while working rows.
— Center Panel (Length Rows) :
Round 13 (Row 1 across center) :
Turn work to a straight-row logic: ch3 (counts as first dc), work 1 3-dc cluster into the same corner ch2 space as the join if comfortable; *ch1, skip to next side space and work 3-dc cluster* continue across along the side that will become the long edge, finishing with a corner cluster into corner ch2. Join with sl st to turn at short end and work back down the opposite side to make a full pass. Maintain total side clusters equal to clusters counted across width (48 clusters in round 12) so Row 1 contains 48 clusters along its long row path. (48 clusters / 144 dc)
Round 14-24 (Rows 2-12) :
Work 11 more joined rows in the same manner: ch3, turn, make cluster into first space, *ch1, cluster* across; sl st to join return at each end. Each row remains 48 clusters (48 clusters / 144 dc). These rows build the long rectangular middle - check length periodically to match desired runner length. Work flat in joined rows for even edges.
Info :
Every 6th row (for example after Row 6, Row 12) you may want to add a thin accent stripe by switching to Red and working a single-row surface slipstitch or a round of sc down each side; instructions for decorative pilasters are provided later. Carry cream yarn along the edge or break and rejoin as preferred; secure ends neatly.
Round 25-36 (Rows 13-24) :
Continue working 12 more rows of mesh in cream keeping cluster count constant (48 clusters per row). After Round 36 you should have reached approximately two-thirds of the final length. (48 clusters / 144 dc per row)
Round 37-48 (Rows 25-36) :
Work an additional 12 rows to reach the calculated length for your table, or continue more rows if you prefer a longer runner. Maintain the same cluster per row. These rows are even stitch rows and do not alter width. After Round 48 you can plan to mirror the top diamond by preparing to decrease in the same way increases were made earlier.
Info :
Use a tape measure to check total length; aim for about 36-40" of mesh between the two tapered points before beginning the lower tapered decreases. If you want a shorter runner, stop sooner and begin decreases earlier. Mark the center row so you can align appliques symmetrically later.
— Lower Diamond (Decreasing Rounds) :
Round 49 :
Begin decreases to form the bottom point: work one full pass equivalent to a round and at each corner omit the usual corner increase—work a single 3-dc cluster in corner (no ch2 corner). This effectively reduces the cluster count by 4. Clusters = 44 (44 clusters / 132 dc).
Round 50 :
Decrease again by removing one side cluster adjacent to each corner: result clusters = 40 (40 clusters / 120 dc).
Round 51 :
Decrease as previous logic, clusters = 36 (36 clusters / 108 dc).
Round 52 :
Continue decreases at corners and sides, clusters = 32 (32 clusters / 96 dc).
Info :
As you decrease the runner will taper toward a point. Maintain even tension and remove stitch markers as spaces fill; replace them lower down to track turning corners. If any rows draw in unevenly, block lightly before attaching appliques.
Round 53 :
Decrease, clusters = 28 (28 clusters / 84 dc).
Round 54 :
Decrease, clusters = 24 (24 clusters / 72 dc).
Round 55 :
Decrease, clusters = 20 (20 clusters / 60 dc).
Round 56 :
Decrease, clusters = 16 (16 clusters / 48 dc).
Round 57 :
Decrease, clusters = 12 (12 clusters / 36 dc).
Round 58 :
Decrease, clusters = 8 (8 clusters / 24 dc).
Round 59 :
Decrease to final point: clusters = 4 (4 clusters / 12 dc). Fasten off and weave ends. This forms the lower pointed end to match the top.
Info :
Block entire runner flat, pinning the lattice open so appliques will sit well. Make sure both tapered ends and long edges are even. Allow to dry before proceeding to border and appliques.
— Decorative Pilaster Stripes (Optional Red Lines) :
Info :
If you want the two thin red vertical stripes flanking the tree as in the photo, add them now by surface slipstitch or by working a narrow column while the runner lies flat. We will add a 1-row surface slipstitch down both sides of the central column spaced approximately 6 clusters in from the long edges.
Round 60 :
Join Red where you want the stripe to start, sc evenly along the chosen vertical line through the mesh spaces using surface slipstitch technique from top to bottom. Keep tension even. Repeat for the other side. Fasten off red.
Info :
Work the slipstitch on the RS with the runner flat. Carry the yarn along the back or break and rejoin at each end for neater ends. These thin lines frame the tree center and contrast the cream mesh nicely.
— Border Rounds (Cream, Red, Green scalloped) :
Round 61 :
With Cream, join at any side edge space. Work 1 sc evenly around the entire runner edge including along the points and around corners to create a firm edge—work 2 sc in tight corner spaces at the tapered tips to avoid puckers. Fasten off. (Edge sc count varies by size; keep stitches evenly distributed.)
Round 62 :
Join Red, ch1, work 1 sc into each sc around to create a narrow red frame; at each point work (sc, ch2, sc) into the point to emphasize the taper. Fasten off Red.
Round 63 :
Join Green, ch3, *skip next sc, 5 dc shell into next sc, skip next sc, sc into next sc* repeat around to form scallops. At tapered points work extra shells as needed to flatten the contour. Fasten off Green and weave ends.
Info :
Blocking after each border round gives sharp scallops. If your scallops look small, add one more dc to each shell (6 dc) consistently to increase curve. Keep the number of shells proportional all the way around to look tidy.
— Large Poinsettia Applique (Make 2 — Top & Bottom) :
Round 1 :
With Red, make a magic ring. Ch1, work 8 sc into ring. Tighten and join. (8 sc)
Round 2 :
Ch2 (counts as first hdc), *2 hdc in next st, ch1* repeat around to make 8 petals base loops (16 hdc total, with ch loops). Join. (16 hdc)
Round 3 :
Petal Round: Work a layered petal into each ch1 loop: (ch1, 1 sc in loop, ch1, (dc, tr, dc) all in loop, ch1, sc) repeat into each loop. This makes 8 small petals. Fasten off red. (Petal count 8)
Info :
These initial petals form the inner layer. Block lightly. We will make larger outer petals in a later round and stack them with offset to create the multi-layer poinsettia.
Round 4 :
Return with Red and work larger petals around: join into a base sc between any two small petals, ch1, sc, ch2, (5 dc cluster into next loop base) ch2, sc — repeat to create 8 larger, fuller petals. Each petal is worked with texture using front post and back post where noted below.
Round 5 :
Texture Round: For each petal work: (sc in base, 1 hdc, 1 dc BLO, 1 tr in center row, 1 dc FLO, 1 hdc, sc in tip), this creates a raised rib look and a pointed petal. After completing all 8 petals, fasten off. Block petals out flat and press gently.
Round 6 :
Make second (outer) layer of petals: Join Red to a space behind any petal base and work (ch1, sc, ch1, dc, tr, dc, ch1, sc) to form a fuller petal behind each inner petal. Repeat for 8 outer petals. Fasten off and block.
Round 7 :
Center Cluster: With Gold, make a small bobble cluster center — ch2, (dc cluster (3 dc together) in next st) repeat 4 times to make a raised central cluster; fasten off leaving a long tail to sew to poinsettia center. Attach gold cluster by sewing through the center of the petals to secure all layers. (4 golden bobbles)
Info :
Pin the outer petals offset from the inner ones by half a petal width to achieve the full layered look seen in the photo. Use small stitches through the base of the petals to secure layers; avoid sewing through the visible petal faces where possible for neatness. Make two identical poinsettias.
— Holly Leaves (Make 8 or as desired) :
Round 1 :
With Green, ch12. Row 1: sc in 2nd ch from hook, sc across until end (11 sc). Turn. (11 sc)
Round 2 :
ch1, sc across 11 sc, turn. Optional: For a more sculpted leaf, use BLO on this row to create a ridge. (11 sc)
Round 3 :
Shaping Row: ch1, sc in first 2 sts, hdc in next 2, dc in middle 3, hdc in next 2, sc in last 2 — turning points shape the center. (11 sts shaped)
Round 4 :
Edge picot shaping: ch1, sc in first, *ch3, sl st in 3rd ch to form a picot, sc in next* repeat along one side to make sawtooth edges. Mirror on other side by turning and repeating. Fasten off leaving long tail to sew. Make 8 leaves total to decorate both sides.
Info :
Holly leaf sawtooth edges are created using short chain picots along the sides. Block leaves with a small curve by pinning the center higher than edges to lift leaves once sewn to the mesh.
— Berry Bobbles (Make clusters of 3) :
Round 1 :
With Red, make a magic ring. Ch1, work 6 sc into ring, tighten and join. (6 sc)
Round 2 :
Bobbles: ch1, (dc bobble in same st) around — or use puff stitch: (yarn over, insert, pull through, repeat 4 times in same st, pull through all loops, ch1) to make a rounded berry. Work 6 bobbles or 3 small bobbles together for clustered look. Fasten off leaving long tail to sew.
Info :
Sew berries in clusters of three over the seam where holly leaves meet to mimic the clustered berries seen on the runner. Use small, secure stitches and hide tails on the WS.
— Christmas Tree Applique (Layered Leaf Triangles) :
Round 1 :
Tree Trunk Base: With Brown, make magic ring. Ch1, 6 sc in ring. Fasten off. (6 sc)
Round 2 :
Trunk Extension: Join Brown to work 3 rows of sc in rounds to make a small rectangle trunk: Row 1: ch1, 6 sc, sl st to join; Row 2: ch1, work 6 sc in BLO to give a ridge; Row 3: ch1, 6 sc. Fasten off leaving tail to sew into center of mesh at tree base area. (trunk 6 sc x 3 rows)
Round 3 :
Layer 1 (Bottom Tier): With Green, ch16. Row 1: sc in 2nd ch from hook across (15 sc). Row 2: ch2, turn, dc dec across to shape triangle: we will work a simple triangular shell technique — (dc, ch1, dc) into a center point, decreasing rows toward a triangular tip. After shaping, work shells across row to make a scalloped edge. Fasten off. (see shaping details below)
Round 4 :
Layer 2 (Middle Tier): Repeat layer 1 on a slightly smaller foundation (ch12 -> 11 sc) and shape similarly so it sits on top of the bottom tier with overlap of ~3 stitches. Fasten off.
Round 5 :
Layer 3 (Top Tier): Make smallest triangle (ch8 -> 7 sc) and shape as before. Add a small gold star at the top: with Gold ch4, join in a ring, form 5 small points with (sc, ch3, sl st) into ring repeated 5 times, fasten off leaving tail to sew to tree tip. (star with 5 points)
Info :
The tree is built from three overlapping triangular scalloped tiers. Each tier has a scalloped edge to look like layered branches. Arrange them with the largest at the bottom and smallest at the top. Add small bobbles in red, cream and gold across the tiers to mimic ornaments (see berry bobble instructions). Sew trunk beneath the bottom tier and attach star at the top.
Round 6 :
Ornament Bobbles: Using Red, Cream and Gold, make small bobbles (6 per tree) and sew them evenly distributed across the tree tiers. Use contrasting colors on each layer for visual depth. Fasten off and weave ends to back.
— Small Decorative Leaves & Tiny Poinsettia Buds :
Round 1 :
Mini Leaf: With Green ch8, sc across, ch1 turn, sc back to create small leaf; cinch one end slightly to make a curved leaf. Make approximately 10 mini leaves to scatter. Fasten off.
Round 2 :
Mini Bud (Tiny Poinsettia center): With Red, make 4 sc in magic ring, then 4 tiny petals around using hdc clusters; fasten off leaving tail. These are used under large poinsettia as filler clusters around corners of the runner.
Info :
These small elements add layered interest between larger motifs in the lattice and make the composition richer. Make more or fewer depending on your personal aesthetic and the exact spacing on your runner.
— Tassels (Make 5) :
Round 1 :
Make tassel with 6" long strands of Green for 4 corners and Red for the center bottom point: Wind yarn around a 2.5" template roughly 30-40 times depending on desired fullness. Tie at top tightly with scrap yarn, slide off, fold, and wrap neck with small length of yarn and secure. Add a small white cream bead between tassel head and runner point if desired. Trim ends evenly. Attach tassel to the tapered tips by sewing the tight wrapped neck to the mesh foundation with several passes. Fasten off and weave ends.
Info :
Use a small dab of fabric glue if you find tassels slip; allow glue to dry and then trim stray fibers. You can also add a small wooden bead above the tassel for a finished look as in the photo.
— Final Assembly & Placement :
Round 1 :
Layout: With the blocked runner flat on a table, position the two large poinsettias centered over the top and bottom widened diamond sections so they sit symmetrically. Place the Christmas tree applique centrally along the length between the two red pilaster stripes if you added them. Place holly leaves and berry clusters around the poinsettias and along the long edges as shown in the photo; pin each item in place.
Round 2 :
Sewing Appliques: Using matching color yarn and a yarn needle, sew each applique to the mesh using small whip stitches at the base and a few hidden stitches through petals or leaf bases to anchor. Avoid stitching through visible petal faces as much as possible. For the tree, sew the trunk and each layer down starting with the bottom tier so that the top tiers cover attachment stitches for the lower tiers.
Round 3 :
Holly Attachment: Sew 3 holly leaves together in small clusters and stitch a 3-bobble berry cluster at the intersection. Place clusters symmetrically along both sides of the runner and at the tapered points as in the image. Use secure stitching and tie off on the underside.
Round 4 :
Final Weave & Finish: Weave all long tails to the back of the runner, trim close. If any edges show gaps, pick up a few sc stitches with matching yarn to tidy. Steam-block again lightly for a crisp finished look. Attach tassels at the five tapered points (top, bottom, and three side points along the elongated edge).
Info :
Check symmetry frequently while sewing; step back from the table to view the overall composition. Tighten any loose appliques and re-block if needed. A finished runner may be lightly starched if desired for table protection, but test starch on a spare swatch first.
This festive table runner pattern brings traditional holiday motifs to life with layered texture and classic colors. Working the airy cream mesh with bold red poinsettias, a dimensional tree and holly clusters creates a showstopping centerpiece you will reach for every season. The detailed step-by-step instructions and assembly guidance make the project approachable and rewarding. Enjoy making something beautiful for your table — and don't forget to share a photo when it's finished! 🧶✨