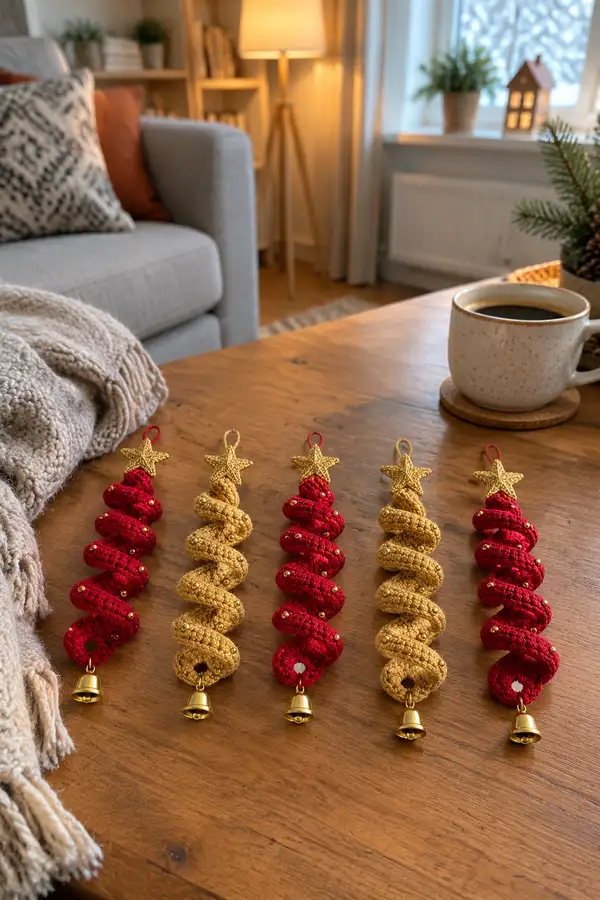
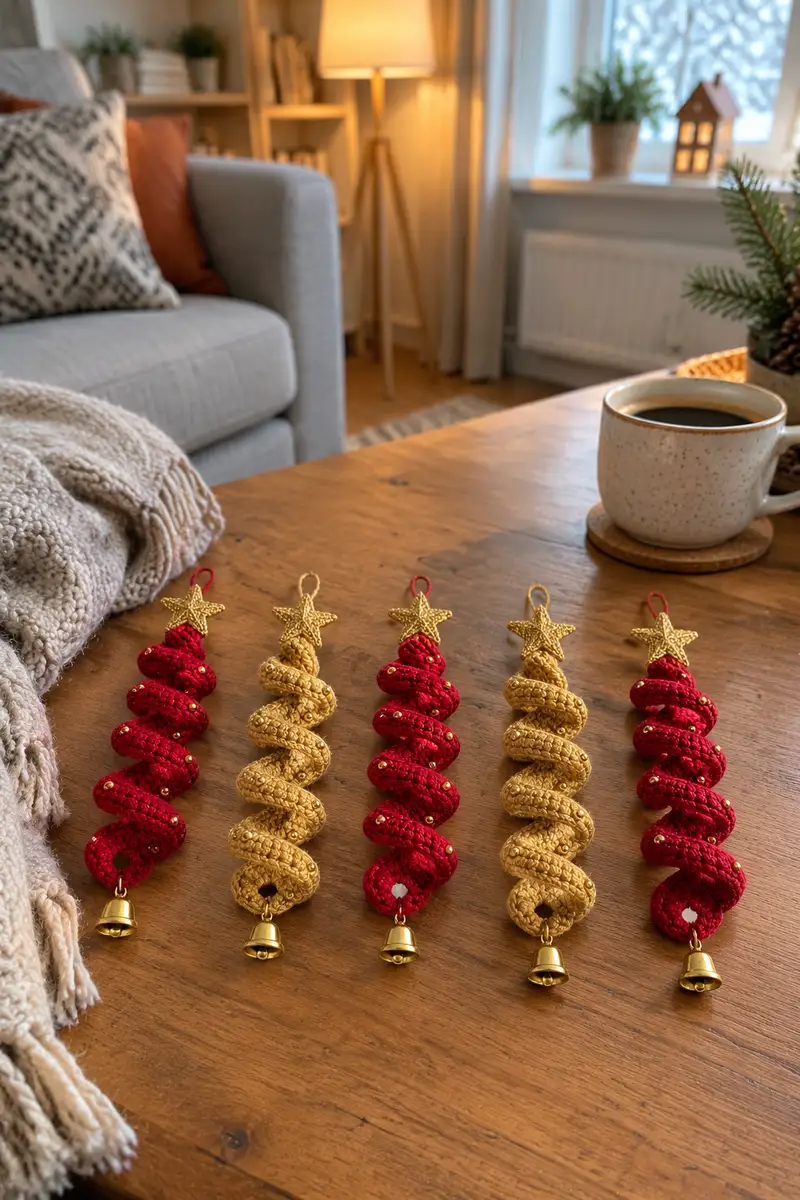
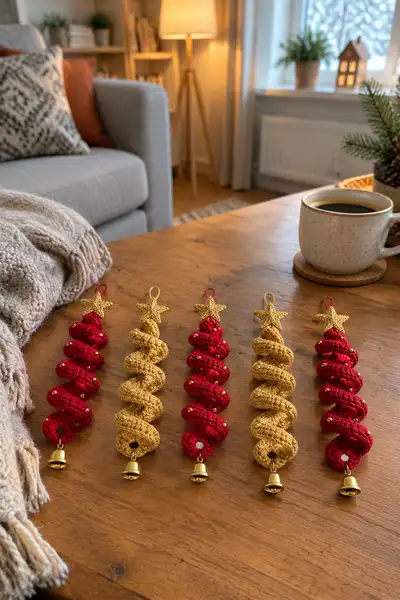
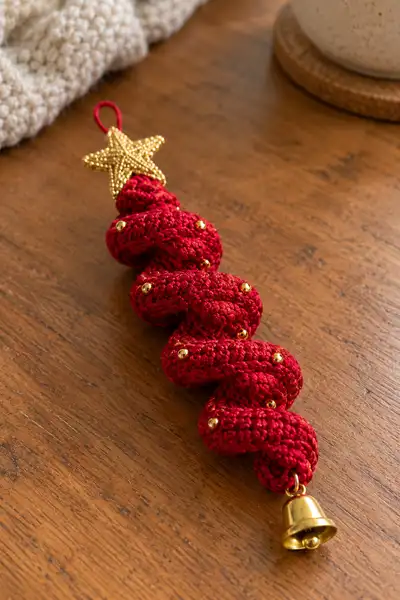
Create elegant spiral Christmas tree ornaments with this detailed pattern. These spiraled tubular decorations are worked in rounds, shaped into a graceful spiral, and finished with a sparkly star topper, gold beads and a tiny bell. The sample set shows alternating red and metallic gold versions with sewn beads for extra holiday shine. A perfect project for gifting or dressing up your tree and garland.
Progress Tracker
0% Complete
— Materials & Gauge :
Info :
Gauge is not critical for this decorative ornament, but a tight fabric is important so stuffing and beads do not show. With DK yarn and 3.5mm hook aim for about 7 sc x 8 rounds = 2.5 cm square worked in the tube. Adjust hook size if necessary to get a firm fabric.
— Spiral Tube :
Round 1 :
6 sc in magic ring (6)
Round 3 :
(1 sc, inc) x 6 (18)
Round 4 :
(2 sc, inc) x 6 (24)
Round 5 :
(3 sc, inc) x 6 (30)
Round 6 :
(4 sc, inc) x 6 (36)
Round 7 :
(5 sc, inc) x 6 (42)
Round 8 :
(6 sc, inc) x 6 (48)
Info :
Rounds 1-8 shape the tube circumference. Ending at 48 sts gives a comfortable tube width for this ornament; you may increase to 54 sts if you prefer a slightly thicker spiral. Mark the first stitch of each round with a stitch marker.
Round 9-16 :
1 sc in each st (48)
Info :
Work these even rounds to build initial length. If you are making stripes, change color at the end of a round: fasten off old color or carry it up the inside. Carrying inside keeps the outside neat; weave in tails later.
Round 17-24 :
1 sc in each st (48)
Info :
At this point you have an open-ended tube. Decide how long you want your spiral to be — the sample photos show about 9-11 full coils on a 10-12 cm long tube. For a single ornament, plan on working 40-56 rounds even after increases before tapering. Continue even rounds until you reach your desired length.
Round 25-56 :
1 sc in each st (48) — repeat for rounds 25 through 56 (48)
Info :
Begin stuffing lightly from the bottom as you continue. Use small bits of fiberfill tucked in evenly — do not overstuff. If you want a more sculpted spiral add a thin wire core now by threading flexible wire through the center of the tube before stuffing further.
Round 57 :
(6 sc, dec) x 6 (42)
Round 58 :
(5 sc, dec) x 6 (36)
Info :
Start a gentle taper to the bottom so the bell can sit neatly. Continue stuffing lightly as you decrease; the tube should remain pliable so it can be coiled into a spiral.
Round 59 :
(4 sc, dec) x 6 (30)
Round 60 :
(3 sc, dec) x 6 (24)
Round 61 :
(2 sc, dec) x 6 (18)
Round 62 :
(1 sc, dec) x 6 (12)
Info :
Fasten off leaving a 15-20 cm tail for attaching the bell hardware. Pull yarn through last stitch and weave into the inside to close the remaining hole; you may leave the last 6 sts open to attach a small jump ring and bell using a darning needle, or close and add a separate hanging ring later.
— Star Topper :
Info :
The star tops are small 5-point stars worked flat. You can work them in metallic yarn for a bright finish. Make one star per ornament. Use the smaller 2.5-3.0mm hook for a firmer star if using the same yarn weight.
Round 1 :
Make ch 2, 5 sc in 2nd ch from hook, join with sl st to form a small ring (5)
Round 2 :
*Ch 4, sl st in next st to form a point* repeat from * to * 5 times around creating 5 loops; sl st to base (5 loops)
Round 3 :
Work each point as follows: in first ch-4 loop work (sl st, sc, hdc, dc, hdc, sc, sl st) to make a tapered point. Repeat for each of the 5 points. Fasten off leaving long tail for sewing.
Info :
For a more dimensional star, work two star layers and sandwich a small bit of stuffing between them, then sew edges together. Alternatively, leave star flat for a streamlined look as in the photos.
— Hanging Loop :
Round 1 :
With main color or contrast: ch 12 (or desired loop length), sl st to first ch to form a loop, sc around the base joining point 6 sc (work these into the same stitch at top of star) - join with sl st and fasten off leaving tail for sewing.
Info :
You can also create a stronger loop by folding a short piece of thin cord or ribbon into a loop and sewing it to the star center. If you crocheted a thicker loop, block the loop into shape and glue the base for extra security before sewing to the star.
— Bell Cap & Attachment :
Round 1 :
6 sc in magic ring (6)
Round 3 :
(1 sc, inc) x 6 (18)
Round 4 :
1 sc in each st (18)
Round 5 :
1 sc in each st BLO (18)
Round 6 :
(3 sc, dec) x 4 (14)
Round 7 :
(2 sc, dec) x 4 (10)
Round 8 :
Fasten off leaving long tail; fold up last rounds to create small cup and stitch through to form bell cap. Attach a small jump ring through the center and hang bell. Alternatively, you may sew the bell directly to the finished tube bottom tail.
Info :
The bell cap is decorative and helps transition from tube to bell. If your bell already has a loop, simply secure it with a jump ring and sew through the last round of the tube to hold it in place. Make sure the bell's jump ring is firmly closed with pliers.
— Optional Wire Core (Pose & Shape) :
Info :
If you want a spiral that holds its shape permanently, insert a thin flexible wire or pipe cleaner before or during stuffing. Use a single piece of 20-24 gauge flexible wire, roughly 10-12 cm long (depending on spiral length). Thread through the tube and shape the spiral after stuffing.
Round 1 :
Thread wire through the center of tube from top to bottom using a blunt tapestry needle, then bend and trim ends, folding them back on themselves so they are not sharp. Continue stuffing small amounts of fiberfill around the wire so the tube keeps a smooth cross-section.
Info :
For extra strength, wrap the wire in a thin strip of yarn or tape before inserting so it does not chafe the inside of the crocheted tube. If you do not wish to use wire, you can coil the tube and stitch the coils together at strategic points to maintain shape.
— Bead Embellishment (Sew-on Beads) :
Info :
Gold beads as shown in photos are sewn on the outside of the spiral after the tube is finished and shaped. Place beads symmetrically along the visible coils — typically 6-8 beads per spiral. Mark positions with pins, then use a needle and thread to sew each bead through several stitches into the interior of the tube for secure attachment.
Technique :
Use a short length of strong metallic thread or doubled sewing thread; pass from inside to outside through the base of the tube at a placement, catch a bead and return to inside through a nearby stitch to hide the knot. Tie a small knot inside and weave ends into the stuffing before trimming.
— Shaping the Spiral & Final Finishing :
Info :
To create the spiral form, hold the tube vertically with the star/top at the top. Starting near the top, gently coil the tube to form the first loop and stitch the inside edge of the coil to the next coil with small, nearly invisible whip stitches at 3-4 points per coil. Repeat down the length. If using wire, simply twist the wire to create even coils and press the tube into shape.
Detail :
Stitch through the back edge of each coil (the inside facing side) to prevent visible stitch marks on the outside face. Use the tail left at the top of the tube to sew the star securely; sew through the star center and into the top round of the tube several times, knotting and weaving the end into the inside padding.
Info :
If you notice small lumps where beads are sewn, reposition beads slightly or add a tiny bit more stuffing around that bead location to smooth the surface before final stitching. Light steam blocking with caution can help smooth cotton yarn ornaments if desired.
— Troubleshooting & Tips :
Info :
If the spiral looks too loose after coiling, remove a few internal stitches and tighten the coil by stitching more frequently around each turn. If the spiral is too stiff, gently bend the wire or reduce the number of inner stitches holding coils together. Always test-shape before permanently sewing.
Info :
Make multiple ornaments in alternate colors (red and gold) and attach them along a length of cord or ribbon to create a charming garland. Alternatively, hang one per tree branch for individual sparkle.
This cheerful ornament set turns simple crochet into a festive statement piece — the spiral tubes, metallic stars and tiny bells make a delightful combination! Each ornament is quick to make but looks lovingly handcrafted, perfect for gifts or garlands. I hope you enjoy the relaxing rhythm of making a set and arranging them on a tree or across a mantel. Happy stitching and may your holiday decor sparkle! 🎁✨