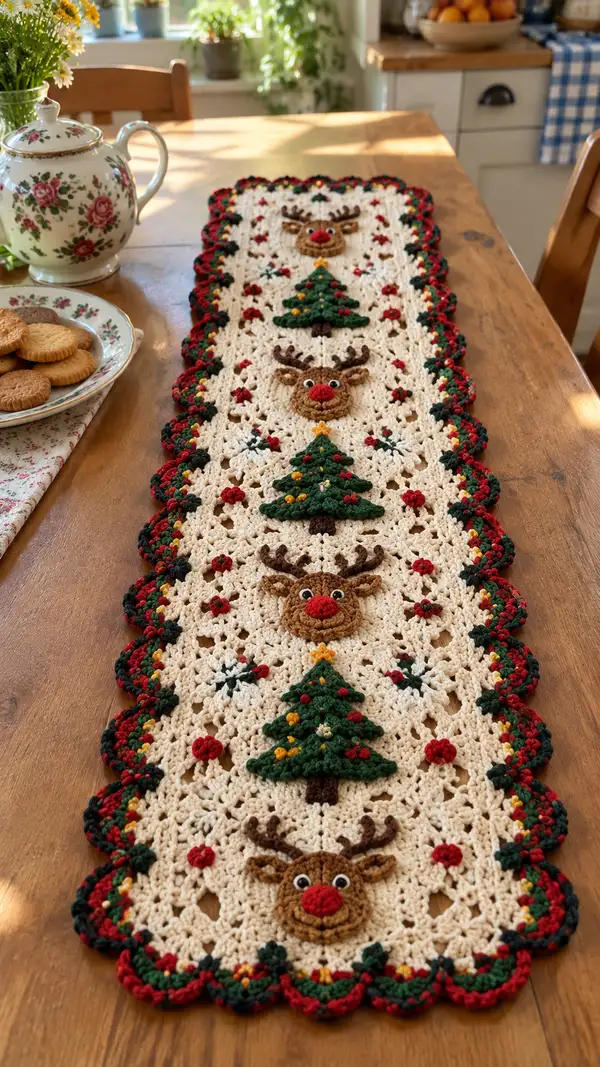
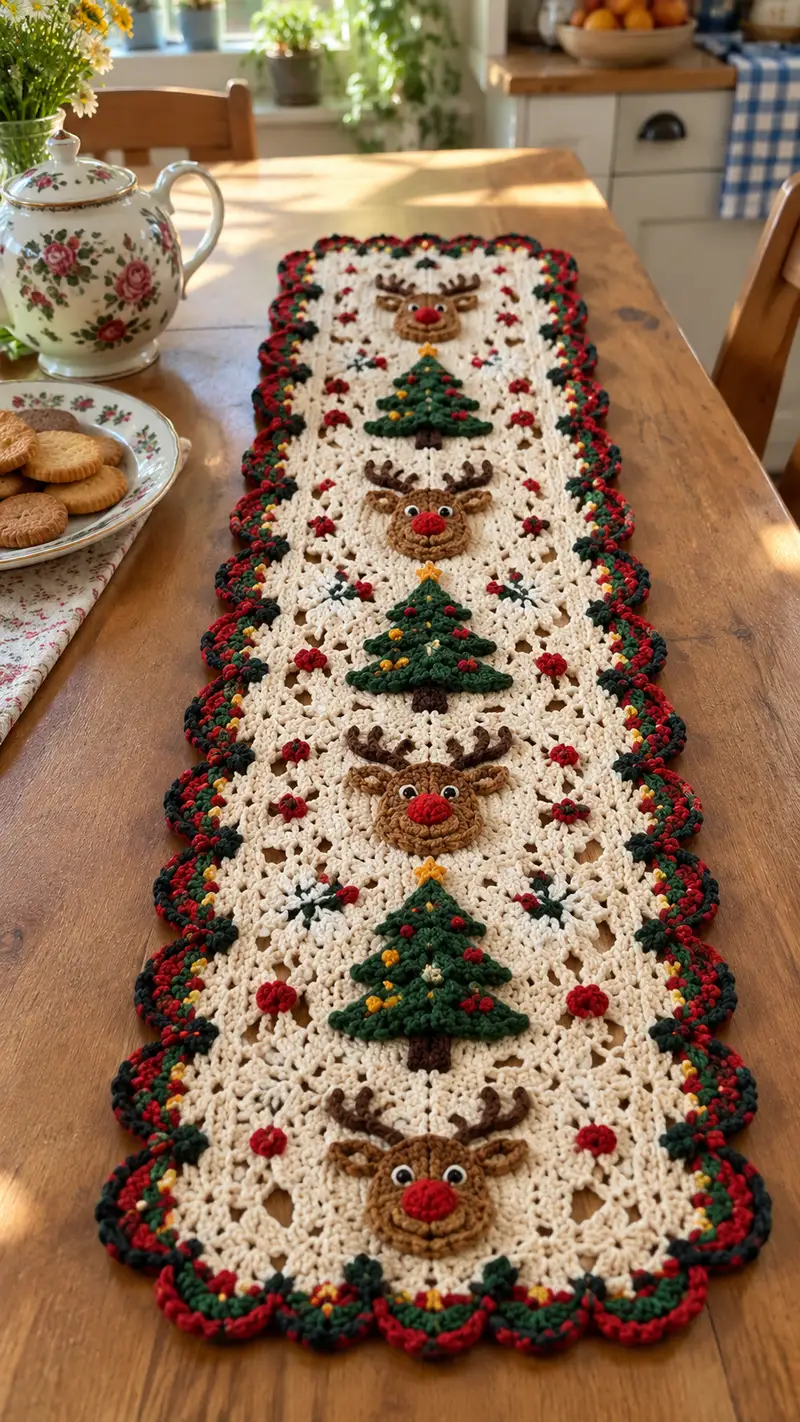
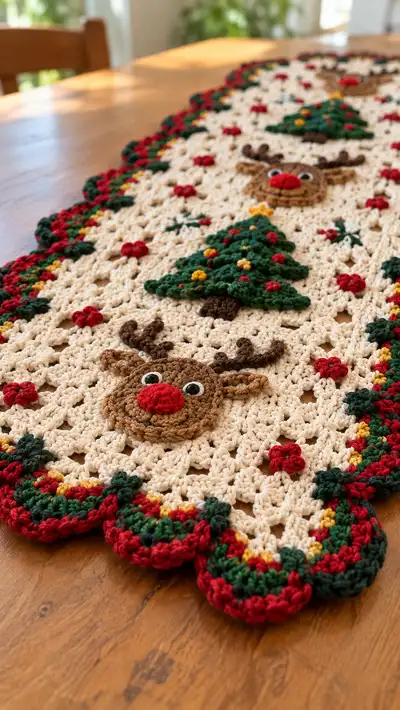
A warm, vintage-inspired holiday table runner featuring three cheerful reindeer faces alternating with three layered Christmas tree appliques, set on a delicate cream lacy background and finished with a scalloped red/green border. This long runner adds handmade charm to your holiday table and is worked in modular appliques and a continuous lacy panel for a polished, vintage look. The pattern uses worsted weight yarn and simple cluster stitches to achieve textured trees, reindeer faces, berries and flowers.
Progress Tracker
0% Complete
— Runner Base (long lacy panel) :
Round 1 :
Ch 120 (or adjust chain multiple of 8 plus 4 to fit desired runner width). Turn. For sample make a foundation chain of 100-120 to achieve approx 10-12 inches width.
Round 2 :
Join to work in rows: sc in 2nd ch from hook and in each ch across (119 sc). Turn. This establishes the foundation edge to work a lacy stitch pattern in joined rounds later.
Info :
If you prefer, you can start with foundation sc rows instead of a chain. Keep the total number of foundation chains divisible by 8 for consistent shell placement.
Round 3 :
Ch 3 (counts as dc), *sk 2 sts, 3 dc in next st (shell), sk 2 sts, dc in next st; rep from * across until last 2 sts, dc in last st. Turn. (Creates first row of shells)
Round 4 :
Ch 1, sc in same st, *ch 3, sk 2 dc, sc in center dc of next shell; rep across, ending with sc in top of turning ch. Turn. (Creates chain spaces between shell rows)
Info :
Place a stitch marker at the first sc of this row to mark the edge; it helps when you later join rounds for a cleaner rectangular border.
Round 5 :
Ch 3 (counts as dc), *3 dc in ch-3 space (shell), dc in next sc; rep across to last sc, dc in last sc. Turn. (Repeat row pattern to build lacy mesh)
Round 6-25 :
Repeat Rounds 4-5 alternating (about 20 rows for a long runner length). Maintain even tension. At this stage you will be building the flat cream lacy panel that will hold appliques. (Number of rows determines runner length; sample photo length made with 38-44 rows total)
Info :
Measure as you go — for the sample runner make 36 rows of the alternating shell pattern to accommodate three reindeer and three trees with even spacing. Use blocking to square the panel if stitches pull slightly.
Round 26 :
Change to cream main color if you used a provisional color earlier. Ch 1, sc in same st, *ch 3, sc in center dc of next shell; rep across. Turn. This creates neat chain loops to which appliques are visually anchored.
Round 27 :
Ch 3, *3 dc in ch-3 space, dc in next sc; rep across. Turn. (Shell round) Maintain stitch multiple across so that corner shaping for border later aligns evenly with shells.
Info :
Mark three evenly spaced vertical positions along the center axis to indicate where the reindeer and tree appliques will be placed: top third, middle, bottom third. Count shells across width and choose center shell as axis.
Round 28 :
Work one more mesh repeat: ch 1, sc across in sc and in shell centers as established (this evens the surface). Turn.
Round 29-34 :
Continue alternating shell and sc/chain rows to reach the desired overall length. For sample runner make total 36-40 mesh rounds before edging. (36-40 rows = long runner shown)
Info :
When you reach the exact number of rows, block the panel flat to measure and ensure the scalloped border will sit nicely. Blocking also helps even out stitch tension so appliques attach neatly.
Round 35 :
Once blocked, join for working border in the round by turning your panel 90 degrees and working along the long edge in sc evenly spaced; aim for 1 sc per shell space to create a neat base for the scallop. Work across the short ends the same way to create continuous round join. (Total sc around will depend on your panel size.)
Round 36 :
Ch 1, sc in each st around to make a clean edge, join with sl st to first sc. Place a marker at the join and count total stitches around — you will use this count to divide into scallop groups. (Sample count around: 240-280 sts depending on width/length)
Info :
Count the total edge stitches (S). Divide by 8 (or 10) to determine how many stitches each scallop group will contain. In the sample each scallop uses 8 sts across the long edges and fewer across corners; adjust as necessary to keep scallops even.
— Reindeer Face Applique (Make 3) :
Round 1 :
With light brown, 6 sc in magic ring (6)
Round 3 :
(1 sc, inc) x 6 (18)
Round 4 :
(2 sc, inc) x 6 (24)
Info :
Use tight tension to ensure a firm, flat circle. Place safety eyes approximately between Rounds 3 and 4 later after creating muzzle; if embroidering, mark placement now. Keep small tail for sewing.
Round 5 :
(3 sc, inc) x 6 (30)
Round 6 :
1 sc in each st around (30) - this is the finished face disc for the reindeer base
Round 7 :
Switch to BLO for a raised edge round: 1 sc in each st BLO (30). This creates a slight ridge that helps the face appear dimensional when attached.
Info :
If you want a slightly larger face, continue rounds with (4 sc, inc) x 6 (36) then 1 round even. The sample uses 30 sts for a compact face that sits nicely on the lacy base.
Round 8 :
Fasten off light brown leaving a long tail for sewing. Weave the tail to the center on the wrong side to secure.
— Muzzle (for each reindeer) :
Round 1 :
With darker brown or same brown, 6 sc in magic ring (6)
Round 3 :
(1 sc, inc) x 6 (18)
Round 4 :
1 sc in each st around (18). Fasten off leaving long tail for sewing. Position in lower center of face and sew in place using whip stitch through face and muzzle edges.
Info :
Stuff muzzle very lightly (or use no stuffing) — the density of stitches gives enough puff; overstuffing will make it sit wrong on the flat runner.
— Nose :
Round 1 :
With bright red, 6 sc in magic ring (6)
Round 3 :
6 dec (6) — or (1 sc, dec) x 2 if more controlled shaping (6). Fasten off leaving long tail. Lightly stuff and sew to center front of muzzle. For a classic Rudolph effect, use a tight, slightly raised stitch to make nose very round.
Info :
Alternatively, crochet a puff stitch circle or surface crochet an embroidered french knot if you prefer a non-stuffed flat nose for table use.
— Eyes :
Round 1 :
Option A: Attach small safety eyes (6mm) through face disc between Rounds 3-4, spaced about 6-8 sts apart depending on desired expression. Option B: Crochet tiny white eye discs: 6 sc in magic ring (6), change to black and embroider a center dot. Sew to face.
Info :
For child-safe versions, embroider the eyes using black yarn or embroidery floss onto the light brown face disc instead of attaching safety eyes.
— Ears (Make 6: 2 per reindeer) :
Round 1 :
With brown, ch 6, sc in 2nd ch from hook and across (5 sc), turn. Ch 1, sc across again to make a short oval, then join into a small round by working sc around the chain edge to create an ear shape. (Work approx 8-10 sts total; see below for worked rounds)
Round 2 :
Work 2 more rows of sc decreasing at the tip by sc2tog once at the end of each row to shape. Fasten off leaving tail for sewing. Pin ears approximately above and to the sides of the face circle and sew securely.
Info :
Ears should be small and slightly folded forward; use a few running stitches along base after sewing to slightly cup the ear for a natural look.
— Antlers (Make 3 pairs) :
Round 1 :
With dark brown, ch 12, sl st in 3rd ch from hook to form a small loop and then hdc back along the chain to create a small curved branch (this counts as one prong).
Round 2 :
At base of chain, ch 8 and repeat a second small branch; secure with sl st to base and finish with a few sc around base to thicken. Make two mirror pieces for a full antler and sew them to the top-back of the head disc.
Info :
Antlers may be worked more robustly by crocheting several rows over a pipe cleaner for poseable antlers, then covering with stitches. For table runner, stick to firm crocheted antlers without wire to avoid sharp ends.
— Christmas Tree Applique (Make 3) :
Round 1 :
With dark green, ch 6, join with sl st to form a small ring. Ch 3 (counts as dc), work 5 dc into ring, join to top of ch-3 (6 dc). (6)
Round 2 :
Ch 3, dc in same st, *ch 1, 2 dc in next dc; rep around to create a small fan of 6 fans; join. (12 dc) This begins the first tier of the triangular tree.
Round 3 :
Ch 1, sc into top of each 2-dc fan space and ch 3 between fans to create small points; rep around to make the first scalloped tier. Fasten off and change to next tier color if desired (same green).
Round 4 :
Join green into a ch-3 space between fans, ch 3, work 5 dc into same ch-3 space to form an extended fan (creates wider second tier), *sk next fan, in next ch-3 space work 6 dc; rep across creating 3 larger fans for the second tier. (Approx 18 dc)
Info :
Each tree consists of three stacked tiers: small top, medium middle, wide bottom. Keep center alignment vertical so when sewn to base the trunk centers in the shell column.
Round 5 :
Ch 1, sc around each fan apex and in spaces between to form a neat edge for sewing. Fasten off leaving tail for sewing. The tree will be layered: bottom tier widest, top tier smallest.
Round 6 :
Trunk: With dark brown, ch 4, turn, sc in 2nd ch and across (3 sc). Work 3 rows of sc increasing 1 sc at base to create slight flare, then fasten off and sew centered under the tree tiers.
Round 7 :
Decorations: With gold, embroider small french knot-like popcorns: make a small 3-d cluster by working ch 2, 3 dc in the same stitch, join and fasten, leaving tiny puffs to appear as ornaments. With red make 4-6 tiny 3-sc puffs (as 3 sc in same st and pull tight) and sew to tree tiers to mimic berries or baubles.
Info :
Use contrasting yarn to sew tiny ornaments into the tree tiers. For more texture create small puff stitch clusters (yarn over 4 times and draw through) placed asymmetrically for a handmade look.
— Small Rosettes and Berries (Make many) :
Round 1 :
With red, 6 sc in magic ring (6)
Round 2 :
*Ch 1, 3 dc in same st, sl st in next st; rep around to create little 3-d flowers. Fasten off leaving tail for sewing. Make 18-24 to scatter across the panel as pictured.
Info :
These little rosettes are lightweight and should be sewn flat but slightly raised on the runner for a decorative effect. Place a rosette in the center of some shell spaces to match photo layout.
— Border Scallop (worked in rounds, multi-color) :
Round 1 :
With cream, join at any corner and work 1 sc in each edge st around the panel to create a strengthened edge. Join with sl st and finish off cream. (This is a preparatory round.)
Round 2 (Green) :
Join forest green into first sc, ch 1, *sc in next 3 sts, ch 2, sk 1 st; rep across to form small picot-like loops along the edge. Join with sl st. This forms a foundation for scallop attachment. Fasten off green if changing colors next round.
Info :
Count the number of loop spaces created. You will work a scallop into each loop space. Adjust loop spacing so there is an even number of scallops across long edges for a balanced look.
Round 3 (Gold)
Join gold in a loop space, ch 1, sc in same loop, ch 2, sc again to make small gold accent at the base of the scallop. Sl st into next loop and repeat across. Fasten off gold.
Round 4 (Multicolor Scallop — worked across entire edge) :
Join red in the first loop space: *(sc, hdc, 3 dc, hdc, sc) all in same loop space (this forms the scallop), sl st into next loop space; rep across long edges. When you reach corners, work an expanded scallop of (sc, hdc, 4-5 dc, hdc, sc) to round the corner. Join with sl st at end of round.
Info :
For a layered look shown in photo, after completing the red scallop round, repeat a smaller green scallop on top of the red scallops by joining green at the apex of each red scallop and working (sl st, sc, sl st) to create a raised green trim. Add tiny gold knots at intervals with yellow yarn.
Round 5 (Final edge tidy) :
Work one final round of slip stitches or sc around to tidy ends and hide tails. Weave all ends through wrong side. Block lightly again to set scallops and appliques.
Info :
When you change colors frequently, leave a tail long enough (approx 6 inches) to weave into the back of the border; this keeps the front neat and prevents tiny loose ends from peeking through.
— Assembly and Placement :
Info :
Before sewing, lay the blocked flat panel on a table and position the three reindeer faces and three trees alternately centered along the length: reindeer at positions 1, 3, 5 and trees at 2, 4, 6 from one end. Use pins to hold each applique in place in the center of a shell motif for perfect symmetry.
Round 1 :
Sew each applique down using mattress or whip stitch along the outermost edge of each applique so that the center stays slightly raised; do not pull tightly or the applique will flatten.
Info :
Sew small rosettes and gold berry knots into selected shell centers and chain spaces between motifs. Scatter them in a balanced way, mirroring both sides of the center axis for a professional look.
Round 2 :
Use small stitches to secure the antlers and ears to the back of the reindeer face disc; anchor into the lacy panel with a couple of sew-through stitches beneath to stabilize the pieces during use.
Info :
For strength, sew through both applique and base panel at every 6-8 stitches. If the runner will be used frequently, add extra anchoring stitches along high-stress points (nose and bottom of trees).
Round 3 :
Weave in all tails securely through the wrong side of the work using a yarn needle; trim close. Optionally, spray-block the completed runner and let dry flat to set scallops and appliques.
Info :
Consider adding a fabric backing to the underside of the runner for extra durability and to protect delicate stitches from friction on the table. Use a matching cream cotton for a tidy look.
This joyful runner blends lacy vintage texture with playful three-dimensional motifs to bring holiday warmth to your table. The layered trees and cheerful reindeer faces make a perfect centerpiece for festive gatherings. I hope you enjoy the process of making each applique and watching them come together like a tiny holiday parade across the table. 🧶✨ Share a photo of your finished runner — it deserves to be shown off! 🎄