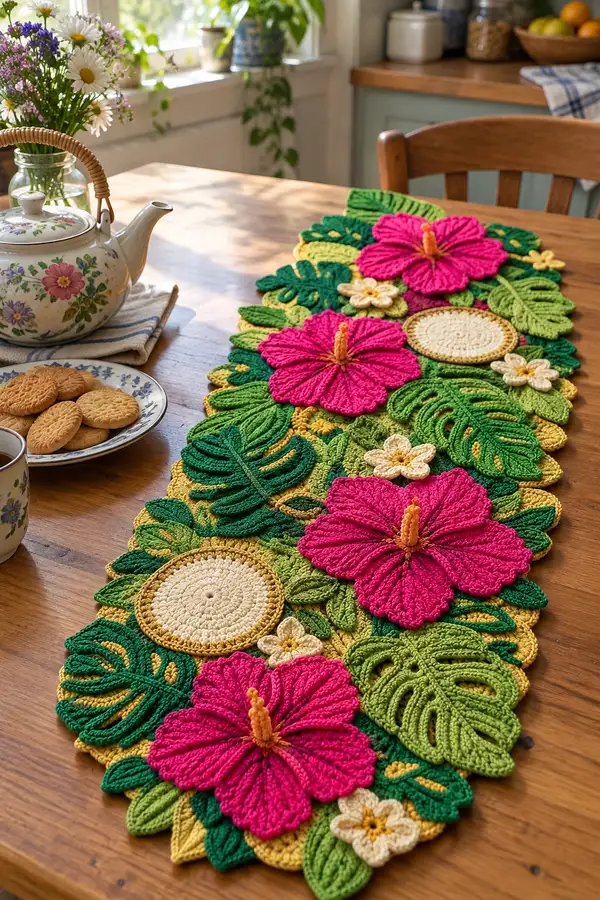
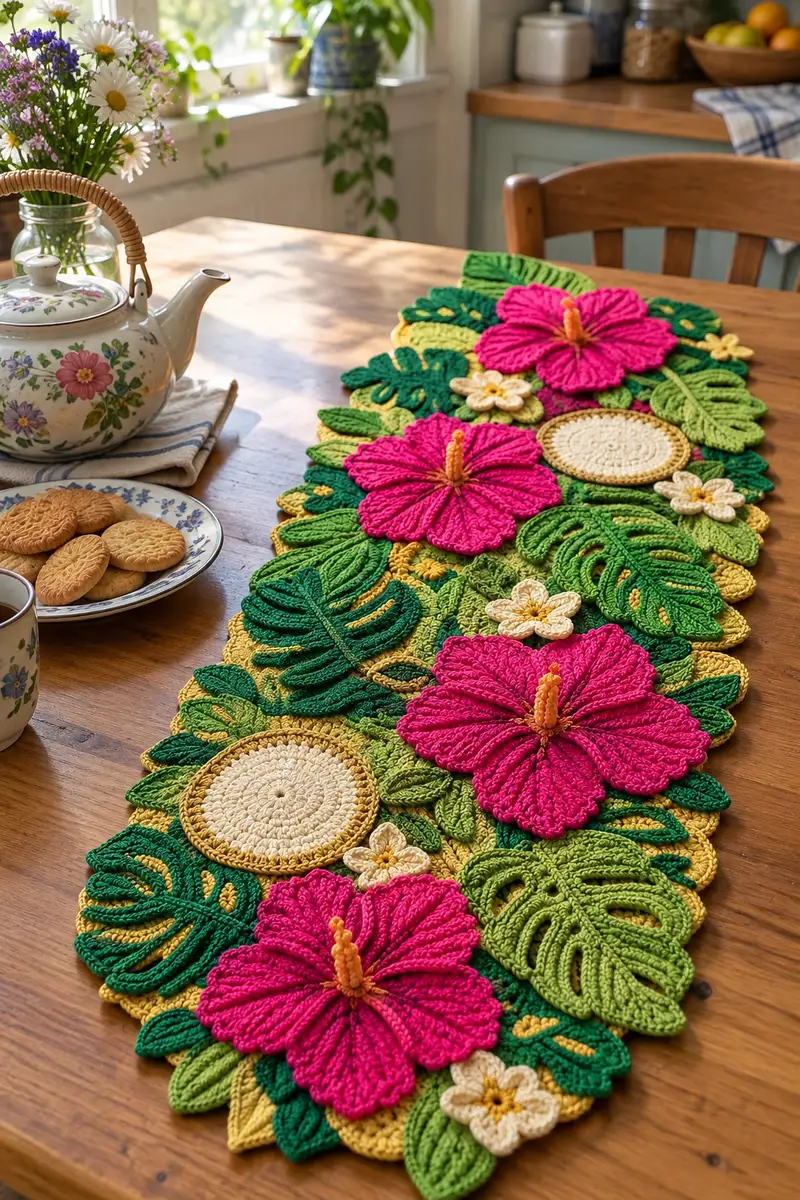
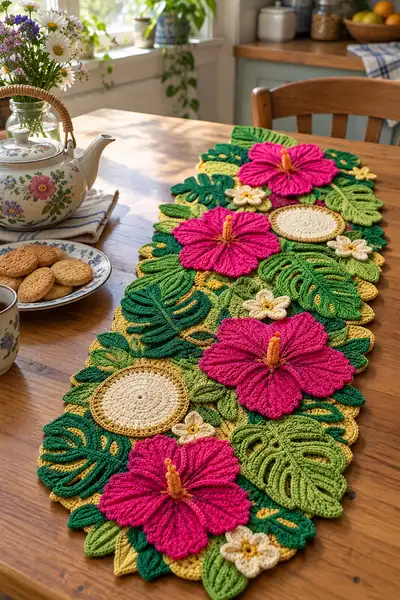
Bright, botanical and full of texture—this tropical hibiscus table runner brings a burst of summer to your table. The design features three large raised hibiscus flowers, layered monstera and elongated leaves, small blossom accents and woven circular discs for contrast. Worked as multiple appliqued motifs and joined into an organic oval runner, it’s perfect for a sunny kitchen or a seasonal centerpiece.
Progress Tracker
0% Complete
— Large Hibiscus Flower (make 3) :
Info :
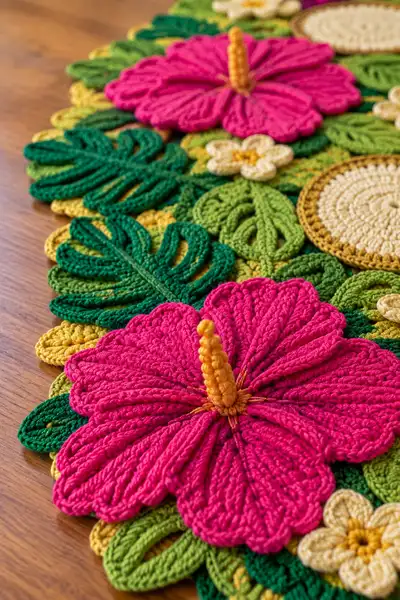
Each large hibiscus is constructed as a small central disc with five individually crocheted petals attached around the edge. Work the center first, mark 5 anchor points evenly, then crochet each petal separately and sew or slip-stitch into place. Yarn: hot pink for petals, golden yellow for stamen.
Round 3 :
(1 sc, 1 inc) x 6 (18)
Round 4 :
(2 sc, 1 inc) x 6 (24)
Round 5 :
(3 sc, 1 inc) x 6 (30)
Round 6 :
1 sc in each st (30)
Info :
Place 5 evenly spaced stitch markers around the final round to mark petal anchor points. To space evenly on 30 sts, place a marker every 6 stitches (6,12,18,24,30). Adjust aesthetically so petals look balanced.
Petal 1 - Round 1 :
Attach hot pink at marker. Ch2 (counts as hdc), 1 hdc in same st, 2 dc, 3 tr, 2 dc, 1 hdc, 1 hdc in next anchor stitch; sl st to next anchor (petal formed) (approx 11 stitches across petal foundation)
Petal 1 - Round 2 :
Turn and work along outer edge: ch2, 2 hdc in first st, (1 hdc, dc) in next 2 sts, (2 dc, tr) in center stitch, (dc, 1 hdc) in next 2 sts, 2 hdc in last st, sl st to base to finish petal (increases create a broad fan)
Petal 1 - Round 3 :
Work texture rows: ch1, sc around outer edge working FLO for each sc to create a ridge. At the top of the petal work 3 fpdc (front post double crochet) down the middle to create a central vein. Sl st to base. Fasten off and weave tail inward.
Info :
Repeat Petal 1 sequence for Petals 2-5 using remaining markers. Work petals in same manner so petals overlap slightly; when attaching later sew a few secure stitches through base and adjacent center stitches to hold petal placement.
Stamen - Round 1 :
With golden yellow, ch6, join ends to make small ring (6) (or mr and 6 sc)
Stamen - Round 2 :
*Ch2, 3 dc in ring, sl st into next loop* repeat 5 times to create small bumps, fasten off leaving long tail (work into center of flower and sew up to create vertical stamen column)
Info :
To make the stamen column raised: use a length of yarn wrapped around a small rolled tube of paper and sew the wrapped roll to the center, then stitch the small bumped pieces around base. Alternatively make a narrow crocheted tube with sc in rounds (ch 6, join, 6 sc in rnds for 6-8 rnds) and insert slightly stuffed core for rigidity.
— Medium Round Disc (make 3) :
Info :
These warm cream discs anchor clusters and add visual contrast. Work in the round completely flat and finish with a narrow raised border in contrasting golden yarn.
Round 3 :
(1 sc, 1 inc) x 6 (18)
Round 4 :
(2 sc, 1 inc) x 6 (24)
Round 5 :
(3 sc, 1 inc) x 6 (30)
Round 6 :
1 sc in each st (30)
Round 7 :
Switch to golden yarn (Info: change color now). 1 sc in each st BLO (30) to create a ridge for the border
Round 8 :
Ch1, *sc2tog, 4 sc* around to slightly flatten edge if desired (24) or leave even (30) depending on desired disc diameter
Info :
Decide whether to make the disc slightly domed by stuffing a tiny amount between rounds 6 and 7 prior to completing the border. If stuffing, add ~1-2g fiberfill then close tightly.
— Small Five-Petal Flower (make 6) :
Round 3 :
Ch4, sl st in next st, (ch4, sl st in next) around to create five loops; sl st to join (5 ch-4 loops)
Round 4 :
Work into each ch-4 loop: (2 sc, 2 dc, 2 sc) in loop, sl st to next loop (petal shell) repeat x5, fasten off and weave ends
Info :
For a more dimensional look, lightly press the petals toward the center and tack a small knot of yellow yarn in the center with a few embroidered French knots to mimic stamen.
— Monstera Large Leaf (make 6) :
Info :
Large monstera leaves are worked as a central spine with mirrored lobes worked in rows out from the spine; use darker green yarn for deep leaves and lighter green for contrast. Each leaf is worked flat as a half-circle elongated shape with cut-out slits created by skipped stitches and chains.
Round 1 :
Ch12, sc in 2nd ch from hook and each across to end (11 sc), continue down opposite side of chain and 1 sc in first chain to create a small oval base (22)
Round 2 :
Ch2, hdc in same st, 3 hdc across, (hdc, ch3, skip 2, hdc) to create first slit, continue to end, join (26) (approx)
Round 3 :
Ch2, 1 hdc in each st BLO to create a raised ridge down the center spine (26)
Round 4 :
Work shaping: along outer edge 1 sc in each st, at each slit area work 3 dc into the ch-3 space to create a pronounced lobe. Fasten off outer edge and switch to lighter green for leaf veins if desired.
Info :
Alternate leaves: for a more sculptural ridge, work 3-4 rows of bpdc (back post double crochet) along the central spine to form a raised midrib before finishing the outer lobes.
Round 5 :
Edging: sl st around outer edge, working 3 sc into each wide lobe and 1 sc in tighter areas for smooth finish. Fasten off and weave ends.
— Monstera Small Leaf (make 8) :
Round 1 :
Ch10, sc across (9), sc along opposite side (18)
Round 2 :
Ch2, hdc in each st BLO (18)
Round 3 :
Mark mid-stitch for central spine, use fpdc along midline for 2 rows to raise midrib, then sl st to finish (18)
Round 4 :
Work three ch-3 slits: *ch3, skip 3 sts, sl st into next* spaced evenly down the leaf to create characteristic cuts; finish edge with sc to neaten
Info :
Small leaves tuck under larger motifs and are great for filling gaps. Work some in BLO to create subtle ridges that catch light after blocking.
— Elongated Ribbed Leaf (make 12) :
Round 1 :
Ch18, sc in 2nd ch from hook across (17), sc back along opposite side (34)
Round 2 :
Ch2, hdc in each st BLO (34)
Round 3 :
Work 3 rows of fpdc alternating with bpdc down the center 6 stitches to form a raised rib; edges 1 sc each st to finish
Round 4 :
Optional edging: 1 sc in each st around to neaten. Fasten off and weave ends.
Info :
Varying the hook by one size when making these leaves will give different drape—use a slightly smaller hook for crisp, sculpted leaves.
— Textured Oval Background Base (make 2) :
Info :
Each runner side is built upon two elongated oval base mats that will be overlapped and joined with motifs. These bases are worked flat in joined rounds to create an even mat about 36-40 cm long and 16-18 cm wide; final runner is created by joining two bases end-to-end and adding motifs across the seam for a continuous organic shape.
Round 1 :
Ch36, sc in 2nd ch from hook and across (35), turn and sc back across opposite side to create an oval foundation (70)
Round 2 :
Ch2, hdc in each st around (70)
Round 3 :
Ch2, *hdc 8, inc* repeat around to gently widen (approx 77) adjust to maintain oval symmetry
Round 4-6 :
1 hdc in each st around to create consistent surface (77)
Info :
Work rounds 3-6 and try the oval on your table for desired width. Increase or leave even to adjust size. These bases remain mostly hidden beneath motifs but provide stability for sewing down appliques.
Round 7 :
Switch to BLO for last round to create an edge ridge: 1 sc in each st BLO (77)
Info :
Make two of these and block them slightly elongated; overlap them slightly when assembling to create smooth center joining for the runner.
— Small Accent Leaves and Fillers (make many) :
Round 1 :
Ch6, sc in 2nd ch from hook across (5), sc back along opposite side (10)
Round 2 :
Ch2, hdc in each st BLO (10)
Round 3 :
Work a row of fpdc down center 2-3 sts to create tiny rib. Fasten off (10)
Info :
These tiny leaves fill small gaps and can be worked quickly. Make a mixture in both greens and scatter throughout composition.
— Hibiscus Petal Variation: Ribbed Petal (make alternate petals as desired) :
Round 1 :
Attach at marker on center disc, ch2, 1 hdc, 1 dc, 1 tr, 1 dc, 1 hdc, sl st back at base (simple narrow petal)
Round 2 :
Work 2 rows of FLO sc across outer edge to create visible ribbing and fold petal slightly inward as you finish to create natural curl
Info :
Alternate narrow and wide petals around a flower to create a more organic, less symmetrical bloom—this is a stylistic choice visible in many botanical compositions.
— Assembly & Joining Motifs :
Info :
Layout is key: block all motifs lightly first. Arrange two oval base mats overlapped into a continuous long oval. Place three large hibiscus along the center line spaced evenly (top, middle, bottom). Fill around with large and small monstera leaves, elongated leaves and discs. Use pins to hold pieces in place while sewing.
Round 1 :
Sew the two oval base mats together where they overlap using whip stitch with yarn matching the base, creating a smooth seam. Secure ends and weave tails.
Round 2 :
Position central large hibiscus: sew each petal base to the base mat through the disc edge with small whip stitches. Sew through center disc onto the base so center is secure.
Round 3 :
Sew medium discs into place next to the flowers to create visual anchors. Use ladder stitch through the disc edge and into the base, pulling stitches tight to flatten edges for a smooth join.
Round 4 :
Layer large and small leaves around motifs. Use a mix of ladder, whip and mattress stitches so seams are invisible from the top—tack at 8-12 points around each larger leaf to prevent lifting.
Info :
When sewing, use a slightly shorter length of yarn than usual so you can keep tension consistent and avoid a bulky seam. Pin and stitch one motif fully before moving to adjacent pieces to ensure stable placement.
Round 5 :
Embroider subtle veins and shadowing: with a strand of darker green, tack a few surface slip stitches along leaf midribs and around disc edges for definition.
Round 6 :
Make stamen columns for each large flower and secure center: sew a narrow tube upright in each center and tack at base for support. If desired, use a short length of toothpick wrapped in yarn inside tube to keep it upright (optional).
Info :
Check the runner for any gaps—fill with small flowers and tiny leaves. For very small gaps use a few woven surface sl sts over the base to create texture rather than filling with separate appliques.
— Final Finishing Touches :
Round 1 :
Edge finishing: work 1 round of sc around entire runner edge through both base and motif edges where needed to unify the silhouette. Use a matching green or the base color for a subtle finish.
Round 2 :
If desired, work a decorative sc, ch1 picot edging in golden yarn across select outer lobes to add small golden highlights (optional).
Info :
Block the entire assembled runner flat—pin edges gently to an oval shape and use a steam iron at safe distance or a wet-block method. Let dry fully before final trimming of ends.
Round 3 :
Weave in all ends and secure any loose stitches with small invisible overcast stitches from the back. Trim excess yarn.
Info :
Store runner flat or carefully rolled to avoid creasing the petals; use a protective cloth when placing heavy objects on top to preserve raised textures.
This tropical hibiscus table runner is a joyful crochet project that brings color, texture and a sunny mood to any table. Each appliqued motif is a small sculptural piece — together they form a lush, botanical centerpiece that’s as fun to make as it is to admire. I hope this pattern helps you bring bright blooms into your home and gives you many happy hours of crocheting. 🌺🧶