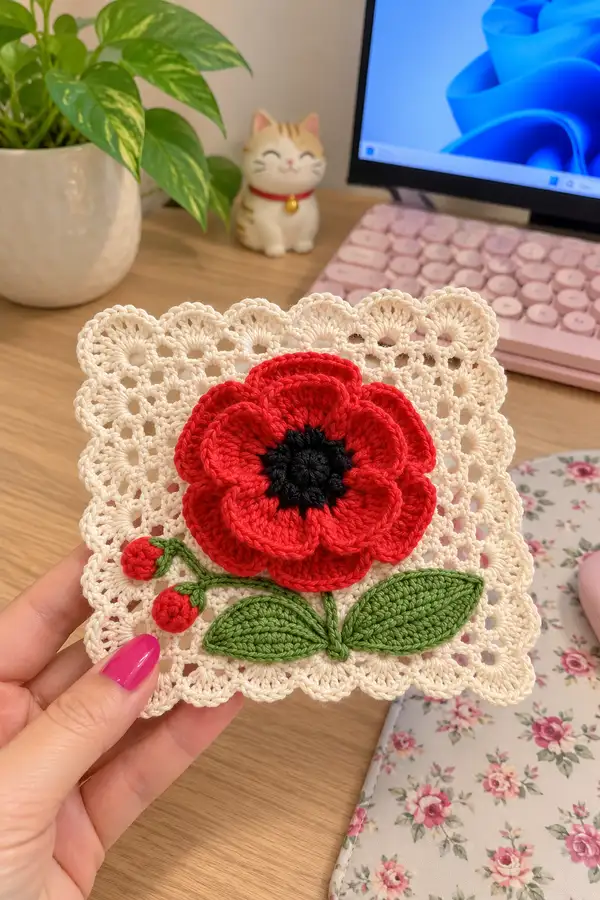
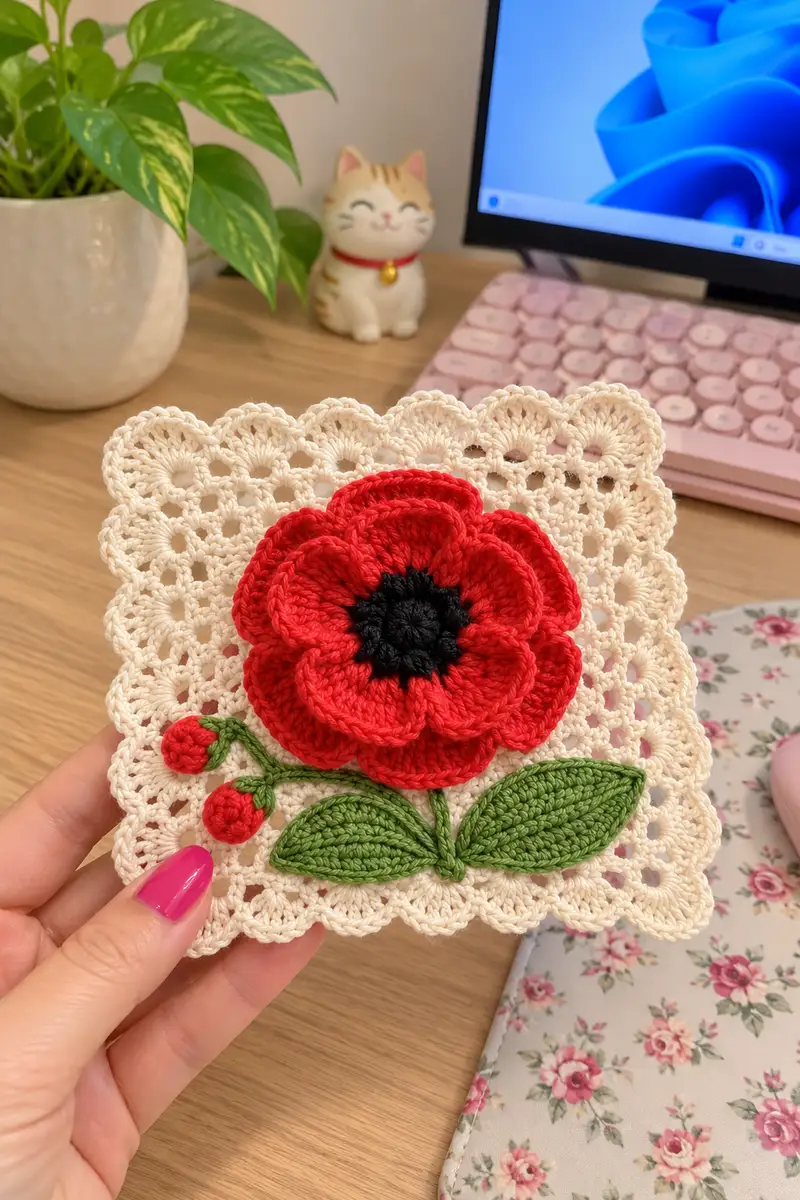
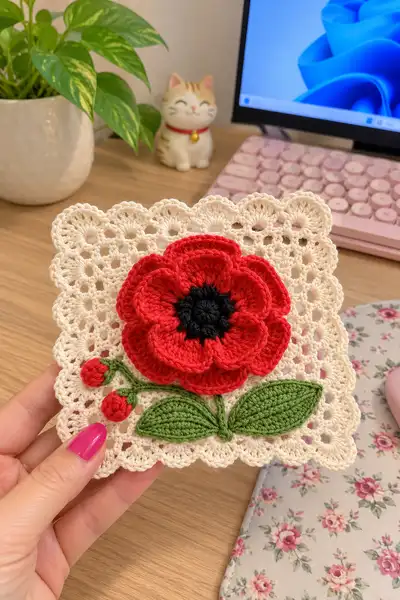
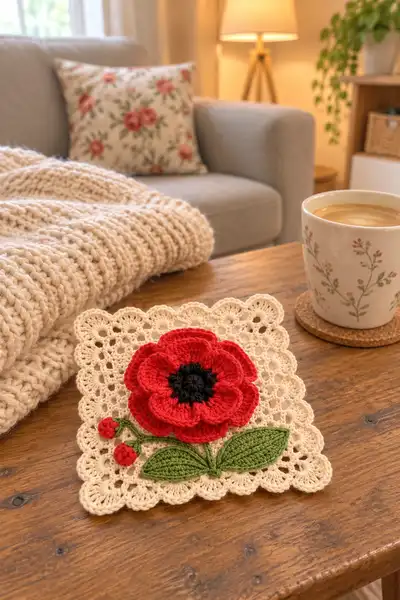
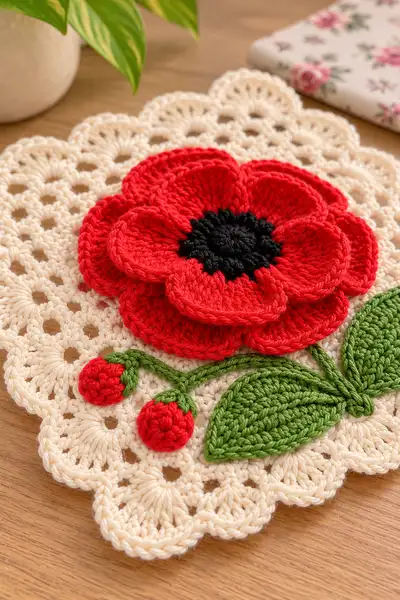
Create a romantic, vintage-inspired floral granny square bedspread made from delicate lacy squares with layered 3D poppy appliques. Each square features a scalloped lace background, a multi-layer red poppy with a black center, sculpted green leaves and tiny berry buds. Designed to be joined into a bedspread and matched with pillow shams, this pattern focuses on crochet texture, layering and assembly for a beautiful heirloom piece.
Progress Tracker
0% Complete
— Overview :
Info :
This pattern is written for worsted weight cotton yarn using a 3.5mm hook to create a firm, lacy square that blocks to approximately 5.5" (14cm) per finished scalloped square. Adjust hook size for your yarn to match gauge. Each decorated square is assembled and sewn into a larger bedspread. Make as many squares as desired: for a twin bedspread plan approx. 30-40 squares, for full/queen 50-80 squares depending on layout. We will make: lacy scalloped square base, poppy center (black), inner petal layer (5–6 petals), outer petal layer (6–8 overlapping petals), two sculpted leaves, two berry buds and a flexible stem. Use blocking heavily to square up motifs before assembly.
— Lacy Scalloped Square Background (Make many) :
Round 1 :
Make magic ring, ch3 (counts as dc), 11 dc into ring. Pull tight and sl st to top of ch3. (12 dc)
Round 2 :
Ch3, 1 dc in same st, 2 dc in each dc around. Sl st to top of ch3. (24 dc)
Round 3 :
Ch3, dc in next st, (2 dc in next st, dc in next st) x 8. Sl st to top of ch3. (36 dc)
Round 4 :
Ch3, dc in next 2 sts, (2 dc in next st, dc in next 2 sts) x 8. Sl st to top of ch3. (48 dc)
Round 5 :
Ch3, dc in next 3 sts, (2 dc in next st, dc in next 3 sts) x 8. Sl st to top of ch3. (60 dc)
Info :
These rounds create a circular expansion. Keep tension even; these early rounds set the foundation for lacy shells. Place a stitch marker at the first dc of each round to mark round start.
Round 6 :
Ch3, dc in next 4 sts, (2 dc in next st, dc in next 4 sts) x 8. Sl st to top of ch3. (72 dc)
Round 7 :
Ch3, dc in next 5 sts, (2 dc in next st, dc in next 5 sts) x 8. Sl st to top of ch3. (84 dc)
Round 8 :
Ch1, sc in same st and in next 2 sts, *ch4, skip 3 dc, sc in next 3 dc; rep from * around creating chain loops. Sl st to first sc. (Creating 12 ch-4 loops)
Info :
These ch-4 loops will form the basis for the lacy shell rows. If your fabric seems tight, omit one ch between loops to relax; you will re-shape when blocking.
Round 9 :
Sl st into first ch-4 loop, ch3 (counts as dc), 11 dc into same loop, sl st into next ch-4 loop, *(ch1, sl st into next loop, ch1, 12 dc into following loop) repeat from * around; sl st to top of ch3. (12 groups of 12 dc)
Round 10 :
Ch1, sc in first dc and next 3 dc, *(ch5, skip 8 dc, sc in next 4 dc) repeat from * around to create ch-5 loops. Sl st to first sc. (12 ch-5 loops)
Round 11 :
Sl st into first ch-5 loop, ch3, 14 dc into same loop, sl st into next ch-5 loop; *ch1, sl st into next loop, ch1, 15 dc into following loop; rep from * around. (12 groups of 15 dc)
Info :
If you'd like a slightly larger lace hole, make ch6 loops in Round 10 and add one more dc in Round 11 groups. Keep counts consistent across squares for even joining later.
Round 12 :
Ch1, sc in first dc and next 4 dc, *(ch6, skip 9 dc, sc in next 5 dc) repeat from * around creating ch-6 loops. Sl st to first sc. (12 ch-6 loops)
Round 13 :
Sl st into first ch-6 loop, ch3, 18 dc into same loop, sl st into next ch-6 loop; *ch1, sl st into next loop, ch1, 19 dc into following loop; rep from * around. (12 groups of 19 dc)
Round 14 :
Ch1, sc in next 6 dc, *[sc, ch3, sc] into space between groups to create corners, sc in next 6 dc; rep from * around to form four corner points. Sl st to first sc. (Maintain 12 corner anchors)
Info :
At this point your round motif is beginning to show scallops. We will now change to shell edging to emphasize scallops and produce a square when blocked — blocking will be a crucial step to square the motif rather than forcing exact square shaping in stitch math.
Round 15 :
Ch1, sc evenly around placing 3 sc into each shell group from Round 13 and 5 sc into corner ch-3 spaces for stability. Sl st to first sc. (Count will vary by density but keep 12 shell groups with 3 sc each plus 4 corner groups with 5 sc)
Round 16 :
Ch3, *7 dc in first shell (worked into the same space as the sc groups), sl st into next shell space; rep from * around creating pronounced scallops. At four corner intervals, work (7 dc, ch3, 7 dc) into corner to emphasize corner bulge. Sl st to top of ch3.
Info :
This scalloped round creates the delicate 'doily' edge seen in the photos. Block each finished square heavily: pin out into an approx. 5.5" square, stretching scallops equally to make sides straight. Steam or wet block and allow to dry fully before assembly.
Round 17 :
Optional: For a slightly firmer edge, ch1 and sc around working 2 sc in each dc across scallops and sc in ch-3 corner spaces. Sl st to first sc. (Edge reinforcement)
Info :
Make as many background squares as required. For a sample single square to decorate, continue to petal and leaf sections. For a bedspread, plan layout before making appliques to ensure even flower placement across squares.
— Poppy Center (Make one per flower) :
Round 1 :
With black, mr, ch1, 6 sc into ring. Pull tight and sl st to first sc. (6)
Round 2 :
Ch1, inc in each st around (12). Sl st to first sc.
Round 3 :
Ch1, (sc in next st, inc) x6 (18). Sl st to first sc.
Round 4 :
Ch1, sc in each st (18). Sl st to first sc. (Creates a dense flat center)
Info :
After Round 4 finish off and leave a long tail for sewing the center to the first petal round. Optionally, add a small dab of textile glue under the center when sewing for extra stability so the poppy center keeps its gathered look.
— Inner Petal Layer (Make 5-6 petals and attach to center) :
Info :
These petals are worked individually and sewn around the black center. The petals are slightly cupped. Make 6 petals for a full look; if you prefer a 5-petal arrangement, space evenly. Work petals with red yarn with a 3.0mm hook for slightly firmer petals.
Petal (Make 6) — Round 1 :
Ch6, sc in 2nd ch from hook, hdc in next, dc in next, tr in next, ch1, sl st to base of ch6 forming a teardrop petal shape. (Work across chains: sc, hdc, dc, tr)
Petal — Round 2 :
Turn and work along opposite side of foundation ch: sl st into first st, ch2, 2 hdc into same st, 2 dc in next, 3 tr in center, 2 dc in next, 2 hdc in next, ch1, sl st to base. Fasten off leaving long tail for sewing. (Creates a fuller petal; counts vary by stitch type)
Info :
Make 6 petals and pin evenly around the black center. To space them, place the center on top of the lacy square where you'd like the flower, then use pins to mark petal placement. The petals should overlap slightly to create a layered look.
Petal Attachment — Round 3 :
Using long tail and mattress stitch, sew base of each petal around the poppy center, shaping petals gently upward so they cup. Sew each petal base to the lacy square background through the ch-6 loops to anchor petal edges. Weave tail into back and knot securely.
Info :
Sew petals so there is slight lift from background; place stuffing or a small rolled felt wedge if you want an exaggerated cupped look. For neat applique, use matching thread color and small invisible whip stitches along the petal base.
— Outer Petal Layer (Make 6-8 larger petals) :
Info :
The outer petals are larger and overlap the inner petal layer. Make 6 large petals for a traditional poppy look or 8 for a fuller rosette. These are worked as elongated petals with more rows to give dimension.
Outer Petal — Round 1 :
With red, ch9, sc in 2nd ch from hook, hdc in next, dc in next 3, tr in next 3, ch1, sl st to base. (Foundation creates long teardrop)
Outer Petal — Round 2 :
Turn and work returning along opposite side: sl st, ch2, 2 hdc in first st, 3 dc in center area, 4 tr over top curve (worked tightly to cup), 3 dc on return edge, slip st, ch1 and fasten off leaving long tail. (Petal is fuller and strongly arched)
Outer Petal — Round 3 :
Block each petal over a curved surface (like a small jar) to set curve if desired: dampen petal, pin around curve and let dry. This encourages the petal to cup outward for the layered look. Repeat for all outer petals.
Info :
Pin outer petals slightly overlapping inner petals, offset so they sit between inner petal seams. Sew the petal bases to the lacy square and anchoring into the round groups of dc in Round 11–13 of the square for secure placement. Use the black center as an anchor point and sew through center and each petal base for stability.
— Poppy Assembly (Center + Inner + Outer) :
Round 1 :
Place black center on square where desired. Pin six inner petals in a circular arrangement around center, leaving small gaps for the outer petals. Sew inner petals first using the long tails from each petal with neat mattress stitches through the square edge and the poppy center. Fasten off tails and weave in securely.
Info :
Attach outer petals by pinning them to overlap inner petals slightly; sew their bases securely through the background and into the black center where possible. Sew small tacking stitches along petal sides into the background to keep them lifting. If you want a very three-dimensional bloom, add a couple of tiny running stitches into the petal midrib then pull lightly to form gentle folds.
— Sculpted Leaves (Make 2 per flower) :
Leaf — Round 1 :
With green and 3.0mm hook, ch12, sc in 2nd ch from hook, hdc in next, dc in next 3, hdc in next, sc in next 2, sl st in next to form one side of leaf. Turn and work along opposite side: sl st, sc in next 2, hdc in next, dc in next 3, hdc in next, sc in last 2, sl st to base. Fasten off leaving long tail for sewing. (Creates a pointed oval leaf, approx. 6-7cm long depending on tension)
Leaf — Round 2 :
With same green, using long tail, sew leaf veins by working surface slip stitches from base to tip on both sides: insert needle under top loop and make 3-4 even surface sl st lines to create a raised vein texture. Do not over tighten; the surface slip stitch should sit lightly on the leaf surface.
Info :
Pin leaves to the square with their bases meeting under the poppy; angle leaves so they flow naturally from the stem. Sew only at the base and inner vein line for a natural lifted look at the leaf edges.
— Stem & Berry Buds (Make stems and 2 buds per flower) :
Stem :
With green, ch30 (or desired length), sl st in 2nd ch from hook and each ch back to create a cord stem (or use chain-stitched i-cord: ch 50, using tapestry needle weave chain to form cord). Leave long tail for positioning and sewing. Tuck the cord under the poppy and sew into place with small stitches through the square background only, not through petal bases, to allow petals to remain 3D.
Berry Bud (Make 2) :
With red, mr, ch1, 6 sc into ring; pull tight (6). Round 2: inc in each st (12). Round 3: (sc, inc) x6 (18). Fasten off leaving tail. Optional: embroider a tiny highlight with a lighter red. Sew buds to ends of short green stems (ch6) which you sl st along, then sew the green stem onto background near main stem.
Info :
Position buds slightly downward as in the photo; sew stems so small buds dangle just above the leaf edge. Use thin pins to hold stems and buds while stitching secure tails on the wrong side.
— Decorative Surface Stitches and Finishing Touches :
Round 1 :
Using green, work three short surface sl st veins from the leaf base toward mid-leaf, securing each with tiny knots on the back side. Using black, add a circle of tiny french knots embroidered around the black center to accent the seed cluster (or use small tightly worked sl st clusters).
Info :
Be conservative with surface embroidery — the floral shapes already have strong dimensionality. Keep the back of appliques neat to avoid lumps when joining squares.
— Joining Squares (Make assembly plan) :
Round 1 :
Layout all blocked squares face up according to your bedspread plan. For a twin bed, plan 5 across by 6 down (30 squares) or adjust to fit your mattress. Ensure flowers fall in pleasing pattern and edges align at scallops.
Round 2 :
Join squares using reverse single crochet (crab stitch) or slip stitch join for decorative join: With main cream color, place two squares right sides together and work sl st through both loops along one edge through the shell anchors — join one side between adjacent squares. Repeat to join all horizontally into rows, then join rows vertically. For stronger bedspread, use whip stitch with matching yarn and mattress stitch to make joins invisible on the right side.
Info :
If you prefer visible join lines, work a contrasting color join using chain-1 loops between scallops then work crab stitch around join for a rope-like seam. Test join style on sample squares first to ensure desired look and elasticity.
Round 3 :
Once all squares are joined into the bedspread panel, crochet a 1-round border to tidy the joins: sc in each exposed edge stitch around the entire cover, working 3 sc into each scallop curve and 5 sc into each corner. Join with sl st and fasten off.
Round 4 :
Work a lace finishing border: ch3, *skip 1 sc, (5 dc in next sc), skip 1 sc, ch3, sl st into next sc; rep around to create scalloped shell border. Adjust shell size to match scallop rhythm from motif edges. Sl st to close and weave ends. Block entire bedspread again if possible to flatten joins and set border.
Info :
When joining many squares, keep your tension loose enough to avoid bunching but tight enough that the join hides the back seams. Use consistent lighting and layout on the floor to ensure even alignment before sewing.
— Pillow Shams (Make 2 matching) :
Round 1 :
Make 4–6 squares per sham (depending on desired size). Block and appliqué poppies as for the bedspread. Join squares into a front panel and make a simple back panel of matching size with plain stitches (e.g., 10 rounds of dc around a starting circle then squaring technique) or use fabric backing for extra comfort.
Round 2 :
Join front and back panels with sc around, leaving a 2" gap for inserting pillow form, then sc around gap to close after inserting form. Optionally add zipper or envelope closure for convenience.
Info :
Pillow shams look beautiful with one centered poppy per sham. Match positions with main bedspread theme for a coordinated look. Consider adding an additional paste-on lace edging for a framed effect.
— Larger Border & Final Edge for Bedspread :
Round 1 :
After all squares joined, work shell rounds to create a wide decorative border: With cream, ch1, sc around entire edge placing 2 sc between outer scallops, 4 sc in corners for structure. Sl st to join.
Round 2 :
Ch3, *skip next sc, 7 dc in next sc, skip next sc, ch3, sl st into next sc; rep around forming large shell scallops. Work 3 shells into each corner and adjust shell numbers so border lays flat. Sl st and fasten off.
Round 3 :
Work final decorative picot edge for polish: join contrasting cream-on-cream with ch3, sc in shell top, *ch3, sc in next shell top; rep around. Block entire spread and steam lightly to set border. Weave all tails to the wrong side and trim close.
Info :
Large bedspreads can be heavy; consider lining with a thin cotton fabric to protect underside from friction and to keep the spread from stretching after washing. Hand wash cold and flat dry when possible.
— Final Finishing and Care :
Info :
Weave in all ends at least 2–3 inches into the work and trim. Consider lightly starching or using fabric stiffener on petal undersides if you prefer crisper petals. For daily use, gentle machine wash in a delicates bag on cold and tumble low or line dry flat. Re-block to maintain scalloped edges.
This floral granny square bedspread pattern brings classic crochet lace together with bold, layered floral appliques to create a stunning heirloom for your home. Each scalloped square becomes a tiny doily topped with a sculptural poppy, and the repeated motif transforms into a breathtaking bedcover. I love how the strong red flowers contrast with the soft cream lace — it feels both vintage and modern. 🧶 Spread warmth and handmade charm across your bed and enjoy the slow, satisfying process of stitching every square. 🌸