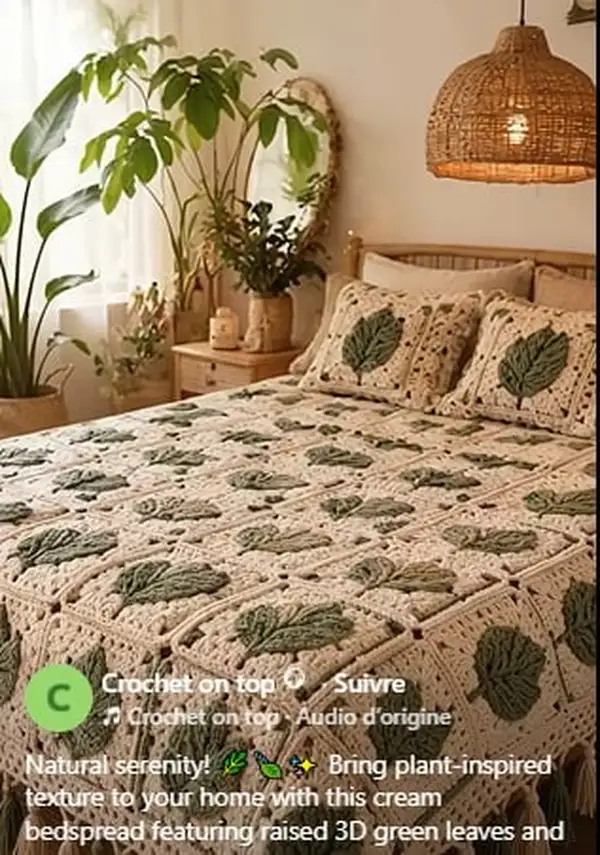
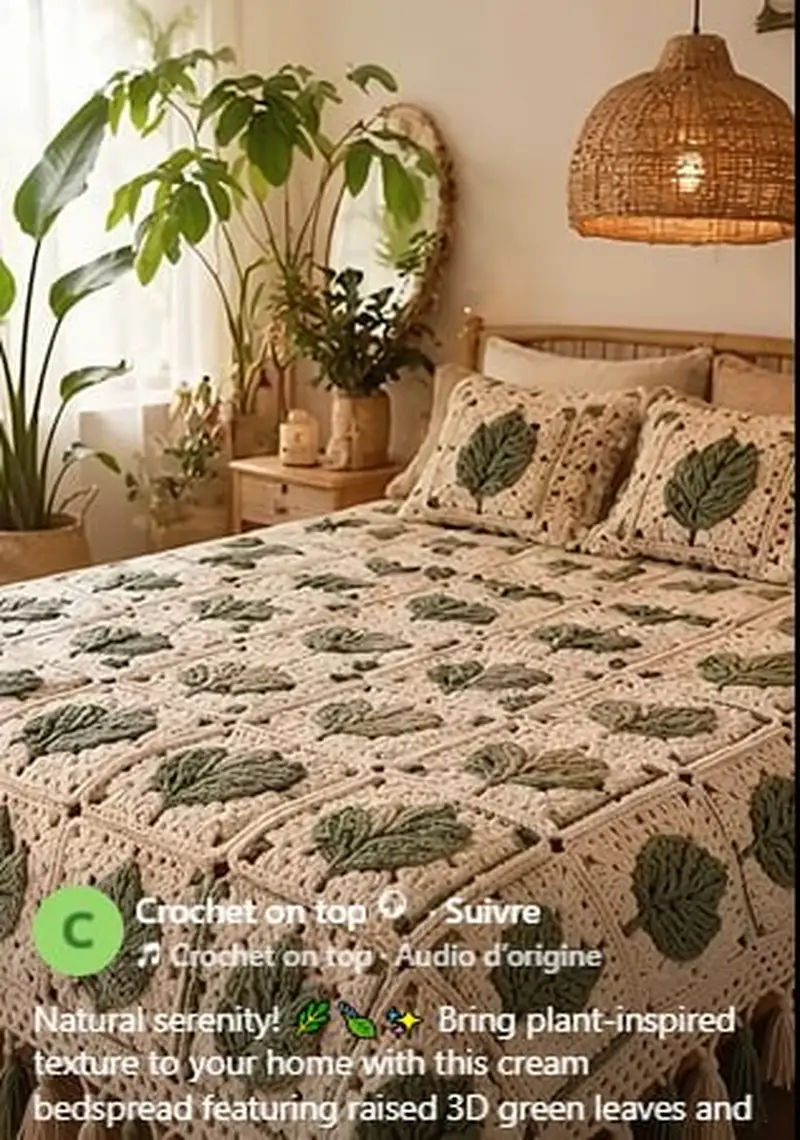
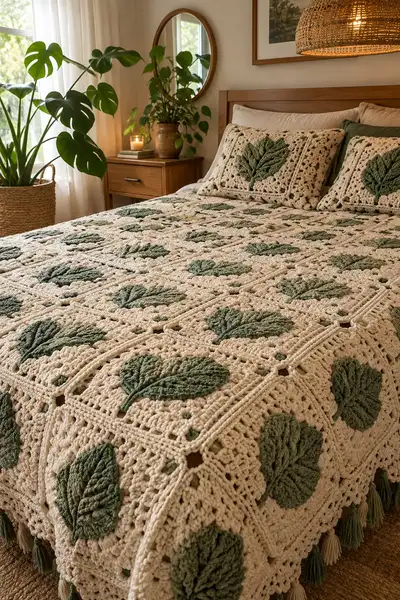
Bring plant-inspired texture to your bedroom with this warm cream bedspread featuring raised 3D green leaves set into lacy square motifs. The pattern uses chunky/aran weight yarn and simple textured stitches to create dramatic, tactile leaves framed with airy granny-style squares and a decorative tassel edge. Modular construction makes the project approachable in sections and perfect for a treasured heirloom piece.
Progress Tracker
0% Complete
— Overview :
Info :
This pattern is modular: make 'leaf squares' (leaf mounted on a framed square), block them to consistent size, then join to form the bedspread. The pattern below gives detailed step-by-step instructions for the leaf motif itself (worked flat), the square frame (worked in rounds), joining technique to assemble multiple squares, a layered outer border, and tassel finishing. Gauge and measurements are provided as guidance; adjust number of squares to fit your bed size.
Info :
Suggested finished quare size (unblocked): approx 12.5" / 31.5 cm square. The pictured bedspread uses a 6 x 8 layout (48 squares) for a queen size; adjust number of squares for your desired bed size. Use blocking to align squares before joining. For crisp raised leaves, work leaves with slightly smaller hook (5.5mm) then continue square with 6.5mm hook.
— Leaf Motif (make 1 leaf per square) :
Info :
Leaf is worked flat as a long teardrop shape: a central ridge with textured ribs formed by front post stitches and short clusters. Work leaves in green yarn. You may use two green shades: a lighter main and a darker for subtle veins. Use tighter tension for leaf to make it hold shape on the square.
Round 1 :
Ch 22. (This counts as foundation chain for the leaf center spine; adjust chain length for a larger leaf.)
Round 2 :
1 sc in 2nd ch from hook and in each ch across to last ch; 3 sc in last ch (turn to work down the other side of chain) then sc across back along opposite side excluding the initial turning ch, total stitches across both sides: 42 sts. (42)
Info :
You have worked a round around the chain to create an oval foundation. Place a stitch marker in the first sc to mark the start of each 'row' as we proceed. Work flat back-and-forth rows but count them as rounds here for consistency.
Round 3 :
Ch 1, 1 sc in same st, 1 sc in next 4 sts, inc (2 sc in next st), 1 sc in next 6 sts, inc, 1 sc in next 6 sts, inc, 1 sc in next 4 sts, 2 sc in final 1 st (creating symmetric increases at tip); turn. (48)
Round 4 :
Ch 1, 1 sc in each st across the row (48). On this pass, maintain a firm, even tension to avoid flaring. (48)
Round 5 :
Ch 2 (counts as hdc), hdc in next 2 sts, (hdc, fpdc around next st, hdc) in next stitch to create a raised rib sequence across the center; continue pattern inserting fpdc every 4th stitch along center row to build a central raised ridge. Finish hdc across to end. (48)
Info :
Front post double crochet (fpdc) creates a raised ridge (vein) down the center of the leaf. Work fpdc by yarn over, insert hook from front to back around the post of the stitch indicated, yarn over, pull up a loop, complete the dc as normal.
Round 6 :
Ch 1, sc in next 3 sts, (sc, inc, sc) around each increase zone across the widest center to begin shaping leaf lobes symmetrically. Place 2 sc in each increase point to keep the rib pattern centered. (52)
Round 7 :
Ch 2, hdc in each st across, working fpdc in the central spine stitches (5 fpdc spaced across center), hdc to end. (52)
Round 8 :
Ch 1, sc in next 4 sts, (2 sc, inc) in next, sc across side, mirror on the return to preserve tapered shape; continue symmetric increases on both sides to widen midsection slightly for natural leaf belly. (56)
Round 9 :
Ch 2, work (hdc, fpdc, hdc) across the central spine stitches (7 fpdc now), hdc across remainder. The fpdc ribs should form clearly visible raised lines. (56)
Round 10 :
Ch 1, sc in each st for 2 rows to firm up base. (56)
Info :
At this point check symmetry of the leaf: lay it flat and compare both sides. Use a hook one size smaller for a few rounds if edges look loose; you want the leaf to be slightly raised when placed on the square.
Round 11 :
Ch 1, sc in next 3 sts, dec (sc2tog) at outer edge to begin tapering toward the tip, sc across middle, dec on opposite outer edge, sc to end. (52)
Round 12 :
Ch 2, hdc across, working fpdc across center ribs (maintain number of ribs; reduce spacing slightly as stitches decrease). (52)
Round 13 :
Ch 1, sc across same count, maintaining even edges. (52)
Round 14 :
Ch 1, sc across with dec at 4 equally spaced points to continue tapering the tip: (sc2, dec) x 4 across each half. (44)
Round 15 :
Ch 2, hdc across including fpdc ribs reduced to 5 ribs, hdc remaining. (44)
Round 16 :
Ch 1, sc across, check shape. If you prefer a more pronounced mid-rib, add a slip-stitch ridge along the center now. (44)
Info :
Optional: embroider small vein details with darker green using duplicate stitch now while leaf is flat. This adds realism without adding bulk.
Round 17 :
Ch 1, sc across with dec every 6th stitch across the outer edges to begin forming the tip. (40)
Round 18 :
Ch 2, hdc across, maintaining fpdc ribs where possible. (40)
Round 19 :
Ch 1, sc across, dec at both outermost stitches. (36)
Round 20 :
Ch 1, sc across for two rows to close off tip area and create a clean finish. (36)
Round 21 :
Working around entire leaf edge, sc evenly around to create a neat edge for attachment: work 1 sc in every st around, placing 3 sc at the base (where leaf connects to stem) to create a rounded base. (approx 80 sc around - exact count will vary based on tension and hook)
Info :
Leave a long tail (approx 30-40 cm) at the base for sewing the leaf to the square. Optionally stuff a tiny amount of fiberfill into the underside of the leaf base to help it sit raised; do not overstuff or the leaf will pucker.
Round 22 :
Optional: Use darker green to surface-slip-stitch veins across leaf: join yarn at base, ch1, work sl st lines radiating from center rib on both halves to suggest smaller veins. Fasten off and weave ends. (no stitch count)
Info :
Blocking the leaf flat or very gently domed will help the ribbed stitches open up and look more like a natural leaf. Use steam/spot blocking to set shape if desired.
— Square Frame (make 1 square per leaf) :
Info :
Each leaf is mounted to a framed square consisting of a textured center ring and four lacy corner shells. The square is worked in rounds from center out in cream yarn. The finished square should measure approximately 12.5" (31.5 cm) after blocking.
Round 1 :
With cream yarn, make a magic ring. R1: 8 dc into magic ring. Sl st to join. (8)
Round 2 :
Ch 3 (counts as dc), 1 dc in same st, 2 dc in each st around (increase in every st) to create a robust center disc. Join with sl st to top of ch3. (16)
Round 3 :
Ch 3, dc in next st, (dc, inc) x 8 evenly spaced to form (24). Join. (24)
Round 4 :
Ch 1, sc evenly around disc in BLO to create a defined ridge for leaf attachment: 1 sc in each st BLO. (24)
Round 5 :
Ch 1, 1 sc in same st, 3 ch, sk 1 st, sc in next, *3 ch, sk 1, sc in next; rep from * around to make an open lacy ring. Join with sl st. (24 sc, 24 ch-3 spaces)
Info :
This lacy ring will be the window where the leaf is sewn on top. The central disc provides a stable base for anchoring the leaf. If your leaf base is larger than this disc, make the disc one round larger before proceeding.
Round 6 :
Ch 3, 2 dc in each ch-3 space around to build up the square frame; aim for 48 dc total. Join. (48)
Round 7 :
Ch 1, sc in same st, *ch 3, sk next 2 dc, sc in next; rep from * around forming corner spaces for future shell corners. Join. (16 sc, 16 ch-3 spaces)
Round 8 :
Ch 3, (2 dc, ch 2, 3 dc) into first ch-3 space to form first corner shell, *3 dc into next ch-3 sp; at next ch-3 sp, make (3 dc, ch 2, 3 dc) corner; rep across to make square corners. Join. (shell count: 4 corners, side clusters as instructed)
Round 9 :
Ch 1, sc in same st, ch 3, sc in center of each side shell to create a wide openwork. Join. (counts vary by tension; square outline established)
Round 10 :
Ch 3, dc in next 2 sts along side, (3 dc, ch 2, 3 dc) in each corner ch-2 sp to maintain square shape; work 3 dc clusters along sides between corners. Join. (approx 56-60 dc total)
Info :
Check that the square is laying flat. If cupping occurs, adjust by adding or removing a few stitches evenly along sides. The goal is a flat single square that will accept the leaf on top.
Round 11 :
Ch 1, 1 sc in same st, *ch 4, sk 3 dc, sc in next; rep from * to create a slightly larger lacy grid for visual airiness. Join. (approx 16 sc and 16 ch-4 spaces)
Round 12 :
Ch 3, dc in each ch-4 space across making 4 dc groups as side clusters, (3 dc, ch 2, 3 dc) in corners; join. (approx 70 dc)
Round 13 :
Ch 1, sc around entire square in BLO to create a frame ridge that will visually 'frame' the leaf. Work 1 sc per st; place 3 sc in corner ch-2 sps. (approx 76 sc)
Round 14 :
Switch to textured edge: ch 2, hdc in next st, *fpdc around next 2 sts, hdc in next 2 sts; rep from * around to create a raised rib border. Join. (counts vary)
Info :
Position the leaf on top of the central disc area so the base aligns with the square center. Pin leaf in place with tapestry needle or pins and make sure the tip points toward the outer corner direction you prefer. Most designs place tip toward the top-right corner of the square so joining lines read consistently when assembled.
Round 15 :
Sew leaf to square: with long tail from leaf base, use whipstitch or invisible stitch along the sc edge of the leaf to the BLO ridge on the central disc, anchoring at approximately 10-14 points around the base. Secure with a few backstitches. (no stitch count)
Info :
Use a threaded tapestry needle and whip-stitch into the sc round of the leaf and corresponding sc on the disc. Do not pull too tight or leaf will pucker; aim for gentle tension so leaf stands slightly lifted.
Round 16 :
After sewing the leaf, hide yarn tails by weaving them through the back of the disc for about 5 cm and trim. Check leaf placement before continuing to outer rounds. (no stitch count)
— Square Expansion Rounds (to reach finished size) :
Round 17 :
Ch 1, sc in each st around square in both loops to firm structure. Place 3 sc in each corner ch-2 sp. (approx 80 sc)
Round 18 :
Ch 3, dc in next 4 sts, (3 dc, ch 2, 3 dc) in corner; rep around forming larger square. Join. (approx 88 dc)
Round 19 :
Ch 1, sc around in BLO, placing 3 sc in each corner ch-2 to make a ridge for joining later. (approx 92 sc)
Info :
These rounds add body to the square so that, when joined, the bedspread has texture and depth. Work 2-3 squares and block them together to check matching and edge straightness before continuing to mass production.
Round 20 :
Ch 3, *dc in next 6 sts, (3 dc, ch 2, 3 dc) in corner; rep around. Join. (approx 104 dc)
Round 21 :
Ch 1, sc around to firm edge; you may choose to make this round in a slightly darker cream to show subtle definition. (approx 108 sc)
Round 22 :
Ch 2, hdc in next st, *fpdc around next 3 sts, hdc in next 3 sts; rep around to form textured raised ribs along the edges which echo the leaf ribs. Join. (approx count varies by tension)
Info :
At this stage your square should be approximately 12-13" wide. Block square(s) to exact size using pins and a steam iron or damp spray. Blocking evens stitches and helps join later.
— Joining Squares (join-as-you-go slip-stitch / whipstitch method) :
Info :
There are several joining options: whipstitch (sewing with yarn), join-as-you-go (JAYGO) with slip stitches during the final round, or continuous join with a surface crochet. The method shown in the images uses a subtle join (invisible whipstitch) to keep squares looking puffed and separate but connected with tiny 3-ch holes between squares. Below we give JAYGO slip-stitch instructions plus whipstitch alternative.
Round 23 :
For JAYGO: On the last round of the square, when you reach the side that connects to an already-made neighbor, stop before the corner and join with sl st into corresponding st of neighbor square (matching sc-to-sc). Work the remainder of the round slipping into neighbor every time you would make a sc in that position. Result: small, neat sl st joins. Continue around. (Applied during last round; no count)
Round 24 :
Whipstitch alternative: Align two finished squares, right sides up, and using a length of cream yarn, whipstitch through back loops only of both squares at approximately every 3rd or 4th stitch to create a small, neat seam; leave 1 ch-3 hole between joined sections as in image. Continue joining squares in rows, then join rows together. (no stitch count)
Info :
When joining squares allow a small open space (3-chain sized) between squares to emulate the airy grid from the original. This also helps the bedspread drape more softly while preserving defined leaf motifs.
Round 25 :
Work sample: Join first two squares by matching corner shells: sew from corner to corner with whipstitch securing every 4th stitch, then pin squares into a row. Join subsequent squares using same technique to achieve consistent spacing across the whole spread. (no stitch count)
Info :
As you assemble, frequently lay rows flat on the floor or bed to ensure alignment. Slight size differences can be eased out by a slight block or by adding one extra sc in a connecting point.
— Center Panel & Assembly Notes :
Round 26 :
When joining rows, aim to join squares so that leaf directions are harmonious: alternating or all pointing the same way depends on your visual preference. The photographed layout appears to have all leaves pointing in roughly the same direction for a sculptural look. (no count)
Info :
Use a spare row of squares to check final bedspread dimensions before completing all squares. For a queen shown, arrange 6 squares across x 8 squares long = 48 squares. Adjust layout for your mattress size: add or remove rows/columns as needed.
Round 27 :
After joining all squares, weave in all ends and block the entire assembled spread gently by sections to create an even surface and tidy corners. (no count)
Info :
Blocking assembled panels is easier when done in sub-sections: block each row or group of 4 squares to match widths, then damp-join and press into final layout to avoid stretching across the whole spread at once.
— Outer Border (Layered decorative border with picot edge and tassels) :
Round 28 :
With cream yarn, join at any corner with sl st. Round 1 of border: ch 1, sc evenly around the whole joined spread, placing 3 sc in each corner; work 1 sc in each visible outer stitch to create a firm base. (st count varies by finished spread size)
Round 29 :
Ch 3, dc in each st across for 2 rounds to create a raised molding around the blanket; join each round. (counts vary)
Round 30 :
Ch 1, sc in same st, *ch 3, skip 2 dc, sc in next; rep around to create loops for tassel anchors at every 3-4 stitches. Join. (approx number of ch-3 loops = spread perimeter / 3)
Info :
Spacing tassel loops evenly is critical for a neat finish. Measure the perimeter and divide by desired tassel count (e.g., 40-60 tassels for a queen) to determine exact spacing. In the pictured spread tassels sit around every 3-4 chain spaces.
Round 31 :
Ch 1, sc in each st around working into each ch-3 loop as needed to create a tidy final row. Join. (counts vary)
Round 32 :
With cream or alternate color, make a decorative picot row: *sc in next 2 sts, picot (ch 3, sl st into top of ch), sc in next 2 sts; rep around. This softens the border and frames tassels. (counts vary)
Info :
If you want a layered look like the photo, make two rows of picots or a scalloped shell row above the tassel row. Change to green at this stage for subtle contrast if desired.
Round 33 :
Fasten off and weave in ends. Prepare tassels: wind yarn around a 4-5" cardboard 40-60 times depending on desired thickness for queen size; tie top firmly and trim bottom evenly. Make tassels in alternating cream and green or two-tone for the organic look in the image. (no stitch count)
Round 34 :
Attach tassels to the ch-3 loops using a lark's head knot: fold tassel loop, pull through ch-3 loop, pass ends through and tighten. Space tassels as planned. (no stitch count)
Info :
Trim tassels to uniform length and lightly comb the ends for a full finish. Secure tassel tops with a dab of clear fabric glue if the spread will be heavily laundered.
— Pillow Covers (optional, make 2) :
Round 35 :
Make two larger squares for pillow fronts using the same leaf square technique but increase rounds for a square of approx 22-24" for standard pillow: extend Square Expansion Rounds Rounds 17-22 for additional 4-6 rounds to reach pillow size.
Round 36 :
For pillow backs, work 2 large rectangles or a single square folded and seamed to enclose pillow insert; join fronts to backs with hidden mattress stitch and add zipper or envelope closure. (no stitch count)
Info :
Pillow leaf direction can mirror bedspread or be arranged as a centered focal leaf. Blocking pillow components helps the leaf sit neatly when stuffed with an insert.
— Finishing Touches :
Round 37 :
Weave in all ends securely on wrong side. Use yarn needle to bury tails into nearby raised post stitches to avoid unraveling. (no stitch count)
Round 38 :
Lightly steam-block entire spread row by row to set the final shape. Let dry completely on flat surface with pins supporting square corners. (no stitch count)
Info :
Final inspection: check for evenly attached leaves, consistent tassel spacing, and secure seams. Make small adjustments by removing a few joining stitches where needed and re-sewing. This step elevates the handmade quality to a professional finish.
Round 39 :
Optional: add a fabric or blanket backing for extra weight and warmth: pin backing fabric to wrong side and use mattress stitch to hand-sew around perimeter. This is useful if you plan heavy use. (no stitch count)
Info :
Care: Hand-wash or gentle machine wash in cold water on delicate cycle and dry flat. Avoid tumble drying to preserve tassels and textured leaves.
Completing the Natural Serenity bedspread is deeply satisfying — each square feels like a little sculpture that, when joined, becomes a lush, tactile landscape. The raised green leaves pop against the warm cream grid and the tassel edge adds playful movement. Whether you make it for your own bedroom or as a heartfelt gift, this project rewards patience with a lasting, heirloom-quality piece. 🧶🌿✨