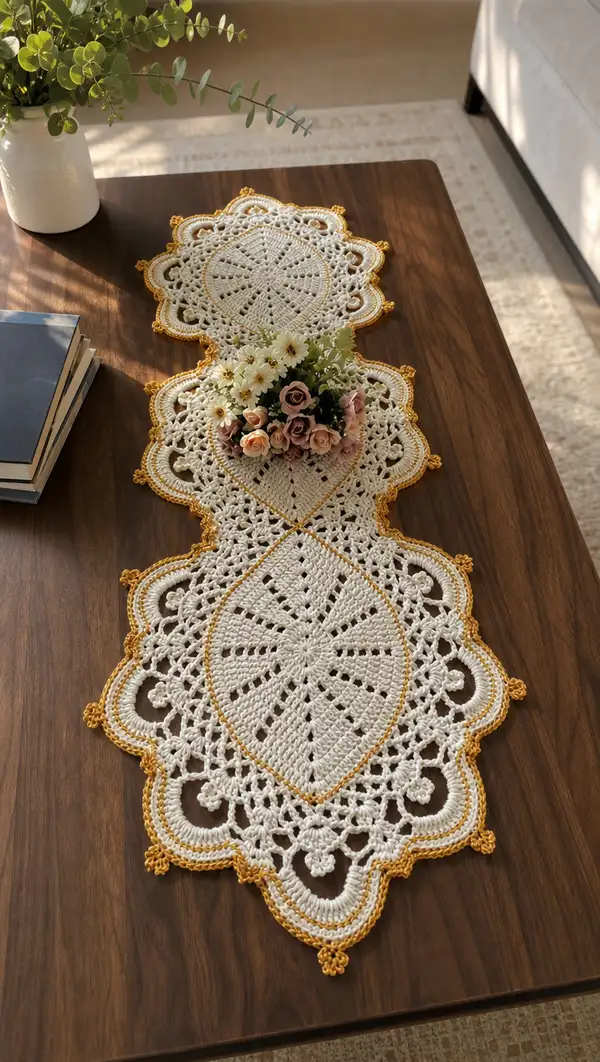
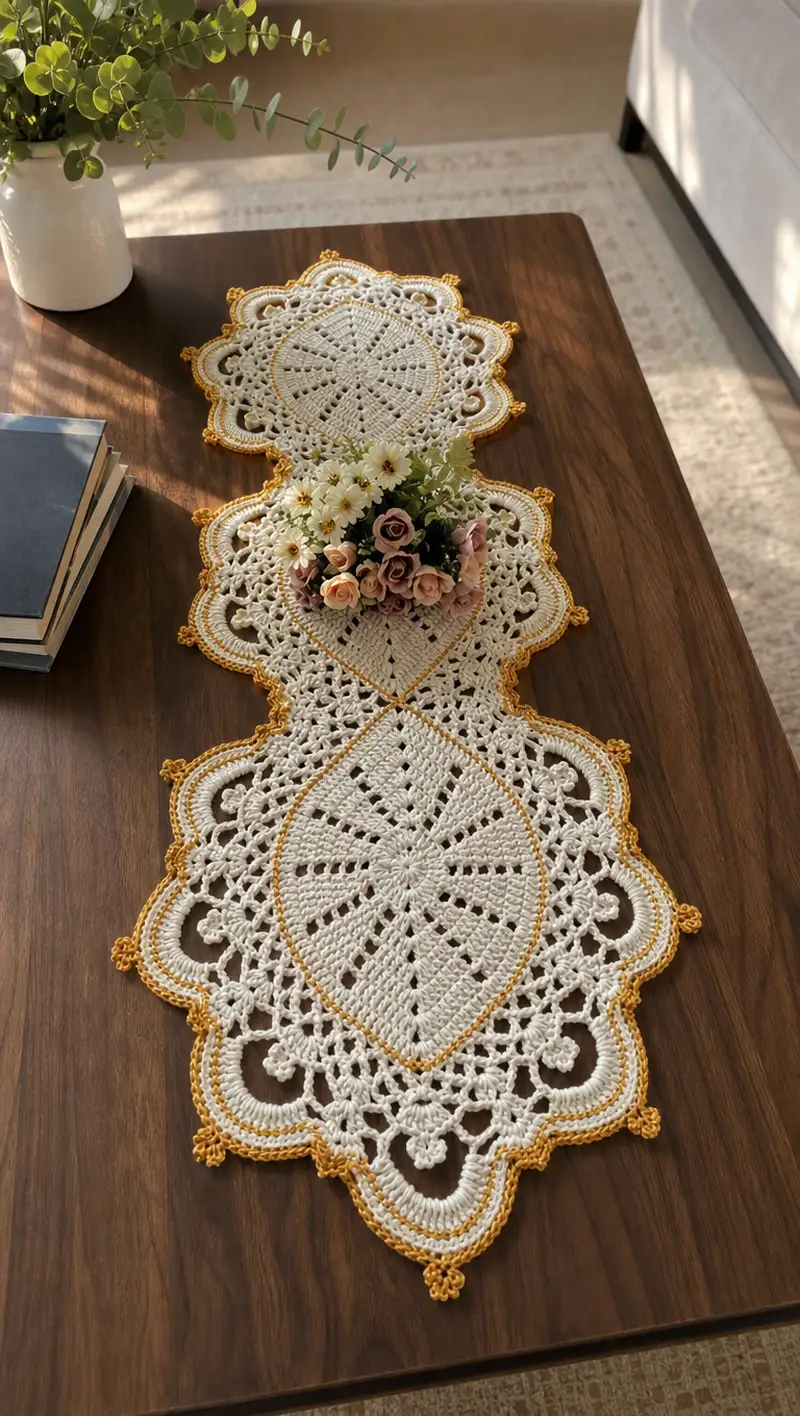
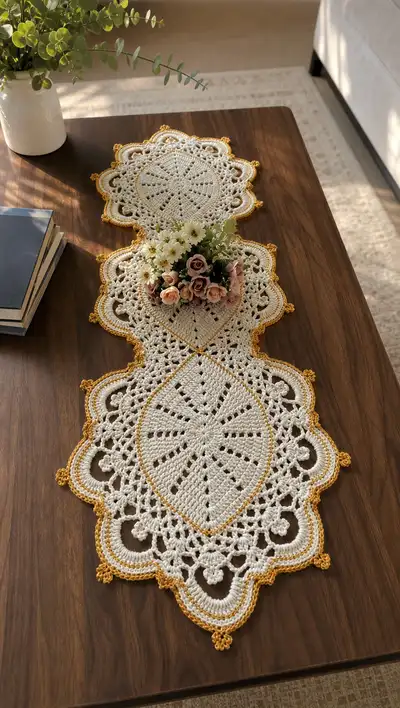
Create a timeless lace table runner featuring three linked medallion motifs in warm white with a contrasting golden picot edge. This pattern uses size-10 mercerized cotton thread and delicate shell, cluster and picot techniques to produce an airy, decorative runner perfect for coffee tables or sideboards. Detailed round-by-round instructions guide you through each medallion, joining, and lace border to recreate the delicate filigree and scalloped trim shown.
Progress Tracker
0% Complete
— End Medallion (Make 2, top and bottom) :
Round 1 :
8 sc in magic ring (8)
Round 3 :
(1 sc, 1 inc) x 8 (24)
Round 4 :
(2 sc, 1 inc) x 8 (32)
Round 5 :
(3 sc, 1 inc) x 8 (40)
Round 6 :
(4 sc, 1 inc) x 8 (48)
Round 7 :
(5 sc, 1 inc) x 8 (56)
Info :
Keep a stitch marker in the first stitch of each round to maintain a consistent start point. Work tightly to avoid gaps in the center when using cotton thread.
Round 8 :
(6 sc, 1 inc) x 8 (64)
Round 9-11 :
1 sc in each st (64)
Round 12 :
(8 sc, ch6) x 8 (64 sc, 8 ch-6 loops)
Info :
The ch-6 loops created this round will be the base for decorative shell groups; count loops to ensure there are 8 evenly spaced around the circle.
Round 13 :
Work into each ch-6 loop: (sc, hdc, 5 dc, hdc, sc) in each ch-6 loop, sl st to next sc on round 11, rep x 8 (64 base sc remain)
Round 14 :
1 sc in each top of cluster and in each sc around (64)
Round 15 :
(5 sc, ch4, sk next 3 sc) x 8 — this forms 8 chain-4 arches between clusters (64 sc worked)
Info :
Count arches after the round; you should have 8 arches. These arches will become the decorative 'spokes' that make the medallion openwork.
Round 16 :
Into each ch-4 arch: sc, hdc, 3 dc, hdc, sc (worked into arch only) — maintain 64 base sc around
Round 17 :
1 sc in each st around, and 3 sc across the top of each shell where necessary to maintain even edge (64)
Round 18 :
(7 sc, ch5) x 8 (64 sc, 8 ch-5 loops)
Round 19 :
Into each ch-5 loop: (sc, 3 dc, sc) to create a small shell; sl st to next sc, rep x 8
Round 20 :
1 sc in each st around to tidy shells and keep edge even (64)
Round 21 :
(3 sc, ch3, sk 2 sts, 1 sc in next 4 sts) x 8 — this begins shaping scallops and creating link points for future lace connector (64)
Info :
Mark every fourth scallop with a removable stitch marker to help alignment when joining medallions later.
Round 22 :
Work 5 dc clusters across each scallop area: *(5 dc into space formed by ch-3), sl st to base sc*, rep x 16 scallop points around (clusters sit atop the 64 foundation), maintain visual symmetry
Round 23 :
1 sc in each st around; where cluster stitches crowd, work sc into top of cluster to keep count visually as 64 foundation sc
Round 24 :
(6 sc, 1 inc) x 8 (72)
Info :
The small increases gently widen the medallion to prepare for an outer lace ring. Keep tension even; this makes the scalloped edge lie flat.
Round 25 :
1 sc in each st (72)
Round 26 :
(9 sc, ch6) x 8 (72 sc, 8 ch-6 loops)
Round 27 :
Into each ch-6 loop: (sc, hdc, 7 dc, hdc, sc) to form deeper scallops (worked into loop only) rep x 8
Round 28 :
Following scallop tops, work *(ch3, sc in 3rd ch from hook) x 3 to create small picot arcs across each scallop top*, rep across scallops to create decorative lace (72 foundation sc remain)
Round 29 :
1 sc around to catch picots into stable edge (72)
Round 30 :
(6 sc, ch8, sk next 8 sc) x 8 — creates 8 large chain arches around outer scallop (72)
Round 31 :
Into each ch-8 arch: sc, hdc, 5 dc, dtr, 5 dc, hdc, sc (a large shell for an ornate scallop) rep x 8
Info :
These large shells form the deep scalloped points seen in the finished runner. Work slowly to keep shells even and flat as they can pull if tension varies.
Round 32 :
1 sc in each stitch around, placing 2 sc at shell joins where needed to preserve 72-count foundation (72)
Round 33 :
Work a decorative loop round: *(ch5, sl st into space between shells)* x 16 to form small openwork arches around the scallops
Round 34 :
1 sc into each small arch and 2 sc at shell crowns where required to maintain a neat border (72)
Round 35 :
Edge round: *sc around scallop edge working (sc, ch3, picot, ch3, sc) at each shell point* to create tiny decorative picot clusters. Fasten off and weave in ends lightly (72)
Info :
Block each medallion to a flat circle/oval shape before joining. Pin to desired shape and mist lightly, allow to dry completely.
— Central Diamond Motif (Make 1 central elongated motif) :
Round 1 :
8 sc in magic ring (8)
Round 3 :
(1 sc, inc) x 8 (24)
Round 4 :
(2 sc, inc) x 8 (32)
Round 5 :
(3 sc, inc) x 8 (40)
Round 6 :
(4 sc, inc) x 8 (48)
Round 7 :
(5 sc, inc) x 8 (56)
Info :
The central motif will be worked into an elongated diamond shape. After the foundation rounds you will create directional shaping by working longer shells along two opposite sides.
Round 8 :
(6 sc, inc) x 8 (64)
Round 9-11 :
1 sc in each st (64)
Round 12 :
(8 sc, ch5) x 8 (64 sc, 8 ch-5 loops)
Round 13 :
Into each ch-5 loop make shell: (sc, hdc, 5 dc, hdc, sc). After completing all shells, sl st into next base sc (sits on 64 foundation)
Round 14 :
1 sc in each st around (64)
Round 15 :
Working on two opposite shell rows only: *ch7, sk 7 sts, sc in next 2 sts*, repeat along the two opposite sides to create longer chain arches that will shape diamond points; other sides keep 1 sc in each st (net sc remain 64)
Info :
Use stitch markers to mark the four compass points of the motif so the elongated sides are symmetrical. This keep the diamond shape even.
Round 16 :
Into long ch-7 arches: sc, hdc, 7 dc, hdc, sc to form pronounced lobes on two opposite sides; on short sides work 1 sc in each st (64 foundation sc)
Round 17 :
1 sc around, placing 2 sc at the lobe joins if necessary to keep fabric flat (64)
Round 18 :
(4 sc, ch4, sk 3) x 16 — creates 16 ch-4 arches around motif edges (64)
Round 19 :
Into each ch-4 arch: sc, hdc, 3 dc, hdc, sc to create a round of small shells between lobes (64)
Round 20 :
1 sc around to tidy and stabilize shells (64)
Round 21 :
(7 sc, ch6) x 8 (64 sc, 8 ch-6 loops)
Round 22 :
Work decorative open fans into ch-6 loops: (sc, hdc, 9 dc, hdc, sc) rep x 8 — these form strong diamond point arches at cardinal points
Round 23 :
1 sc around to catch fan tops (64)
Round 24 :
(4 sc, ch3, sk 2) x 16 to create small connectors and lace windows between fans
Round 25 :
Into each ch-3: sc, 5 dc, sc to create beaded arches (64)
Info :
At this stage you will see the motif forming an elongated shape. Adjust shell sizes by dropping or adding a dc or two if your lace is too dense or too open.
Round 26 :
1 sc around; place an extra sc at points where stitches feel sparse to keep even tension (64)
Round 27 :
(6 sc, 1 inc) x 8 (72)
Round 28 :
1 sc each around (72)
Round 29 :
(9 sc, ch8) x 8 (72 sc, 8 ch-8 loops)
Round 30 :
Into each ch-8: sc, hdc, 7 dc, dtr, 7 dc, hdc, sc (large ornate scallop) rep x 8
Round 31 :
1 sc around to stabilize scallops and equalize row (72)
Round 32 :
Decorative bridging round: *(ch3, sl st into base between scallops, ch3, sc into next scallop top)* x 16 to create lace loops that will be used for join-as-you-go points
Round 33 :
1 sc around, catch each loop with a tidy sc to keep count (72)
Round 34 :
Edge round: *sc, ch3, picot, ch3, sc* across each scallop top to create decorative peaks; fasten off leaving long tail for joining later (72)
Info :
Block this central motif to an elongated diamond shape with pins. This is an essential step to ensure symmetry and that join points line up with the end medallions.
— Lace Connector & Join-As-You-Go Rounds :
Info :
With medallions and central motif blocked, we'll join them using join-as-you-go technique through designated scallop loops and small bridges. Lay the three motifs aligned on blocking board so scallop points match. We'll join at eight or more connection points along each side.
Round 1 :
Begin at one edge of central motif with RS facing; attach white thread at a corner scallop point by sl st. Work 1 sc into corner scallop top.
Round 2 :
Chain 5, sl st to corresponding scallop loop on end medallion (joining), ch 5 and sl st back to central motif at next join point, then 1 sc in next base st; repeat across one side creating evenly spaced chains that link motifs (do not fasten off)
Info :
Maintain even spacing when joining; use pins to keep motifs aligned. Count joins; typically 8 join points per side produce a clean edge.
Round 3 :
Work *into each chain-5 link made while joining*: sc, hdc, 5 dc, hdc, sc (small joining shell) across entire join to strengthen connection; when reaching the other end motif, continue linking to next medallion when prompted until both sides are joined (this completes one long strip of three motifs)
Round 4 :
1 sc in each stitch around all joining shells and motifs to tidy the seam; where seams meet, work 2 sc to flatten any raised joins
Round 5 :
Work small decorative loops into join area: *(ch4, sl st into base between shells)* across the join, creating openwork that visually integrates the motifs
Info :
If you prefer to stitch motifs completely and then sew later, use mattress stitch or whip stitch, sewing through the same stitch points used for join-as-you-go to maintain elasticity. Blocking after joining helps the seam relax and flatten.
— Outer Lace Border (All motifs combined) :
Round 1 :
With runner assembled and RS facing, join white thread at an outer scallop point anywhere. Work 1 sc into edge to create a firm base.
Round 2 :
*(ch6, sk 6 sts, sc into next st), repeat across entire outer perimeter* creating large arches for outer scallops
Round 3 :
Into each ch-6 arch make wide shell: sc, hdc, 9 dc, dtr, 9 dc, hdc, sc — this will create the large scalloped silhouette around the whole runner
Round 4 :
1 sc around to stabilize shell tops; work 2 sc at shell joins where needed to keep tension even
Info :
As you work the outer border you will notice corners where motif shapes meet; add an extra sc or a small 3-sc cluster to smooth transition areas so the scallops remain regular and symmetric.
Round 5 :
(ch3, sc into top of next shell) x across to create small decorative arches between large scallops
Round 6 :
Into those ch-3 arches work: sc, 5 dc, sc to create petite shells that add lace depth (this accent helps prepare for picot finishing)
Round 7 :
1 sc in each stitch around, placing additional sc at transitions where motif edges meet to preserve edge uniformity
Round 8 :
(sc, ch2, picot, ch2, sc) across shell tips to create raised picot marks at each scallop top; fasten off white thread if you prefer to switch to gold for final edge
Info :
Before switching to gold, count scallop points. You should have a consistent number of scallop peaks around the runner; this will determine how many picot clusters you will make in the gold border.
— Golden Accent Round (Change to Gold Thread) :
Info :
Change to golden thread: attach gold with a sl st at any scallop peak. Carry white thread inside the work or fasten off and weave in later. Use a small blunt needle to weave tails into nearby stitches to hide them.
Round 1 :
With gold, work 1 sc around the top of each scallop peak, then (ch3, picot, ch3) into each arch to create trimmed loops. Continue around entire runner
Round 2 :
Into each gold ch-3 loop work: sl st, ch2, sl st to create small raised loops; this gives a subtle braided rim effect
Round 3 :
Work small picot clusters at each scallop valley: *(sc, ch3, sl st into same st), rep* — these little points emphasize the scallop shapes
Info :
Work the gold rounds with a slightly looser tension to allow the gold thread to sit atop the scallops without pulling them inward. Periodically lay the runner flat and adjust loops before continuing.
Round 4 :
Final trim: *sc around and in each picot make (ch3, sl st into base) to form decorative chain-picot edging; finish with a neat sl st and fasten off leaving a 12 cm tail to weave in*.
Round 5 :
Weave the gold tail into the underside of scallops with tapestry needle, securing at least 4 cm under multiple stitches so it will not pull free
Info :
Work a small reinforcement round under the gold edge if your runner will receive heavy use: seam a thin length of matching thread on the back where the gold sits to reduce abrasion over time.
— Decorative Corner Picots and Final Touches :
Round 1 :
Create tiny corner knots at pointed ends of runner: attach gold at point, ch5, picot, sl st to base, repeat three times to form tiny tassel-like knot
Round 2 :
Check symmetry of both end medallions; if one end sits higher, use small hidden whip-stitches under shells to slightly pull it flat and even with the center
Info :
Lightly press the runner with a steam iron under a damp cloth if needed after blocking to set the golden trim. Avoid too much heat on mercerized cotton to preserve sheen.
Round 3 :
Final weave: use tapestry needle to weave all remaining tails into the back of the lace for at least 4 cm; trim close to work
Round 4 :
Inspect all joins and secure with small stitches where any gaps appear; ensure the runner lays perfectly flat on table
Info :
For a longer runner simply replicate the central diamond motif and join additional medallions using the same join-as-you-go sequence; adjust border repeats so scallops remain evenly spaced.
This delicate lace table runner brings the charm of classic crochet to your home with a touch of golden elegance. Each medallion is a little piece of lacework art that, when joined, becomes an heirloom-quality accent. Pin and block carefully, enjoy the meditative rhythm of shells and picots, and take pride in a finished runner that will complement any table setting. 🧶✨ Bring this runner to life and enjoy the glow of handmade beauty every day. 🌼