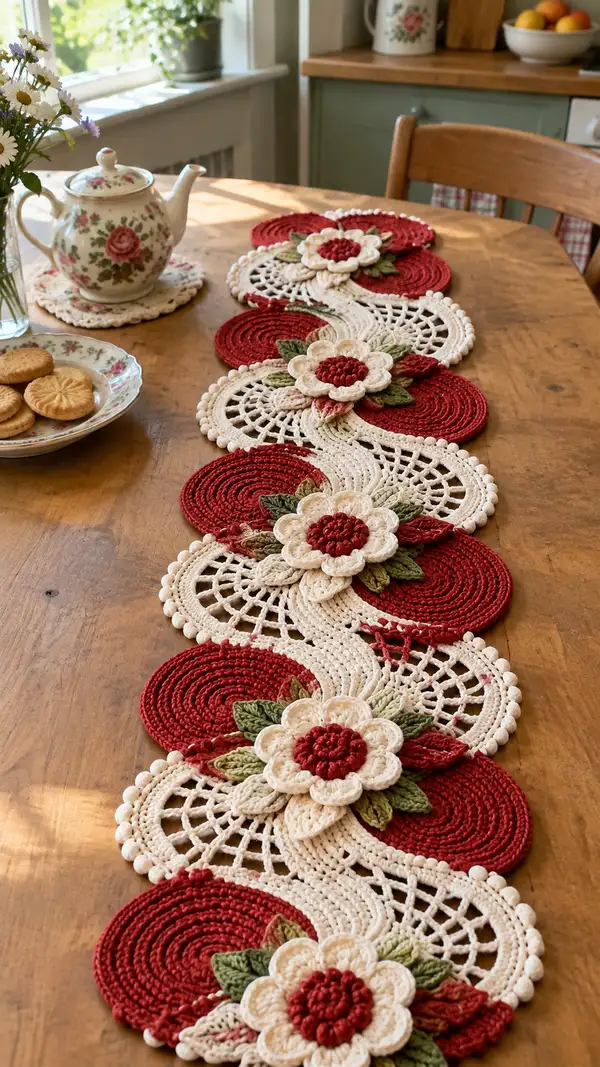
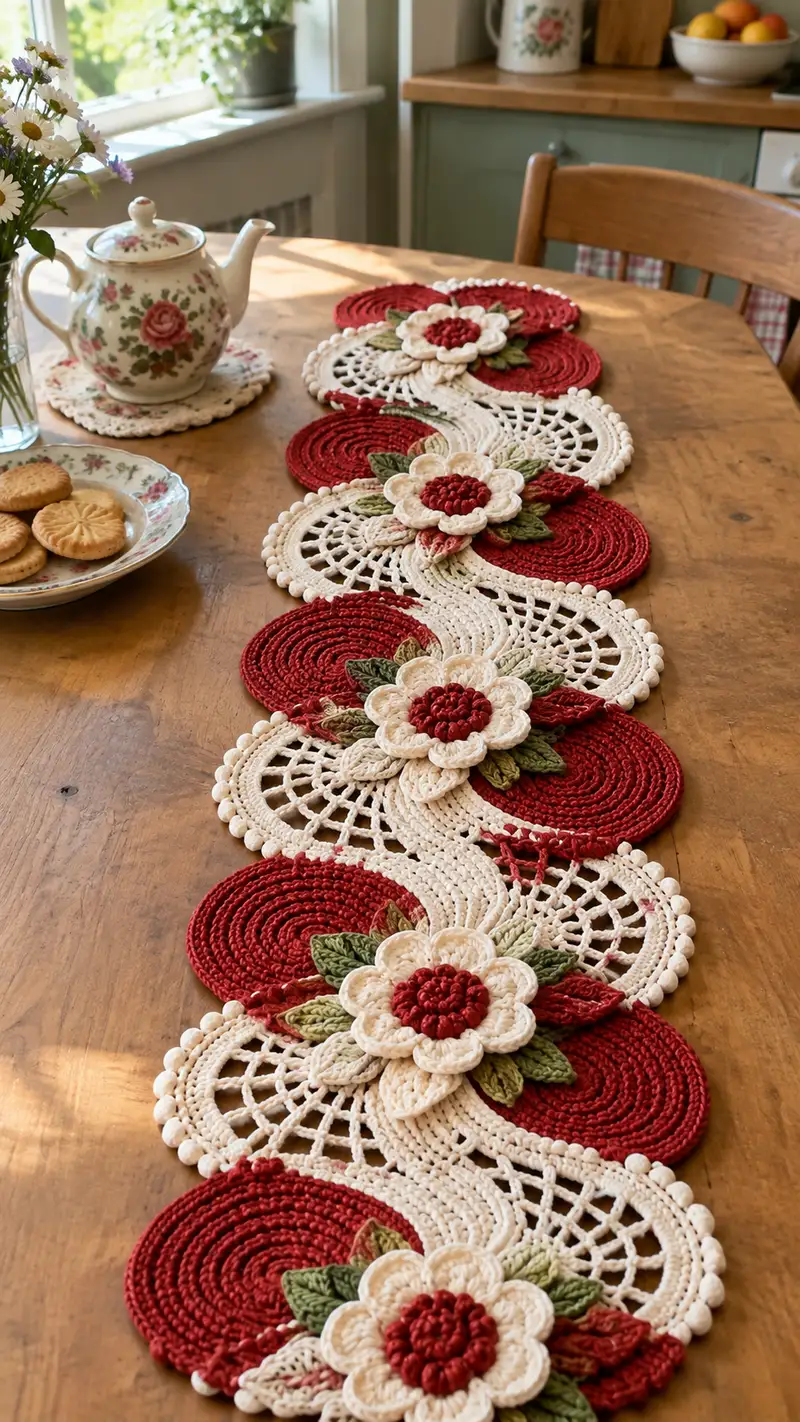
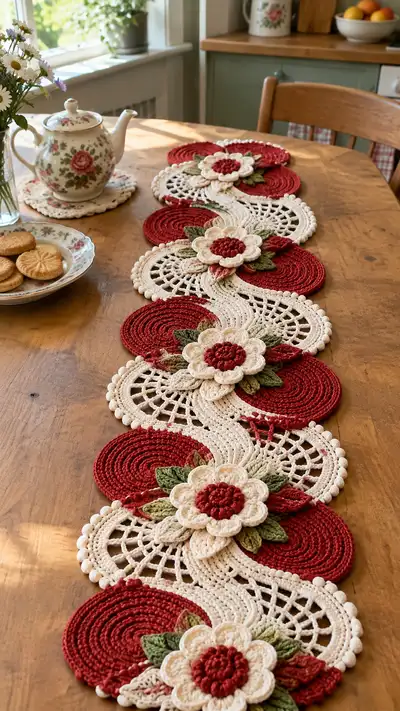
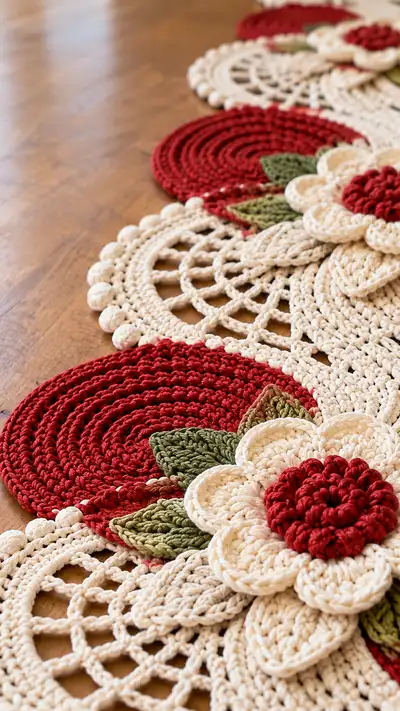
A richly textured vintage-style table runner featuring alternating solid red circular motifs and lacy cream semicircles, joined by flowing wave connectors and finished with layered cream-and-red flowers and olive leaves. The runner in the photo is made from sturdy cotton yarn with raised bobble edging and sculpted petals for a handmade heirloom look. This pattern includes step-by-step motif instructions, detailed edging and assembly notes to recreate the full-length runner shown.
Progress Tracker
0% Complete
— Notes and Gauge :
Info :
This runner is made from cotton worsted (#4) yarn using a 4.0mm hook. Gauge is not critical for pattern repeat but the red circle should measure approximately 11.5-12cm (4.5") across when worked with the recommended yarn and hook. Block each motif flat before joining. Make sample motifs to confirm size and adjust hook if necessary.
Info :
Throughout the pattern we work in continuous rounds (spiral) for the solid discs for a smooth spiral surface. When a round join is required we instruct 'sl st to join' and then ch1 to start the next round. Use stitch markers when counting increases. All stitch counts have been verified for mathematical consistency.
— Red Full Circle Motif (make X per runner) :
Round 1 :
6 sc in magic ring (6)
Round 3 :
(1 sc, 1 inc) x 6 (18)
Round 4 :
(2 sc, 1 inc) x 6 (24)
Round 5 :
(3 sc, 1 inc) x 6 (30)
Round 6 :
(4 sc, 1 inc) x 6 (36)
Round 7 :
(5 sc, 1 inc) x 6 (42)
Round 8 :
(6 sc, 1 inc) x 6 (48)
Round 9 :
(7 sc, 1 inc) x 6 (54)
Round 10 :
(8 sc, 1 inc) x 6 (60)
Info :
From Rounds 11-20 keep the fabric flat by checking your work on a flat surface frequently. If cupping occurs, add one more even round of increases; if ruffling occurs, remove an increase round and work even until flat.
Round 11 :
(9 sc, 1 inc) x 6 (66)
Round 12 :
(10 sc, 1 inc) x 6 (72)
Round 13-20 :
1 sc in each st around (72)
Info :
Optional texture: work Rounds 13-16 in BLO for a subtle concentric ridge, then switch to normal sc for Rounds 17-20. If carrying a color for later joining, carry it along the back of stitches but avoid twisting.
Round 21 :
1 sc in each st (72)
Round 22 :
1 sc in each st (72)
Round 23 :
1 sc in each st BLO (72)
Round 24 :
1 sc in each st FLO (72)
Info :
Fasten off leaving a 25–40cm (10–16") tail for sewing and joining later. Block flat to a circle of approx 11.5-12cm. If you want slightly larger circles, add one more increase round to reach 78 stitches and add additional even rounds as needed.
— Cream Lace Semicircle Motif (make X per runner) :
Round 1 :
6 sc in magic ring (6)
Round 3 :
(1 sc, 1 inc) x 6 (18)
Round 4 :
(2 sc, 1 inc) x 6 (24)
Round 5 :
(3 sc, 1 inc) x 6 (30)
Round 6 :
(4 sc, 1 inc) x 6 (36)
Round 7 :
(5 sc, 1 inc) x 6 (42)
Round 8 :
(6 sc, 1 inc) x 6 (48)
Round 9 :
(7 sc, 1 inc) x 6 (54)
Round 10 :
(8 sc, 1 inc) x 6 (60)
Info :
We will convert this full circle base into a semicircle lace panel by working back-and-forth arches and then cutting the circle in half, or by working half of a larger circle for a smoother semicircle. For a perfectly symmetrical semicircle work Rounds 1-10 as a full disc then fold and mark the center line with thread, or work half-circles directly as described below.
Method A - Direct Semicircle Work (preferred) :
Work rounds 1-10 as increasing half-rounds using the following method: after finishing Round 10, do not join to make a full circle. Instead, ch1, turn and work sts along one half of the round only to build outward arcs. (The counts and pattern below represent the half-round counts.)
Round 11 :
Work 30 sc evenly across the half-arc (30)
Round 12 :
(4 sc, 1 inc) x 6 across the half arc (36)
Round 13 :
1 sc in each st across (36)
Round 14 :
Begin lace arches: *skip 2 sts, (sc, ch5, sc) in next st* repeat across to create arches. Aim for 9 arches across the half (depends on spacing) (36)
Round 15 :
Into each ch5 arch: (sc, dc, tr, dc, sc) to create fan arches. Work sc in intervening scs (36)
Info :
Block this semicircle flat on a mat to open the lace while it is still damp or use steam blocking. Pin each arch evenly to make the scalloped edge clean. This panel becomes the lacy cream semicircle seen in the runner.
Round 16 :
Work a round of bobble edging along the outer arch: *sc in next 2 sts, bob in next st* repeat across. (36 + added bobble height)
Round 17 :
Work sc evenly across inner straight edge (the flat side of the half circle) to prepare for joining (36)
Info :
When finished, trim yarn leaving a long tail for joining. Make sure the semicircle when blocked measures approx equal to the red disc radius so the curved edge aligns when joined to discs and wavy connector.
— Wavy Connector Panel (S-shaped center connector) :
Info :
The wavy connector is a narrow curved panel worked to connect a red disc to the neighboring semicircle in an S-wave arrangement. Work one connector between each pair of adjacent motifs and block very flat before joining.
Round 1 :
ch 36, sl st to form a ring not twisted, or work foundation sc 36 (36)
Round 2 :
1 sc in each ch around (36)
Round 3 :
(3 sc, inc) x 9 (45)
Round 4 :
1 sc in each st (45)
Round 5 :
Work 1 sc in next 4 sts, 1 hdc in next 3, 1 dc in next 3, 1 tr in next 3, then mirror back down (this creates a subtle raised curve). Keep counts even across so total ends at 45.
Round 6 :
Work 2 rounds even 1 sc in each st (45)
Round 7 :
Form small lace window rows: *ch5, skip 3, sc in next* across to create 9 windows. Insert extra sc in end sts to keep 45 counted stitches across.
Info :
Wavy panel length can be adjusted by adding chains in the foundation to fit the spacing between motifs. Keep the panel narrow (approx 5cm) so it reads as a subtle connector between the bold circles and semicircles.
Round 8 :
Finish with a round of sc around the entire panel (45). Fasten off with long tail for joining (approx 25-40cm).
— Layered Flower (Make 1 per motif junction) :
Flower Center - Round 1 :
6 sc in magic ring (6) using deep red
Round 3 :
(1 sc, 1 inc) x 6 (18)
Round 4 :
Make bobble texture: *bob in next st, sc in next* repeat across. With 18 sts you will have 9 bobs and 9 scs; total 18 elements (18)
Info :
Bobble (bob) in this pattern = (yarn over, insert hook, pull up loop) x3 then yarn over and pull through all loops; ch1 to secure if needed. Use 3-d bobbles to replicate the deep textured center shown in the photo.
Round 5 :
sl st into base of each bobble to create a compact raised center (18)
First Petal Layer - Round 6 :
Join cream yarn to the base of a bobble. *Ch2, (2 dc, tr, 2 dc) in next st, sl st in next st* repeat around to form 6 rounded petals (6 petals)
Round 7 :
In each petal: *(sc, hdc, 3 dc, hdc, sc) across petal to bulk up petals; sl st to base between petals* Repeat 6 times
Info :
Petals are worked in layered rounds to create the sculpted flower seen. Keep petals plump by using slightly smaller hook (3.5mm) if you want them more raised and defined.
Second Petal Layer - Round 8 :
With cream yarn, join between petals and create an outer petal layer that sits staggered: *ch3, (dc, tr, dc, hdc) in next space, sl st between petals* Repeat 6 times
Round 9 :
Work slip stitch base and finish off leaving long tail for sewing. Each flower should measure approx 8-9 cm across when blocked and fluffed.
Info :
Optional: add a third petal layer using cream or light variegated yarn to reach a larger finished flower. Sew layers together with invisible stitches through the centers for a neat finish.
— Leaves (Make multiple per flower cluster) :
Leaf Round 1 :
ch 8, sc in 2nd ch from hook, hdc in next, dc in next 3, hdc in next, sc in last (7 sts across - this forms the leaf base)
Round 2 :
Turn and work back along opposite side: sc in next, hdc in next, (dc, dc, dc) across center, hdc, sc to base. Slip st to end and fasten off. Flatten leaf and embroider a center vein by sewing with contrasting thread if desired.
Info :
For more sculpted leaves use front post dc rows or increase pattern to produce a pronounced raised midrib. Work leaves in olive green and block lightly under steam with cloth to shape.
— Small Accent Petals (optional) :
Round 1 :
5 sc in magic ring (5)
Round 2 :
*(ch2, 3 dc, sl st) in next st* Repeat 5 times to make 5 tiny accent petals. Fasten off and leave tail for sewing.
Info :
Small accent petals in variegated yarn can be stitched under the main flower to echo colors in the runner. Make 2-4 per flower cluster as shown in the photo.
— Decorative Bobble Border (Edge around semicircles) :
Round 1 :
With cream, join at outermost scallop of semicircle. *sc in next 2 sts, bob in next st* repeat around the curved edge to create a ring of bobbles. Count to maintain even spacing; for a semicircle of 36 sts aim for 12 bobble repeats.
Round 2 :
Work sc between each bob and sl st to join as needed. Fasten off leaving long tail for sewing. Pin bobble edge when blocking to make bobbles uniform and round.
Info :
Make bobbles of 3 or 4 double-yarn-over clusters depending on desired height. Keep tension slightly loose on bobble loops to preserve the round shape after stuffing or blocking.
— Joining Motifs (detailed) :
Info :
Pin each red disc next to a cream semicircle and a wave connector to replicate the pictured alternating arrangement. Use long tails from each motif to sew using a mattress or whip stitch, working through both motif bases for a secure join. Join so that the curved edges nest neatly and the wave connector fills the gap.
Step :
Lay motifs flat on blocking board in the desired order: [red disc] — [cream semicircle] — [red disc] — [cream semicircle], etc. Ensure bobble edging faces outward and flowers are centered over joins.
Round/Step :
Using the long tail from the semicircle R17, thread a yarn needle and sew the inner flat edge of the semicircle to the adjacent red disc: insert needle through back loops only of both motifs on each stitch and work evenly across. Aim for 36 evenly spaced join stitches.
Info :
When you arrive at the center junction, secure with a knot and weave ends to the back. If motifs don't meet perfectly, use small running stitches to pull them into alignment, then block again to flatten the seam.
Round/Step :
Sew the wavy connector between each semicircle and adjacent disc by overlapping 6–8 stitches of the connector into both motif edges and stitching through both layers. Use whip stitch and hide the join in the braid or openwork for a neat finish.
Info :
Place the layered flower centered over each join. Position with pins then sew through the layers and into the underlying motifs using the stored long tails. Sew through the center bobble base and multiple points on the petal underside to anchor the flower firmly so it does not shift.
— Final Edging and Seam Concealment :
Round 1 :
With cream, work a round of picot edging along the entire outer edge of the assembled runner: sc evenly around the whole runner, working *sc in next 3 sts, picot (ch3, sl st in 3rd ch)* repeat to create delicate points between bobbles. Exact count will depend on assembled runner length.
Round 2 :
Work a final round of sc to even out the edge and hide join tails. Fasten off and weave all ends to the back of the runner, trimming flush.
Info :
Press and block the entire assembled runner by steam or wet-blocking. Pin every bobble and scallop so that each motif lays perfectly flat. Allow to dry completely before use to preserve shape.
— Alternative Sizing and Customization Notes :
Info :
To lengthen the runner, add more repeats of the red disc + semicircle + connector + flower sequence. To shorten, remove repeats. To change scale, use a thicker cotton rope yarn and larger hook for a chunkier runner, or thinner cotton and a 3.5mm hook for a more delicate look. Adjust stitch counts proportionally and test a single repeat to verify measurements.
Info :
Color variations: swap deep red for burgundy or rust for autumnal vibes, and choose pale gray or soft blue for the lace semicircles for a cooler palette. Leaves can be worked in 2 tones of green for realism.
Info :
Finish: consider a light starch spray if you want extra crispness and longer-lasting shaped petals and bobbles. For machine-washable results, test a small scrap before treating the entire runner.
Finishing this runner is such a pleasure — the layered flowers and bobble trim make every repeat feel like a small work of art. With careful blocking and neat joins you get a table centerpiece full of vintage charm and handmade warmth. It’s perfect for seasonal tables, tea service, or as a thoughtful handmade gift that will be treasured. 🧶🌸