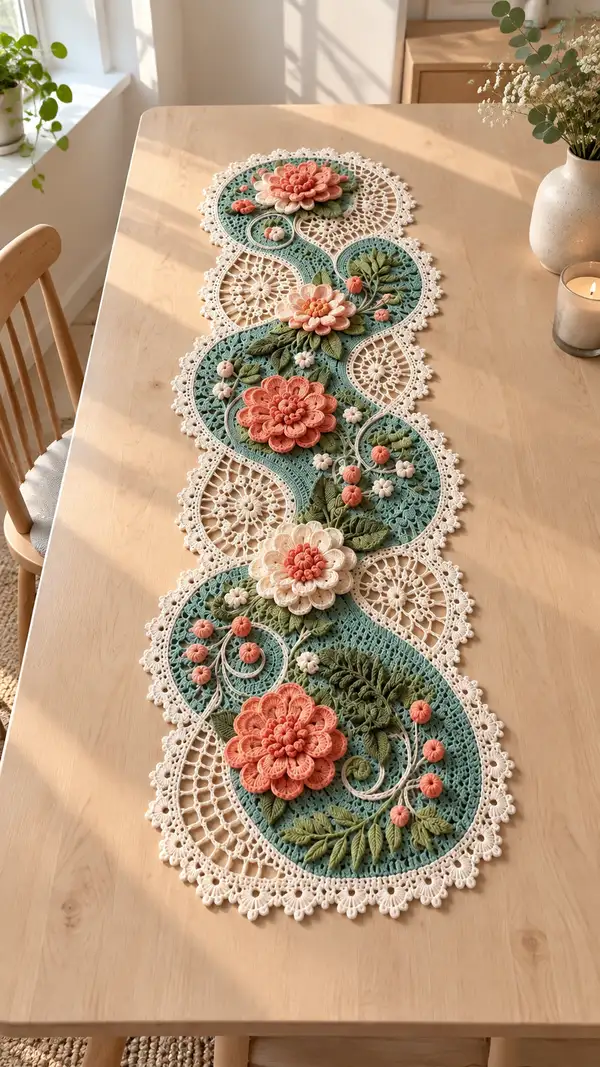
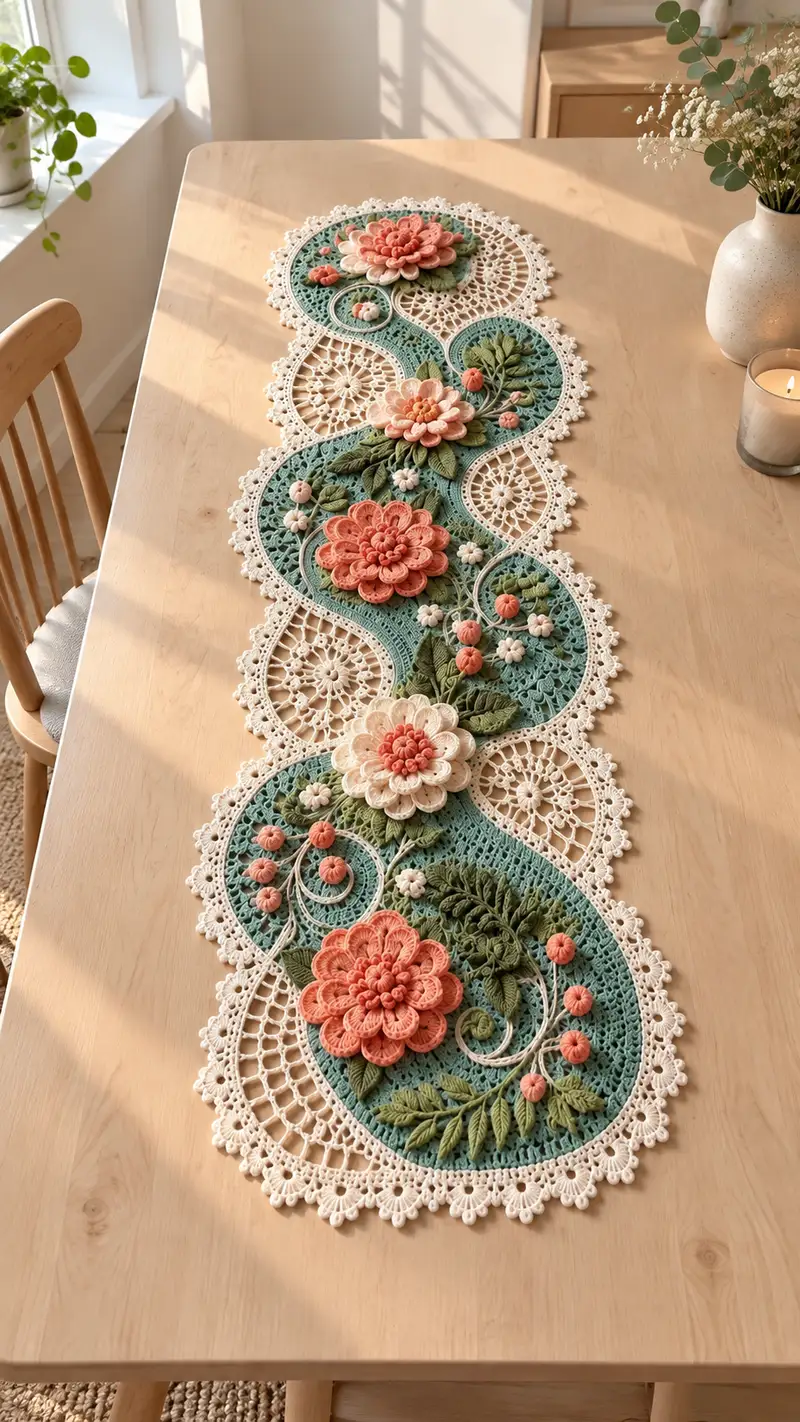
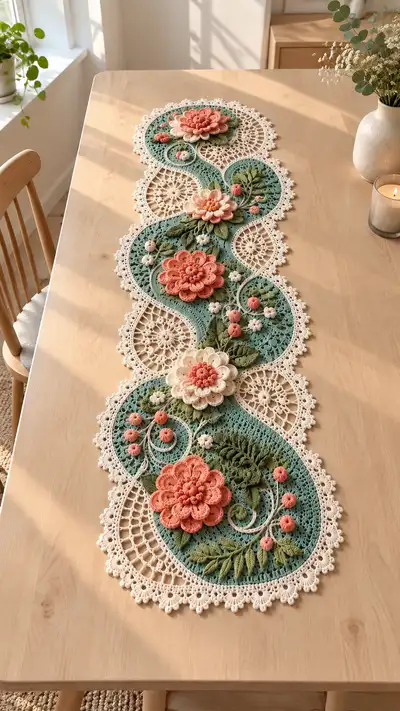
A stunning S-shaped crochet table runner featuring teal lacy fields, cream openwork medallions, and layered 3D floral appliques in coral and blush. This advanced decorative runner is designed with intricate motifs, raised petals, sculpted leaves and delicate picot edging to create a heirloom centerpiece. The pattern includes full stitch-by-stitch rounds for motifs, flowers, leaves, berries, joining and a scalloped border.
Progress Tracker
0% Complete
— Overview :
Info :
This pattern creates one S-shaped table runner consisting of alternating teardrop-shaped lacy ovals (teal) and circular cream medallions. There are five teal oval panels and four cream medallions in the pictured runner. Each teal panel is embellished with a large layered 3D flower, smaller buds and clusters, sculpted leaves and embroidered vines. Work each motif individually, block flat, then assemble and add the edge. Use a tight hook and consistent tension for crisp stitch definition.
Info :
Abbreviations used are included at the top. All stitch counts in rounds are total stitches at round end. The pattern provides complete rounds for core motifs and for appliques (flowers, leaves, berries). Pin pieces together and use whip stitch or mattress stitch to join pieces invisibly. Block firmly before joining.
— Teardrop Oval Motif (Make 5) :
Round 1 :
Start with mr, ch1, 8 sc in magic ring. Pull tight and join to first sc with sl st. (8)
Round 2 :
Ch1, inc in each st around (2 sc in each) (16)
Round 3 :
(1 sc, inc) x8 (24)
Round 4 :
(2 sc, inc) x8 (32)
Round 5 :
(3 sc, inc) x8 (40)
Info :
At this stage you have created a flat circular base. We will extend one side to form a teardrop/oval shape by working extra rounds into one sector of the circle to create length. Use a marker to identify the sector that will be elongated; this becomes the 'point' of the teardrop.
Round 6 :
Ch1, 1 sc in each st around (40). Place marker at stitch opposite the marked sector (this marks start of elongation). (40)
Round 7 :
(2 sc, inc) x8 then 8 sc in elongation sector - working twice around the designated elongation segment to add width. End round with 8 sc. (48)
Round 8 :
1 sc in each st around (48)
Round 9 :
(3 sc, inc) x8 (56)
Round 10 :
1 sc in each st around (56)
Round 11 :
(4 sc, inc) x8 (64)
Round 12 :
1 sc in each st around (64)
Round 13 :
Begin shaping oval length: work 1 sc in 48 sts around main circumference, then in elongation sector work (inc, 3 sc) twice to add extra rows across the sector; this produces a slightly longer oval top. Maintain total approx (68) — count carefully as needed.
Info :
To create a teardrop shape, select a sector of 12–16 stitches and work additional rounds that increase only within that sector; this will elongate one side into a rounded point. Keep the opposite side circular. Place markers to track start and end of elongation.
Round 14 :
1 sc in each st around (68)
Round 15 :
(5 sc, inc) x8 (76)
Round 16-18 :
1 sc in each st (76) — these rounds build height and stabilise shape
Round 19 :
Work 1 sc in 6 sts, (sc2tog, 4 sc) x11 to start gentle tapering at the opposite side (64)
Round 20 :
1 sc in each st around (64)
Round 21 :
(4 sc, dec) x8 (56)
Info :
By now motif should be an oval approximately 20–24 cm long (depends on yarn/hook). Keep this as the teal inset field that will receive appliques and embroidery. Block flat to required measurements before further work.
Round 22 :
1 sc in each st around (56)
Round 23 :
(3 sc, dec) x8 (48)
Round 24 :
1 sc in each st around (48)
Round 25 :
(2 sc, dec) x8 (40)
Round 26 :
1 sc in each st around (40)
Round 27 :
(1 sc, dec) x8 (32)
Round 28 :
1 sc in each st around (32)
Round 29 :
(6 sc, dec) x4 (28)
Round 30 :
1 sc in each st (28)
Info :
Finish oval by smoothing edges with one round of sc in BLO to create a defined ridge that will help the cream border sit neatly. 1 sc in each st BLO for 1 round. Fasten off leaving long tail for joining. Block to shape and size.
— Cream Circular Lace Medallion (Make 4) :
Round 1 :
mr, ch3 (counts as dc), 11 dc in mr. Join with sl st to top of ch3 (12)
Round 2 :
Ch3, dc in same st, (ch2, 2 dc) in next st repeat around, join (12 clusters, 24 dc total in clusters)
Round 3 :
Sl st to next ch2 sp, ch4 (counts as tr), tr, ch3, (tr, tr) in each ch2 sp around forming petal arches. Join (12 petals)
Round 4 :
Work into each petal: sl st to base, ch1, 7 sc across petal (working evenly into the arches to form firm petal bases) (84)
Round 5 :
Ch1, (sc, ch3) x7 across each petal - create lacy spokes. At each petal top, join with sl st and continue. (count variable by petals; end result roughly 84 sc and 84 ch3 spaces)
Round 6 :
Into each ch3 sp: (sc, ch5, sc) to form star nets between petals. Join and finish round. (12 net points)
Round 7 :
Work 2 dc clusters into each net point with ch2 between (approx 36 clusters) then sl st to join. This builds a circular lacy medallion approx 18 cm diameter.
Info :
Block each medallion pinned to circular shape to open lace fully. These cream medallions will alternate with teal ovals and create the open lace sections of the S-shape. Their diameter should match the width of the oval's wider section when blocked.
Round 8 :
Edge round: *ch4, sl st into dc cluster between petals* repeat around to create small picot loops. Fasten off leaving long tail for joining.
— Teal Field Fine Mesh Surface (worked on top of oval motif) :
Info :
To create the delicate surface mesh seen inside the teal fields, work an overlay mesh with dc and ch stitches leaving small lacy holes. This is worked into the oval base by surface or by crocheting directly into the teal oval after blocking. The following rounds assume working on top of the oval and into the Sc rounds near Round 16–18 where surface texture is desired.
Round 1 :
Pick up teal yarn on the oval at the start of the flat section. Ch1, sc around the inner circumference aligning with base rows to create a foundation (same stitch count as base round where you start).
Round 2 :
*Ch5, skip 3 sts, sc in next st* repeat around to create open loops. Adjust spacing to maintain symmetry. (loop count depends on circumference)
Round 3 :
Into each ch5 loop: (sc, ch3, 3 dc, ch3, sc) to make little fan shells inside the mesh. This fills the teal field with textured fans that read as subtle floral impressions.
Round 4 :
1 sc between each fan to stabilise the mesh. If you prefer a denser field, work 1 hdc instead of sc.
Info :
These surface fans provide a visual background that makes the 3D flowers pop. Work them inside the oval only. Keep tension consistent to avoid puckering.
— Large Layered Flower A (Make 3 large flowers + 2 medium) :
Info :
Each large layered flower has multiple petal tiers: central small petals (tight, round center), middle tier (curved petals that are slightly cupped) and outer tier (large elongated petals). Weights and stitch counts below are for a large rose-like flower approx 7–9 cm diameter when finished.
Center Round 1 :
mr, ch1, 6 sc in mr. (6)
Center Round 2 :
inc in each st around (12)
Center Round 3 :
(1 sc, inc) x6 (18)
Center Round 4 :
Folded bobble center: *ch1, (hdc, dc, tr) in next st, sl st into next* repeat around 6 times to create six raised clusters; fasten off center tail for sewing. This yields a textured central rosette.
Tier 1 (Small inner petals) Round 1 :
Attach contrast petal color to base, ch1, into each of the 18 sts: (sc, ch2, 3 dc, ch2, sl st) making small looped petals across base (18 petals). Fasten off but leave long tail for sewing to center.
Tier 2 (Curved petals) Round 1 :
Attach next color, ch1, into same base: *skip 1 st, (sc, ch3, 5 dc, ch3, sc) in next st* repeat around to form 9 larger curved petals (9)
Tier 2 Round 2 :
Work a round of sc evenly across petal bases to stabilise: 1 sc in each petal base stitch and across connecting points (approx 54 sc).
Info :
To get the cupped petal look, after completing each large petal, pull the top of the petal forward and stitch the petal base to the center with a few reverse slip stitches to create a slight cup. Add a tiny bit of fiberfill to the base of each petal if you want extra body.
Tier 3 (Outer elongated petals) Round 1 :
Attach outer color, ch1, *in each of the 9 petal tops: (sc, ch4, 7 dc, ch4, sc)* repeat for 9 outer petals. Finish with a round of sc across petal bases to reinforce (approx 72 sc)
Tier 3 Round 2 :
Edging: In outermost loops work picot points: *(sc, picot, sc) across petal top* to create delicate scallop. Fasten off leaving long tail for sewing.
Attachment Info :
Sew flower layers together through the center using a yarn needle and matching thread. Slightly offset tiers so petals alternate for a fuller bloom. Use small stitches through the very centers; hide tail ends beneath bottom tier. Make three large flowers and two medium (omit outermost tier for medium size).
— Small Round Puff Berries (Make many) :
Round 1 :
Make a tiny puff: ch2, 6 hdc in 2nd ch from hook, join with sl st (6)
Round 2 :
Work 2 rounds of sc around to firm the berry: 1 sc in each st (6) then again (6). Pull yarn tight to close center, fasten off leaving tail for sewing. Add a single stitch of darker color thread at top for a calyx if desired.
Info :
Insert a tiny pinch of fiberfill to shape the berry before closing. These small puffs are attached in clusters of 3–5 near vine ends and between leaves to mimic little buds.
— Leaves (Make 20–30 of varying sizes) :
Leaf Round 1 :
Ch10, sc in 2nd ch from hook, hdc, dc, tr, dtr, tr, dc, hdc across to last ch, sc in last ch. Turn to work along opposite side of chain: sc, hdc, dc, tr, dtr, tr, dc, hdc, sc into base to form a pointed leaf. Fasten off. (approx 18–20 sts per row)
Leaf Round 2 :
Optional: For textured central vein work sl st down center of leaf from base to tip then back; or embroider a central ridge with contrasting yarn. For a more sculpted leaf, work a round of sc in BLO to create a ridge at leaf base.
Info :
Use olive/leaf green shades; vary chain length to produce small (ch6), medium (ch8) and large (ch12) leaves. Starch or lightly block leaves if you want them to hold shape.
— Curled Vine Embroidery and Surface Chains :
Info :
Use a length of cream yarn held double or single, chain desired vine length and sew down with tiny whip-stitches. For raised spirals, chain 20–40 and coil into spiral, then stitch coil in place at several anchor points. You may alternatively use bullion or twisted chains to create raised rope effect.
Round 1 :
To make a double-strand vine: ch40 (or required length), fold into a gentle S, stitch along its length to secure at 6–8 anchor points with invisible stitches, leaving loops for berries to be placed.
Info :
Coil vines before attaching to determine final placement. Use pins and tailor tacking to experiment until composition feels balanced across the oval field.
— Joining Oval + Medallion Units into Runner :
Info :
Arrange your worked and blocked pieces on a flat surface in the S-shaped layout: alternate one teal oval then one cream medallion, offset so the medallions nest into the curves of the oval fields. Pin motifs together along touching edges. Joining should be done with invisible mattress stitch using the long tails left when fastening off motifs.
Round 1 :
Sew the first seam by matching stitch markers on both motifs; using a tapestry needle and long tail, work neat whip or mattress stitches through the back loop of both motifs about every 2–3 stitches to keep join flat. Continue joining motifs sequentially to form the full runner.
Round 2 :
When two motifs meet at pointed teardrop ends, gather the small extra stitches on one motif to match the curve of the other — use slight tucks and small stitches to align edges invisibly. Reinforce corners with 2–3 extra stitches to avoid gaps.
Info :
Leave small gaps intentionally where vine embroidery will cross seams so you can secure vines across joins as a continuous element.
— Scalloped Picot Border (Work around entire assembled runner) :
Info :
After joining and final blocking, create a continuous cream scalloped edge that frames both teal and cream motifs. Work into outer edge stitches evenly; adjust spacing along curves for consistent scallop size.
Round 1 :
Attach cream yarn anywhere on outer edge, ch1, sc evenly around outer edge of whole runner, placing 2 sc in each small curve and 1 sc on straighter edges. Maintain stitch count to keep runner flat. (st count will vary)
Round 2 :
*Skip 2 sc, in next sc work (5 dc, picot, 5 dc), sl st into next sc* repeat around to form scalloped petals. On tighter curves, reduce to (4 dc, picot, 4 dc) as needed. Join and fasten off.
Round 3 :
Edge finishing: Work a final round of slip-stitch or single crochet in cream in the very outermost loops to tidy picots. Add tiny picot points between main scallops for lace-like fringe. Fasten off and weave in ends.
Info :
Blocking the assembled runner pinned to final dimensions is crucial. Use a steam iron over a damp cloth or wet-block with pins to hold scallops open and create crisp picot points.
— Additional Small Decorative Motifs and Finishing Touches :
Round 1 :
Make small cream star flowers: mr, ch1, 10 sc in ring. Sl st to join. Then in each st ch2, sl st to form small 10-point stars. Make 8–12 and sew between big flowers.
Round 2 :
Make several 3D rosettes: ch4, join to form ring, (dc3, ch2) x8 around, cinch center, sew to field centers for extra texture.
Info :
Arrange and sew appliques starting with leaves, then berries, then flowers to prevent sewing over visible seams. Stitch through the backing of the oval but keep front appearance neat. Reinforce any high-stress points with a few extra passes of thread to secure heavier flowers.
— Final Blocking, Pressing and Care :
Info :
Completely wash and block the runner stretched to final dimensions. Pin each scallop to keep an even border. Once dry, gently press under a damp cloth on low to set the shape. Avoid heavy steam directly on cotton petals to prevent flattening 3D elements.
Round 1 :
Trim loose ends and weave tails into inner structure. If you used any glue for appliques, allow to dry overnight before final blocking.
Info :
For storage, roll runner gently to avoid crushing petals. If stacking for display, place tissue between layers to protect raised flowers.
Finishing this floral S-shaped runner feels like arranging a handmade garden on your table — each petal and leaf adds personality and charm. The combination of open lace medallions and sculptural blossoms creates a sophisticated centerpiece that guests will admire. Block, pin and sew slowly, enjoy the tactile process, and celebrate the beautiful heirloom you'll have created. 🧶🌸✨