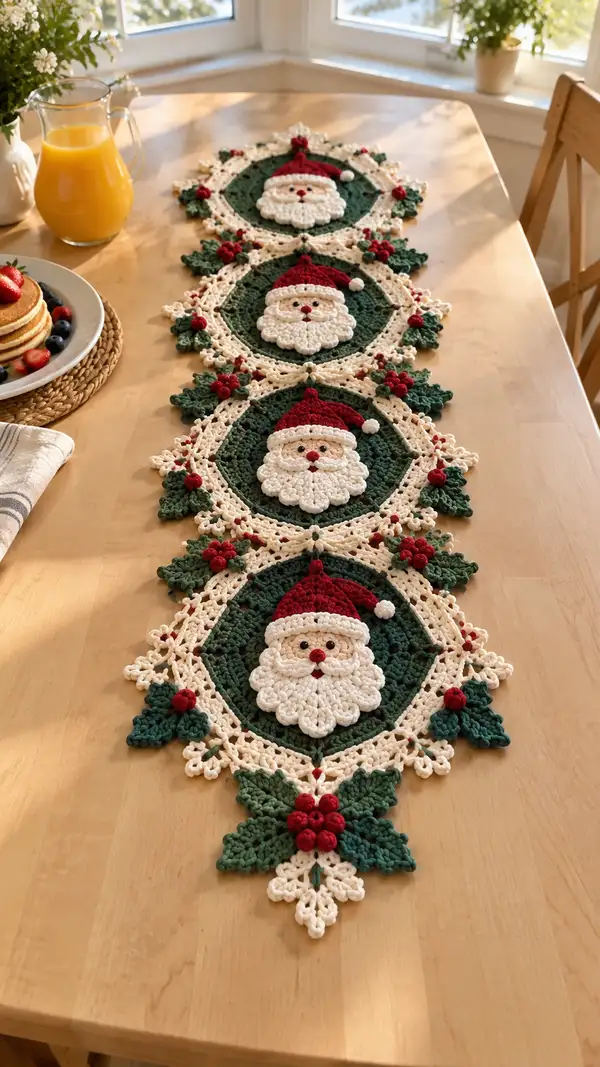
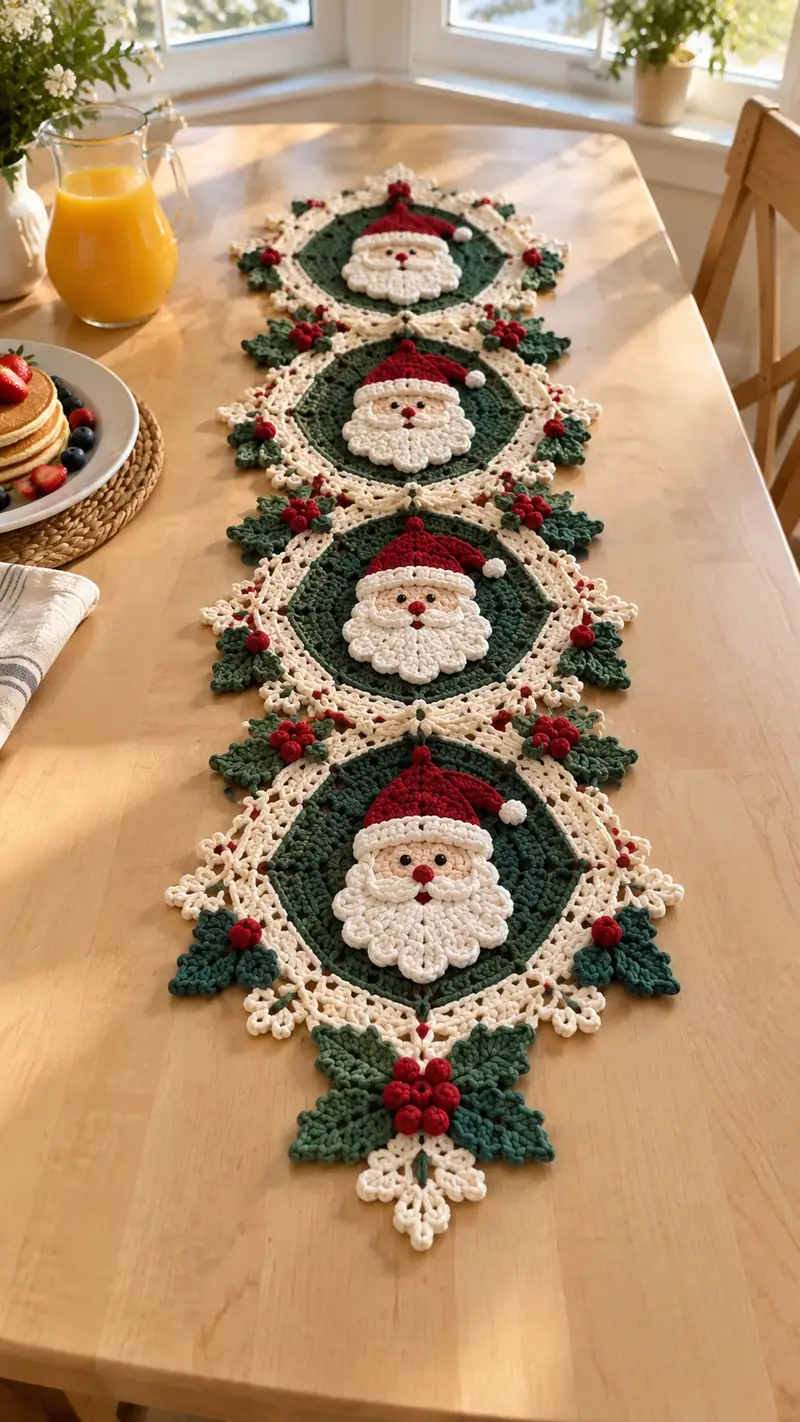
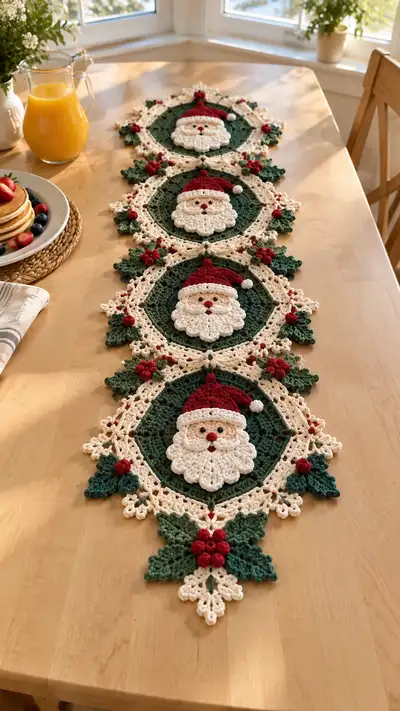
Create a festive Forest Green and Cranberry Santa table runner with four linked Santa medallions surrounded by lacy cream edging and holly clusters. This pattern includes detailed motif construction: Santa face appliques, textured beards, jaunty hats, deep green round backgrounds, and decorative holly and berries. Perfect for a holiday centerpiece, the pattern shows step-by-step rounds, color-change tips, and assembly notes to recreate the exact layered look shown in the photo.
Progress Tracker
0% Complete
— Santa Face (Flat Head Applique) :
Round 1 :
6 sc in magic ring (6)
Round 3 :
(1 sc, 1 inc) x 6 (18)
Round 4 :
(2 sc, 1 inc) x 6 (24)
Round 5 :
(3 sc, 1 inc) x 6 (30)
Info :
Work the face in flesh/peach yarn. Keep tension moderate; this applique is slightly domed so do not work overly tight. This piece is worked flat and will be sewn onto the green background.
Round 6 :
(4 sc, 1 inc) x 6 (36)
Round 7 :
(5 sc, 1 inc) x 6 (42)
Round 8 :
1 sc in each st (42)
Round 9 :
1 sc in each st (42)
Info :
Eye placement note: embroider or place small beads/safety eyes between rounds 7 and 8, spaced approx. 10-12 sts apart centre-to-centre for the expression shown. If embroidering, use small stitches to keep eyes subtle.
Round 10 :
(5 sc, 1 dec) x 6 (36)
Round 11 :
(4 sc, 1 dec) x 6 (30)
Info :
Stop flattening too early — keep face slightly padded with a smidge of craft batting for three-dimensional effect. Fasten off leaving a long tail for sewing to the green circle.
Round 12 :
(3 sc, 1 dec) x 6 (24)
Round 13 :
(2 sc, 1 dec) x 6 (18)
Round 14 :
Fasten off and weave tail through remaining sts to close a tiny center if you want a slightly rounded back (optional). Leave front smooth. (18)
Info :
Do not overstuff; the face should remain mostly flat so the beard appliques sit on top. Securely weave in tails behind the face so they do not show when sewn onto the green background.
— Beard Base (Textured Beard Applique) :
Round 1 :
Using cream yarn, ch 4, join with sl st into ring to form a small loop, then 8 sc into that small ring (8) — or mr with 8 sc (8)
Round 2 :
Inc in each st (16)
Round 3 :
(1 sc, inc) x 8 (24)
Round 4 :
(2 sc, inc) x 8 (32)
Info :
This piece is an applied scallop beard that will be sewn along the lower half of the face applique. Use a slightly looser tension for the whirl of textured loops so the scallops puff slightly above the face.
Round 5 :
(3 sc, inc) x 8 (40)
Round 6 :
1 sc in each st (40)
Round 7 :
Switch to loop stitch technique across next round to form scallops — *ch1, insert hook, yarn over and pull up long loop 3 times across same st to create 3-loop puff; secure by working a sc in next st*; rep around to create 10 scallops (40)
Round 8 :
Work 10 shell scallops for beard edge: *(5 dc in same st, skip 2 sts, sl st) x 10* forming scalloped border (40)
Info :
Sew beard onto face across rounds 10-14 of the face piece covering the lower half of the face. Place beard so scallops form a semi-circle and do not obstruct the mouth area. Use mattress stitch for an invisible join.
Round 9 :
Fasten off leaving long tail for sewing. Weave in ends. (40)
— Nose & Mouth Details :
Round 1 :
Using small amount of cranberry or red, make a small nose: mr, 6 sc (6)
Round 2 :
Sl st into next st, fasten off leaving tail for sewing (6)
Info :
Sew nose centered above beard scallops ~2-3 stitches above the beard edge. Use a couple of small whip stitches around the base to flatten slightly. For mouth, embroider a small 'v' under the nose with brown or deep red thread.
Round 3 :
Embroider simple mouth: use brown yarn, backstitch a small 'v' shape under nose (no stitch counts)
Round 4 :
Optional: add light blush with a fabric-safe rosy paint dot on each cheek (do this after assembly)
— Santa Hat (Make 1 per motif) :
Info :
Work hat in cranberry red with cream trim. The hat is a flattened cone worked in rounds and edged with white trim. Use 4.0mm hook for body of hat and 3.5mm for trim if you want a tighter edge.
Round 1 :
6 sc in magic ring with red (6)
Round 3 :
(1 sc, inc) x 6 (18)
Round 4 :
(2 sc, inc) x 6 (24)
Round 5 :
(3 sc, inc) x 6 (30)
Round 6-12 :
1 sc in each st (30)
Info :
Rounds 6-12 build hat height. You can increase or decrease rounds for taller or slouchier hats. For the exact look in photo, stop after round 12 for a medium slouch.
Round 13 :
(3 sc, dec) x 6 (24)
Round 14 :
(2 sc, dec) x 6 (18)
Round 15 :
(1 sc, dec) x 6 (12)
Round 16 :
6 dec (6) – leave a long tail to close and flatten the hat peak slightly, shaping to the slouch desired (6)
Round 17 :
Switch to cream yarn for trim. Join with sl st and work 1 round of crab stitch (reverse sc) or 1 round sc BLO to create a neat rolled brim. (6)
Info :
Attach a small cream pom: make a small mr pom ball (6 sc) or work 6-8 dc into a mr and cinch to form a little bobble, then sew to hat tip.
Round 18 :
Fasten off leaving long tail for sewing onto face centre top; position hat to cover the top quarter of the face and slightly overlap the forehead. (6)
— Central Green Background Circle (Make 1 per medallion) :
Round 1 :
6 sc in magic ring using forest green (6)
Round 3 :
(1 sc, inc) x 6 (18)
Round 4 :
(2 sc, inc) x 6 (24)
Round 5 :
(3 sc, inc) x 6 (30)
Round 6 :
(4 sc, inc) x 6 (36)
Round 7 :
(5 sc, inc) x 6 (42)
Round 8 :
(6 sc, inc) x 6 (48)
Round 9-12 :
1 sc in each st (48)
Info :
These rounds create a stable circular base large enough for the Santa face applique to be sewn on. Block flat before attaching appliques to ensure uniform diameter across all motifs.
Round 13 :
1 hdc in each st around (48)
Round 14 :
1 dc in each st around (48)
Round 15 :
Work 1 round of *sk1, (3 dc in next st), sk1, sl st* to create subtle texture ring of puffed clusters at outer edge (48 clusters counted as 48)
Round 16 :
Fasten off and block flat to measurements: aim for approx. 18-20cm diameter (this gauge depends on yarn/hook); adjust rounds to increase/decrease diameter as needed.
— Inner Joining Round (Cream) :
Info :
Join face and beard appliques to the green background now. Center face on circle and use mattress stitch with cream or matching flesh color to invisible-sew around face edge. Tack beard first then sew face slightly over the beard base for layered effect.
Round 1 :
With cream, join at the outer edge of green circle and ch1, sc around the outermost green edge placing 1 sc in each st (48)
Round 2 :
1 sc in each st BLO to create a subtle ridge and a surface for lace join (48)
Round 3 :
Work a decorative picot round: *sc, ch3, sl st in 3rd ch to form picot, sc* repeat creating 24 picots evenly spaced around (48)
Info :
This inner cream round is the base for the lacy frame and holly attachments. Keep tension even; if picots pull, block before proceeding.
— Lace Frame (Per Motif) :
Round 1 :
With cream yarn, join to one picot, ch4 (counts as tr), (tr, ch2, tr) in same picot to create a small arch. Skip 2 picots, sl st in next picot, ch4, (tr, ch2, tr) in same picot; repeat around to make 12 arches. (12 arches)
Round 2 :
Work across each arch: *(sl st into arch, ch5, sc into arch middle, ch5, sl st) x 12* creating decorative chains between arches (center openings increase) (12)
Round 3 :
Into each arch work a shell: *(5 dc, ch2, 5 dc) in arch top, sl st into base between arches* to form lacy scalloped points (12 shells)
Info :
Work loosely in the lace rounds; the lacy frame should drape and appear delicate. If you crochet tightly, go up one hook size for these rounds to keep the lace open.
Round 4 :
Between each shell, attach a tiny loop of green to begin holly leaf positioning: sl st into shell valley, ch3, join green with sl st. (12 green anchor points)
Round 5 :
Decorative connecting round: in cream, ch1, sc into base stitch, *ch4, sl st into next valley*, repeat around (creates small connecting lacy net) (48 chains)
Round 6 :
Work small star points to mimic the photo's pointed lace tips: *(sc, ch3, picot, sl st) into every other chain valley* repeat to create 24 small points
Info :
Do not fasten off. Leave long tails at predetermined positions where you will connect adjacent motifs. Each motif will be joined at 4 cardinal points plus minor connecting points along the scalloped edge.
— Holly Leaves (Make 8 large leaves per motif cluster pattern) :
Round 1 :
With forest green, ch 10. Row-style leaf: 1 sc in 2nd ch from hook, 1 hdc, 4 dc, 2 tr, 1 dc, 1 hdc, 1 sc across, then work down the opposite side: 1 sc, 1 hdc, 1 dc, 2 tr, 4 dc, 1 hdc, 1 sc. Sl st to base to complete leaf. (counts depend on chain length, approx. 20 sts)
Round 2 :
Edge the leaf with picot points: *sl st, ch3, sl st into next st* around to form small points that mimic holly serrations. Fasten off leaving long tail for sewing.
Info :
Block leaves flat into shape. Make leaves in two slightly different sizes by changing ch start (ch8 for small leaf, ch12 for a large leaf). Placement in photo shows layered leaves — place larger behind smaller ones when assembling clusters.
— Holly Berry Clusters (Make many small berries) :
Round 1 :
With cranberry yarn, mr, 6 sc (6)
Round 2 :
6 sc (6) — work tightly to create a small puff ball
Round 3 :
Fasten off leaving tail to sew. Make clusters of 3-7 berries depending on placement (photo shows clusters of 3 and larger central cluster near runner ends).
Info :
Sew berries in tight groups, tacking each berry into the lace frame and through to the green base for stability. Use small backstitches between berries to group securely.
— Smaller Decorative Berries & Beads :
Round 1 :
Use tiny French knot style bead with crochet: with red yarn, work a small tight knot and sew in place as filler accents between larger berries (no crochet count)
Info :
These tiny accents fill small gaps and create the dotted cranberry effect seen along the trimmed cream lace. Use either tiny crocheted 6-sc balls or small seed beads sewn in — choose according to recipient safety needs.
— Extra Lace Connectors & Motif Joins :
Round 1 :
Position 4 motifs in a straight line. At the cardinal joining points (top and bottom centers and two side centers) use cream yarn to work chain bridged connectors: from motif A, sl st to outer cream round, ch6, sl st into corresponding picot on next motif B, finish with secure knot and weave tail. Repeat for each join.
Round 2 :
To reinforce joins, work 1 round of sc along the chained bridge each side: join yarn at mid chain and sc along chain and into adjacent picots to create a decorative ribbon link. Fasten off and weave tails invisibly. (counts vary)
Info :
Pin motifs in place on a blocking mat in final arrangement before sewing joins. The photo shows four round medallions linked edge to edge with narrow cream chain links and small decorative red dots right at the joins, so mark those spots before sewing.
— End Medallion Extension (Pointed Fleur at Runner Ends) :
Round 1 :
From last motif bottom join, continue cream lace to form elongated leaf with 5 lobes building outwards: ch10, sl st to secure, then form 5 petal shells: each petal = (3 dc, ch2, 3 dc) in one arch and finish with picot edge. Repeat to create symmetric triangle point. (5 petals per side)
Round 2 :
Edge the extension with small green leaves and a central cluster of 7 cranberry berries (create and sew 7 small berries into a flower cluster), then finish with cream pointing tip using picots. Fasten off.
Info :
These end points are decorative anchors for the runner and replicate the triangular flourish seen at each end in the photo. Make them identical both ends for balance.
— Decorative Scallops and Final Picot Edging :
Round 1 :
With cream cotton, join near each small connecting chain and work *ch3, sc, ch3, picot* repeating along outer lace edge to accentuate photo's airy look — approx. 48 small scallops around each motif.
Round 2 :
Work a final tidy round of sl st to even any uneven points, go around each motif perimeter and snip excess, weave tails on back. (approx. 48)
Info :
Final blocking: soak gently and pin each motif flat with correct spacing, pulling lace out to its points. Use steam blocking or wet-block and allow to dry fully. This makes joins tidy and motifs lie flat on the table.
— Assembly & Final Touches :
Round 1 :
After all motifs, leaves and berries are ready and blocked, lay out runner in straight line with even spacing. Use long whip stitches with cream yarn to sew lace bridges securely, then reinforce green base to base with a few invisible mattress stitches to keep motifs flat during use. (no st count)
Round 2 :
Sew on additional small red berry accents along seam lines for the dotted cranberry look outward from motifs. Weave and hide all ends on reverse and, if desired, add a few hand-stitched invisible tacks in the center of each motif to prevent buckling during use.
Info :
Consider lightly starching the finished runner for a crisp tabletop look, especially if it will be used as a centerpiece. Store flat to preserve shape and avoid heavy stacking on top of the lace points.
This Forest Green and Cranberry Santa runner is a joyful holiday heirloom that brings color, texture, and handmade charm to your table. Each medallion is a small scene you create stitch by stitch — Santa's warm face, fluffy beard scallops, and sparkling holly clusters. The lacy connecting frame ties everything together and creates a vintage-yet-festive centerpiece you'll be proud to display. 🎄🧶