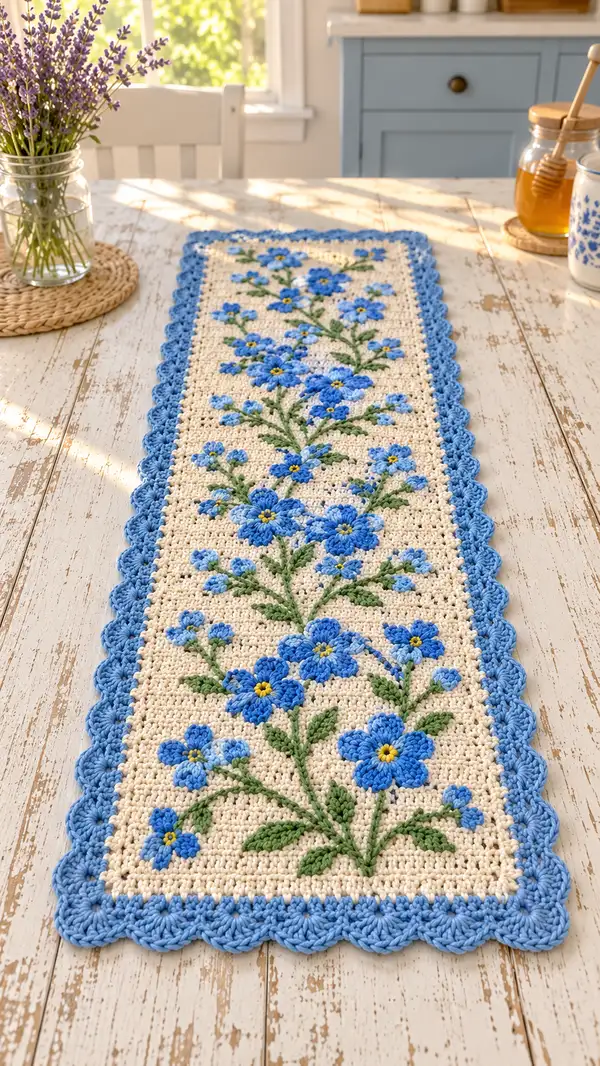
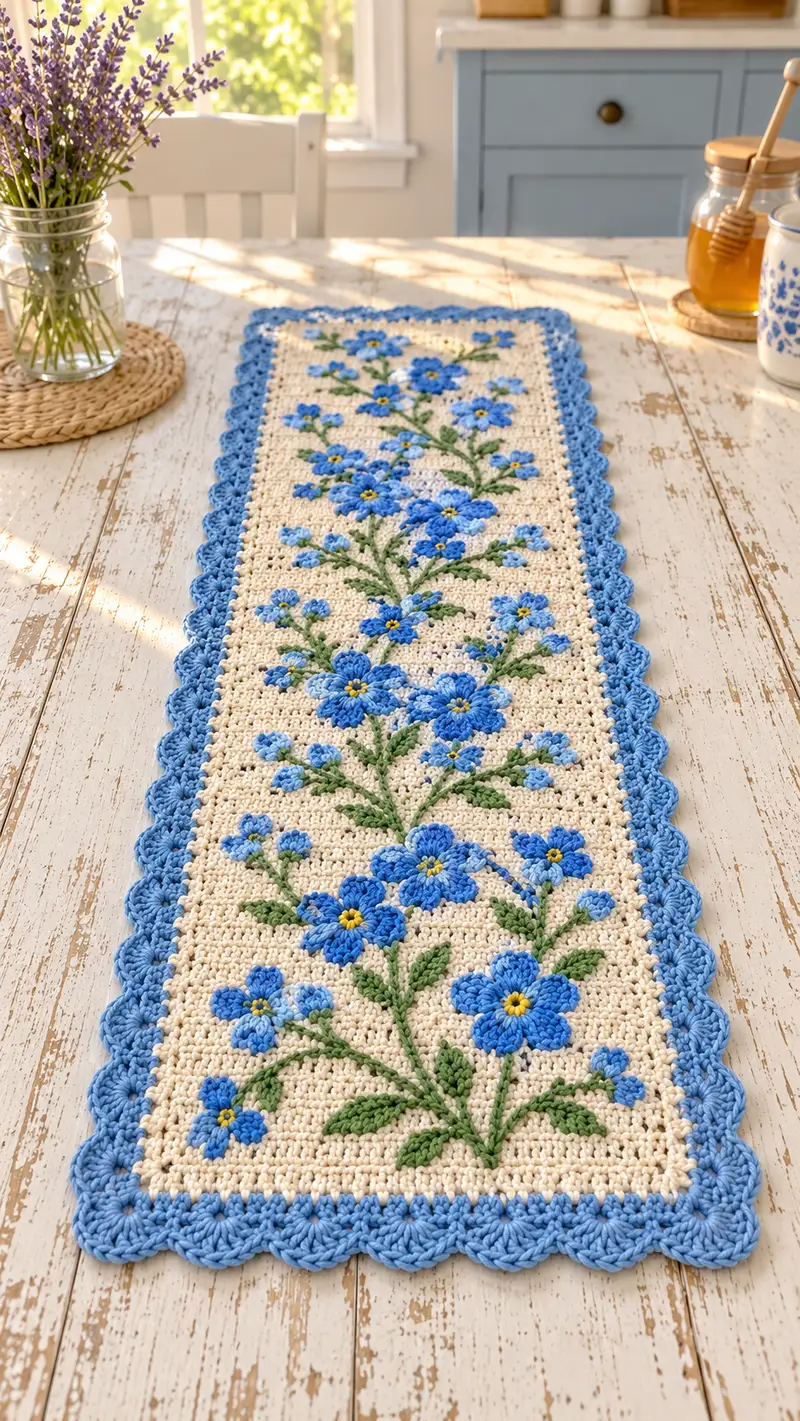
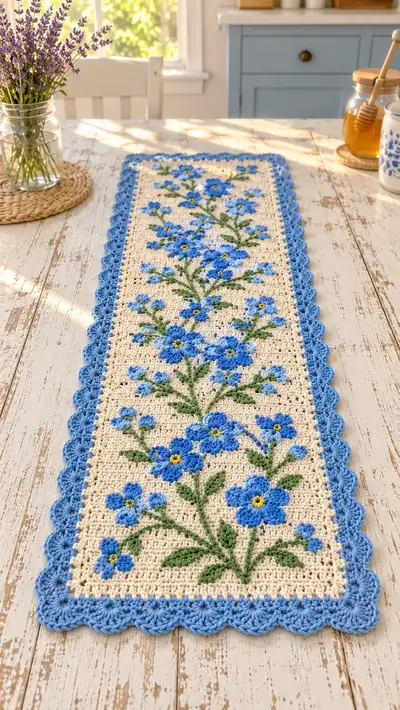
A long, delicate table runner featuring a cream background with handworked blue 'forget-me-not' blooms, leafy green stems, and a soft scalloped blue border. This beautiful, vintage-inspired runner adds a touch of cottage charm to a farmhouse table. The pattern uses a worked panel foundation with surface crochet/embroidery for floral detail and a scallop edging to finish. Ideal for gifting or a sunny brunch table centerpiece.
Progress Tracker
0% Complete
— Notes & Gauge :
Info :
This runner is worked flat in rows. Gauge is approximately 18 sc x 22 rows = 4 in (10 cm) in single crochet using 4.0mm hook and worsted yarn; check gauge and adjust hook size if necessary. Finished runner pictured measures approximately 12" (30 cm) wide by 40" (102 cm) long. You may adjust foundation chain and number of motif repeats to change width and length.
Info :
Throughout this pattern we call each row a 'Round' for consistency with round-style notation; the runner is worked flat in joined rows. Use stitch markers at the first stitch of each row if you prefer. Surface crochet details do not change the background stitch count.
— Foundation & Main Panel (Cream Background) :
Round 1 (Foundation) :
Ch 121. (This is the foundation chain and results in 121 base stitches across the panel.)
Round 2 :
1 sc in 2nd ch from hook and in each ch across. Turn. (121)
Info :
Maintain even tension. Place a stitch marker in the first stitch of each row to help track row starts and keep edges straight. The foundation chain of 121 gives an approximate width of 11.5-12" depending on gauge.
Round 3 :
Ch 1, 1 sc in each st across. Turn. (121)
Round 4 :
Ch 1, 1 sc in each st across. Turn. (121)
Round 5 :
Ch 1, 1 sc in each st across. Turn. (121)
Info :
Work the background in single crochet to create a nice, stable surface that will later support surface crochet and puff stitches. If you prefer a slightly more open texture, substitute hdc for sc throughout the panel but note motif heights will change.
Round 6 :
Ch 1, 1 sc in each st across. Turn. (121)
Round 7 :
Ch 1, 1 sc in each st across. Turn. (121)
Round 8 :
Ch 1, 1 sc in each st across. Turn. (121)
Round 9 :
Ch 1, 1 sc in each st across. Turn. (121)
Info :
The floral motifs are planned in vertical sprigs spaced along the length. It's helpful to mark the central column for each sprig before beginning surface details. For this runner, plan for four full-length sprigs spaced evenly along the width: mark stitch columns at stitches 21, 41, 61, and 81 as the approximate center columns for each vertical motif.
Round 10 :
Ch 1, 1 sc in each st across. Turn. (121)
Round 11 :
Ch 1, 1 sc in each st across. Turn. (121)
Round 12 :
Ch 1, 1 sc in each st across. Turn. (121)
Round 13 :
Ch 1, 1 sc in each st across. Turn. (121)
Info :
Rows 1-20 form the lower third of the runner. You will add floral clusters beginning around Round 15 and up to Round 55 to create the vertical flow. Use a removable marker or a contrasting scrap of yarn to mark the rows where large flowers will be anchored (suggested row centers: 18, 26, 34, 42, 50).
Round 14 :
Ch 1, 1 sc in each st across. Turn. (121)
Round 15 :
Ch 1, 1 sc in each st across. Turn. (121)
Round 16 :
Ch 1, 1 sc in each st across. Turn. (121)
Round 17 :
Ch 1, 1 sc in each st across. Turn. (121)
Round 18 :
Ch 1, 1 sc in each st across. Turn. (121)
Info :
Before you continue to the central panel rows, check the panel width and length. If you prefer a narrower runner, reduce the foundation chain by multiples of 20 and shift motif placement accordingly. Keep the number of foundation stitches odd so motif centers fall on single center columns.
Round 19 :
Ch 1, 1 sc in each st across. Turn. (121)
Round 20 :
Ch 1, 1 sc in each st across. Turn. (121)
Round 21 :
Ch 1, 1 sc in each st across. Turn. (121)
Round 22 :
Ch 1, 1 sc in each st across. Turn. (121)
Round 23 :
Ch 1, 1 sc in each st across. Turn. (121)
Info :
We will now begin instructions for floral elements. The flowers are created using a combination of puff stitches (for raised petals), small clusters for buds, and surface slip stitches for stems and leaf outlines. These stitches are worked into the background stitches (sc) and do not change row stitch counts.
— Large Flower Motif (Make 8-10 large flowers across runner) :
Info :
Each large flower is centered on a single stitch column and anchored to a particular background row. Suggested anchor rows: 18, 26, 34, 42, 50. Center columns per sprig are stitches 21, 41, 61, 81. For each large flower, work the following 6 rounds (rows) of petal building in place with blue yarn. The petal work does not alter the main panel stitch count.
Round 1 :
Change to Cornflower Blue yarn. Locate the anchor stitch (the sc on the background row where the flower center sits). Insert hook through the front loop of the anchor stitch and yarn over to begin a puff petal.
Round 2 :
Puff Petal 1: Yarn over, insert hook into the same anchor st, pull up loop (repeat 4 times total to gather 5 loops on hook), yarn over and pull through all 5 loops, ch 1 to close puff. Sl st into the next background stitch to set petal. (Petal width occupies roughly 1-3 background stitches depending on tension)
Round 3 :
Puff Petal 2: Move the hook to the background st immediately clockwise from the anchor and repeat the 5-loop puff (yarn over, insert, pull loop x4, yarn over and pull through all 5, ch1). Sl st into next background stitch.
Round 4 :
Repeat puff petals working around the anchor stitch to form 5 petals total (complete puff at each adjacent background stitch around anchor). When five puff petals are complete, switch to Sunshine Yellow for the small center: in the center anchor stitch, work 6 sc tightly to form the disc, or embroider a sewn French-knot-style center with yarn.
Info :
If your puff petals look too large, reduce to 4 loops per puff instead of 5. Keep petals consistent across the runner. After completing petals and center, fasten off blue and yellow yarns and weave ends to the back of the panel. The completed flower will be raised above the background about the height of 1-2 rows.
Round 5 :
Optional Petal Shadow: With a lighter Sky Blue, anchor into the base of alternate petals and work one small sc or slip-stitch to create a shaded edge, placing 1-2 short slip stitches per petal to suggest layered petals. Fasten off and weave ends.
Info :
Repeat this large flower build for each planned anchor position. There are approximately 8-10 large flowers across the runner length (two per sprig for longer sprigs). Space them vertically as suggested by anchor row numbers. Keep consistent petal counts and placement for a balanced appearance.
— Small Bud Motifs (Make many small buds) :
Round 1 :
Change to Sky Blue yarn. For each small bud, insert hook through the front loop of the background stitch where you want the bud, yarn over, pull up a loop, yarn over and pull through two loops (a small psuedo-hdc), ch 1 and fasten off to create a small raised bud. Alternatively use a 3-loop puff (pull up loop 3 times then pull through) to make a tiny puff bud. These do not change background stitch counts.
Round 2 :
Place small buds in clusters of 2-4 around large flowers and along stems as shown; vary orientation for natural look.
Info :
When working many small buds, work from bottom to top so you can plan stem connections smoothly. Keep small buds evenly sized by using the same number of loops for puff or the same small hdc method each time.
— Stems & Leaves (Surface Crochet & Embroidery) :
Info :
Stems are worked with surface slip stitches (ss) using Leaf Green yarn. Surface slip stitch: insert hook from front to back around the bar of the sc in the row above (or below) and draw yarn through to the front, then sl st to create a raised line. Leaves are worked as anchored short rows of sc or small puff clusters to suggest leaf blades. These techniques do not alter the background sc stitch counts.
Round 1 :
Change to Leaf Green. For each stem, begin at the base anchor row (suggested rows 16-18 for the first sprig). Insert hook into the front loop of the background stitch where the stem starts, yarn over and pull up loop, then work 1 sc and chain 1, or begin a surface sl st by inserting hook under the horizontal bar of a background sc in the row above, draw yarn through and sl st along successive sc bars to create a continuous stem shape. Work surface sl st upward diagonally to the location of the first leaf.
Round 2 :
Work first leaf: anchor a small 3-4 loop puff at the background stitch where leaf base sits, then decrease the puff loops on the opposite side to form a tapered leaf. Alternatively, work 3 sc in a triangular arrangement, placing them in adjacent background stitches to form a leaf. Fasten off or continue stem above leaf.
Round 3 :
Continue stem upward to the next flower anchor. Add additional leaves on alternating sides, varying leaf sizes (3-6 leaves per vertical sprig as pictured). Use small sl st veins within leaves for additional detail if desired.
Info :
Keep stems gently curving and slightly tapered by changing the angle of surface sl st placement. Work stems with consistent tension so they sit neatly on the background; avoid pulling too tight or creating dimples in the background fabric.
— Small Accent Branches & Tiny Flowers :
Round 1 :
Using Sky Blue, work small three-petal flowerlets by placing three tiny puff stitches around an anchor stitch. Add a tiny yellow center if desired. Place these clusters adjacent to leaves and large flowers to create a meadowed effect.
Round 2 :
Vary the bud and flowerlet positions along the stem to mimic the photographed layout: clusters of two or three small flowers between large flowers, and one or two tiny buds near leaf axils.
Info :
Step back periodically and view the runner from a few feet away to ensure motifs read well at a distance. Adjust spacing and density as needed so the flowers do not appear cramped.
— Central Small Flower Variations (Alternate Petal Techniques) :
Round 1 :
Variation A - Raised Crochet Petal: Work 3-4 puff loops per petal (4-loop puff recommended), 5 petals per small flower, yellow center 4 sc.
Round 2 :
Variation B - Cluster Petal: Work small bobble cluster: (yo, insert, pull up loop) x 3 then finish as one bobble using sl st to secure; place 5 around anchor.
Info :
Alternate the petal style every other sprig for visual interest. Use either cornflower or sky blue for petals to create tonal contrast across the runner.
— Edge Preparation (Before Border) :
Info :
When floral work is complete, gently block the panel to square it. Pin to the desired final measurements and steam-block or wet-block according to yarn instructions. Allow to dry thoroughly before working the border to ensure a smooth scalloped edge.
Round 1 :
With cream yarn, work 1 sc evenly along the side edge (the side of the rows). Start in the first stitch at the corner and work 1 sc in each row-end stitch up the side; place 3 sc in each corner stitch to keep corners square. Continue 1 sc evenly across the top edge (work into top row stitches), 3 sc in corner, 1 sc evenly down the second side, 3 sc in corner, and 1 sc across the bottom to join. Join with sl st to the first sc. Do not turn. (Edge sc count will approximate the sum of row-end stitches and top-side stitches; for this panel you will have roughly: 2 sides x 61 row-ends + 121 top + 121 bottom + 12 corner extras ≈ 376 stitches around - this is approximate; work 1 sc evenly.)
Info :
Count and adjust your sc evenly so scallops fall evenly around the perimeter. If necessary, add or remove a few sc along the long edges so that scallop repeats divide evenly into the total sc count for the shell round.
— Scalloped Shell Border (Blue) :
Info :
Switch to Cornflower Blue for the scallop round. The scallop is worked as shell repeats: (skip 2 sc, 5 dc in next sc, skip 2 sc, sl st) repeated around. For more pronounced scallops, use 6 dc per shell or increase spacing. We will give two rounds: an anchor row of dc and the shell scallops round.
Round 1 :
Join Cornflower Blue with a sl st to any sc on the border. Ch 2 (counts as first dc), work 1 dc in same st, 2 dc in each sc across the long sides with 3 dc in corners to gently turn corners, aiming to increase the anchor so shells sit flat. Join with sl st to top of ch-2. (Stitch count will vary depending on how many dc you placed; work evenly.)
Round 2 :
Shell Round: *Sk 2 dc, 5 dc in next dc, sk 2 dc, sl st in next dc; rep from * around. When you reach corners, work 5 dc into the corner dc to keep shell centered and continue. Join with sl st to first dc. Fasten off and weave in ends. (Number of shells around the runner will be approximately the total anchor dc divided by 3-4; adjust spacing so shells are even.)
Info :
For a scallop that matches the photo, work shells neatly and block again lightly after finishing the border. If shells pucker, damp-block and pin shells to flatten. If you want a smaller scallop, use 4 dc shells with skip 1 between shells.
— Finishing Touches & Weaving Ends :
Round 1 :
Secure all yarn tails from flowers, stems, and border by weaving them into the back of the panel for at least 2" (5 cm) before trimming. Use a tapestry needle and weave along rows and under several stitches for security.
Round 2 :
Block the finished runner again to set the scallops and flatten motifs. Pin to dimensions and steam or wet block per yarn care instructions. Let dry completely on a flat surface.
Info :
Label the underside with a small sewn tag if gifting. Keep a small fabric patch or felt piece under the runner when in heavy use to protect high-relief petals from snagging.
— Alternative Border Option (Lace Edge) :
Round 1 :
After the anchor dc round, work 1 ch, *skip 2 dc, (sc, ch 3, sc) in next dc, sk 2 dc, sl st* repeat to create tiny picot-lace points. This gives a delicate border instead of large scallops.
Info :
Choose edge styling based on intended use: scallops for a bold cottage look, tiny lace points for a lighter, more delicate runner.
— Optional Additional Embellishments :
Round 1 :
Add tiny french-knot-style embroidered yellow centers using embroidery floss or leftover yarn for bright highlights. Use a small needle and sew 3-6 stitches in the center of each large flower for a textured, slightly beaded center.
Round 2 :
Sew small clear seed beads or glass beads into the flower centers for sparkle (optional) — secure with knot and weave ends thoroughly.
Info :
If making this runner for a child or households with small children, avoid beads and use embroidered centers instead to keep it safe and washable.
— Sizing & Customizing :
Info :
To lengthen the runner, add more background rows in multiples of 8-10 rows to maintain motif spacing, then repeat flower clusters along the added length. To widen, increase the foundation chain by multiples of 20 and redistribute sprig center columns evenly.
Round 1 :
If you wish to create a table runner with five sprigs instead of four, increase foundation chain to 141 and place motif centers at approximate stitch columns 21, 41, 61, 81, 101. Adjust border stitch counts accordingly when working shells.
Info :
Different yarn weights: if using DK or sport weight, increase hook size by one or two sizes to keep drape similar; if using bulky, decrease hook or expect a much denser, shorter runner.
— Care Instructions :
Info :
Hand wash or use gentle machine wash in a laundry bag on a delicate cycle. Lay flat to dry to keep scallops and puff petals intact. Avoid wringing or tumble drying to preserve shape and prevent distortion of raised textures.
Completing this Forget Me Not Blue Meadow Table Runner brings the joy of a sunlit cottage into your home. Each raised petal and subtle leaf gives the runner a hand-stitched, heirloom-quality look. The scalloped border frames the meadow of blue blooms perfectly, making it a stunning centerpiece or thoughtful handmade gift. 🧶🌼 I hope this pattern sparks your creativity and becomes a treasured piece on your table. Happy stitching! ✨