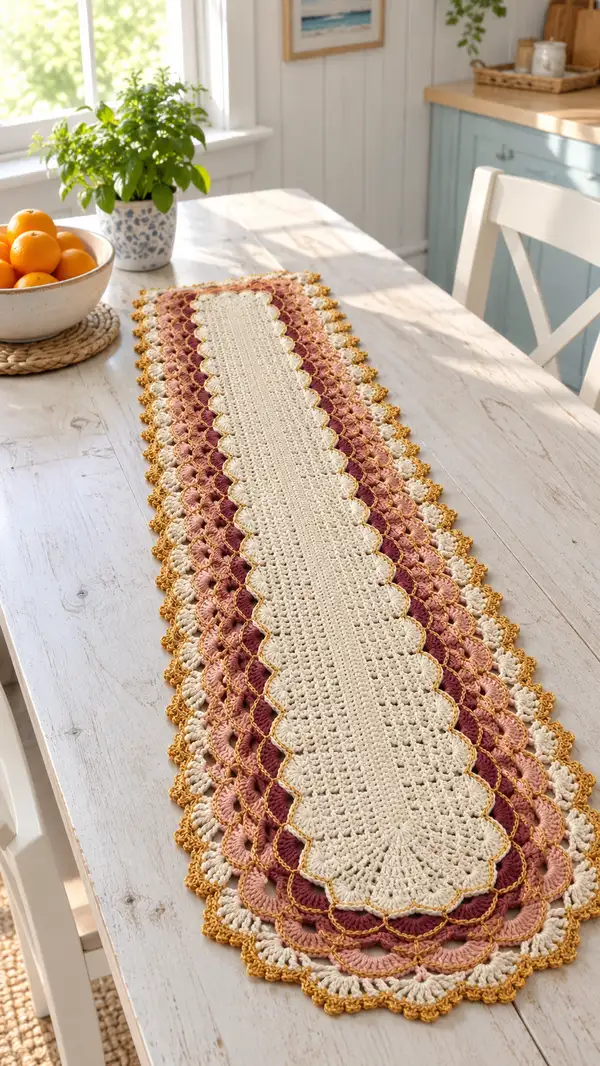
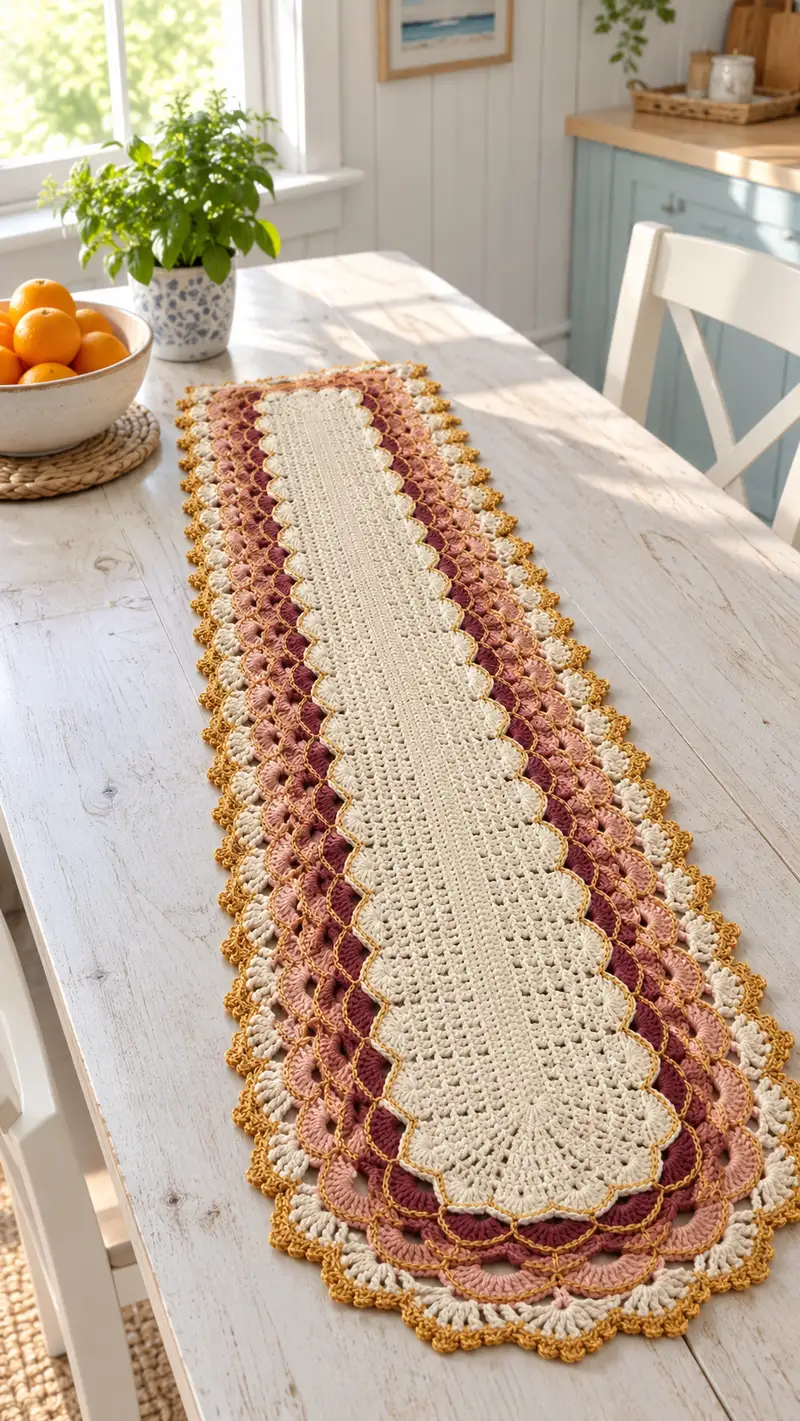
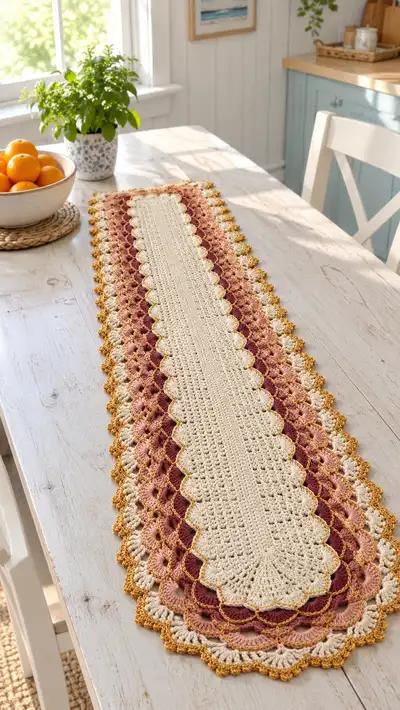
A long, elegant table runner with layered scallop edging in warm autumn tones. The center features a textured cream panel flanked by concentric scalloped bands in burgundy, dusty rose, and soft pink, finished with a mustard-gold picot trim. This flat crochet runner is worked in joined rounds and color bands to create the stacked shell effect pictured — perfect for a dining table or console.
Progress Tracker
0% Complete
— Notes :
Info :
This pattern is worked in joined rounds starting with a foundation chain to create a long oval. The runner length can be adjusted by changing the initial foundation chain in multiples of 2 stitches (see Adjusting Length Info). Shell and fan clusters are placed evenly around the perimeter; counts are given for the sample size shown in photographs. Carry unused colors loosely along wrong side where possible or weave in ends after each band if you prefer a cleaner finish.
— Gauge & Finished Size :
Info :
Gauge is not critical for this accessory, but the sample measures approximately 12.5" (32cm) wide and 36" (91cm) long using foundation chain 62 and the yarns specified, after light blocking. If you change yarn weight or hook, expect the finished size to vary proportionally.
— Foundation & Center Panel :
Round 1 :
Ch 62, do not twist chain. Join with sl st to first ch to form an oval; ch 1 to begin. Work 1 sc in each ch across (62), work 3 sc in last chain to round the end, sc across opposite side of chain (62), work 3 sc in last chain (turn of chain). Total = 130 sc (2 x 62 + 6).
Info :
This creates a neat oval base with six increases (3 sc) at each short end. Mark the center stitch on each long side and the center of each short end with a removable stitch marker to help count shells for later rounds.
Round 2 :
1 sc in each st around (130)
Round 3 :
Ch 2 (counts as hdc). *Skip next st, hdc in next st; rep from * around to create a subtle texture. End with hdc in last st. Total ~130 hdc-equivalents (130)
Round 4 :
1 sc in each st around (130)
Round 5 :
Ch 3 (counts as dc). *Sk 1, [dc, ch1, dc] cluster (V in next st), sk1; rep across the long sides, and work clusters into the 3-sc corner groups at ends to maintain shape. Total stays 130 stitch anchors (counting clusters as single anchors)
Info :
Work clusters evenly on both long sides. If you find your oval pulling at the ends, double-check the 3-sc corners have clusters placed into them to distribute increases evenly.
Round 6 :
1 sc in each st around, placing 3 sc into the grouped cluster spaces at each short end when necessary to keep the oval shape (130)
Round 7 :
Ch 2, hdc in same st. Hdc in each st around (130)
Round 8 :
1 sc in each st around (130)
Round 9 :
Ch 3 (counts as dc), dc in next st; *ch1, sk1, dc in next 2 sts; rep from * around. Work dc clusters into corner groups at each short end. Maintain anchors as 130 (130)
Info :
At Rounds 2-9 the center panel is establishing body and texture. Keep tension even and ensure short ends remain rounded by placing slightly more stitches into the 3-sc base at the ends when needed. Use stitch markers to confirm you have 65 anchors along each long side (65 anchors + 65 opposite = 130 total anchors).
Round 10 :
1 sc in each st around (130)
Round 11 :
Ch 2, *BLO hdc in next 2 sts, ch1; rep from * around to create a subtle ribbed strip down the center visual (130)
Round 12 :
1 sc in each st around (130)
Round 13 :
Ch 3 (counts dc), *dc in next st, ch1, sk1; rep from * around. Maintain corner shaping by placing clusters in the ends (130)
Info :
Check your work now: you should see a long textured panel with rounded short ends. The anchors (stitch groups that will take shells) should still be 65 on each long side — keep this count for upcoming border rounds.
Round 14 :
1 sc in each st around (130)
Round 15 :
Switch to deep burgundy (Accent A). Join color with sl st at any long-side anchor stitch. Ch 1, 1 sc in same st, 1 sc in each st around (130)
Info :
Change to Accent A (deep burgundy) for the first scallop band. Carry cream inside if you like or fasten off and weave in. When changing color at a side, make sure the join sits on the wrong side for a cleaner right side appearance.
Round 16 :
1 sc in each st around in Accent A (130)
Round 17 :
Ch 2 (counts hdc). *hdc in next 2 sts, ch1; rep around (130)
Round 18 :
1 sc in each st around (130)
Round 19 :
Ch 3 (counts as dc). *sk next st, shell 5 dc in next st; sk next st, 1 sc in next st; rep across the long sides; in corner groups at ends work shells into center of corner cluster to preserve roundness. Repeat pattern across whole round as written until you reach starting point. Using 130 anchors, this pattern is executed as (1 sc, shell 5 dc) x 65. Total stitches worked this round = 65*(1+5) = 390 stitches.
Info :
This is your first shell row. Each shell is worked into an anchor stitch. Counting: because the pattern uses a pair of anchors per repeat (1 sc then shell in next), you will have 65 repeats. Mark every 10th repeat with a removable marker so you can check the count as you go along a long round.
Round 20 :
1 sc in each st around (390)
Round 21 :
Ch 1, *1 sc in top of shell (center dc of 5), ch 2, 1 sc in next sc between shells; rep around. This series keeps 65 shells and creates small chain loops between shells. Count is 65*(1 sc + 1 ch-space + 1 sc) as worked on top of 390 base stitches but you will work 130 actual sc anchors and 65 ch-2 loops; total worked actions = 195 anchors/spaces visible (but the structural anchors remain 65). For practical counting simply follow the shell centers: 65 shells = 65 loop placements.
Info :
When a round uses chain loops between shell tops, numeric stitch totals are often described in terms of units (shells) rather than raw stitch counts around. Focus on maintaining 65 shell centers around the perimeter; this preserves symmetry for the next shell band.
Round 22 :
1 sc in each sc and across the ch-2 loops (work 2 sc into each ch-2 loop) to tidy the round and prepare anchor points for next band. Total stitches after working 2 sc into each ch-2 = 65 shell tops + (2*65 sc into ch loops) = 65 + 130 = 195 sc. Practical count = 195 sc
Round 23 :
Switch to dusty rose (Accent B). Join in any shell top. Ch 1, 1 sc in same st, 1 sc in each st around (195)
Info :
Accent B will create the second band of scallops that sit on top of the Accent A shells. Take time to hide and weave the burgundy tail behind the new join for a tidy edge.
Round 24 :
Ch 3 (counts dc). *Sk 1 sc, dc in next sc (center of previous shell top), ch 1; rep across; ensure corner placement receives appropriate dc clusters. This gives a base of dc loops for fan shells. Total approx = follow 65 shell top anchors -> you will perform ~65 dc actions and ch loops (count expressed per shell center)
Round 25 :
1 sc in each st and ch-space around (195)
Round 26 :
Ch 2, *FAN: work [5 dc] in center dc of previous row (in that anchor), ch 2, 1 sc in the ch-1 space between anchors; rep across. Work a 5-dc fan at the top of each Accent A shell center. Repeats = 65 fans. Stitches worked this round = 65*(5 dc + 1 sc) = 65*6 = 390 actions (counts as 390 stitches worked).
Info :
Keep each fan centered on the shell top from the previous band; using a stitch marker at first fan and then counting in 10s will help you keep an accurate tally across the long perimeter.
Round 27 :
1 sc in each st around to tie fan bases together (390)
Round 28 :
Switch to soft blush (Accent C). Join in any fan top. Ch 1, 1 sc in same st, 1 sc in each st around (390)
Round 29 :
Ch 3; *work shell of 7 dc in top of fan (center top stitch), ch 2, sl st into next sc between fans; rep across. Repeats = 65 shells. Stitches worked = 65*7 = 455 stitches worked during the round.
Info :
This Accent C layer creates a larger, fuller scallop on top of the dusty rose fan. The shells will naturally overlap slightly with the band beneath — this is expected and gives the stacked scallop effect seen in the photo.
Round 30 :
1 sc in each st around to stabilize large shells (455)
Round 31 :
Ch 2, *1 sc in top of shell center, ch 3, sk next few stitches to reach next shell center; rep. This produces chain loops that accent the shells and prepare for the final edge. Count by shells: 65 ch-3 loops and 65 sc anchors; worked actions = 130 anchors + 65 ch loops = 195 actions.
Info :
At this point the layered scallops in three colors are visible: deep burgundy at the inner band, dusty rose middle fans, and soft blush outer shells. Confirm that your short ends remain rounded; re-shape slightly if necessary before edging rounds.
Round 32 :
Switch to mustard/gold for highlight and edging. Join with sl st into any sc anchor on outer shell row. Ch 1, 1 sc in same st, 1 sc in each st and ch-space around, working 2 sc in the center loop at each short end to keep the oval shape. Total stitches around this round = count of sc around previous round (approx 195 to 455 depending on how you interpret anchors). Work to maintain even distribution; practical method: place 2 sc into each short-end center shell to avoid pulling (final count depends on your previous work but will align to 65 shell centers around entire runner).
Info :
Mustard is used as a highlight to trace the edges of shells and give the runner a crisp, finished look. If you prefer a softer finish, use cream instead for the final rounds.
Round 33 :
1 sc in each st around in mustard (work evenly to the end). This is a tidy consolidation round to create a stable base for the picot edging. Practical count = whatever your working stitches are; focus on even coverage across the shells.
Round 34 :
Ch 3, *skip next 2 sc, (3 dc, ch 2, 3 dc) in next sc — a double fan/fnote anchored on shell peaks — sk next 2 sc, sl st in next sc; rep around. This creates a scalloped decorative line on top of the mustard base. Anchors per repeat correspond to the number of outer shells — repeat count = 65 repeats. Stitches per repeat = 3dc + ch2 + 3dc + sl st + 2 skipped = ~7 worked stitches per repeat actually executed = 65*7 = 455 actions.
Info :
The double fan adds definition to each scallop. If your runner feels bulky at the double fans, switch to a slightly smaller hook for the final decorative rows to keep the edge lying flat.
Round 35 :
1 sc in each st around to hold the double fan row together (455)
Round 36 :
Ch 1, *1 sc in next 2 sts, picot (ch 3, sl st into first ch), sk 1 st; rep around. Place picot at outer edge of each double-fan valley to achieve the tiny points visible in the finished image. Repeat count = 65 picot points (approx). Total worked actions = depends on stitch density but target is one picot per scallop.
Info :
Picot placement is the final flourish. If you prefer a fuller picot, ch 4 instead of ch 3. Use a finer hook if you want smaller picots.
Round 37 :
1 sc in each st around to secure picots (work slowly across picots so they remain upright). Count by shells rather than raw stitch numbers to maintain even coverage.
Round 38 :
Optional: For a layered trim, repeat a shallow scallop row: *1 sc in next 3, (5 dc in next), 1 sc in next 3; rep across; do 1 sc round after to secure. This creates a small additional scallop band that follows the larger shells. This band will have 65 repeats. Stitches per repeat = 3 sc + 5 dc + 3 sc = 11 actions => 65*11 = 715 actions. Choose this only if you want a fuller edge.
Info :
The optional secondary scallop is decorative. The sample runner shows multiple layered scallops; including this step makes the edge visually richer but increases yarn usage and bulk. If you do add this band, you will likely increase the overall width by ~1/2"-1" per band.
Round 39 :
1 sc in each st around to tidy optional scallops (if used). Otherwise skip this round and proceed to final picot finishing in Round 40.
Round 40 :
Final edging: using mustard, with the RS facing, *sl st to the outermost point of a scallop, ch 1, 1 sc in same point, ch 3, sl st into base of sc (a simple raised picot), sl st to next scallop point; rep around to finish. Fasten off and weave in all ends neatly. If you added optional scallops, place picots across the outermost edge.
Info :
Weave in ends as you go, using tidy duplicate-stitch-like weaving on the wrong side for secure joins. Lightly block the runner once all ends are woven: pin into shape on blocking mats and steam or wet block gently. Allow to dry flat before removing pins.
— Adjusting Length :
Info :
To make the runner longer or shorter, change the foundation chain in multiples of 2 stitches. Each additional 2 chains adds one more anchor pair across both long sides (effectively adding two anchors per long side and raising the repeat count accordingly). When altering length, re-count anchors before the first shell round so the shell repeats stay evenly spaced. For best results, maintain an even number of anchors per long side (sample used 65 anchors per long side, 130 total for base).
— Blocking & Finishing :
Info :
Block the runner after weaving ends. Pin the scallops gently into shape using rust-proof pins and a blocking mat. For crisp picots, use a tiny amount of fabric-safe spray starch or a steam iron held an inch above the fabric — do not press directly. Let dry completely before use.
Info :
Storage tip: keep flat or rolled to preserve scallops, and avoid stacking heavy items on top of the runner to keep the shell edges from flattening over time.
Completing this scalloped table runner is so rewarding — each shell layer builds personality until the whole piece feels like a heirloom. The layered scallops and mustard picot give it a warm, vintage-inspired charm that livens a tabletop in any season. Enjoy blocking it into a crisp finish and seeing how the colors sing together! 🧶💛