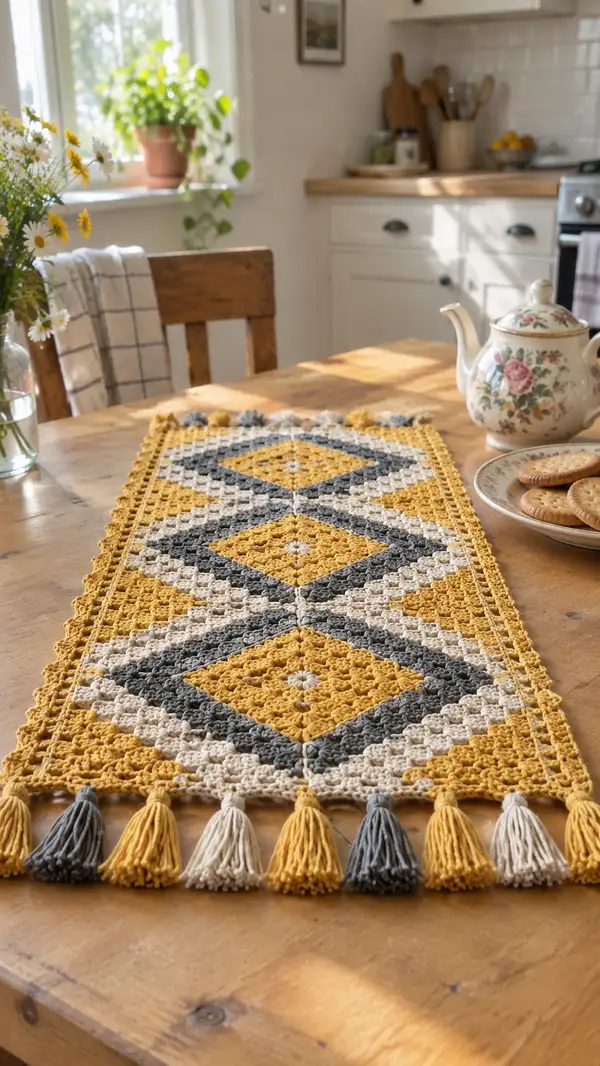
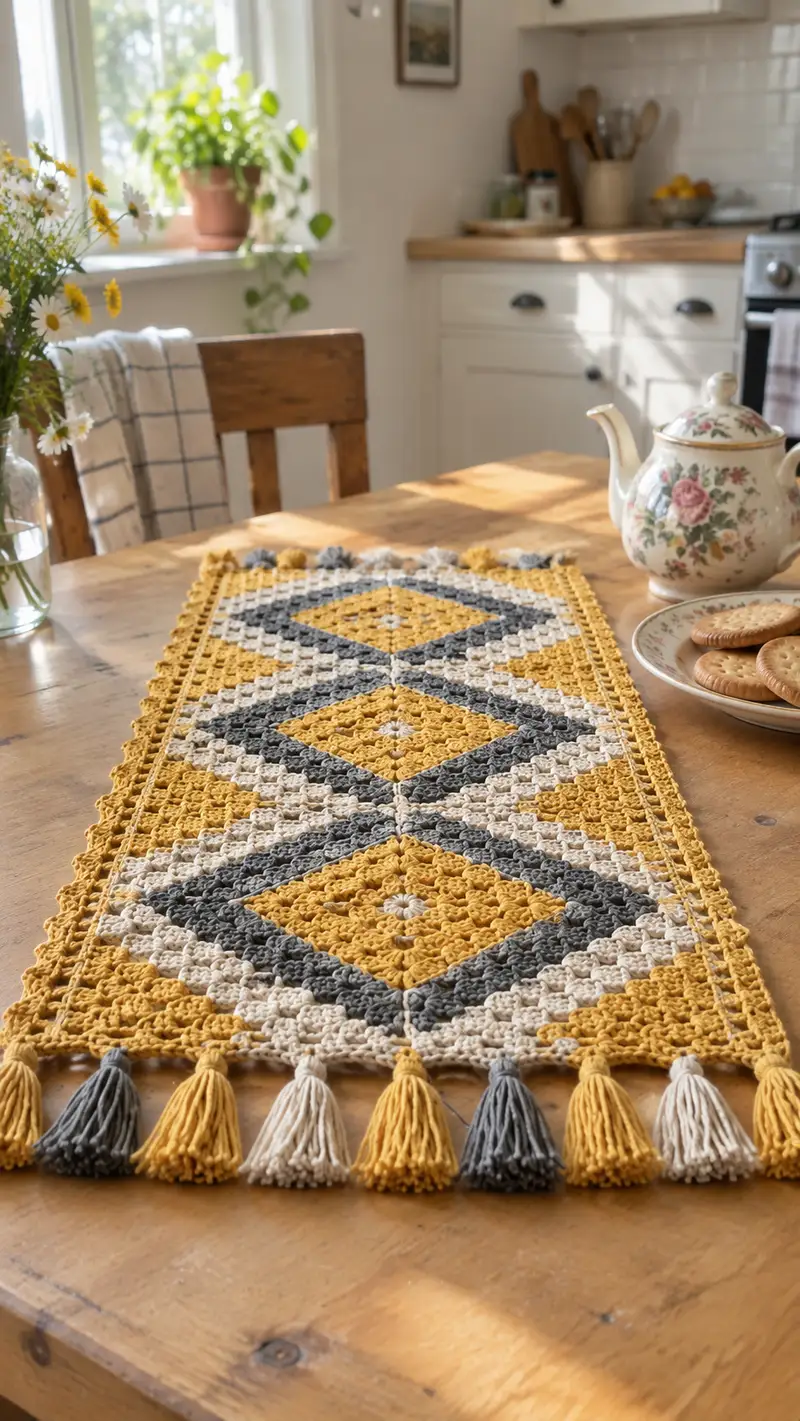
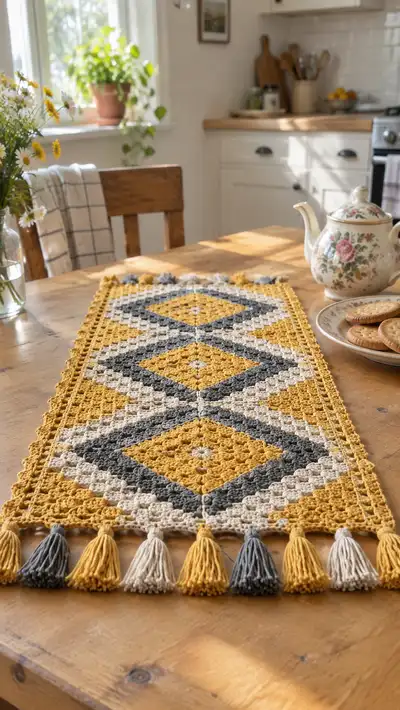
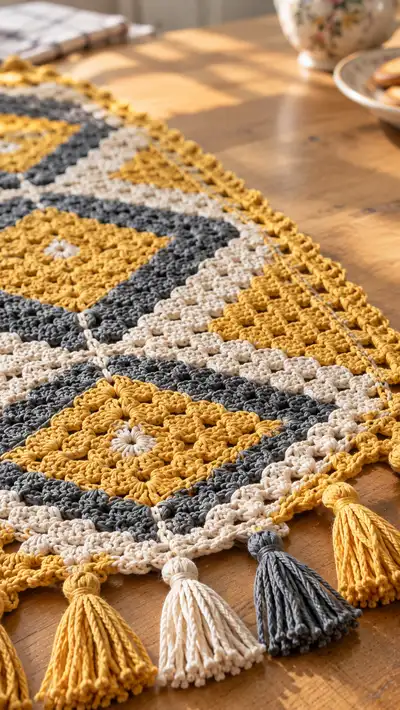
A warm, modern table runner featuring stacked diamond granny motifs in mustard, charcoal gray, and cream with a delicate scalloped border and playful tassels. This pattern uses textured cluster/puff stitches to create a vintage-modern look that lays flat and dresses any table. Detailed step-by-step instructions guide you through making the diamond motifs, joining them seamlessly, adding borders, and finishing with neatly wrapped tassels.
Progress Tracker
0% Complete
— Notes & Gauge :
Info :
This runner is designed to be worked as three large diamond motifs joined in a row and bordered. Gauge is not critical for fit but is important for fabric drape: 10x10cm (4x4") = approximately 12 clusters/puff units by 12 rows when using worsted cotton and 4.0mm hook. Adjust hook size if needed to achieve a firm but flexible fabric. Block motifs before joining for best results.
— Puff/Cluster Stitch Explanation :
Info :
Puff stitch used here: yarn over, insert hook into designated stitch, pull up loop (repeat 4 times total to have 5 loops on hook), yarn over and pull through all loops on hook, ch1 to close puff. Count puff as one stitch in subsequent rounds. Cluster (cl) = 3 dc cluster: yarn over, insert, pull up, yarn over, pull through 2 loops (do this 3 times in same st), yarn over, pull through all remaining loops; join top of cluster with ch or as directed. Keep tension even.
— Motif (Make 3) :
Round 1 :
Begin with mustard/gold. Ch4, sl st to first ch to form ring, ch3 (counts as first dc), work 11 dc into ring, sl st to top of beginning ch3 (12 dc total). (12)
Round 2 :
Ch3, dc in same st, ch2, *2 dc in next st, ch2; rep from * around, join with sl st to top of ch3. (12 groups of 2dc separated by ch2 - creates rough round of corners)
Info :
Round 2 establishes 12 corner/edge points which will be expanded into a diamond. Keep counts visible for later rounds. Place a marker in the top of any representative 2-dc group to track orientation.
Round 3 :
Change to cream. In each ch2 corner: (ch3, 2dc, ch2, 3dc) to form corner cluster. In each 2-dc group along edges: work puff stitch cluster into the space between the two dc from previous round: ch1, puff, ch1. Join with sl st to top of ch3. (This round begins forming a square with puff accents.)
Round 4 :
Switch to gray. Ch3, *in next puff sp work (3dc, ch2, 3dc) as corner if the puff is at a planned corner, otherwise work (3dc) in puff sp separated by ch1 between clusters; rep around to maintain expansion. Join. (Work to create first frame around center.)
Info :
At this stage, orient motifs so the corners sit at 12/3/6/9 o'clock; later rounds will be worked in diamond shaping by increasing along diagonals more than on sides. Use a stitch marker to identify the center ch2 corners for diamond points.
Round 5 :
Change to mustard. Ch1, sc in same st, *ch3, skip next 2 dc clusters/edge groups, sc into next puff/top of next cluster; rep to form a decorative lacy row that starts to emphasize diagonal lines. Join. (This is a spacer row.)
Round 6 :
Remain mustard. Ch3, work puff into the ch3 sp created previously: puff, ch1, puff (counts as two puffs separated by ch1), in next sc work 3dc; rep around following the diagonal line pattern so that along diagonal axes you add puffs, while along side axes you place 3dc groups. Join. (Motif expands more along diagonals.)
Info :
From rounds 5-8 the goal is to define the diamond: increase cluster/puff density on the four diagonal axes so that the motif grows into a diamond rather than a square. Use consistent tension for matching diamonds across motifs.
Round 7 :
Change to gray. Ch3, dc into next st, ch1, *puff into next ch sp, ch1, 3dc into following sc/ch sp, ch1; rep continuing the diamond expansion. Join. (Count clusters per side to verify symmetry.)
Round 8 :
Switch to cream. Ch1, sc in same st, *ch4, skip the group of puff+ch1+3dc, sc into next puff top; rep around. Join. (Creates larger spaces to later hold groups that will shape the diamond corners.)
Round 9 :
Mustard. Ch3, in each ch4 space work (3dc, ch2, 3dc) forming a defined corner around the diamond point; in spaces along diagonals work puff clusters separated by ch1; along flat sides work 3dc clusters separated by ch1. Join. (Motif now has clear diamond shape.)
Info :
Check that the motif measures approximately 14-16cm across from point to point (this will depend on yarn/hook). If slightly small, use a larger hook for future motifs or add an extra round of clusters to grow size.
Round 10 :
Gray. Ch3, *in next 3dc group work puff into center dc, ch1, in next corner ch2 work (3dc, ch2, 3dc); rep around. Join. (This creates a framed diamond with alternating puff bands and dc frames.)
Round 11 :
Cream. Ch1, sc across exposed top stitches and ch spaces working evenly: (sc, ch2, sc) across corner ch2s to maintain corner definition, sc in top of puffs and dc clusters elsewhere. Join. (This gives an even base row for next increase round.)
Round 12 :
Mustard. Ch3, in each sc or space around work puff or 3dc based on previous band: along the diagonal axes place puff clusters (puff, ch1, puff) to accent the diamond center; along side axes place (3dc) clusters. Join.
Info :
At rounds 10-12 you are establishing a repeating band pattern: mustard center diamond, framed by gray, then cream band. Keep color changes neat by fastening off and weaving tails or carrying yarn behind when color runs are short (no more than 2-3 rounds carried).
Round 13 :
Gray. Ch3, *work (3dc, ch2, 3dc) into corner ch2s to expand diamond points, and work puff clusters into diagonal spaces between corner frames; rep around. Join.
Round 14 :
Cream. Ch1, sc evenly in each visible stitch to tidy the perimeter and create a solid base for subsequent rows; work (sc, ch2, sc) in corner ch2 spaces. Join.
Round 15 :
Mustard. Ch3, across each side work alternating pattern: in diagonal axis spaces work puff, ch1, puff; in straight edge spaces work 3dc groups. Join. (This round thickens the diagonal bands to read more strongly as a diamond.)
Info :
Mark the four diamond points (corners) with stitch markers. These markers will be used later to align motifs when joining so that diamond points meet cleanly and runner lines up straight.
Round 16 :
Gray. Ch3, dc into each 3dc group top and puff top as directed, placing (3dc, ch2, 3dc) into the corner ch2s to enlarge diamond. Join.
Round 17 :
Cream. Ch1, sc evenly across, making sure to place sc into top of puffs and into corner spaces to keep a tidy square edge. Join.
Round 18 :
Mustard. Ch3, work a final motif expansion round: in straight sides work (3dc) across each space, in diagonal lines work puff clusters (puff, ch1, puff), and in corner ch2s work (3dc, ch2, 3dc). Join.
Round 19 :
Gray. Ch1, sc into each top around to flatten edges and create a consistent edge for joining. Do not fasten off if you plan to carry yarn to join; otherwise fasten off leaving long tail for sewing. (Edge row helps when sewing motifs together.)
Info :
Repeat motif rounds for a total of 3 identical motifs. Blocking each motif flat will ensure edges are even and diamonds align correctly in final layout. After making 3 motifs, place them in a row with points aligned and centers centered lengthwise.
— Joining Motifs (Seamless Join-As-You-Go Option) :
Info :
We recommend a join-as-you-go (JAYG) method to create nearly invisible joins along the sides of the diamonds. Begin joining on the second motif when you have worked up to Round 12 of the second motif so that joining points align where stitches are consistent. Alternatively, you can whipstitch motifs together after blocking using long tails left at Round 19.
Round J1 (on motif 2) :
Position motif 2 next to motif 1, right sides together. With motif 2 on hook at a sc edge, join yarn in the sc space at the center side where motifs meet. Ch1, sc in same st, then sc through corresponding sc on motif 1 (insert hook through both motifs together), *sc in next sc of motif 2 and through next sc of motif 1; rep across seam until motifs are joined from center to top and bottom of seam. Fasten off and weave ends. (This creates a flat join.)
Info :
If using JAYG during working round sequences, slip stitch the second motif's joining edge into the first motif's corresponding sc or ch space every 2-3 stitches to create an even connection. Keep joins tight but not puckered.
Round J2 (join motif 3) :
Repeat the process to join motif 3 to motif 2, aligning diamond axes and matching corner markers. After joining, check overall runner length and alignment: diamonds should form a straight central spine with cream and gray bands matching across seams.
Info :
Weave in any carried yarn tails into the seam and bury them through several stitches for security. If you prefer visible seams, use contrasting yarn and a decorative slip-stitch seam instead of invisible sc-through-both method.
— Center Seam Tidying & Reinforcement :
Round C1 :
With mustard yarn, join at the very center seam where the three motifs meet. Ch1, sc into each sc along the seam through both layers to flatten and reinforce. Work from one end to the other, then reverse and sc back for a double-row reinforcement if desired. Fasten off. (This keeps the runner lying flat.)
Info :
If your join shows small gaps, use small connecting stitches (sc or sl st) in the ch spaces adjacent to seams to close holes, taking care not to distort the diamond points.
— Outer Border (Round-by-Round Expansion) :
Round B1 :
With mustard, join yarn at one corner of the outermost motif edge. Ch1, sc evenly across edge stitches working 3 sc into each corner space (sc, ch2, sc). Work sc along each side until you reach the next corner. Join. (This establishes a tidy even edge for border rounds.)
Round B2 :
Ch3, dc into next 2 sc, *ch1, skip 1 sc, dc in next 3 sc; rep around placing (3dc,ch2,3dc) into corner ch2s. Join. (This round creates a framed set of small shells around entire runner perimeter.)
Round B3 :
Change to cream. Ch1, sc into each dc and ch1 space across to tidy; in corner ch2s work (sc, ch2, sc). Join. (Tidy round.)
Round B4 :
Gray. Ch3, work (3dc) into groups across each straight edge, working (3dc, ch2, 3dc) into each corner. Place a puff cluster into every ch1 space along previous round to add texture. Join.
Info :
Border rounds are an opportunity to balance width and texture. If you prefer a narrower runner, stop after Round B4. For a more substantial border, continue following rounds B5-B12 to build a scalloped lacy edge.
Round B5 :
Mustard. Ch1, sc into each st around, working (sc, ch3, sc) into each corner ch2 for a rounded corner effect. Join.
Round B6 :
Ch3, dc twice into next sc, *ch2, skip 2 sc, (dc, ch1, dc) into next sc; rep across; work (dc, ch2, dc) into corner ch3 spaces. Join. (Creates open scallops building outward.)
Round B7 :
Cream. Ch1, sc into each st and ch space around to anchor scallops. Join. (This anchors the open shells for the final edge.)
Round B8 :
Gray. Ch4 (counts as tr+ch1), *tr into top of next scallop peak, ch1; rep around; work (tr,ch2,tr) into corner peaks. Join. (This gives a taller picot-like ridge across the edge.)
Info :
At this stage, measure your runner width and length again. If you want a narrower border, fasten off after B7. For a decorative fringe base, continue to B9-B12 which add a loop foundation for tassels.
Round B9 :
Mustard. Ch1, sc into each tr and ch1 space around, making sure to place 3 sc into corner ch2s. Join. (Creates a tidy row to attach tassels.)
Round B10 :
Cream. Ch3, dc in same st, ch3, slip stitch into next sc to create small loop spaces for tassels every 6 sc (or spacing as desired). Continue around placing loop-spaces evenly. Join. (This round sets the tassel attachments.)
Round B11 :
Gray. Ch1, sc around, making a neat edge to finish border and cover any visible join tails. Work a picot every 4 sc along sides to create delicate points: (sc, picot (ch3, sl st into first ch), sc). Join.
Round B12 :
Mustard. Final cleanup round: sc evenly around, blocking any slight scallops flat. Fasten off and weave in ends. Runner edge should be symmetrical and lay flat.
Info :
Use a smaller hook for the last 1-2 border rounds if you want a firmer edge. Weave in ends into border stitches and consider using a small dot of fabric glue inside tassel loops for extra security if runner will be laundered frequently.
— Tassels (Make 10-14, spaced evenly along both short edges) :
Round T1 :
Make tassels by wrapping yarn around a 6-8cm cardboard piece approximately 40-60 times depending on desired fullness. Cut one strand for the loop and one for the head wrap. Slide the bundle off the card, fold in half to form loop, wrap top tightly with contrasting yarn for a neat head, knot and secure. Trim ends to 6-8cm for uniform tassels. Attach tassels by pulling the loop through a loop space on Round B10 and pulling ends through loop to secure with a tight knot (lark's head knot). Trim and even lengths.
Info :
Alternate tassel colors mustard/cream/gray in a repeating pattern for a balanced look, as shown in the photos. Make tassel heads neat by wrapping multiple times and sewing the wrap tail into the head through several stitches to secure.
— Final Finishing :
Round F1 :
Press or steam-block carefully on low heat (if using cotton-blend yarn that permits steam-blocking). Lay runner flat and pin edges to ensure scallops are even. Allow to dry completely before use. Weave all remaining ends into the back of border stitches using a yarn needle.
Info :
For easy washing, tie tassels separately or make removable tassels with small jump rings through the loops. Hand washing on gentle cycle and air drying flat is recommended to preserve shape and color.
— Alternate Construction: Single-Row Continuous Diamond Method :
Info :
If you prefer to work the runner as one continuous piece, you can construct the diamond panels by turning and continuing rounds lengthwise rather than making and joining motifs. This requires careful count-keeping and is recommended for advanced crocheters. The rounds above can be adapted into linear bands and worked long-ways with increases/decreases to keep diamond proportions.
— Troubleshooting & Helpful Tips :
Info :
If your runner flares at edges, block more aggressively or remove a round of clusters near the border and replace with a tidy sc round. If runner cups in slightly, add an extra sc round to flatten. For more texture, replace dc clusters on side bands with tr clusters to raise relief. Keep scissors, pins, and a tape measure handy to check progress as you go.
This geometric diamond table runner brings a handmade, modern-boho warmth to your table. Each puff cluster and border scallop adds texture and personality, culminating in a playful tassel fringe that sways with every passing hand. It’s the kind of project that looks gorgeous from the first stitch and even better on your table — perfect for brunch, coffee time, or seasonal decorating. 🧶✨ Enjoy every stitch and the cozy, handcrafted charm you bring into your home!