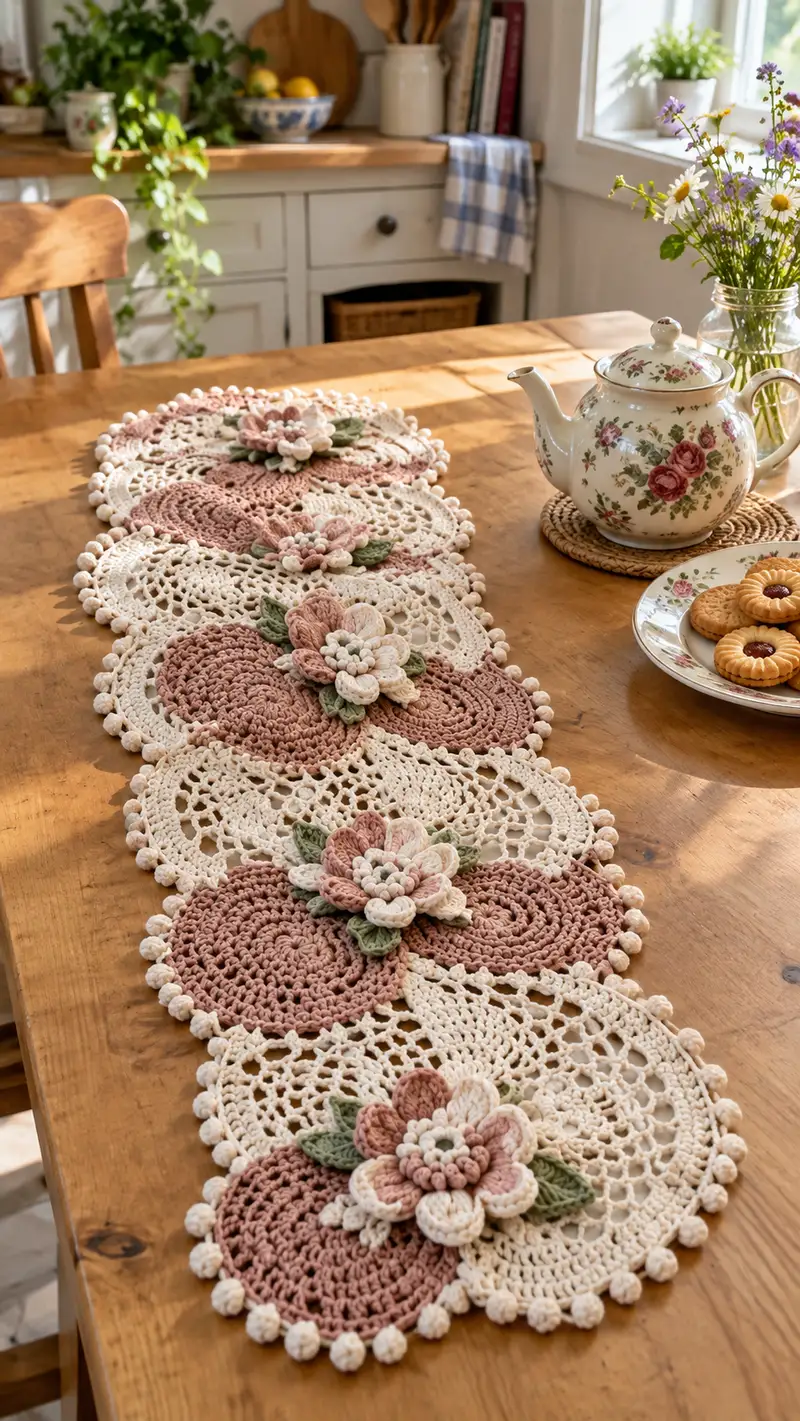
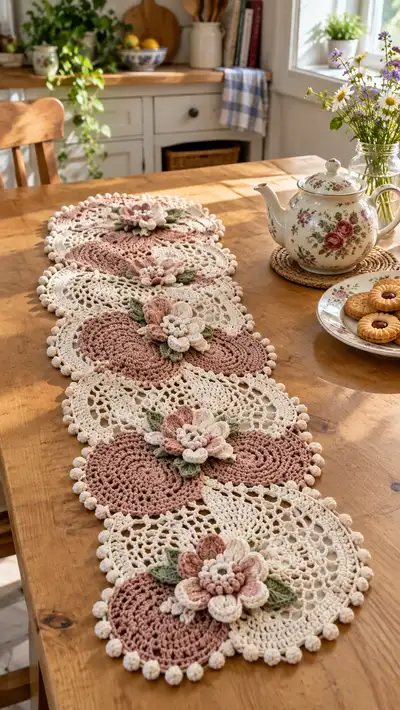
Create a charming vintage-inspired table runner composed of linked lace circles, bobble edging, and layered floral appliques. This pattern features cream and dusty rose circles with soft sage leaves and sculpted 3D flowers. The finished runner is elegant, textured, and perfect for tea settings or a decorative centerpiece.
Progress Tracker
0% Complete
— Circle Motif (Make 10: 5 dusty-rose solid circles and 5 cream lace circles) :
Round 1 :
With dusty-rose (for solid) or cream (for lace) yarn, 6 sc in magic ring (6)
Round 3 :
(1 sc, inc) x 6 (18)
Round 4 :
(2 sc, inc) x 6 (24)
Round 5 :
(3 sc, inc) x 6 (30)
Info :
For the solid dusty-rose circle continue in the same yarn. For the lace cream circle prepare to switch to openwork at Round 9 by making the round count even and blocking later to match diameter. Use stitch marker to mark beginning of rounds
Round 6 :
(4 sc, inc) x 6 (36)
Round 7 :
(5 sc, inc) x 6 (42)
Round 8 :
(6 sc, inc) x 6 (48)
Round 9 :
For solid circle: 1 sc in each st (48). For lace circle change to cream and work openwork round: *ch3, sk 2 sts, sc in next; rep around to create mesh base (48 mesh loops approx)*
Info :
If working lace, aim to make Round 9 a mesh foundation by spacing chains evenly; this will be the foundation for later lace rounds
Round 10 :
Solid circle: 1 sc in each st (48). Lace circle: (ch4, sk next ch-sp, sc in next sp) around to enlarge mesh (48)
Round 11 :
Solid circle: (3 sc, inc) x 12 (60) increase to create a slightly raised disc center used under flower placement
Round 12 :
Solid circle: 1 sc in each st (60) - flatten disc by pressing with hand as you work
Info :
Place center flower later over rounds 8-12 of solid circle. Use blocking to flatten rounds before assembly. Maintain consistent tension to avoid ruffling.
Round 13 :
Solid circle: (4 sc, inc) x 12 (72)
Round 14 :
Solid circle: 1 sc in each st (72)
Round 15 :
Solid circle: (5 sc, inc) x 12 (84)
Round 16 :
Solid circle: 1 sc in each st (84)
Round 17 :
Solid circle: 1 sc in first 7 sts, *bobble cluster around next st: {yo, insert, pull up loop} 4 times, yo and pull through 9 loops, ch1 to secure; sk next st, 7 sc; rep across to set bobble anchor points (84 with bobble texture)
Info :
Round 17 creates a textured base for flower seating. If you prefer no bobbles under the flower, replace bobble clusters with regular sc.
Round 18 :
Solid circle: 1 sc in each st (84). Lace circle: from Round 10 mesh expand to chain arches: *(sc in sp, ch5, sc in next sp) around to create open lace arches (approx 84)
Round 19 :
Solid circle: (7 sc, inc) x 12 (96) to create final disc diameter matching lace rounds
Round 20 :
Solid circle: 1 sc in each st (96). Lace circle: work tall arch round: *sc in arch base, ch7, sc in next arch base* around (96)
Round 21 :
Both types: Transition round to prepare for border: *sc in next 3 sts, hdc in next, dc in next 3, hdc in next; rep around to create scallops (96)
Round 22 :
Both types: Work surface slip stitch ridge: 1 sl st in each st BLO around to create a neat join line (96)
Info :
At this point your solid and lace motifs should be similar diameter. Block both motifs flat to match precisely before adding bobble edging. Use light steam or wet block with pins to circular shape.
Round 23 :
Bobble round preparation: *sc in next 2, ch2, sk next st* across as guideline (approx 64 sc positions)
Round 24 :
Bobble final: *sc in next 2, bobble (make bobble as 5 dc cluster: yo, insert, dc5 cluster in next st, pull through), sc in next 2, sl st in next ch-sp; rep around (64 bobbles approx)*
Info :
Make bobbles consistent by working into same base space and keeping tension even. Bobbles give the runner its charming pebble edge.
Round 25 :
Fasten off leaving long tail for joining. Weave in ends or leave for assembly (use long tail to sew if joining motifs later). Block again if necessary
Info :
Make 10 motifs total: arrange in alternating solid rose and cream lace pattern to form the runner sequence. Place motifs on blocking board in the order you plan to join.
— Lace Connector Panel (Optional elongated oval connector used between motif pairs) :
Round 1 :
With cream yarn ch 10, join with sl st to form ring, ch3 (counts as dc), 11 dc in ring (12)
Round 2 :
2 dc in each st around (24)
Round 3 :
(1 dc, inc) x 12 (36)
Round 4 :
1 dc in each st around (36)
Round 5 :
Turn to work in rows along long edge: ch2, hdc in next 8 sts, ch2, turn (8)
Round 6 :
Work filet mesh rows along long side: *ch3, sk 2, hdc in next; rep working chain spaces to create openwork rectangular panel (8 rows depth)*
Info :
This connector panel is optional and used to create negative space between motifs when a longer runner is desired. Make connectors to taste and block flat.
Round 7 :
Edge finish: join around panel with sc to create neat seam for join-as-you-go later (perimeter sc count depends on panel length)
Round 8 :
Fasten off and block. Make as many connector panels as needed to achieve your desired runner layout
Info :
Use stitch markers to match connector edge stitches to motif bobble round foundation when joining. Aim for evenly spaced joins for symmetrical row alignment.
— Large Flower Applique (Make 5; layered 3D flowers) :
Round 1 :
With pale pink center color, mr, 6 sc in mr (6)
Round 2 :
Inc in each st (12)
Round 3 :
(1 sc, inc) x 6 (18)
Round 4 :
1 sc in each st (18)
Round 5 :
Make a popcorn cluster center: *ch1, 5 dc in same st, remove hook and reinsert to close cluster, sl st to secure* repeat 6 times around center on alternate sts (6 popcorns)
Info :
The popcorn centers give a tactile core. Keep popcorns small and firm by consistent tension and finishing each cluster before moving to next.
Round 6 :
Fasten off center. Join dusty-rose for first petal round: ch2, in next space work shell petals: (3 dc, ch1, 3 dc) in same sp to form large petal base across 6 spaces (6 petals)
Round 7 :
Round of slip stitches to anchor petals: sl st around securing each petal base with 3 sl st across base (approx 36 sl sts)
Round 8 :
Second petal layer (pale cream): join cream yarn behind petals, *ch3, in next petal base work tall pouf: (tr, tr, tr) cluster, ch1, sl st in base; rep for 6 overlaid petals to add height
Info :
To create 3D effect alternate stitch heights: inside petals use dc clusters, outer petals use taller tr clusters. Pin petals to shape before sewing on motifs.
Round 9 :
Edge round for petals: sc evenly around outer edge of petals to tidy shape (approx 60 sc)
Round 10 :
Make small decorative petals: in cream yarn make 6 small «teardrop» petals: ch4, sc in 2nd ch from hook, hdc in next, dc in last, sl st to base; repeat 6 and place between larger petals
Round 11 :
Sew small petals into position, secure with long tails for finishing. Fasten off leaving long tails for sewing onto motif (no stuffing needed)
Info :
Flower layering: assemble petals centered on popcorn core. Use a blunt tapestry needle and long tails to sew flower through rounds 11-13 of the solid circle base for secure attachment.
Round 12 :
Optional bead or French knot embroidery: using contrast thread, make tiny knots between petals for extra center detail; secure all ends
Info :
Make 5 identical large flowers. Block lightly and shape petals by pinching into place while damp for a sculpted look.
— Small Petal Details & Central Beads :
Round 1 :
With cream, make a small 7-bump bud: mr, ch1; (sc, bobble) x 6 around to produce tiny clustered berries (12 sts incl bobbles)
Round 2 :
Secure bud to center of flower with long tail; place under popcorns for a natural clustered center
Info :
These tiny bead-like buds are crocheted clusters and should be compact. Keep yarn tension tight to avoid flattening under sewing.
— Leaves (Make 10–15) :
Round 1 :
With sage green, ch8, sc in 2nd ch from hook, hdc in next, dc in next 2, hdc in next, sc in next, sl st to last ch to form one side; turn and work opposite side: sc, hdc, dc2, hdc, sc in remaining sl sts; sl st to base (approx 16 sts)
Round 2 :
Edge finish: sc around leaf edge working 2 sc in tip to round shape; fasten off leaving long tail for sewing
Info :
Make 2–3 leaves per flower cluster and additional leaves to tuck between motifs. Block leaves to a gentle curve for natural look.
— Joining Motifs (Join-as-you-go method for a clean runner) :
Info :
Arrange motifs in desired order alternating solid dusty-rose and cream lace circles. Joining occurs at the last bobble/sc border round. Each motif will be joined to its neighbor on the last sc round before bobble finish.
Round 1 :
With motif A completed and motif B ready, on motif B at the last sc round, when you reach a joining point, ch1, sl st into corresponding stitch on motif A (through both layers), ch1 and continue around making sl st joins every 4–6 sts to align edges; repeat until motifs are connected with a continuous seam
Round 2 :
Work an even sc seam around join area for reinforcement: sc in remaining sts across motif B, where sl st joins are present, sc through both layers to lock seam (stitch count unchanged overall)
Info :
Pin motifs before joining to ensure alignment. For stronger joins, work two lines of sc or use invisible mattress stitch with yarn needle after initial sl st join.
Round 3 :
Continue joining motifs in sequence; when adding a third motif, join to both adjacent motifs at corresponding points to create continuous runner (match bobble positions for regular scalloped edge)
Round 4 :
For connectors: place lace connector panel between motifs and join with sc through connector edge and motif sc round for a lightly spaced runner
Info :
Check alignment frequently and adjust pins. Keep join stitches loose enough to let the lace drape but tight enough to hold motifs firmly together.
— Final Edging & Accent Bobble Round :
Round 1 :
With cream yarn attached at a seam point, sc evenly around the entire runner perimeter (work through both joined edges where motifs meet); count to ensure even distribution across convex and concave edges (approx perimeter sc depends on number of motifs)
Round 2 :
Sc in each st around (perimeter count unchanged)
Info :
This sc perimeter creates a neat foundation for the decorative bobble scallop. Work slowly around concave joins to keep bobbles spaced evenly.
Round 3 :
*Sk 2 sts, 7 dc bobble in next st (make 7 dc cluster leaving last loop, then pull through all loops), sl st in next st*; rep around to create bobble scallop. Adjust spacing by adding or reducing skipped stitches to maintain symmetry
Round 4 :
Fasten off and weave ends. Lightly steam-block to set bobbles and flatten edges. If desired, apply light fabric stiffener to bobble round for permanence
Info :
If your bobbles are too loose or too tight, frog back to previous sc round and adjust by altering skipped sts or number of dc in bobble clusters (5–7 dc gives different puff sizes).
— Attaching Flowers and Leaves :
Round 1 :
Position large flower over the center of dusty-rose solid circle (centered on rounds 11–13). Use pins or stitch clips to hold in place
Round 2 :
Sew flower with long tails through rounds 10–14 of the disc using a whip or ladder stitch; secure at least 8 points around the flower base to prevent flopping
Round 3 :
Sew leaves beneath petals at staggered angles: use 2–3 leaves per flower. Use hidden stitches passing through underside of disc into leaf base
Info :
For natural positioning slightly fold petals inward and place leaves at an angle so they peek from under petals. Sew through the motif bobble round for strong attachment.
Round 4 :
Add small cream bud clusters between petals and secure with short stitches. Trim any excess tails and weave ends into underside of motif
Info :
Use small, neat stitches and hide knots between stitches on underside. Avoid bulky knots so runner lies flat on the table.
— Optional Decorative Embroidery and Finishing Touches :
Round 1 :
Using pale green embroidery thread, couch a vein down each leaf center with running stitch to add realism
Round 2 :
Use a tiny amount of soft chalk blush or fabric paint to add subtle shading to petal edges if desired. Test on scrap yarn first
Info :
These final touches are optional but add a handcrafted, vintage-finish. Allow any paints to dry fully before using runner.
Round 3 :
Final blocking: wet-block entire runner pinned to shape, ensuring bobble edge is evenly spaced and flowers lie flat. Allow to dry completely
Round 4 :
Weave in all remaining tails at least 4" under (10 cm) through underside for durability
Info :
Store runner flat to prevent bobbles flattening. For drying after washing, reshape and re-block to maintain form.
Finish this runner and you’ll have a gorgeously textured centerpiece that invites compliments at every tea time. The layered flowers and bobble edges create such inviting depth—every touch reveals another little detail. It’s a joyful project that’s both decorative and functional, bringing a bit of cottage charm to any table. 🧶🌸✨