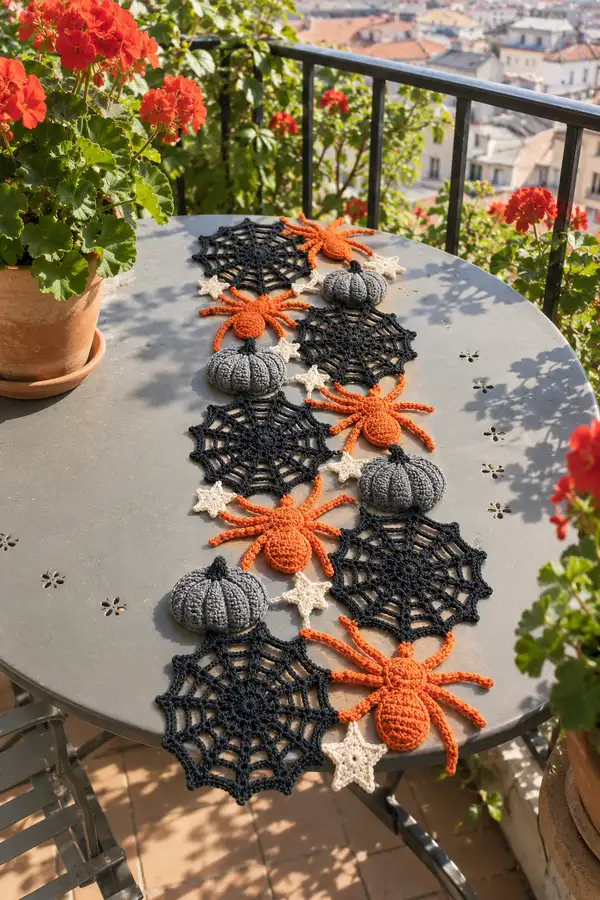
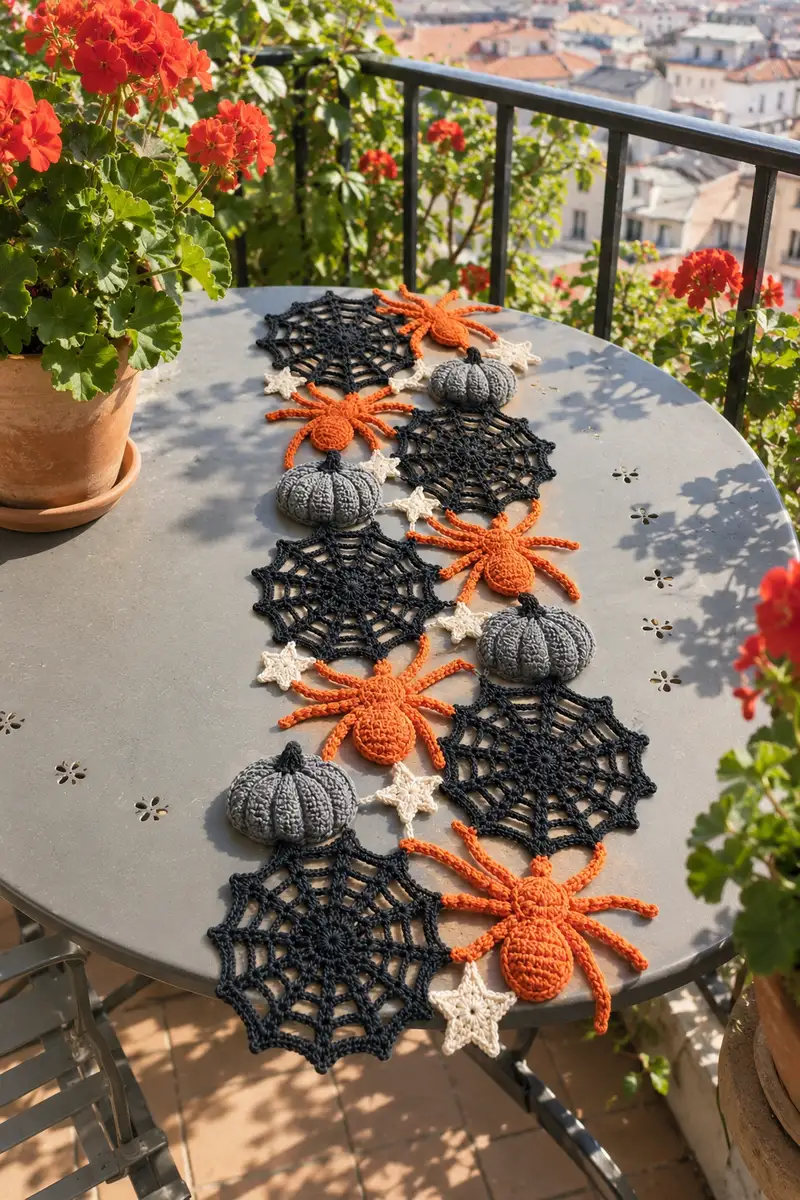
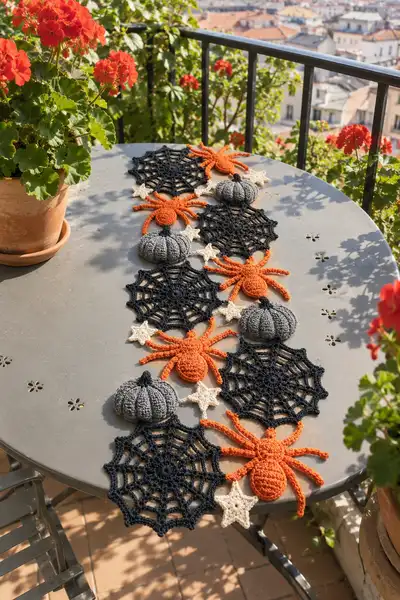
A dramatic Halloween table runner made from linked crochet spiderwebs, plump 3D pumpkins, and big orange spiders with tiny ivory stars for contrast. The runner pictured alternates black spiderweb motifs with bright orange spiders and grey pumpkins to create a long, spooky centerpiece. Perfect for an autumn table, porch, or mantle — this pattern guides you through every motif, 3D shaping, and assembly step to recreate the layered look.
Progress Tracker
0% Complete
— Web Motif (Make multiple, each web approx. 9-11 cm)
Round 1 :
ch 4, join with sl st to form ring, ch 3 (counts as dc), 15 dc in ring, join with sl st to top of ch-3 (16 dc) (16)
Round 2 :
ch 3 (counts as dc), dc in same st, *ch 3, sk next dc, 2 dc in next dc; rep from * around to create 8 ch-3 loops, join with sl st to top of ch-3 (32 dc worked in pairs)
Round 3 :
sl st into first ch-3 sp, ch 3 (counts dc), 2 dc in same ch-3 sp, ch 5, *3 dc in next ch-3 sp, ch 5; rep from * around (8 clusters), join with sl st (24 dc clusters, 8 long ch-5 loops)
Info :
This beginning creates the central wheel of the web. Keep your tension even so the web lies flat; if the center cups, block it with steam or pinning while dampening slightly.
Round 4 :
sl st to center of next 3-dc cluster, ch 3, 2 dc in same cluster, *ch 7, 3 dc in center of next cluster; rep around (8 ch-7 spokes) join with sl st (24 dc clusters)
Round 5 :
sl st to first ch-7 sp, ch 3 (counts as dc), 1 dc in same sp, ch 9, *2 dc in next ch-7 sp, ch 9; rep around, join (16 dc as 2-dc clusters with eight ch-9 loops)
Info :
Adjust chain lengths (ch7 -> ch9) depending on yarn drape to keep the web circular rather than ruffled. For cotton, ch9 is usually perfect for a lacy look.
Round 6 :
Working into the ch-9 loops: *sl st into next ch-9 sp, ch 3, 2 dc, ch 3, 3 dc, sl st into same ch-9; rep around to create petal-like arches (8 arches)
Round 7 :
To form the outer rim: sk to top of next arch, *(sl st, ch 3, 3 dc, ch 3, 3 dc, ch 3, sl st) into center of arch creating a pointed tip; rep around for 8 points, join with sl st
Info :
Create a tighter point by finishing the final chain with a sl st into the base of the arch before joining. Pin each point outward when blocking for crisp points.
Round 8 :
Ch 1, sc evenly around the edge working 3 sc into each outer point tip and 1-2 sc between points to create an even scalloped edge (approx. 64 sc total depending on yarn and tension) (estimate 64)
Round 9 :
1 sc in each st around to tighten the edge and create a uniform border (64)
Info :
Weave in ends for the web or leave a long tail for join-as-you-go. If joining webs directly, leave tail long enough (approx. 25-40 cm) to seam to neighboring motifs.
Round 10 :
Optional: Work picot edging for decorative finish: *sc into next 2 sts, ch 3, sl st into top of ch-3 (picot), skip 1 st; rep around (approx. 48 picots)
Info :
One web is complete. Make a total of 8-10 webs depending on runner length. For this runner layout, make 6 webs for the central line as pictured.
— Spider (Make 4 large orange spiders)
Head / Small Sphere (Head) :
We start with the smaller head sphere. Use 3.25mm hook and orange yarn.
Round 1 :
mr, 6 sc in mr (6)
Round 3 :
(1 sc, inc) x6 (18)
Round 4 :
(2 sc, inc) x6 (24)
Round 5 :
(3 sc, inc) x6 (30)
Round 6 :
(4 sc, inc) x6 (36)
Round 7-11 :
1 sc in each st (36)
Info :
Place a stitch marker at the first stitch of every round. Head will be joined to the body later; leave a 20-25 cm tail for sewing. Start to lightly stuff the sphere at the end of Round 8 to keep shape even.
Round 12 :
(4 sc, dec) x6 (30)
Round 13 :
(3 sc, dec) x6 (24)
Round 14 :
(2 sc, dec) x6 (18)
Round 15 :
(1 sc, dec) x6 (12)
Info :
Fasten off leaving long tail. Finish stuffing head firmly but avoid overstuffing. Set aside and do not close fully; the head will be seamed to the body later.
Body / Large Oval Sphere :
We will make a larger oval body in continuous rounds to form the abdomen.
Round 1 :
mr, 6 sc in mr (6)
Round 3 :
(1 sc, inc) x6 (18)
Round 4 :
(2 sc, inc) x6 (24)
Round 5 :
(3 sc, inc) x6 (30)
Round 6 :
(4 sc, inc) x6 (36)
Round 7 :
(5 sc, inc) x6 (42)
Round 8-12 :
1 sc in each st (42)
Info :
To create an oval shape, we will make partial increases at two opposite points and maintain even rounds across most rows. Place markers where the increases should occur to keep symmetry.
Round 13 :
(5 sc, inc) x6 (48)
Round 14-18 :
1 sc in each st around (48)
Round 19 :
(5 sc, dec) x6 (42)
Round 20 :
(4 sc, dec) x6 (36)
Round 21 :
(3 sc, dec) x6 (30)
Round 22 :
(2 sc, dec) x6 (24)
Round 23 :
Begin stuffing the abdomen firmly now. Add small amounts of stuffing and work to shape the oval by smoothing with your fingers (24)
Round 24 :
(1 sc, dec) x6 (18)
Round 25 :
sc around (18) - prepare for joining head
Info :
Do NOT fasten off. Use the tail from the head (left earlier) to stitch the head to the body at this point. Position head centered on the smaller end of the oval and sew using whip stitch through 18 evenly spaced stitches for a secure seam.
Legs (Make 8) :
Legs are worked as long chains with a sturdy base and slip-stitched reinforcement so they maintain a slight curve.
Leg Round 1 :
Attach yarn at marked leg position on body, ch 25 (or desired length for leg), sc in 2nd ch from hook and across back to base to create a thickened cord; finish with sl st into the body to anchor (approx. 24 sc on chain)
Leg Round 2 :
Working along the chain cord: sc in each st back to body, then *sl st around the base of the leg 2-3 times to stiffen; rep for each leg (24)
Info :
Arrange 4 legs on each side of the body evenly spaced. Slightly bend legs as you work the final sl sts so they hold a natural spider leg curve. If using wire, insert thin wire inside the chain cord before the final slip-stitching and fold/secure wire ends inside the body.
Finishing Spiders :
Weave in all ends, and adjust stuffing if needed. Position spiders onto webs using the long tail left from the body or small extra yarn tails; sew securely through the web motif from back to front and back again in several passes to prevent flipping.
Info :
For the pictured runner, spiders are placed alternating between web junctions and directly on top of webs. Use pins to lay them in place before sewing.
— Pumpkin (Make 3 medium grey pumpkins)
Round 1 :
mr, 6 sc in mr (6)
Round 3 :
(1 sc, inc) x6 (18)
Round 4 :
(2 sc, inc) x6 (24)
Round 5 :
(3 sc, inc) x6 (30)
Round 6 :
(4 sc, inc) x6 (36)
Round 7-10 :
1 sc in each st (36)
Info :
These rounds establish the pumpkin crown. We will create ribs by surface stitching later, so keep the top slightly domed. Begin light stuffing round 9-10 to hold shape.
Round 11 :
(4 sc, dec) x6 (30)
Round 12 :
(3 sc, dec) x6 (24)
Round 13 :
1 sc in each st (24)
Round 14 :
(2 sc, dec) x6 (18)
Round 15 :
(1 sc, dec) x6 (12)
Info :
Leave a long tail and fasten off. Stuff pumpkin firmly. Do not close completely — you will create vertical ribs by pulling the yarn through the body top-to-bottom with the long tail.
Surface Ribbing :
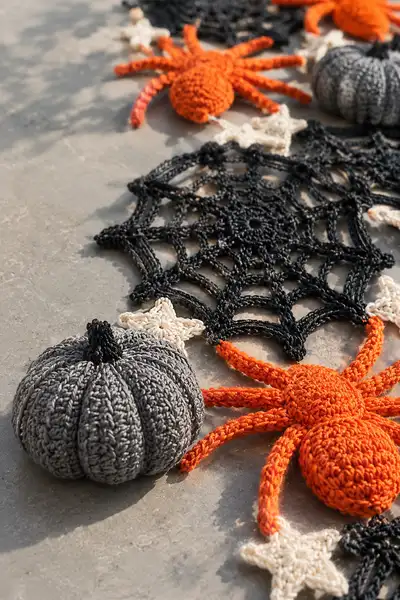
Thread the long tail into your yarn needle. Starting at the top center, insert the needle down through the middle and out at the bottom seam; pull snug to create one rib. Repeat inserting every 6 stitches around to make 6-8 ribs depending on pumpkin circumference. Pull each rib taut and secure at top by wrapping yarn around stem base and knotting. Finish with a few surface slip stitches along ribs if desired to emphasize ridges.
Stem :
With dark grey or black, mr, 6 sc in mr, ch 1, sc in each st for 4 rounds (6), finish and sew to top center. Optionally stuff a tiny bit of fiberfill in the stem before sewing.
Info :
For a fuller pumpkin, insert more stuffing before final ribbing and adjust number of ribs to taste: more ribs = smaller segments, fewer ribs = chunkier pumpkin.
— Star Connector (Make 8-10 ivory stars)
Round 1 :
ch 4, sl st to form ring, ch 1, 10 sc in ring, join with sl st (10)
Round 2 :
*ch 3, sl st into next st to create a point; rep from * around to make 5 points (5 small points)
Round 3 :
For a fuller star: into each point work (sl st, ch 3, 2 dc, ch 3, sl st) for a raised point. Fasten off leaving tail for joining
Info :
Stars are used between motifs to give small pop of contrast and act as join points. Make as many as required to connect webs, spiders, and pumpkins in your chosen layout.
— Joining & Runner Construction
Info :
Lay out all motifs flat in your desired sequence. The pictured runner alternates web - spider - star - pumpkin - web creating a repeating band. Pin the arrangement to a blocking mat to finalize spacing and angles.
Joining Method 1 (Sewing) :
With matching thread/tail from each motif, whip stitch through edges where motifs touch. For webs to spiders, sew through the underside of the spider body to the top center of the web and back several times. For web-to-web, use the long tail left after Round 9 and mattress stitch across the edge stitches to create a flat seam.
Joining Method 2 (Join-as-you-go)
When finishing the final round of a web, instead of sl st join, slip stitch into the adjacent motif at pin points and complete the round; this method works well for flat-to-flat joins (web to web or web to star) and yields a neat continuous seam.
Info :
Space motifs approx. 3-5 cm apart depending on your runner density. The pictured runner uses compact spacing so pumpkins slightly overlap web edges for dimension.
Edging and Final Stabilizing :
Once all motifs are joined, work a simple border along the outer edge of the runner: 1 sc in each available stitch around the perimeter, working small increases at sharp corners. If runner feels floppy, add a second round of sc or a slip-stitch edging to tighten the border.
Blocking :
Pin the runner to shape on a blocking mat and lightly steam or mist and let dry to set the motifs flat and keep points crisp. Use rust-proof pins to avoid marks.
Info :
Trim and weave in all loose ends securely. For extra durability, you can tack motifs down with small invisible stitches across the runner back to keep pieces from shifting over time.
— Alternate Sizes & Customization
Info :
To make a longer runner add extra sets of web-spider-pumpkin-star repeats. For a tabletop mat, scale down by using lighter yarn and smaller hook; adjust number of rounds on 3D pieces to keep proportions.
Optional Finishing Touches :
Sew small beads or black sequins into web centers for dewy highlights, or embroider tiny lines on pumpkin ribs with a darker grey for contrast. Consider a fabric backing if you want a stable underside for everyday use.
This Giant Spider Web Halloween Table Runner brings seasonal charm and handcrafted personality to any surface. It combines airy black spiderwebs with plump grey pumpkins, friendly orange spiders, and little ivory stars for a striking Halloween centerpiece. Each motif is enjoyable to make and the modular construction lets you personalize length and layout. Enjoy the process of creating layers of texture and color — then take pride in the spooky, cozy result! 🎃🕷️